Planning Guides, Style Guide
Transparent Wedding Invitations: Clear Acrylic Modern Designs
May
Getting Started with Clear Acrylic Invitations
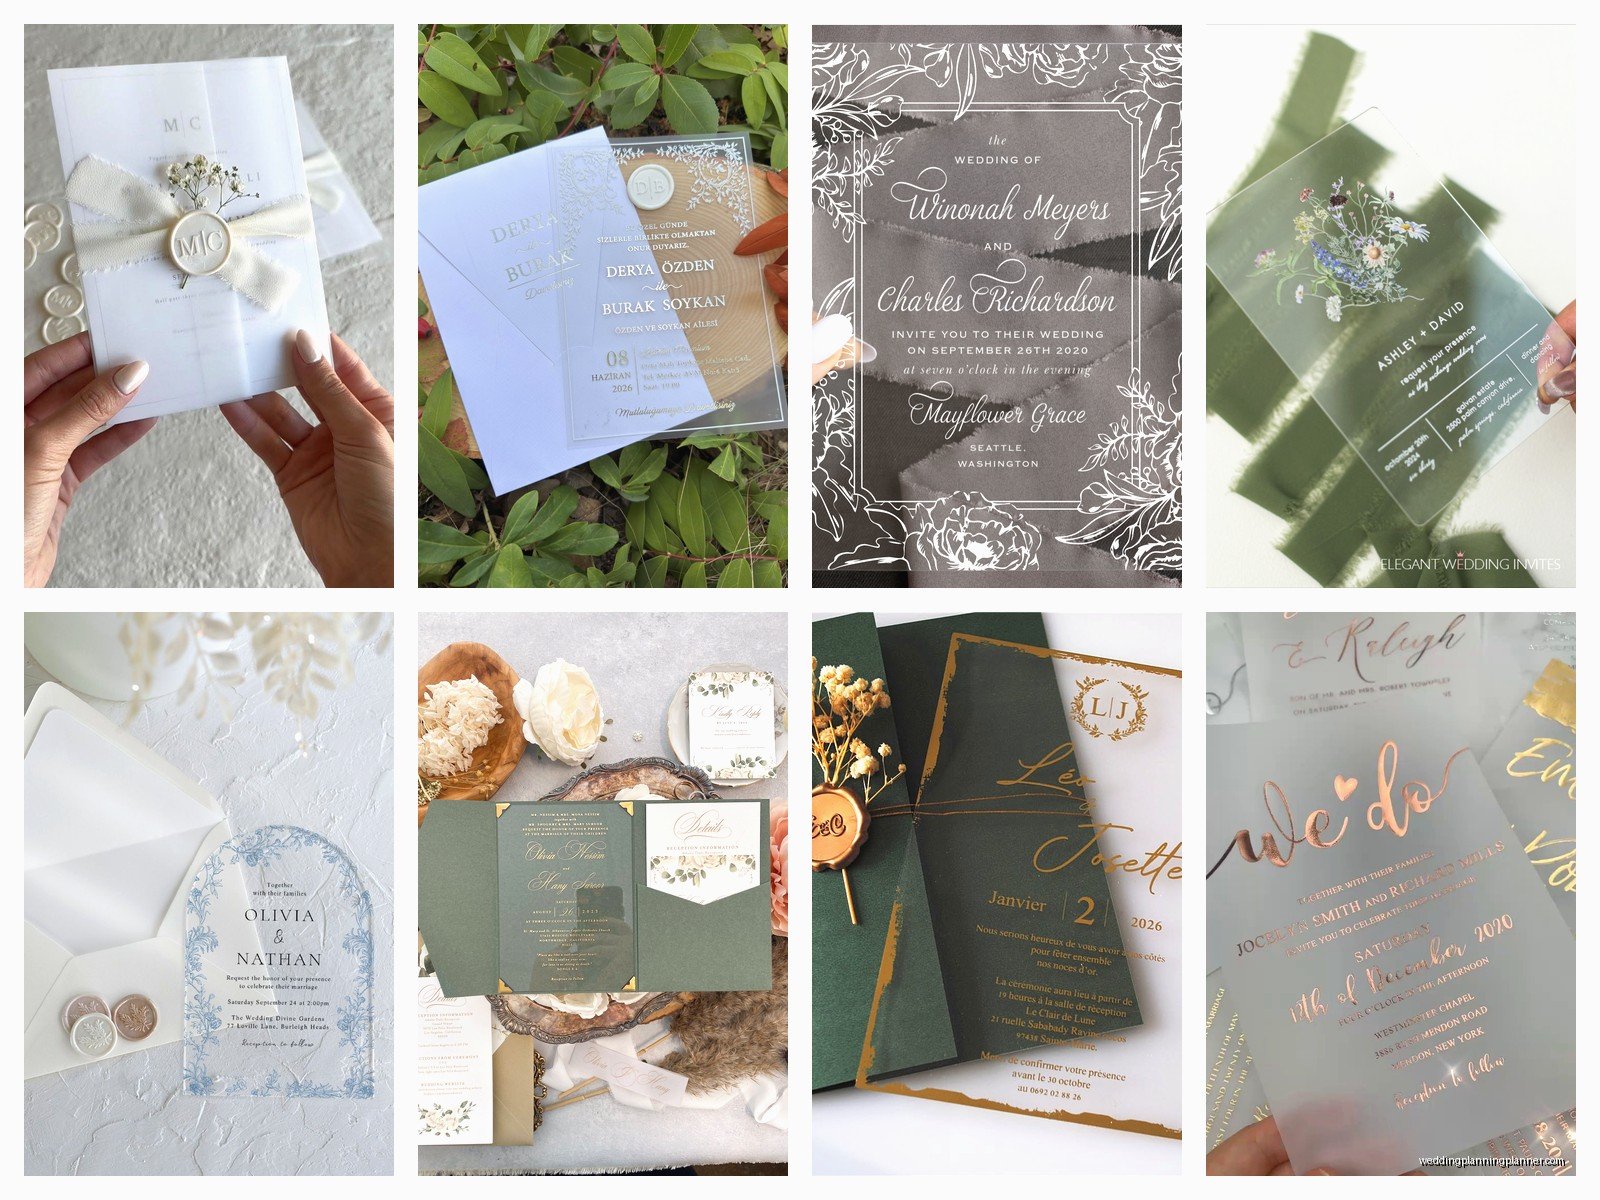
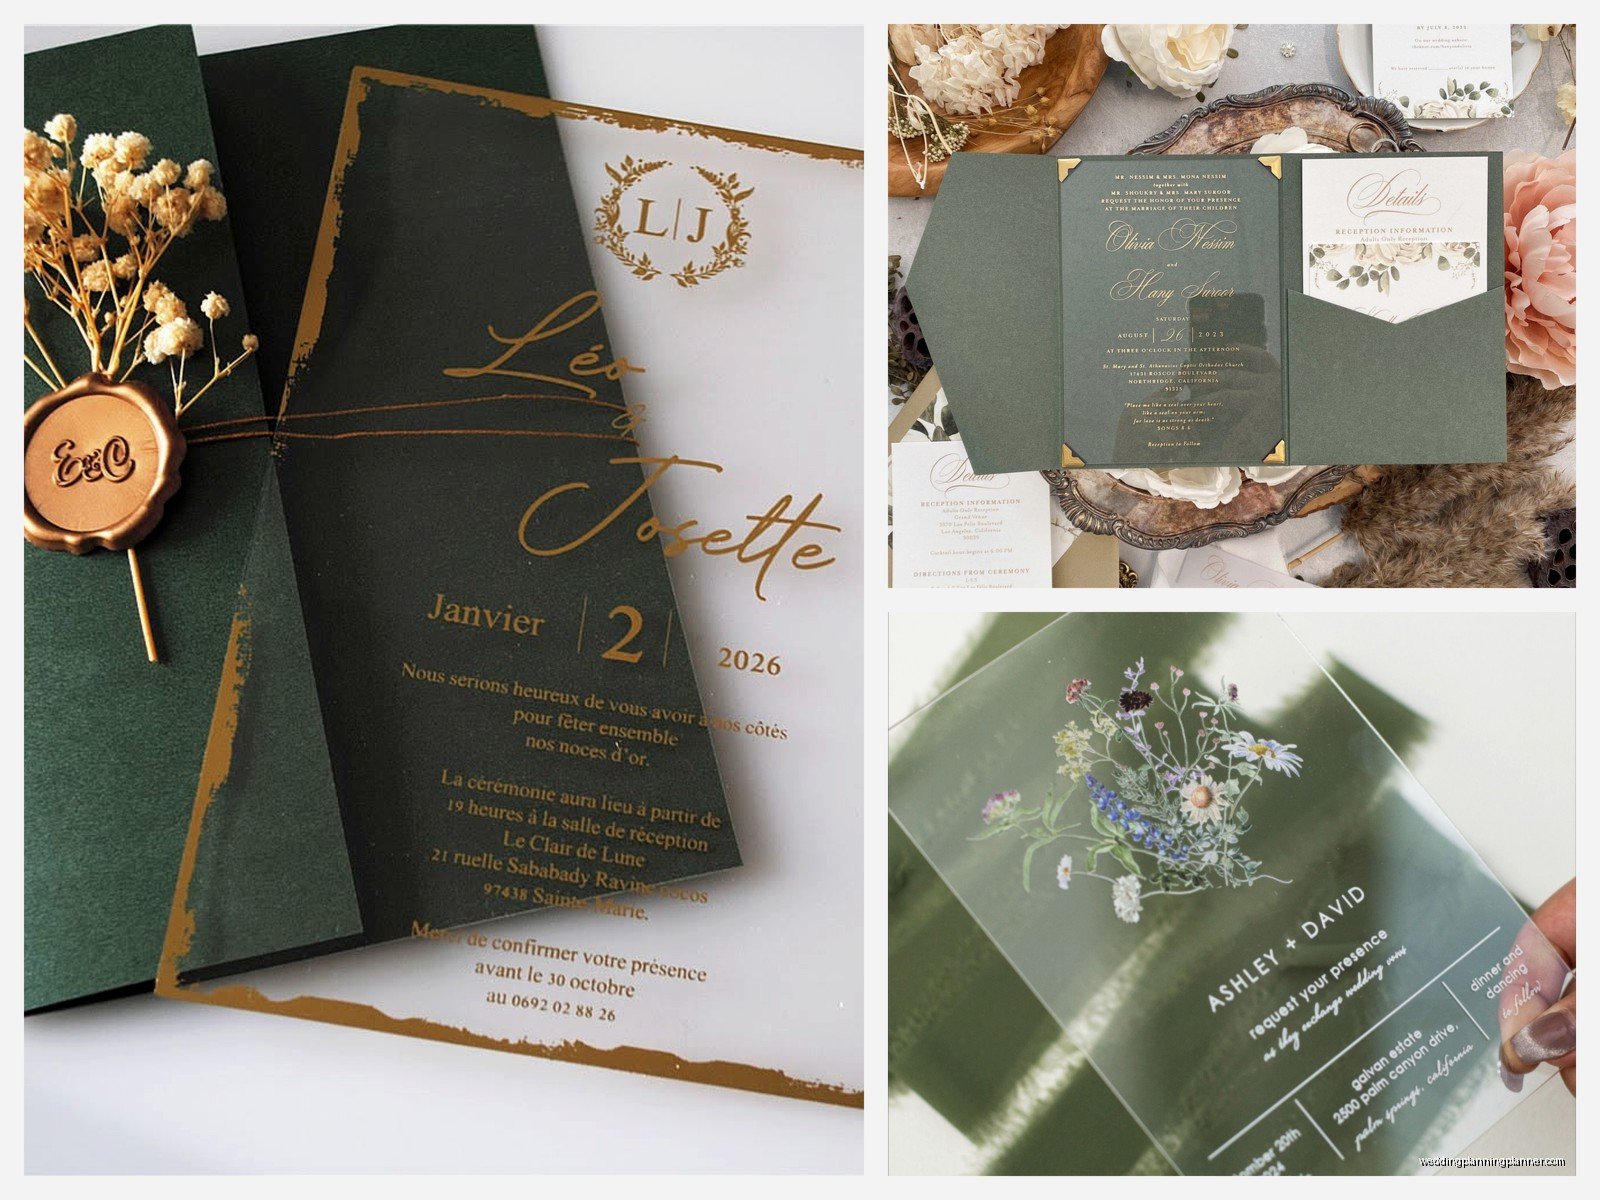
Okay so transparent wedding invitations are having such a moment right now and honestly they’re not going anywhere. I had this bride back in spring 2023 who was absolutely obsessed with modern minimalist everything, and when I showed her acrylic samples she literally gasped. Like actual audible gasp. These invitations are basically made from clear acrylic sheets—think plexiglass but thinner and wedding-appropriate—and you print directly onto them or use vinyl lettering.
The first thing you gotta know is that these are NOT cheap invitations. They’re a splurge. You’re looking at anywhere from $8 to $25 per invitation depending on thickness, printing method, and all the extras. But god they photograph beautifully. If you’re hiring a professional photographer (which you should be), these invites will be in your detail shots and you’ll be so glad you went for it.
Types of Acrylic Materials You Can Use
There are basically three thickness options and this matters more than you’d think. The 1/16 inch thickness is the most budget-friendly but it can feel kinda flimsy if you’re doing larger invitation sizes. I usually recommend 1/8 inch for most couples because it has that nice substantial feel without being too heavy for mailing. Then there’s 1/4 inch which is gorgeous but honestly it’s overkill for most weddings and the postage will kill you.
You can also get frosted acrylic instead of completely clear, which gives you this soft translucent look. Some couples do a combo—clear invite with frosted RSVP card or something. The frosted shows printing better if you’re doing light colored ink, just FYI.
Printing Methods That Actually Work
This is where people get confused and honestly where a lot of DIY attempts go wrong. You’ve got three main options: UV printing, vinyl application, or screen printing.
UV printing is what most professional invitation companies use now. The printer shoots UV light at the ink while it’s printing, which cures it instantly onto the acrylic. The colors are vibrant, you can do full color designs, even print white ink which looks INSANE on clear acrylic. The downside? You can’t do this at home. You need to work with a specialty printer or order through a stationery company that has the equipment.
Vinyl lettering is more DIY-friendly if you have a Cricut or Silhouette machine. You’re basically cutting out your text and design from vinyl sheets and applying it to the acrylic. This works great for simple, text-heavy designs. Not gonna lie though, weeding tiny letters from vinyl is tedious as hell and if you’re doing 100+ invitations… I mean, you could, but your sanity might not survive. I learned this during a bride’s DIY attempt where I had to step in and help at midnight because her wedding was in three days and she’d only finished 23 invitations.
Screen printing is old school but it works beautifully on acrylic. You get that slightly raised ink texture which feels expensive. But you need to find a screen printer willing to work with acrylic sheets, and you’re limited to one or two colors usually unless you wanna pay for multiple screens.
Design Considerations That Matter
Here’s what annoys me about acrylic invitations that nobody talks about: they’re see-through (duh) which means your design needs to work with that transparency. I’ve seen so many couples design their invite like it’s on paper and then when it’s printed on acrylic, half the text is unreadable because there’s not enough contrast or the background shows through weird.
White ink is your best friend here. Seriously. White text on clear acrylic is the most classic look and it’s readable against any background. If you’re doing colored ink, make sure it’s dark enough—think black, navy, deep burgundy, emerald green. Pastel pink text on clear acrylic? Nah, you’ll never be able to read it.
Also think about what’s behind the invitation when someone holds it. If you’re doing a photo save-the-date on acrylic, that works because the photo provides the background. But if it’s just text floating on clear acrylic, you might want to add a design element—geometric shapes, botanical illustrations, a colored border—something that gives the eye a place to land.
Size and Shape Options
Standard invitation size is 5×7 inches and that works fine for acrylic. But honestly? This is where you can get creative. I love 4×9 inch vertical invitations on acrylic—they’re sleek and modern and fit perfectly in a standard invitation envelope. Square invitations (6×6 or 5×5) look super contemporary too.
You can also do custom die-cut shapes. I had a couple do arch-shaped acrylic invitations that echoed the architecture of their venue and they were stunning. But custom shapes cost more—you’re paying for the cutting service—and you’ll need custom envelopes which adds another expense.
One thing about size though… bigger isn’t always better with acrylic because of weight. Once you get above 5×7, you’re adding significant weight which means higher postage. And if you’re doing a full invitation suite (invite, details card, RSVP) all in acrylic, you could be looking at international letter rates even for domestic mail. Always weigh your finished invitation before you order 150 stamps.
The Envelope Situation
Okay so this is tricky. Regular paper envelopes work but they don’t really do the invitation justice because you can’t see through to the acrylic until you open it. Some couples do vellum envelopes which are translucent so you get a preview of the acrylic invite inside. Pretty but vellum envelopes are annoying to work with—they show every fingerprint and they don’t seal well with regular glue.
Clear plastic envelopes are another option. They’re literally made for this. You can see the full invitation through the envelope, which makes a huge impact when it arrives in the mail. The problem is… and this drove me crazy during a fall 2022 wedding… some post offices don’t like them because the address can shift around. You need to make sure your mailing label or printed address is VERY secure.
My cat knocked over an entire box of clear envelopes once and they scattered everywhere and I’m still finding them behind furniture, but that’s not really relevant here.
A lot of couples do a double envelope situation—the acrylic invite goes in a vellum or clear inner envelope, then that goes inside a traditional paper outer envelope with a colored liner. This protects the invitation during mailing and adds that wow factor when they open it.
Assembly and Mailing Tips
Assembly is more involved than paper invitations, I’m not gonna sugarcoat it. If you’re doing belly bands or ribbons to hold multiple cards together, you need to be careful not to scratch the acrylic. Always handle with clean hands or cotton gloves if you’re doing a large quantity—fingerprints show up like crazy on clear acrylic.
For multiple pieces, I usually recommend tiny clear glue dots in the corners to keep cards stacked together, or you can drill a small hole in the corner and tie everything together with ribbon. The drill method looks gorgeous but you need a steady hand and the right drill bit for acrylic (a regular bit will crack it).
Postage is gonna be more than you expect. Even a simple 5×7 acrylic invitation usually needs extra postage because of the rigidity. Take a fully assembled invitation to the post office and have them weigh it and tell you exact postage. Don’t guess. I’ve seen too many invitations returned for insufficient postage and it’s heartbreaking.
Also tell your guests to hand-cancel if possible. That means the post office hand-stamps them instead of running them through the sorting machine. Acrylic can crack or scratch in the machines, and honestly after spending $15+ per invitation, you don’t want them arriving damaged.
Backing and Layering Options
Some couples do a paper or cardstock backing behind the acrylic which gives you the transparency effect from the front but provides a solid background. This is great if you want to use lighter ink colors or if your design needs more contrast. You can do white cardstock for a clean modern look, or colored cardstock that matches your wedding colors.
Layering different materials is really trendy right now—like a clear acrylic layer on top of a vellum layer on top of colored cardstock. It creates this dimensional effect that’s really beautiful. But again, more layers means more weight means more postage, and also more assembly time or more cost if you’re paying someone to assemble them.
Cost Breakdown Reality Check
Let’s talk actual numbers because this is where couples get sticker shock. If you’re ordering from a stationery company with UV printing, expect $8-12 per invitation for just the main invite. That’s not including RSVP cards, details cards, envelopes, postage, or assembly.
For a 100-invitation order, you’re looking at:
- Main invitations: $800-1200
- RSVP cards (if acrylic): $400-600
- Envelopes: $100-200
- Postage: $200-300
- Assembly (if outsourced): $150-300
So you’re at $1650-2600 total for 100 invitations. That’s… a lot. Like, that’s more than some people’s entire stationery budget including day-of paper goods. But if it’s important to you and fits your aesthetic, it’s worth it. Just go in with eyes open.
DIY vs Professional
You can DIY parts of this but probably not all of it unless you’re really crafty and have a lot of time. Buying blank acrylic sheets and doing vinyl lettering yourself is the most cost-effective DIY route. You’ll pay maybe $2-3 per acrylic sheet and vinyl is cheap, but you’re trading money for TIME. Lots of time.
I usually recommend DIY for simple designs with minimal text. If you want full color printing, custom graphics, or anything complex, just pay for professional printing. The setup fees might seem high but the quality difference is massive and you won’t waste materials on failed attempts.
Timeline for Ordering
Order earlier than you would for paper invitations. Most companies need 3-4 weeks for acrylic invitations because of the specialty printing process. If you’re doing custom shapes or sizes, add another week or two. Then you need time for assembly and addressing.
I tell my couples to have their design finalized and ordered 4-5 months before the wedding. That gives you buffer time for proofing, production, assembly, and mailing with enough time for guests to RSVP. Rush orders are possible but you’ll pay through the nose for them.
Design Trends I’m Seeing
Minimalist text-only designs are huge right now. Just clean typography in white or black on clear acrylic, maybe a simple line border. Very Scandinavian modern vibes. Botanical illustrations printed in one color also look gorgeous—think delicate line drawings of eucalyptus or olive branches.
Geometric shapes and art deco patterns work really well with the modern aesthetic of acrylic. Gold or rose gold vinyl on clear acrylic is stunning for evening weddings or more glamorous affairs.
Some couples are doing watercolor backgrounds printed on paper, then layering clear acrylic with text over top. This gives you the softness of watercolor with the modern edge of acrylic and it’s such a good combination.
Honestly the trend that’s kinda dying out is trying to make acrylic look like something else. Like, don’t fight the material—lean into the fact that it’s clear and modern and contemporary. That’s the whole point.
What to Include With Your Acrylic Invites
You still need all the same information as traditional invitations obviously. Main invite with names, date, time, venue. Details card with accommodations, website, dress code. RSVP card or info about online RSVPs.
Some couples do just the main invite in acrylic and then the other pieces in paper or vellum to save money. That works fine—you still get the wow factor from the main invite but you’re not dropping $15 per person on invitation suites.
If you’re doing a destination wedding or have a lot of weekend events, consider a paper or vellum insert with the full schedule rather than trying to fit everything on acrylic. Too much text on a transparent background gets hard to read and loses the clean modern aesthetic anyway.
Maps don’t really work on clear acrylic unless you’re doing a very simplified line art version. Regular detailed maps need solid backgrounds to be readable, so maybe do that as a paper insert instead.