
Planning Guides, Style Guide
Wedding Guest List Excel: Spreadsheet Template Guide
Jul
Setting Up Your Wedding Guest List Spreadsheet
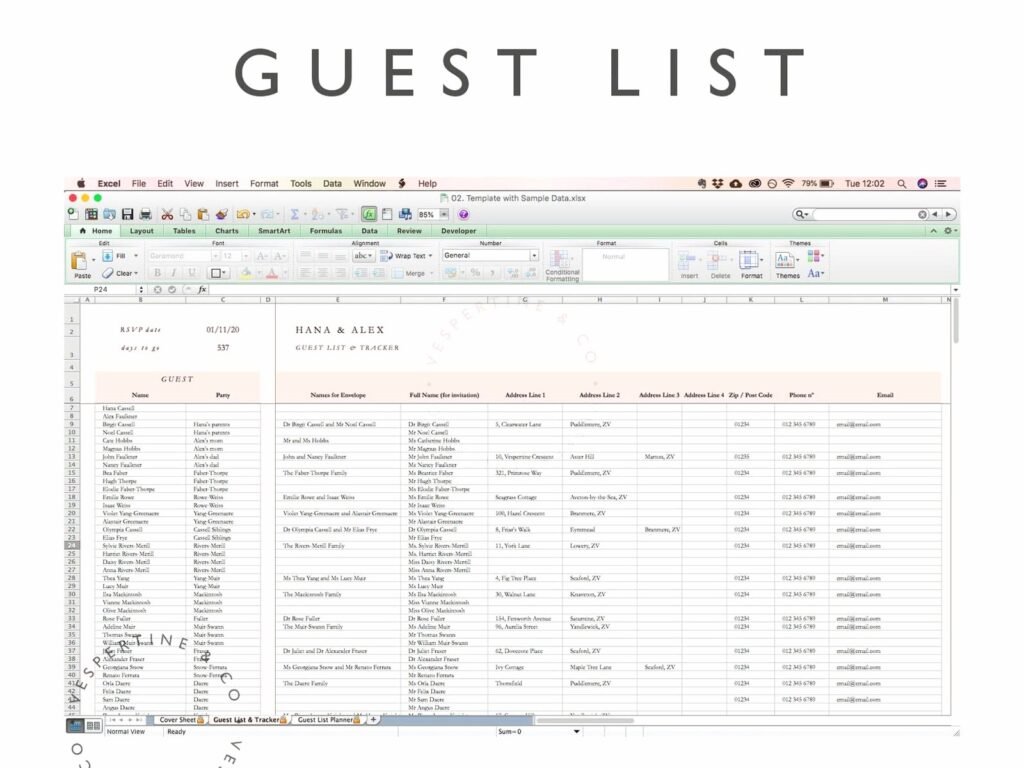
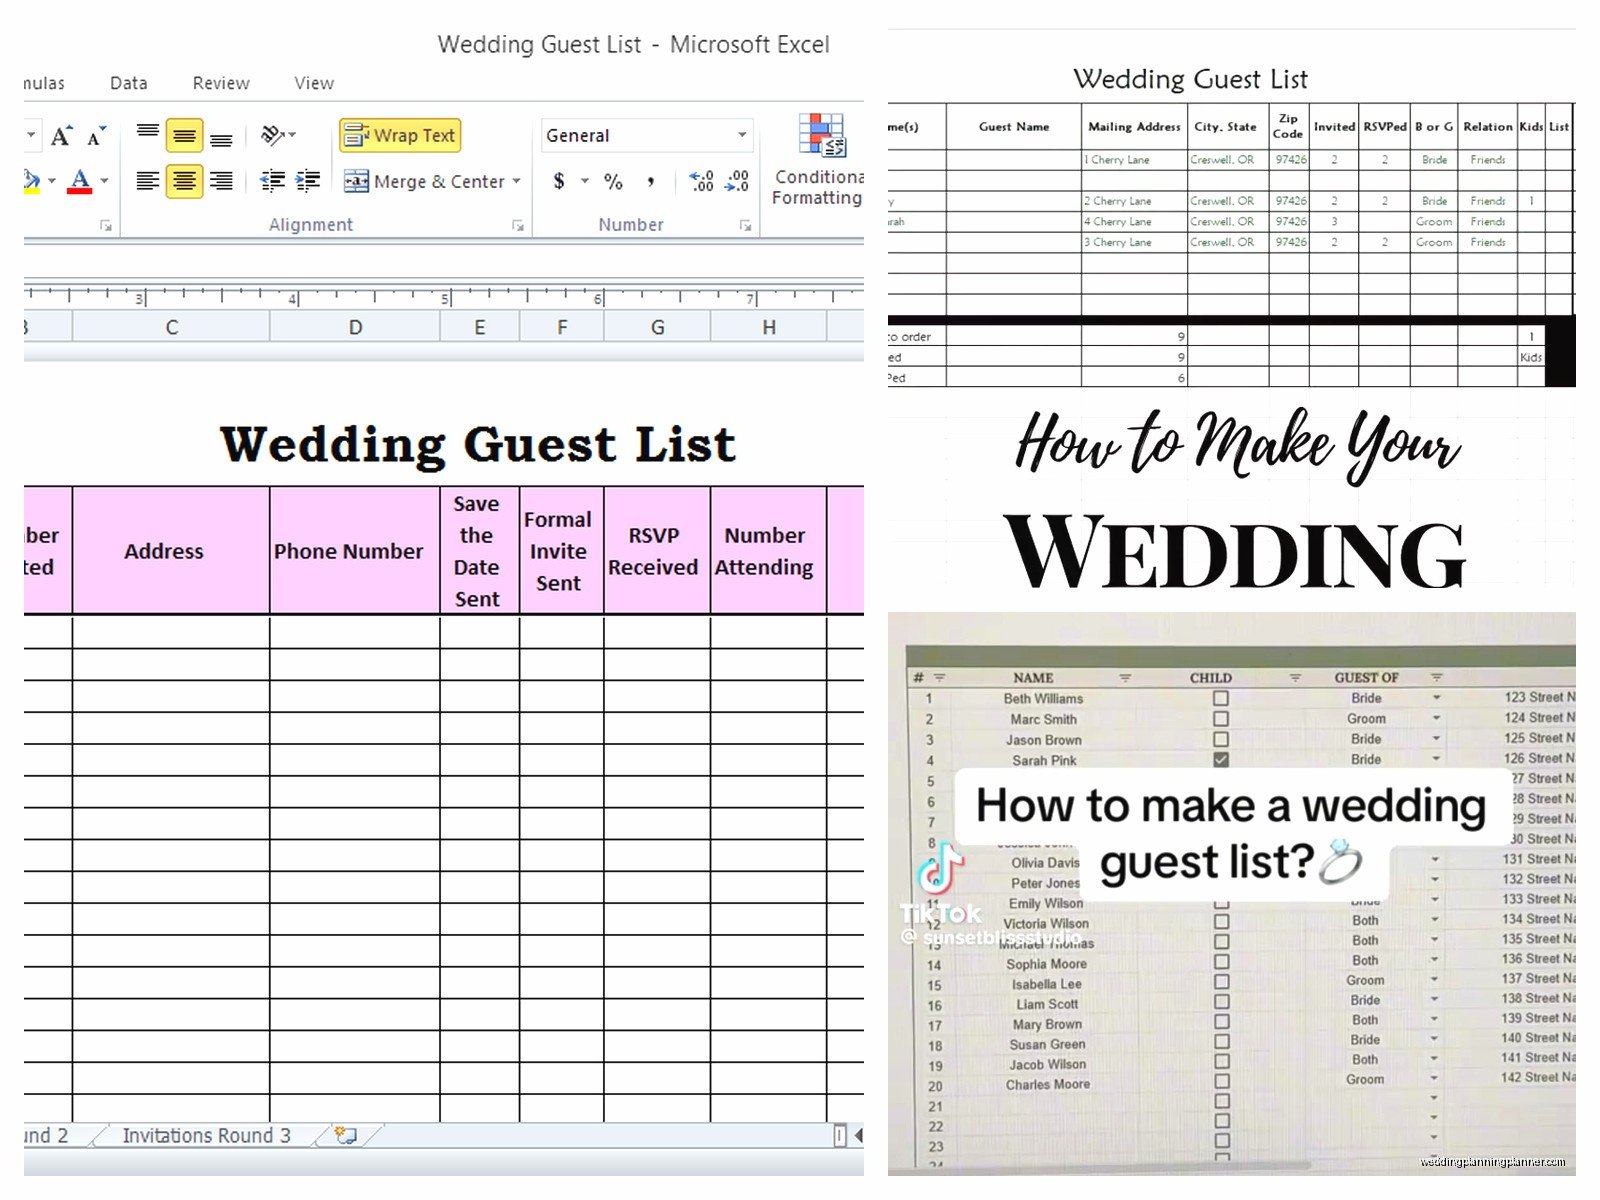
Okay so the first thing you gotta do is open Excel or Google Sheets—honestly I prefer Google Sheets because you can share it with your partner and both work on it at the same time without that annoying “this file is locked” message that Excel loves to throw at you. Create a new spreadsheet and start with these column headers across the top: Guest Name, Plus One Name, Mailing Address, City, State, ZIP, Email, Phone Number, Relationship (like whose side they’re on), RSVP Status, Meal Choice, Dietary Restrictions, Thank You Note Sent.
That’s your basic setup but you can add more columns as you go. I usually throw in a Notes column at the end because there’s always something random you need to remember like “Sarah can’t sit near Tom because of that thing that happened at the holiday party” or whatever.
The Guest Name Situation
Here’s where it gets kinda specific—list each person individually on their own row even if they’re a couple. So like, if you’re inviting John and Jane Smith, that’s two rows. I learned this the hard way back in spring 2023 when I had a bride who listed couples together and then couldn’t figure out her actual headcount because she had to go back and count everyone manually. It was a mess and she was texting me at like 11pm panicking about numbers.
For families with kids, same deal. Each kid gets their own row. Yeah it makes your spreadsheet longer but trust me when you’re trying to figure out how many children’s meals to order you’ll be so glad you did this.
The Mailing Address Columns
Break your address into separate columns—one for street address, one for city, one for state, one for ZIP. This makes it SO much easier when you’re doing mail merge for invitations or thank you cards later. If you lump everything into one cell you’re gonna hate yourself when you need to sort by state or create mailing labels.
And get these addresses early, like way before you think you need them. People move, people are weird about giving out their address, people will say “oh I’ll send it to you later” and then never do.
Tracking RSVPs and Meal Choices
The RSVP Status column should have dropdown options—you can do this in Excel by clicking Data Validation. Set it up with choices like: Not Yet Sent, Awaiting Reply, Accepted, Declined, Maybe (even though maybe isn’t really an option but people do it anyway and it’s super annoying). This dropdown thing keeps your data clean and you can filter by status really easily.
For Meal Choice I usually set up another dropdown with whatever options the couple is offering. Could be Chicken, Beef, Fish, Vegetarian, Vegan, Kids Meal—whatever applies. Some couples do plated dinners, some do buffet and don’t need this column at all, but if you’re doing plated you NEED this tracking or your caterer will not be happy with you.
Dietary Restrictions needs to be a free text field because people have all sorts of specific things going on. Allergies, religious requirements, that one person who’s on a cleanse… I once had a guest who could only eat foods that were white or beige and we had to actually accommodate that, which was bizarre but whatever.
Adding Formulas That Actually Help
At the bottom of your spreadsheet create a little summary section. Use COUNTIF formulas to count stuff automatically. Like =COUNTIF(J:J,”Accepted”) if column J is your RSVP status—this tells you how many people said yes. Do the same for declined, for each meal choice, for kids vs adults.
You want a running total of your headcount that updates automatically as you fill in RSVPs. Nothing worse than manually counting and recounting and getting different numbers each time, which… I’ve definitely done that at 2am while my cat was knocking pens off my desk because apparently that’s more important than me meeting a venue deadline.
Create a column for “number in party” if you wanna get fancy—like put a 1 for each individual but then you can sum that column to get your total guest count. Some people do a separate count for adults vs children since venues often charge differently.
The Plus One Problem
Plus ones are honestly the most complicated part of guest list management and it drives me up the wall. You need a clear system from the start. I recommend having a column called “Plus One Allowed” with Yes or No, and then the “Plus One Name” column where you fill in the actual name once you know who they’re bringing.
Some couples do plus ones for everyone, some only for people in serious relationships, some only for members of the wedding party. Whatever your rule is, write it down somewhere in your spreadsheet so you remember why you made certain decisions. Because I promise you’ll forget and then you’ll have your aunt calling asking why her son got a plus one but her daughter didn’t and you’ll have no idea what you were thinking.
When someone RSVPs with a plus one name, immediately add that person’s info to your spreadsheet as a new row linked to the original guest. This keeps your count accurate and helps with seating charts later.
The Relationship and Groups Column
The Relationship column is where you note whose side they’re on—Bride’s Family, Groom’s Family, Bride’s Friend, Groom’s Friend, Mutual Friend, Coworker, etc. This helps when you’re trying to balance numbers between sides or when you’re doing seating arrangements and need to group people logically.
I also sometimes add a “Group” column where you can tag people who should probably sit together—like “College Friends” or “Bride’s Cousins” or “Groom’s Hockey Team.” Makes the seating chart process way less painful, though honestly seating charts are painful no matter what you do so…
Invitation Tracking Tabs
Okay so here’s something I started doing around summer 2021 that changed everything—create multiple tabs in your spreadsheet. Your first tab is the master guest list with everyone. Then create separate tabs for:
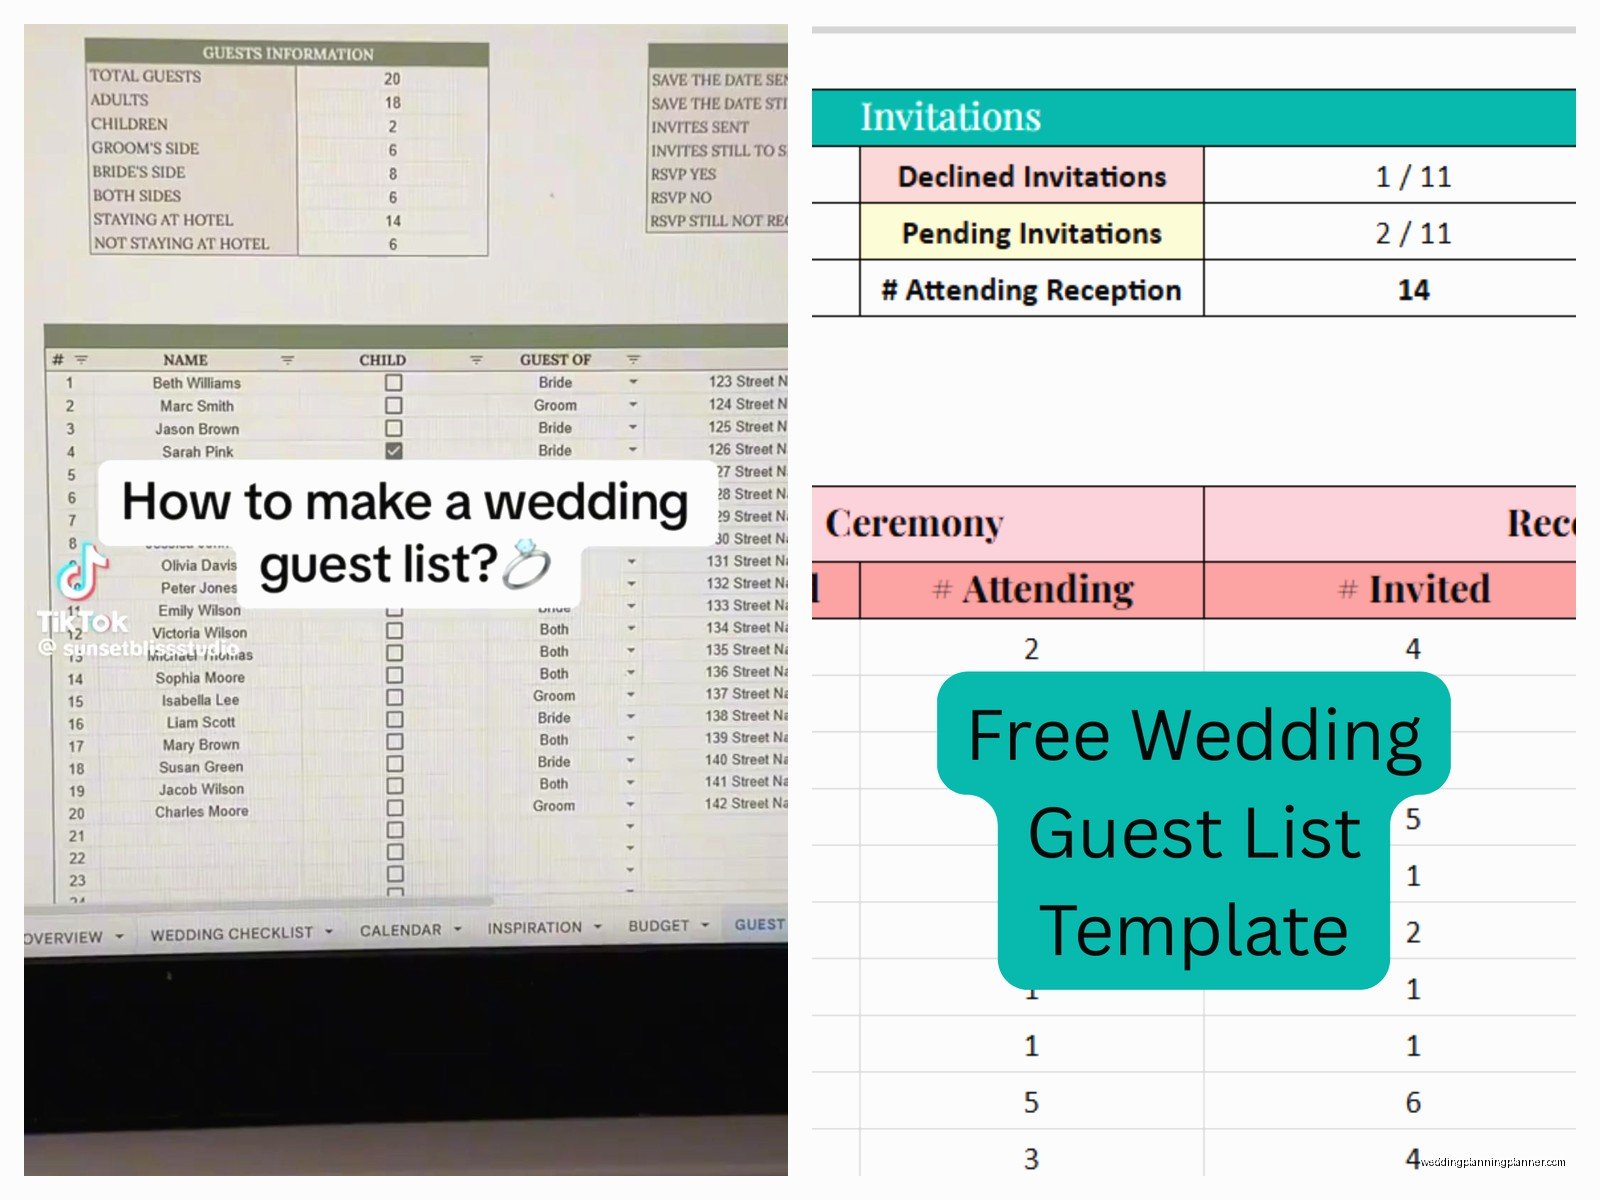
- Save the Dates (who you sent them to and when)
- Invitations (tracking when sent, when RSVPs are due)
- Shower Guests (if applicable)
- Rehearsal Dinner (usually smaller group)
- Thank You Notes (tracking who gave what gift and when you sent the note)
You can link data between tabs so you’re not retyping everything. Like, your invitation tab can pull names and addresses from the master list automatically. Google Sheets does this really well with formulas, Excel can do it too but it’s slightly more annoying.
The A-List B-List Strategy
Look, I know etiquette people say not to do this but realistically a lot of couples have budget constraints and venue capacity limits. If you’re gonna do an A-list and B-list situation, you need to track it carefully in your spreadsheet.
Add a column called “Invitation Wave” and mark people as Wave 1 or Wave 2. Send Wave 1 invitations early (like 10-12 weeks out). Then if you get declines, you immediately send Wave 2 invitations to fill those spots. The key is timing it so Wave 2 people don’t realize they were second choice—send their invites at least 6-8 weeks before the wedding so it seems normal.
Just be really careful about who you put in Wave 2 because if they find out they were backup invites it can hurt feelings. Don’t put like, your actual close friends or immediate family in Wave 2. That’s more for distant relatives, casual acquaintances, coworkers you’re semi-friendly with, etc.
Managing the Spreadsheet With Your Partner
If you’re using Google Sheets you can both access it simultaneously which is great. But you need some ground rules or you’ll end up with duplicate entries, deleted information, and fights about whose cousin is more important.
Assign ownership of different sections—like maybe one person handles their side of the family and friends, the other handles theirs. Or one person is in charge of updating RSVPs while the other handles address collection. Whatever works but have a system.
Use the comment feature in Google Sheets to leave notes for each other instead of texting back and forth. Like if you’re not sure whether to invite someone, leave a comment on their row saying “do we really need to invite this person?” and your partner can respond right there in the spreadsheet.
Color Coding for Visual People
Some people are really visual and need color coding to make sense of data. You can highlight rows different colors based on status—like green for accepted, red for declined, yellow for awaiting response. Or color code by relationship category so all family is one color, friends another, coworkers another.
I personally find too much color coding distracting but I’ve had clients who loved it and found it really helpful. Do what works for your brain.
Common Mistakes People Make
Not backing up the spreadsheet is the biggest one. If you’re using Google Sheets it auto-saves to the cloud so you’re pretty safe, but if you’re using Excel you better be saving that file regularly and keeping a backup copy somewhere. I’ve heard horror stories of people losing their entire guest list because their computer crashed or they accidentally deleted the file.
Another mistake is not keeping the spreadsheet updated in real time. You get an RSVP and think “oh I’ll update that later” and then you forget and suddenly you have RSVPs on sticky notes, in texts, in your email, and you have no idea what your actual count is. Update immediately when you get information or you’ll lose track.
Also people forget to track thank you notes and then six months after the wedding they’re trying to remember who gave them what gift and whether they sent a note. Create that tracking column from the start and use it.
Sharing With Vendors
You’ll need to share parts of your guest list with various vendors—your caterer needs the headcount and meal choices, your venue needs total numbers, your stationer needs addresses for invitations. Don’t just send your whole master spreadsheet to everyone because it’s got personal info like phone numbers and emails that vendors don’t need.
Create filtered views or separate tabs with just the info each vendor needs. For the caterer, export just names and meal choices. For the stationer, just names and addresses. Keep it clean and professional.
Using the Spreadsheet for Seating Charts
Once you’ve got all your RSVPs in, your spreadsheet becomes the foundation for your seating chart. You can add columns for Table Number and Seat Number if you’re doing assigned seating down to specific seats, or just Table Number if you’re doing assigned tables but not specific seats.
Sort your spreadsheet by relationship/group to see clusters of people who should sit together. Then start assigning tables. Some couples do this in the spreadsheet, some export to a separate seating chart tool, some get a big posterboard and move sticky notes around. The spreadsheet is your source of truth though—whatever seating decisions you make need to get recorded back in the spreadsheet.
Consider who can’t sit together (divorced parents, people who had a falling out, exes, that sort of drama) and who should sit together (people who know each other, people with similar interests, people in the same age range). It’s like a giant puzzle and honestly it’s one of the most stressful parts of wedding planning but having all your data organized in the spreadsheet at least makes it possible.
Final Numbers and Guarantees
Most venues and caterers need a final headcount about a week before the wedding, and that number is usually a guarantee—you’re paying for that many people whether they show up or not. Use your spreadsheet to get an accurate count of everyone who accepted, add about 2-3% buffer for vendors/staff meals if needed, and that’s your guarantee number.
After you submit final numbers, freeze your spreadsheet or at least the RSVP column so you don’t accidentally change anything. Save a copy of the spreadsheet as it exists at final count so you have a record of exactly what you told your vendors.
