
Planning Guides, Style Guide
Wedding Program Fan Template: Ceremony Order Downloads
Jul
Why Program Fans Are Actually Worth the Effort
Okay so program fans. I’ve been doing weddings since like 2008 and honestly program fans used to annoy me SO much because brides would ask for them and then realize they needed to print like 150 of these things and suddenly it’s my problem at 11pm three days before the wedding. But here’s the thing – they’re actually super practical for outdoor ceremonies, especially summer weddings, and if you use a good template it’s not that painful.
The whole point is combining your ceremony program with something guests can actually use when it’s hot outside. I had this wedding in July 2021, outdoor vineyard ceremony at 3pm because the couple wanted golden hour photos, and it was like 94 degrees. We had these gorgeous program fans and I watched every single guest use them throughout the entire ceremony. The photographer even got some great shots of guests fanning themselves during the vows which sounds weird but it actually looked really natural and candid.
What Actually Goes on a Program Fan
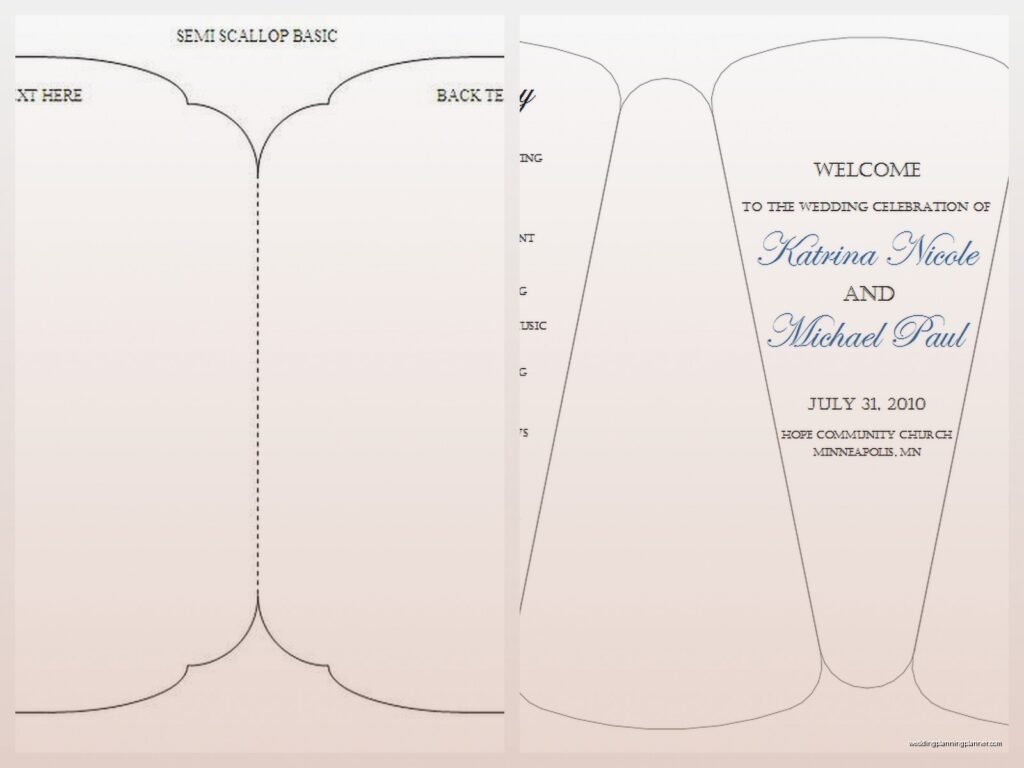
So the ceremony order part is basically the same as a regular program but you gotta fit it on one side of whatever shape you’re using. Most program fans are either paddle-shaped or round or that fancy art deco fan shape.
Here’s what you typically include:
- Names of the couple and wedding date at the top
- Ceremony order (processional, readings, vows, ring exchange, etc.)
- Names of your wedding party with their role
- Names of parents if you want
- Officiant name
- Special readings or song titles
- Maybe a quick thank you note or “in memory of” section
The back side is usually decorative or has a meaningful quote or your monogram. Some couples put their love story back there but honestly that’s a lot of text for something people are waving around.
Finding and Using Templates
Alright so templates. You’ve got a bunch of options and some are definitely better than others.
Etsy Templates
This is where I send most of my clients honestly. You can find program fan templates for like $8-25 and they’re usually editable in Canva or Templett or sometimes Photoshop if you’re fancy. The nice thing about Etsy is you can search by your wedding style – like “rustic program fan template” or “modern minimalist ceremony fan” and actually find something that matches your invitations.
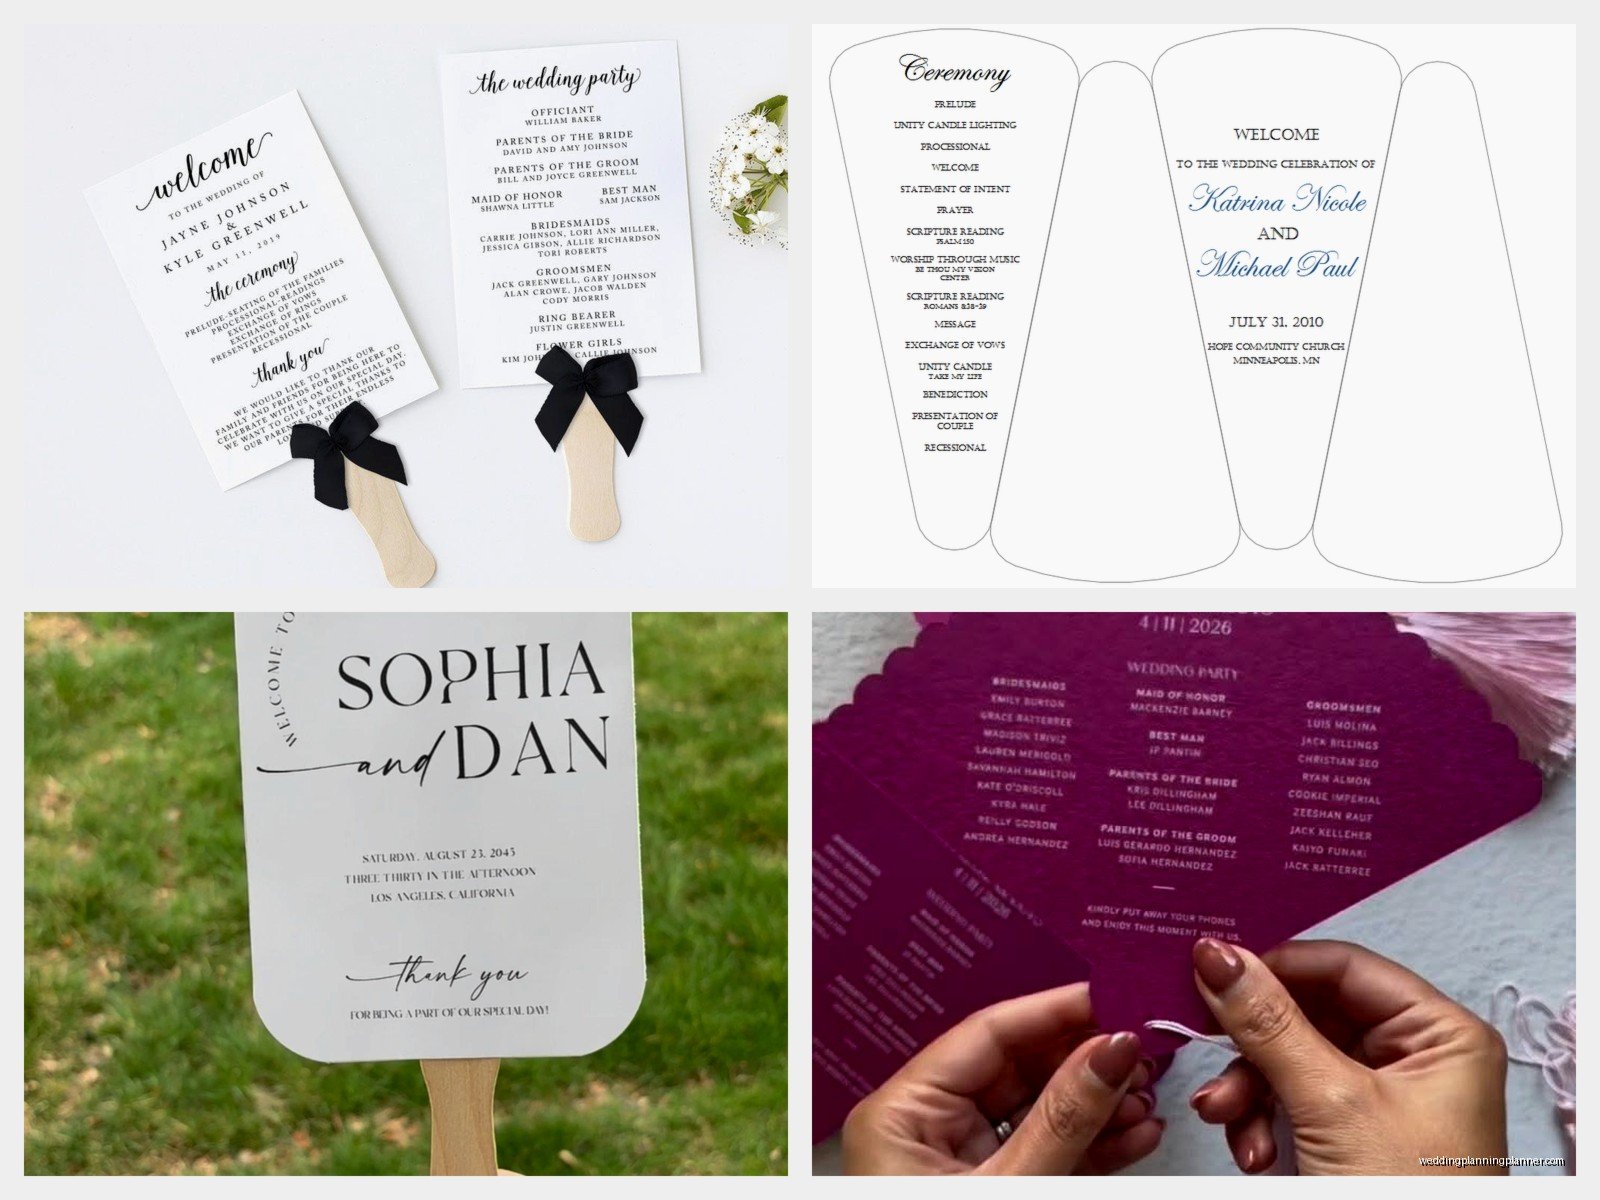
What I tell couples: make sure the listing specifically says it’s editable and check what software you need. Some templates require Adobe programs and if you don’t have those… well you’re gonna have a bad time or you’ll need to pay someone to edit them for you.
Canva Templates
Canva has free and paid program fan templates. The free ones are kinda basic but if your wedding aesthetic is clean and simple they work perfectly fine. Canva Pro has better options and the cool thing is you can resize stuff easily and they have this whole library of wedding graphics and fonts.
I use Canva for my own mockups when I’m showing clients options because it’s just faster than… anyway. The drag-and-drop thing makes it really accessible even if you’re not design-savvy.
Microsoft Word Templates
Nah. I mean you CAN do this but Word templates for program fans are usually formatted weird and you’ll spend more time fighting with margins and image placement than just using something actually designed for this. Unless you’re really comfortable with Word and have a simple text-only design in mind.
Professional Template Sites
Sites like Creative Market, Design Bundles, or even some wedding-specific template shops have really gorgeous options. These tend to be a bit pricier ($15-40) but the design quality is usually higher and they come with multiple format options and good instructions.
The Actual Ceremony Order Format
So when you’re filling in your template you need to know what order things actually happen. This is where I see couples get confused because every ceremony is different depending on whether it’s religious or secular or whatever.
Here’s a standard secular ceremony order:
- Processional – this is when the wedding party walks down the aisle
- Welcome and Opening Remarks – officiant welcomes everyone
- Reading or Song – if you’re having one
- Declaration of Intent – the “do you take this person” part
- Vows – exchange of personal or traditional vows
- Ring Exchange – pretty self-explanatory
- Unity Ceremony – if you’re doing sand ceremony or candle lighting or whatever
- Pronouncement – “I now pronounce you…”
- The Kiss – obviously
- Recessional – walking back down the aisle as a married couple
You don’t have to include every little detail. Like you can just say “Exchange of Vows” instead of writing out whether they’re personal vows or traditional. Keep it brief because the text needs to be readable and people are holding this thing while standing or sitting outside.
Design Stuff That Actually Matters
Okay so I learned this the hard way spring 2023 when a bride ordered 200 program fans from an online printer and the text was SO SMALL that her grandmother literally couldn’t read it. We had to have the ceremony coordinator verbally explain the order to like half the older guests.
Font size matters. Minimum 10pt for body text, preferably 11-12pt. Headers can be bigger obviously. And pick a readable font – this isn’t the place for that super swirly calligraphy font you can barely decipher. One script font for names or headers is fine, but the ceremony order itself should be in something clean.
Color contrast is huge too. Light text on light background looks pretty in the template but in actual outdoor lighting it’s gonna be invisible. Dark text on light background or vice versa. I had a couple who wanted blush pink text on white and we had to talk them into a darker mauve because it just wasn’t readable.
Size and Shape
Most program fans are between 4-6 inches wide. The paddle shape (rectangle with rounded top) is easiest to print and assemble. Round fans look really elegant but you waste more paper when cutting them out.
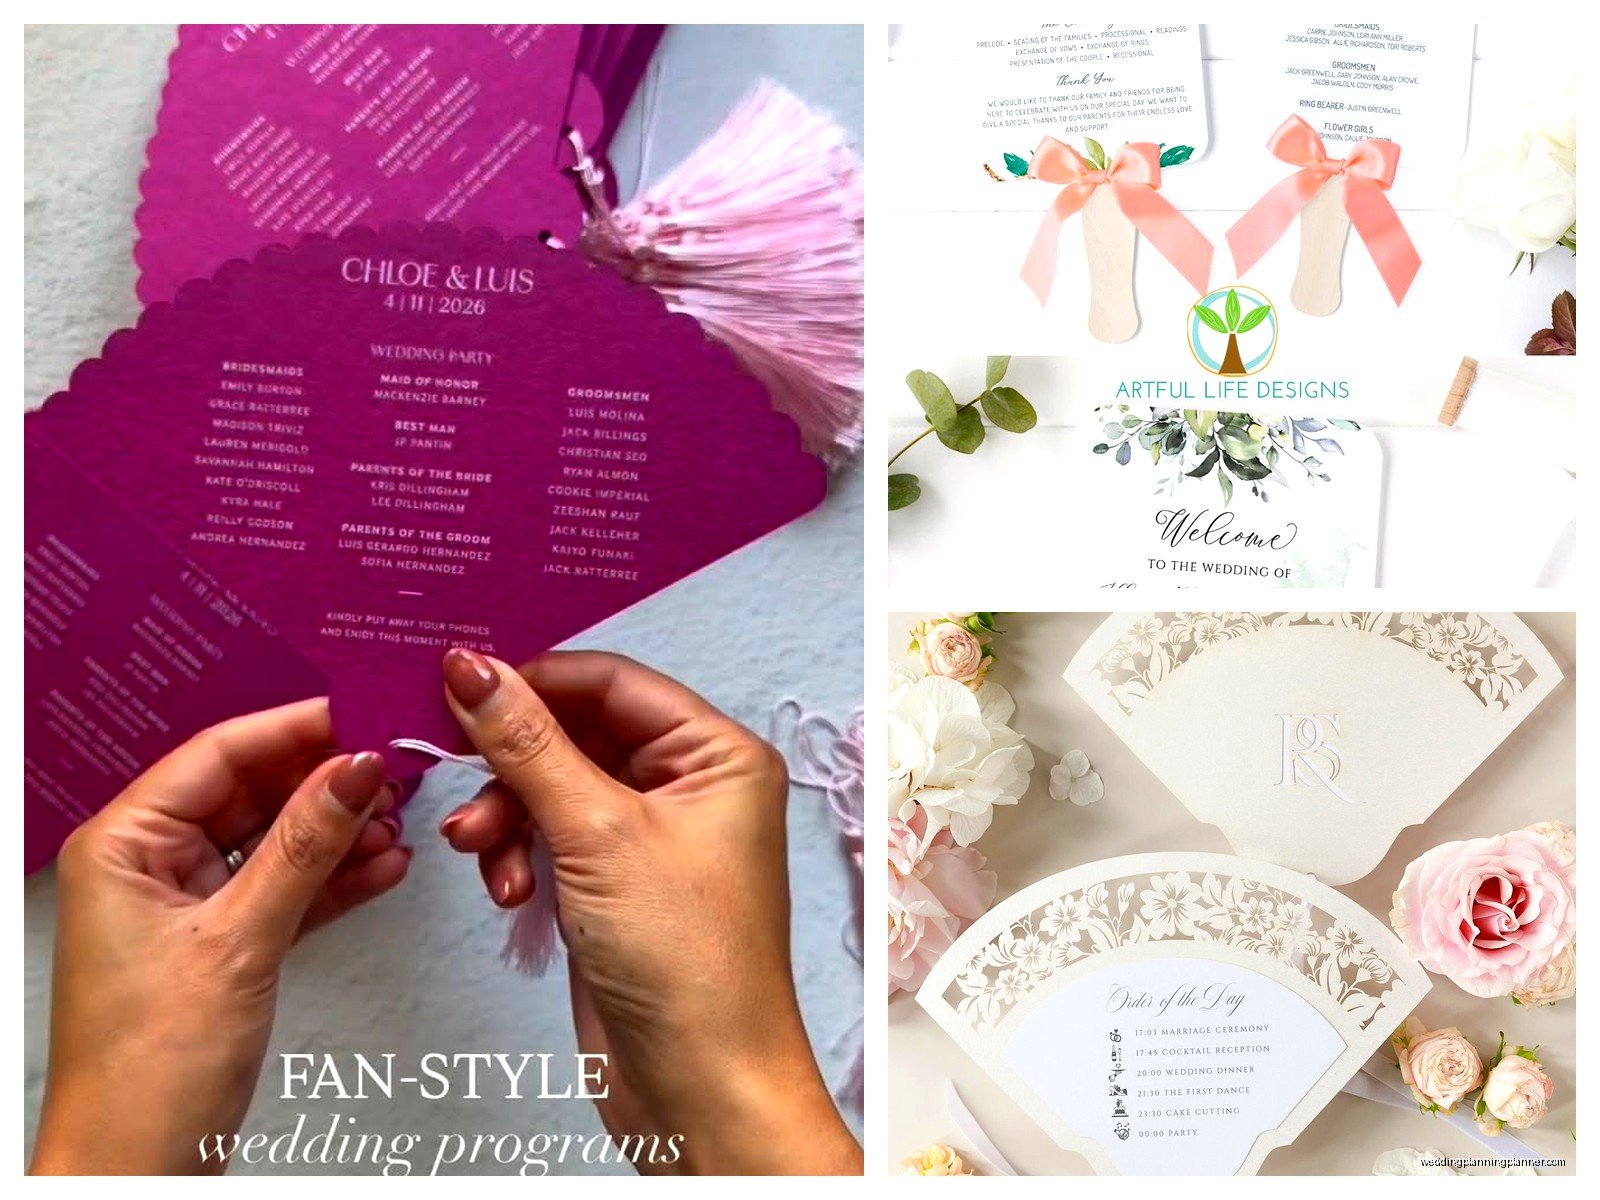
You can do double-sided printing where both sides have info, or single-sided where you glue/tape two printed sheets back-to-back with the handle in between. Double-sided is easier but single-sided looks more polished because you can use patterned paper or cardstock for the back.
Printing These Things Without Losing Your Mind
So you’ve got your template filled in and it looks gorgeous on screen. Now what.
Home Printing
If you’re doing like 30-50 fans and you have a decent printer this is totally doable. Get cardstock – 65lb or 80lb weight works well. Too thin and it’s flimsy, too thick and it might jam your printer or not fan well.
Print a test copy first. Seriously. Check the colors, check if everything’s positioned right, make sure nothing got cut off. I cannot tell you how many times I’ve seen people print 100 copies before realizing there was an error.
You’ll need to cut them out (scissors, paper cutter, or cutting machine like Cricut), punch a hole at the bottom, and attach handles. Handles can be wood craft sticks, paint stirrers, or fancy wooden paddle sticks from craft stores.
Professional Printing
For more than 50 or if you just don’t wanna deal with it, send it to a print shop. Local print shops can do this, or online places like Catprint, PrintingCenterUSA, or even Staples. Some will cut them for you, some won’t – check before ordering.
Vistaprint and similar sites sometimes have program fan options but you’re limited to their templates usually. Etsy sellers often offer printing services too if you buy their template.
Fully Assembled Options
There are companies that will print AND assemble the fans for you. It costs more but if you’re doing a large wedding and don’t have time to sit there gluing 150 sticks to paper circles… worth it. My cat knocked over a whole stack of assembled fans once while I was working from home and I wanted to cry, but that’s unrelated to whether you should order assembled ones.
Assembly Tips If You’re DIY-ing
Get your bridesmaids together with wine and make it a craft night. Seriously this is too tedious to do alone.
Use glue dots or double-sided tape instead of liquid glue – less mess, faster, no warping. Put the handle on the back so it’s not visible from the front. Make sure it’s centered or at least consistent across all fans.
Some people use hot glue guns which works but you gotta be careful not to get those stringy glue bits everywhere. Also hot glue can show through thin paper if you use too much.
If you’re doing the two-sheets-glued-back-to-back method, line them up carefully before sticking them together. Once they’re glued there’s no fixing it if they’re crooked.
What Drives Me Crazy About Program Fans
The thing that annoyed me most is when couples order fans for an indoor ceremony. Like… you’re in an air-conditioned church. You don’t need fans. Just do regular programs and save yourself the money and effort. I had this client who insisted on fans for her November indoor wedding and then was upset about the cost and I’m like… I told you this was unnecessary but okay.
Also when people forget to account for the handle length when designing. Your text can’t go all the way to the bottom edge or it’ll be covered by the handle. Leave at least an inch of space at the bottom, maybe more if you’re using wider paint stirrers.
Timeline for Getting These Done
You need your ceremony details finalized before you can complete the program obviously. That usually happens like 2-3 weeks before the wedding once you’ve confirmed your wedding party, readings, songs, etc.
Order or create your template at least a month out so you’re not rushed. If you’re printing professionally, give yourself 2-3 weeks for printing and shipping. If you’re DIY printing and assembling, budget at least a full weekend, maybe two if you’re doing a large quantity or if you’re a perfectionist.
I always tell couples to make 10-15 extras because some will get damaged or forgotten or blown away if it’s windy or… you get the idea.
Digital Downloads vs Physical Products
When you’re shopping for templates, “digital download” means you get the file to edit and print yourself. “Physical product” means they’re shipping you actual printed fans. Make sure you know which one you’re buying because I’ve had stressed-out brides email me confused about why they only received a PDF file.
Digital downloads are obviously cheaper and faster – you get them immediately after purchase usually. But then you’re responsible for all the printing and assembly. Physical products cost more but save you time and effort.
Matching Your Other Stationery
Your program fans should coordinate with your invitations and other wedding stationery but they don’t have to match exactly. Same color palette and similar fonts is usually enough. If your invitations have a specific graphic element like a floral motif or geometric pattern, try to incorporate that.
Some couples order their program fan template from the same Etsy seller who did their invitation template, which makes coordination easier because the fonts and style are already… wait I think I’m repeating myself.
Anyway the point is visual consistency matters but don’t stress about it being identical. Your guests aren’t gonna compare them side by side.
Alternative Ideas
If the whole printing-cutting-gluing thing sounds like too much, you’ve got options. Pre-folded programs that guests can use as fans work okay. Not as effective as actual fans but better than nothing. Or you could skip programs entirely and just have a big sign at the ceremony entrance with the wedding party names and ceremony order.
Some couples do QR codes that link to a digital program on their wedding website. Environmentally friendly and no printing, but kinda impersonal and doesn’t help with the heat situation.
You could also provide plain fans (like the cheap paper ones from Oriental Trading or whatever) and have separate programs. More stuff to coordinate but it’s an option if you found a program design you love that doesn’t work in fan format.
Random Tips From Years of Doing This
Keep a box of extra fans in your car or give them to your wedding planner day-of. Guests forget them, they blow away, whatever. Having backups is smart.
If it’s gonna be really windy, program fans might be more trouble than they’re worth because they’ll literally blow out of people’s hands during the ceremony. Consider the weather forecast.
You can add ribbon to the handle for a decorative touch. Just tie it near the top where the handle meets the paper. Keeps it from looking too craft-project-y.
Don’t put critical information only on the programs. Like if you want guests to do something specific during the ceremony (stand at certain times, participate in a group blessing, whatever), have your officiant announce it too because not everyone reads the program carefully.
The ceremony order doesn’t have to be super detailed. “Welcome and Opening Remarks” can just be “Welcome.” “Exchange of Marriage Vows” can be “Vows.” Keep it simple and readable.
Test your fan by actually using it. Does it fan effectively? Is it sturdy enough? Is the handle long enough? Sometimes what looks good doesn’t actually function well and you wanna know that before you make 100 of them.
