Planning Guides, Style Guide
Handmade Wedding Cards: DIY Craft Invitation Ideas
Mar
Getting Started With Paper and Basic Supplies
Okay so the first thing you gotta know about making your own wedding invitations is that the paper matters way more than you think. I learned this the hard way back in spring 2023 when a bride brought me her “finished” DIY invites and the cardstock was so thin it looked like printer paper. We had to redo everything two weeks before the wedding which was… not fun.
You want cardstock that’s at least 80lb weight, preferably 100lb for the actual invitation card. The 65lb stuff just feels cheap in your hands and it shows. I usually tell people to go to an actual paper store if you can find one, or order from Paper Source online. Michael’s works in a pinch but their selection is kinda limited and honestly their prices aren’t even that great anymore.
For a basic handmade invitation you’re gonna need:
- Cardstock in your main color (100lb)
- A lighter weight paper for layers or inserts (65-80lb)
- A paper trimmer with a sharp blade – not scissors unless you want uneven edges
- Double-sided tape or a tape runner
- Bone folder for crisp creases
- Ruler and pencil for measuring
The bone folder thing sounds fancy but it’s literally just a smooth stick that costs like $3 and makes your folds look professional instead of lumpy. Game changer.
The Layered Look That Always Works
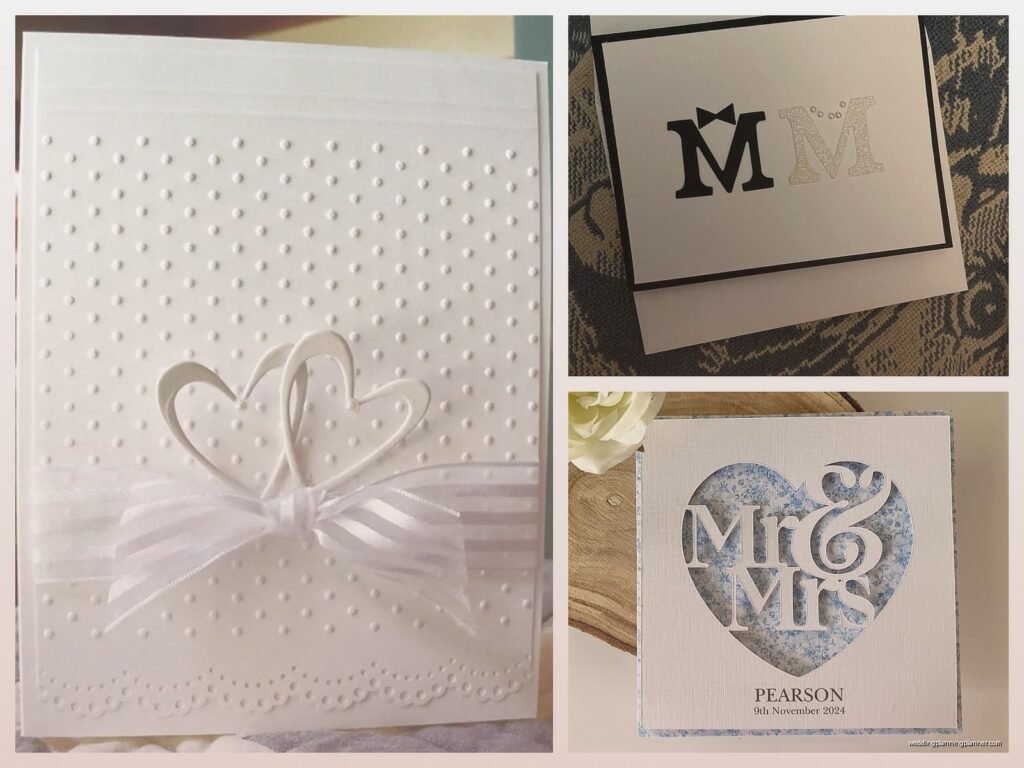
The easiest way to make invitations look expensive is layering. You take a larger piece of cardstock as your base, then mount a smaller piece on top in a contrasting color. Sometimes I do three layers if I’m feeling ambitious or if the bride is really into that maximalist look.
Here’s the technique I use: Cut your base card to 5×7 inches (standard invitation size). Then cut your second layer about a quarter inch smaller on all sides – so that would be 4.5×6.5 inches. If you’re doing a third layer, go another quarter inch smaller. The key is keeping those borders even, which is where the paper trimmer becomes essential because eyeballing it with scissors is gonna drive you crazy.
I mount the layers with a tape runner because liquid glue warps the paper and glue dots are too bulky. You want it flat and smooth. Apply the tape to the back of your top layer in an X pattern or around all four edges, then carefully center it on your base layer. Use your bone folder to press it down firmly.
One thing that really annoyed me when I first started doing this was that nobody tells you that darker cardstock shows fingerprints like crazy. Navy blue, black, deep burgundy – they all show every single smudge. I learned to wear those white cotton gloves that jewelers use, which sounds ridiculous but it actually works.
Printing Your Wording Without Losing Your Mind
So you can hand-letter everything if you’re into calligraphy, but let’s be real, most people aren’t gonna do that for 100+ invitations. Printing is fine. It’s not cheating or whatever.
The trick is setting up your document correctly in Word or Canva or whatever you’re using. Measure your paper size exactly and set up your margins so the text is centered where you want it. Do a test print on regular paper first – actually do like five test prints because I promise you the alignment will be off the first few times.
When you’re ready to print on the actual cardstock, feed it through your printer one sheet at a time. Most home printers can handle 80lb cardstock but they jam with 100lb, so you might need to print on the lighter weight paper and then mount it on the heavier base. That’s actually what I do most of the time anyway because it creates that layered effect automatically.
Font choice matters but that’s a whole other thing… just don’t use Comic Sans or anything too scripty that people can’t read. I had a bride once who picked this elaborate calligraphy font and half her guests couldn’t figure out what time the ceremony started. Keep the important info in a readable font.
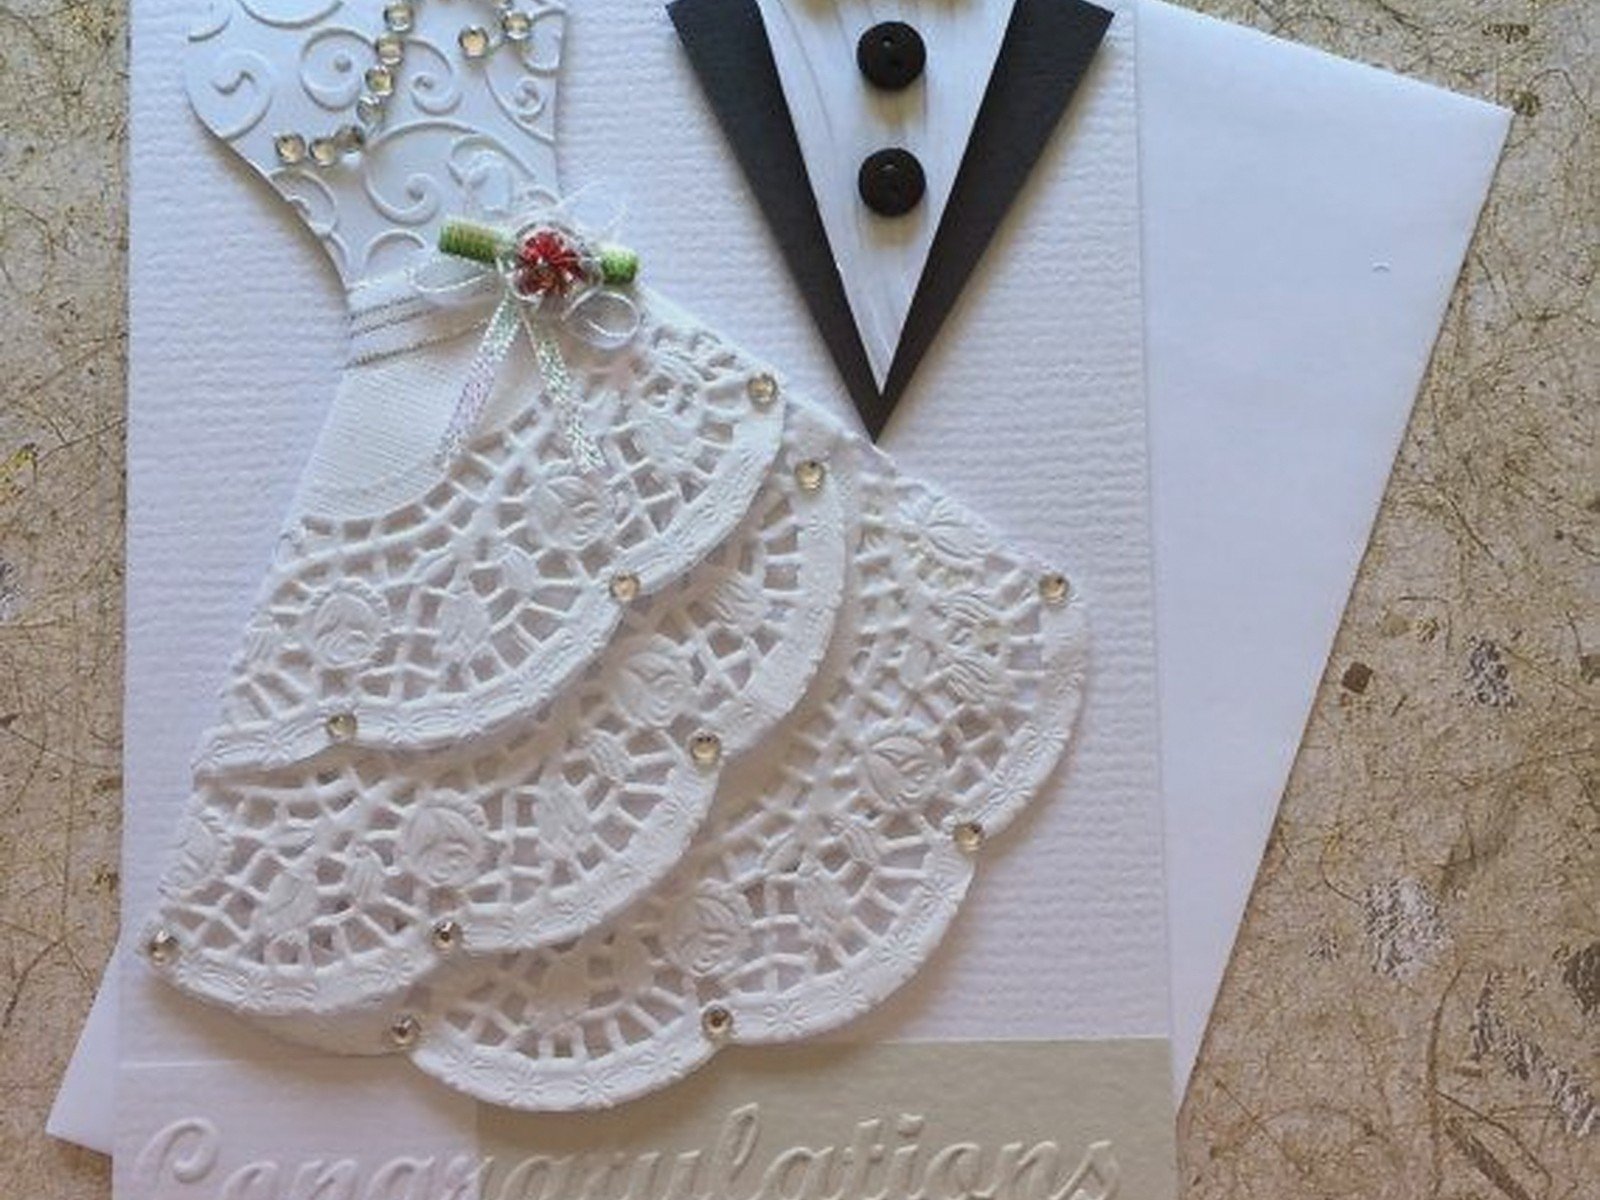
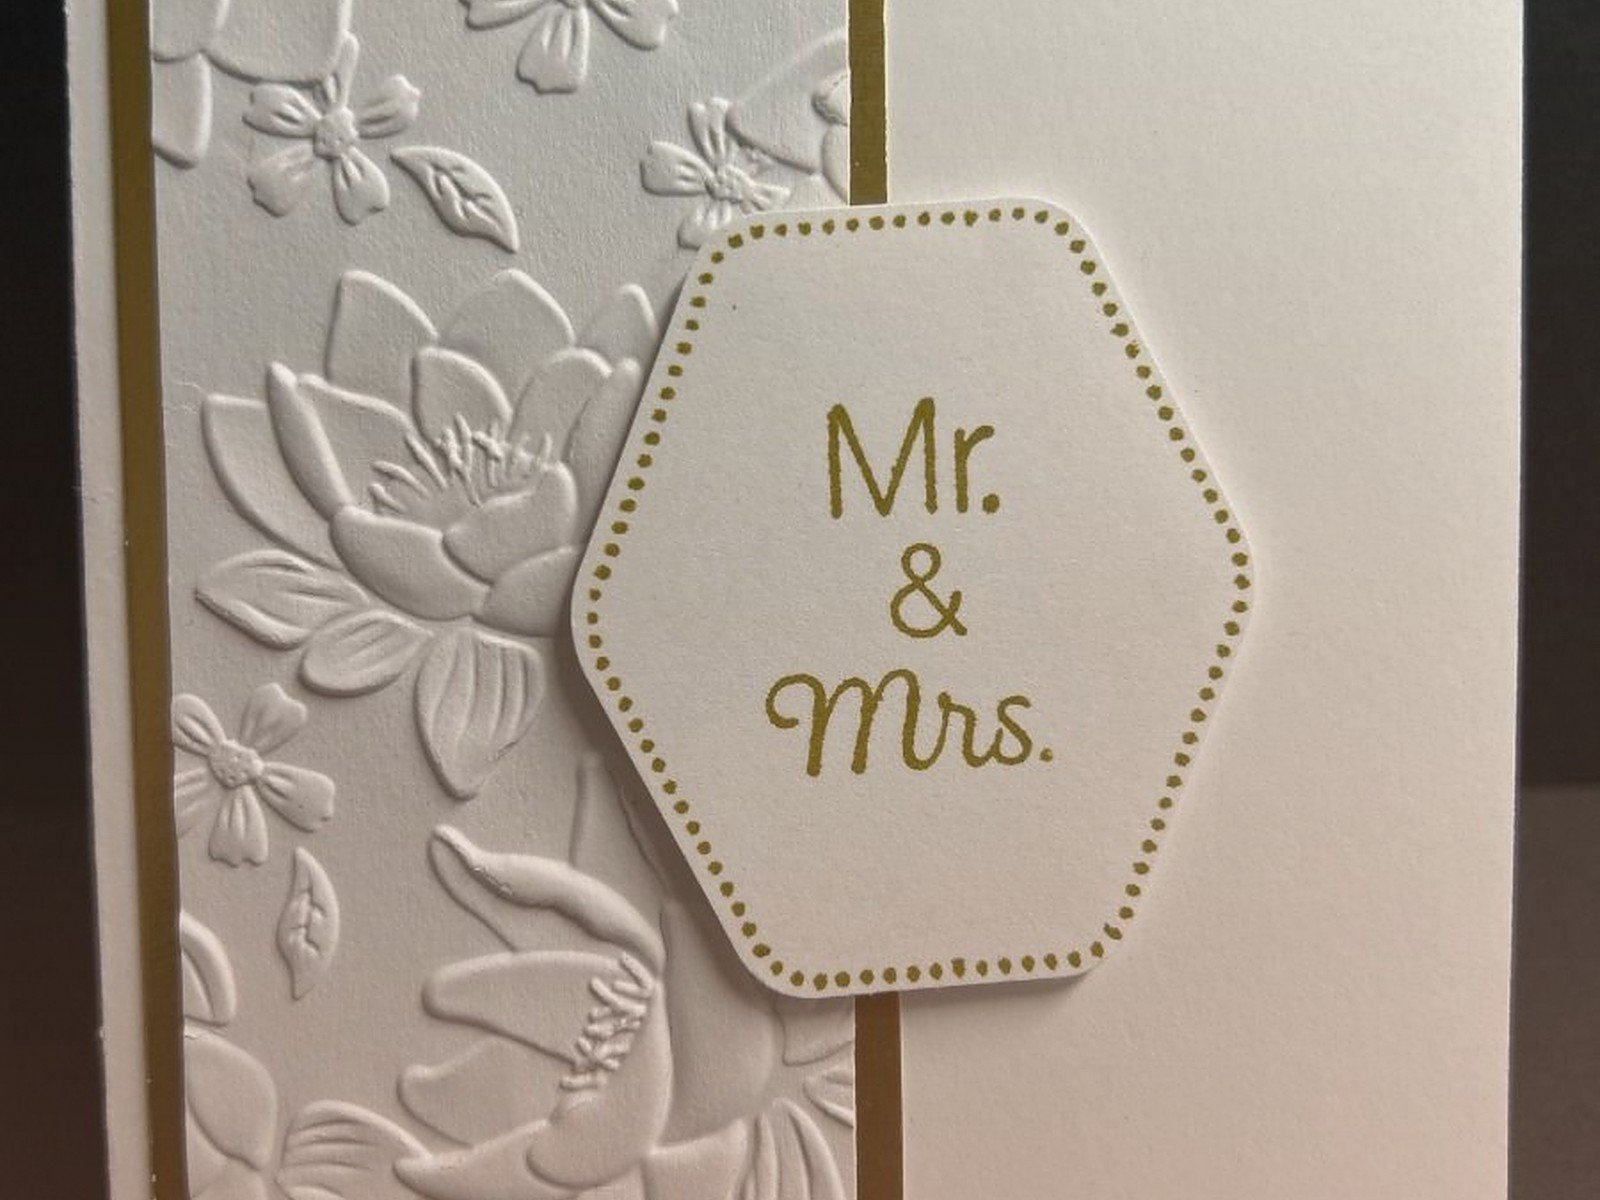
Adding Texture and Embellishments
This is where it gets fun and also where you can spiral into spending way too much money at craft stores, so pace yourself.
Ribbon is probably the easiest embellishment. Get some satin or grosgrain ribbon in your wedding color, cut it to length (usually about 10-12 inches for a standard invite), and tie it around your invitation layers before you glue them together. Or you can glue the ribbon to the back and wrap it around to the front. There’s no wrong way really, just make sure it’s secure.
Wax seals are having a moment right now and they do look gorgeous but oh my god they’re time consuming. You melt the wax, pour it, stamp it, wait for it to cool, and hope you didn’t drip it everywhere. I made 80 invitations with wax seals last summer and my cat knocked over the melting pot twice which was… anyway. They’re beautiful but budget your time accordingly. Like maybe an hour for every 15-20 seals when you’re starting out.
Other embellishments that work well:
- Lace trim glued along one edge
- Small silk flowers or greenery (fake ones, real ones will die obviously)
- Twine or jute string for rustic themes
- Rhinestones or pearl stickers for glamorous looks
- Vellum overlay with printed text – this looks so elegant
- Pressed flowers if you’re patient and planned ahead
The vellum overlay thing is actually one of my favorite techniques because it adds this soft, romantic layer without being too fussy. You print your details on vellum paper, cut it to size, and lay it over your main invitation. Secure it with a ribbon, a wax seal, or even just a small piece of double-sided tape at the top. It’s like a wedding invitation mullet – business in the back, party in the… wait that doesn’t work here but you get what I mean.
Pocket Fold Invitations For Multiple Inserts
If you need to include multiple cards – like an RSVP card, directions card, accommodation info, etc – a pocket fold invitation keeps everything organized. You can buy pre-scored pocket fold cards or make them yourself if you’re feeling confident.
To make your own: Cut a piece of cardstock to 12×12 inches. Score it at 6 inches so it folds in half to create a 6×12 card. Then score one of those halves again at about 4 inches up from the bottom – this creates your pocket. Fold it up and glue or tape the sides to create the pocket space. The invitation and other cards slip into this pocket.
I’m not gonna lie, these take more time than flat invitations but they look really polished and professional. Plus everything stays together which your guests will appreciate when they’re trying to keep track of all the wedding details.
The Assembly Line Method That Saves Your Sanity
Here’s what I learned after making way too many invitations the hard way: set up an assembly line. Don’t try to complete one invitation at a time from start to finish. That’s madness.
Instead, do each step for all the invitations at once. Cut all your base cards. Then cut all your layer pieces. Then do all the gluing. Then all the ribbon tying. Then all the embellishing. Your brain gets into a rhythm and you work so much faster. Plus you can catch mistakes early – if your measurements are off, you’ll notice it on the first batch instead of after you’ve completed 50 invitations.
I usually set up stations on my dining room table: cutting station, assembly station, embellishment station, quality check station. Move the invitations through each station in batches of 10-20. Put on a podcast or some music because this is repetitive work and you need something to keep your brain occupied or you’ll lose focus and make mistakes.
Addressing Envelopes By Hand Or Not
Okay so hand-addressing envelopes looks beautiful but it’s also incredibly time-consuming and if your handwriting isn’t great, it might actually make your invitations look less professional. There’s no shame in printing addresses.
If you do want to hand-address them, get a good quality pen – I like the Pigma Micron pens or Tombow dual brush pens. Practice your style on scrap paper first until you find a rhythm. Use a ruler or a light box with lined paper underneath to keep your lines straight.
For printed addresses, you can buy clear address labels, or you can feed the envelopes directly through your printer if they’re not too thick. The clear labels work better in my experience because they don’t show the white label background. Or honestly, there are tons of online services now that will print and address everything for you, which might be worth it if you have a huge guest list and limited time.
One thing about envelopes – buy extras. You will mess some up. The printer will jam and crumple one. You’ll smudge the ink. Your cat will… anyway. Buy at least 20% more envelopes than you need.
Timing and Realistic Expectations
People always underestimate how long this takes. A simple layered invitation with minimal embellishment takes about 10-15 minutes per invite when you’re working efficiently. More complex designs with multiple elements can take 20-30 minutes each. So if you’re making 100 invitations, that’s 25-50 hours of work. Maybe more if it’s your first time.
Start at least 2-3 months before you need to mail them. Give yourself weekends to work on them in batches. Don’t try to do it all in one marathon weekend because you’ll burn out and start hating your own wedding, which defeats the whole purpose of DIY invitations being a labor of love.
Also, make a few extra complete invitations beyond your guest count. You’ll want one for your own keepsake, maybe one for your parents, and inevitably someone will ask for one last minute or you’ll realize you forgot to invite your mom’s cousin or whatever.
Budget-Friendly Substitutions That Still Look Good
If you’re trying to save money – which is probably why you’re DIYing in the first place – there are ways to cut costs without sacrificing style.
Instead of expensive ribbon, use twine or embroidery floss. Instead of real wax seals, get wax seal stickers that look almost identical but cost way less and take no time to apply. Instead of fancy cardstock from specialty stores, check out the clearance section at craft stores or buy during their 50% off sales.
You can also do a simple design beautifully instead of trying to incorporate every trend you saw on Pinterest. Sometimes a clean, minimalist invitation with just good paper and nice typography looks more expensive than something overloaded with embellishments. Less is more and all that, though I know that’s hard to embrace when you’re excited about your wedding.
Vellum jackets instead of full vellum overlays use less material. Single layer instead of triple layer. Printed details instead of hand-calligraphy. These small changes add up to significant savings when you’re multiplying by 100+ invitations.
Common Mistakes To Avoid
Don’t use hot glue for paper projects – it’s too bulky and messy. Don’t assume your printer can handle thick cardstock without testing first. Don’t forget to account for envelope size when planning your invitation dimensions or you’ll end up with invitations that don’t fit in standard envelopes and have to order custom ones which gets expensive fast.
Also don’t start a new technique the week before you need to mail invitations. If you want to try something new like watercolor backgrounds or letterpress (which requires special equipment anyway), practice it months in advance. I had a situation last year where a bride decided three weeks before her mail date that she wanted to add hand-painted elements to each invitation and it was just… we made it work but barely, and she was stressed the entire time which sorta ruined the enjoyment of the process.
Test your materials together before committing to 100+ invitations. Sometimes certain tapes don’t stick well to certain papers. Sometimes ink bleeds on particular cardstock. Make one complete prototype invitation and live with it for a few days – does the ribbon stay tied, does the glue hold, does everything fit in the envelope properly?
Actual Ideas For Different Styles
For rustic weddings: kraft paper base, twine wrap, small dried flower sprig tucked into the twine, and maybe a woodgrain texture embossed or printed on the paper.
For elegant formal weddings: heavy white or ivory cardstock, satin ribbon, possibly a vellum overlay with gold or silver foil printed text if you can find a print shop that does foiling.
For modern minimalist: clean lines, maybe a geometric border, single color scheme, good quality paper in an unexpected size like a square invitation instead of rectangular.
For vintage theme: lace trim, pearls, soft colors like blush or mint, maybe a vintage postage stamp as part of the design.
For beach weddings: light blue or sandy beige colors, maybe some subtle shell embellishments or a starfish charm, casual fonts.
You can also do photo invitations where you print an engagement photo as part of the design, or use a custom illustration of your venue. The possibilities are honestly endless which is both exciting and overwhelming, so pick a direction early and stick with it or you’ll keep changing your mind and never actually finish.