Planning Guides, Style Guide
The Knot Wedding Invitations: Platform Design Guide
Feb
Hey! So you’re looking at The Knot for wedding invitations and honestly, I’ve walked like dozens of couples through this platform and it’s kinda become my go-to recommendation, though I’ll be real with you about where it gets tricky.
Getting Started on The Knot’s Invitation Platform
Okay so first thing, you’re gonna wanna create your free account if you haven’t already. The Knot basically lets you design invitations through their partnerships with various stationery companies, which means you’re not actually buying directly from The Knot but from their vendor partners. This threw off one of my brides last month because she thought she was getting “The Knot brand” invitations but it’s really more like a curated marketplace situation.
Once you’re logged in, head to the “Invitations & Paper” section. You’ll see literally thousands of designs and tbh it can be overwhelming at first glance. My cat just knocked over my coffee while I’m typing this but anyway—the filter system is gonna be your best friend here.
Using the Filter System Effectively
So here’s what I tell every client: don’t just scroll endlessly. Use the filters on the left sidebar to narrow things down because otherwise you’ll be there for hours. You can filter by:
- Style (modern, rustic, classic, vintage, etc.)
- Color scheme
- Price range
- Format (flat, folded, pocket, etc.)
- Theme
- Printing method
The price filter is super important because The Knot’s inventory ranges from like $1 per invite to $15+ per invite, and that adds up quick when you’re ordering 150 of them. I usually tell couples to set a realistic budget first, then filter accordingly so you don’t fall in love with something that’s gonna blow your budget.
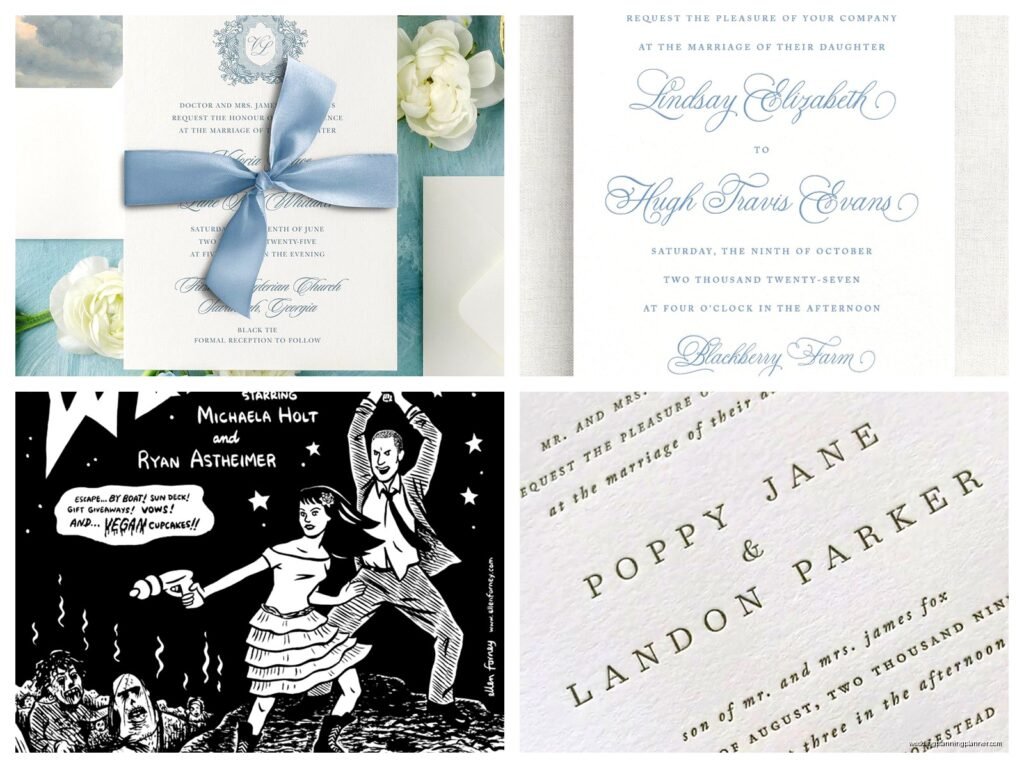
Understanding Design Styles and What Actually Works
Ngl, some of the categories overlap weirdly. Like, you’ll find “botanical” designs under both “rustic” and “modern” which is… not super helpful? But I guess botanicals can go either way depending on the execution.
Here’s my actual advice after seeing what works: if you’re having a formal wedding, stick with designs that have more white space, classic typography, and maybe a simple border or monogram. For casual weddings, you can go with bolder colors, playful fonts, and busier designs. I know that sounds obvious but you’d be surprised how many couples pick invitations that don’t match their wedding vibe at all and then the guests show up dressed completely wrong.
The Customization Tool (This Is Where It Gets Real)
Alright so once you click on a design you like, you’ll see a “Personalize” button. This opens their customization tool which is… okay it’s pretty good but it has some limitations you should know about upfront.
The tool lets you change:
- Text content (obviously)
- Font choices (usually 3-5 options per design)
- Colors (but only pre-set color combinations, not custom colors)
- Some design elements depending on the template
What you typically CAN’T change: the overall layout, the position of design elements, the size of text boxes beyond a certain point, or add completely new graphics. This frustrated a bride I worked with in October because she wanted to move the floral element from the top to the bottom and it just… wasn’t possible with that particular design.
Font Selection Strategy
Here’s something I learned the hard way: not all fonts are created equal when it comes to readability. I had a couple choose this gorgeous script font for their entire invitation and when the proofs came back, you literally couldn’t read half the words. So my rule now is script fonts for names and dates only, clean serif or sans-serif for all the actual information.
Also some fonts look amazing on screen but print super light or super bold depending on the printing method. Which brings me to…
Printing Methods and What They Actually Mean
The Knot offers invitations with different printing methods and the price difference is significant, so let’s break this down:
Digital Printing: This is your most budget-friendly option. It’s basically high-quality printing on nice cardstock. Looks great, totally professional, and like 80% of couples go with this. No shade at all to digital printing—it’s come a long way.
Thermography: This creates a raised, shiny effect on the text. It feels fancy when you run your fingers over it. Costs more than digital but less than letterpress. One thing though—it can smudge if people touch it too much right after printing, so vendors usually let it cure for a bit.
Letterpress: Okay so this is the fancy fancy option. The text is actually pressed into thick cotton paper, creating an impression. It looks incredibly elegant and has this tactile quality that guests definitely notice. But it’s expensive—usually $8-15 per invitation. I only recommend this if you’ve got budget to spare or if premium stationery is like, your thing.
Foil Stamping: Metallic foil (gold, silver, rose gold, etc.) is applied to the paper. Super trendy right now and honestly gorgeous for formal weddings. Mid-to-high price range. Wait I forgot to mention—foil can only be applied to certain parts of the design, not photographs or complex graphics.
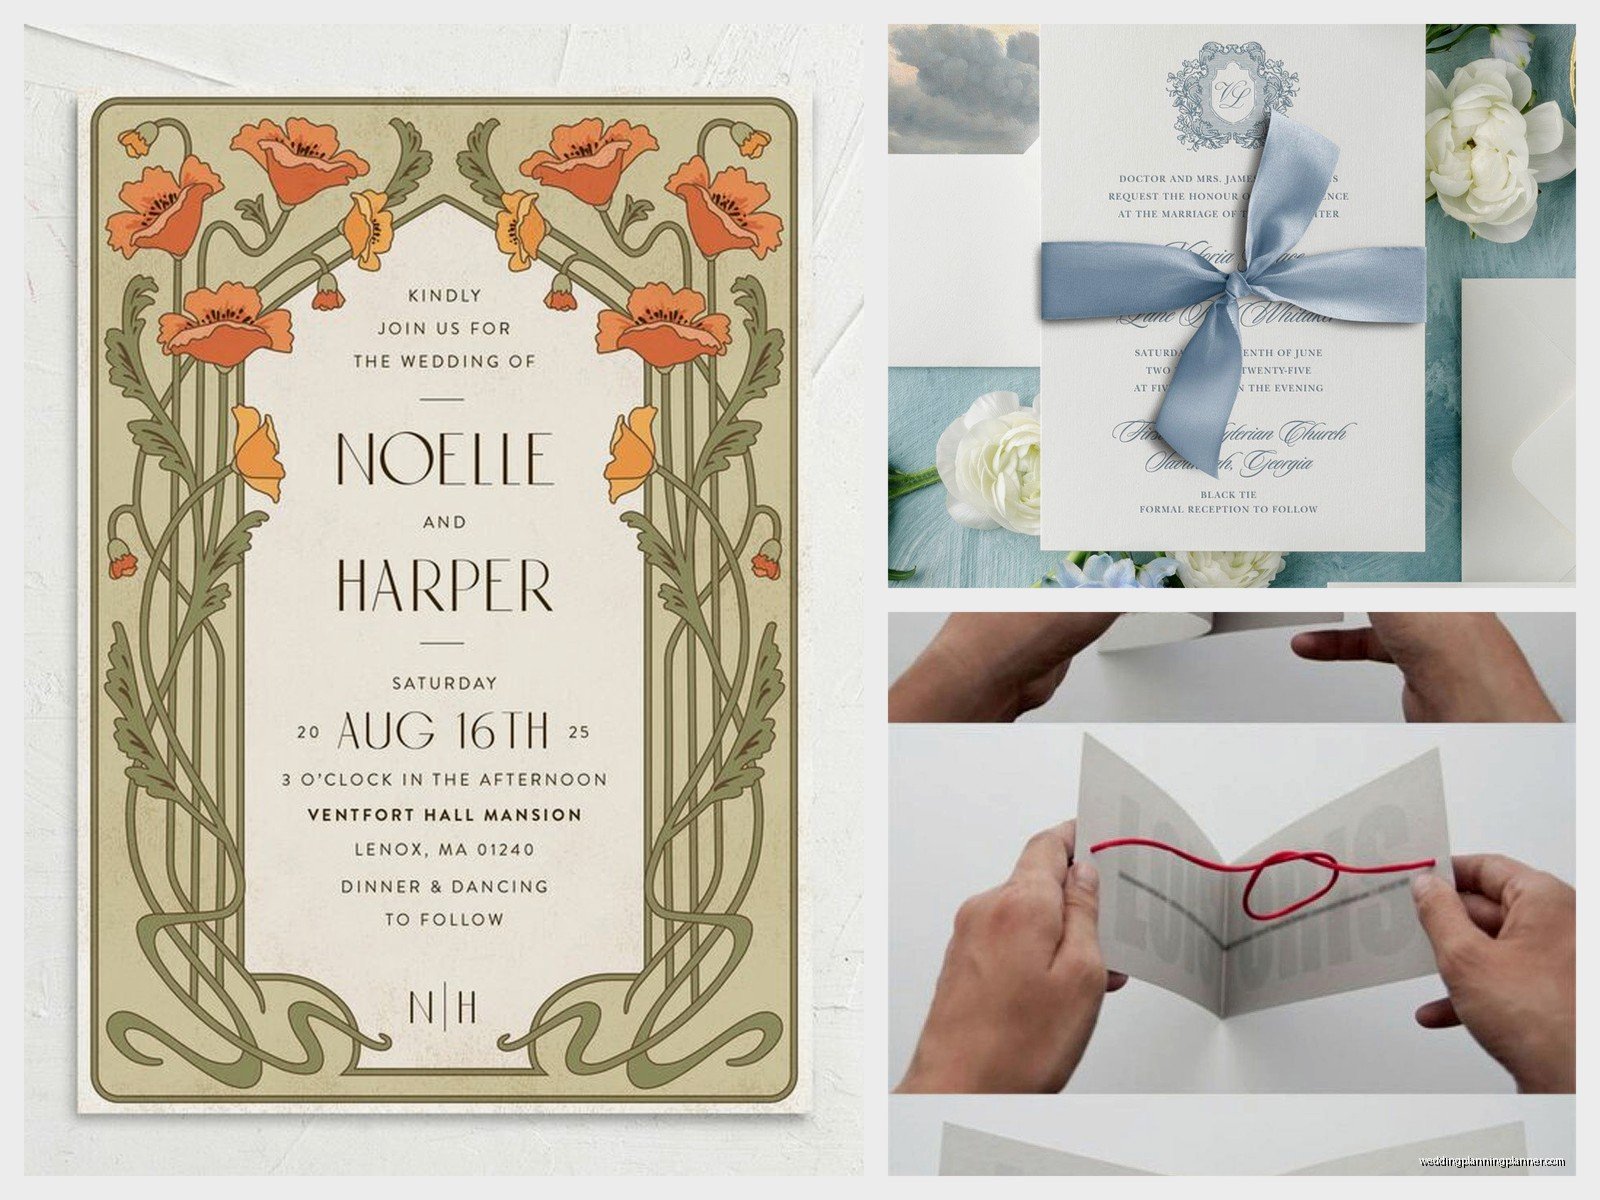
The Suite System and What You Actually Need
So The Knot shows you “suites” which include multiple pieces. Let’s talk about what’s standard versus what’s extra:
Definitely need:
- The main invitation
- RSVP cards
- Envelopes for both
Probably need:
- Details card (reception info, hotel blocks, website)
- Envelope liners (not essential but they make it look more polished)
Maybe need depending on your situation:
- Direction cards (or just put your venue info on your website)
- Accommodation cards (can also go on the website)
- Reception cards (only if ceremony and reception are different locations)
Tbh most of my couples are going minimal now—invitation, RSVP, and details card. Everything else goes on the wedding website. It saves money and frankly, guests prefer looking things up online anyway.
Envelope Addressing Options
This is gonna sound weird but the envelope addressing can literally take longer than choosing the actual invitation. The Knot partners with vendors who offer:
- Guest addressing printed directly on envelopes
- Clear address labels
- Printed return address on the back flap
- Or you can hand-address them yourself like in the old days
I always recommend getting at least the return address printed because it looks professional and saves so much time. For guest addressing, it depends on your budget and your handwriting honestly. If you’ve got gorgeous handwriting or know someone who does calligraphy, hand-addressing adds a personal touch. If not, printed addressing looks totally fine and nobody’s gonna judge you for it.
The Proof Process (Don’t Skip This)
Okay so after you finish customizing, you’ll order a proof. Some vendors on The Knot offer digital proofs only, others send physical proofs. I strongly strongly recommend paying for the physical proof if your design has any special printing techniques like foil or letterpress.
When you get your proof, check these things specifically:
- All names spelled correctly (you’d think this is obvious but…)
- Date and time are accurate
- Venue name and address are complete and correct
- RSVP date is at least 3-4 weeks before your wedding
- Font sizes are readable—hold it at arm’s length
- Colors look how you expected (they can vary from screen to print)
- If you have foil or raised printing, make sure it’s applied evenly
I had a couple who didn’t catch that the ceremony said 5:00 PM instead of 5:30 PM until the invitations were already printed. They had to order new ones. So yeah, take your time with the proof stage.
Timing and When to Order
Here’s the timeline I give every couple:
Order your invitations at least 4-5 months before the wedding date. This gives you time for design selection, customization, proof approval, printing, and shipping. Then you mail them 6-8 weeks before the wedding.
So basically, start the design process like 5-6 months out if you wanna be safe. I know that feels early but printing can take 2-3 weeks, and if there’s any issue with the proof that needs correcting, that’s another week or two.
Save the Dates Through The Knot
Oh and another thing—you can also order save the dates through The Knot using the same process. These should go out 6-8 months before the wedding (or even earlier for destination weddings). A lot of vendors offer matching save the date designs with your invitation suite which looks really cohesive.
My client last spring did digital save the dates through one of The Knot’s email partners (Greenvelope) and then ordered physical invitations. It saved her like $300 and honestly made sense since save the dates are really just informational.
Price Breakdown and Hidden Costs
Let’s talk money because this is where couples sometimes get surprised. When you see a price listed on The Knot, that’s usually per invitation, not per suite. So if it says $2.50 per invitation, your actual cost per guest might be:
- Invitation: $2.50
- RSVP card: $1.00
- Details card: $1.00
- Envelope liner: $0.75
- Printed envelope addressing: $1.00
So you’re at $6.25 per guest for a “budget-friendly” invitation. Multiply that by 150 guests and you’re at $937.50, plus shipping and tax. See how it adds up?
Here’s where you can save money without sacrificing quality:
- Skip the envelope liners—they’re pretty but not necessary
- Use your wedding website for details instead of printing details cards
- Hand-address envelopes or recruit friends/family
- Choose digital printing over specialty techniques
- Order slightly fewer than your guest count (you don’t need extras for couples, just one per household)
Customer Service and Vendor Communication
Since you’re technically ordering from The Knot’s partner vendors, customer service goes through both The Knot platform and the individual vendor. I’ve found this to be… hit or miss honestly. Some vendors are super responsive and helpful, others take forever to answer questions.
Pro tip: before you commit to a design, scroll down and read the vendor reviews specifically. Look for comments about customer service, shipping times, and how accurate the final product was compared to the proof. If a vendor has consistent complaints about late shipping or quality issues, just move on to a different design.
What to Do If Something Goes Wrong
Okay so if your invitations arrive and there’s a mistake that was the vendor’s fault (not something you approved in the proof), contact them immediately through The Knot’s messaging system. Most reputable vendors will reprint at no cost if it’s their error.
If the vendor is being difficult, escalate to The Knot’s customer service. They usually side with the customer in disputes, especially if you have documentation showing the error.
I had a situation last year where invitations arrived with smudged ink on about 30 of them. The vendor reprinted those specific invitations and rushed them within a week. It worked out but it was stressful, so this is why I always say order with plenty of time buffer.
Design Tips From Someone Who’s Seen It All
Alright, let me just dump some practical design wisdom on you:
Keep it readable: I cannot stress this enough. Fancy script fonts are beautiful but if your guests need a magnifying glass to read the venue address, you’ve gone too far.
Match your wedding vibe: Your invitation is the first impression of your wedding. Rustic barn wedding? Skip the ultra-formal black and white suite. Modern rooftop wedding? Maybe pass on the kraft paper and twine situation.
Less is usually more: My most elegant couples always go for cleaner, simpler designs. Too many fonts, colors, and design elements looks chaotic.
Consider your venue: If you’re getting married somewhere iconic or beautiful, some couples use a custom illustration or photo of the venue on their invitation. The Knot has vendors who do this and it’s such a nice personal touch.
Think about your envelope: The envelope is what guests see first. A pop of color inside with an envelope liner or a pretty stamp makes a good first impression before they even open it.
Alternatives to Traditional Paper Invites
Wait let me mention this because it’s becoming way more common—The Knot also has digital invitation options through partners like Greenvelope and Paperless Post. These are obviously way cheaper (or free) and eco-friendly.
I usually recommend digital invites for:
- Casual weddings
- Intimate weddings under 50 guests
- Eco-conscious couples
- Tight budgets
- Destination weddings where you need to communicate info quickly
For traditional or formal weddings, paper invites are still the expectation. Your older relatives will definitely appreciate getting something physical in the mail. But honestly, it’s your wedding and if digital makes more sense for you, go for it.
Sample Kits and Why You Should Get One
Most vendors on The Knot offer sample kits where you can order a few different invitation designs to see them in person. It’s usually like $5-10 and totally worth it if you’re deciding between a couple options.
The samples let you feel the paper weight, see the actual colors (which look different in person than on screen), and get a sense of size. I’ve had couples change their minds completely after getting samples because something that looked perfect online felt too flimsy or too formal in person.
Order samples of your top 3-5 choices and lay them out. See which one you keep coming back to. That’s your winner.
Assembly and Mailing Tips
Okay so your invitations arrived and now you gotta assemble and mail them. Here’s the proper order for suite assembly from bottom to top:
- Invitation (face up)
- Tissue paper if included (honestly you can skip this—it’s a holdover from when ink smudged)
- Reception card if you have one
- Details card or direction card
- RSVP card tucked under the flap of its envelope
Everything goes into the main envelope with the text facing the back flap, so when guests open it, they see the invitation right away.
Postage: Don’t forget that wedding invitations are usually heavier than standard letters. Take one fully assembled invitation to the post office and have them weigh it before you buy stamps. You’ll probably need $1-2 in postage depending on weight and size. Running out of stamps or having invitations returned for insufficient postage is a nightmare, trust me.
Also those square envelopes cost extra to mail because they can’t go through the standard machines. Just something to keep in mind when choosing your design.