Planning Guides, Style Guide
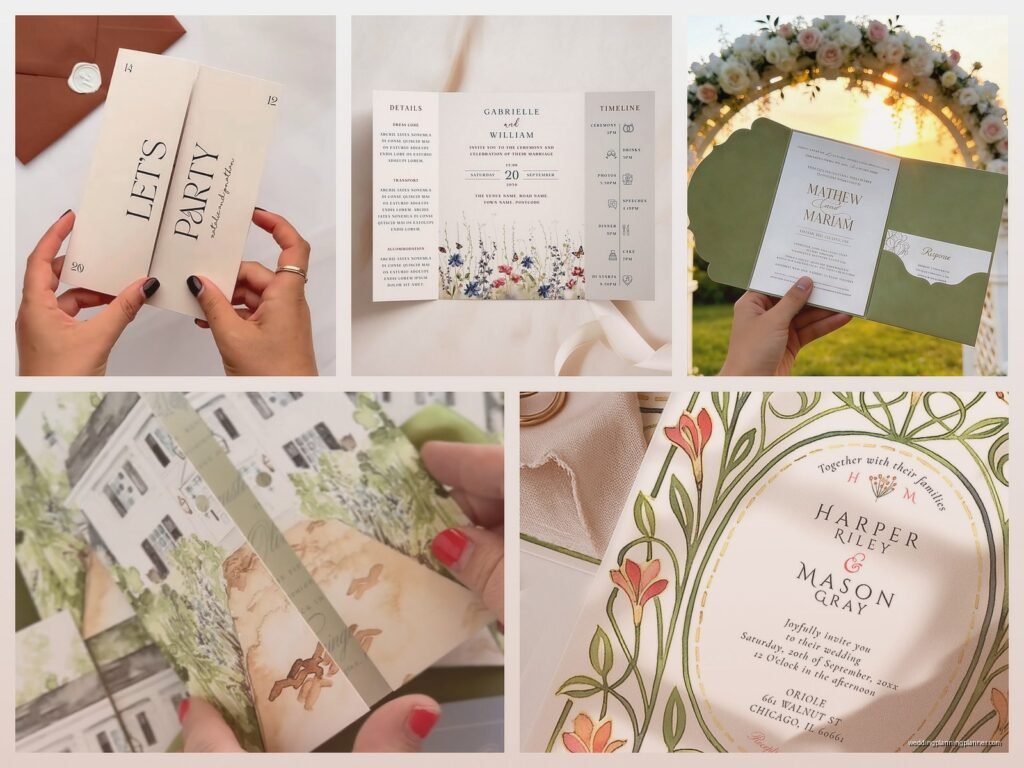
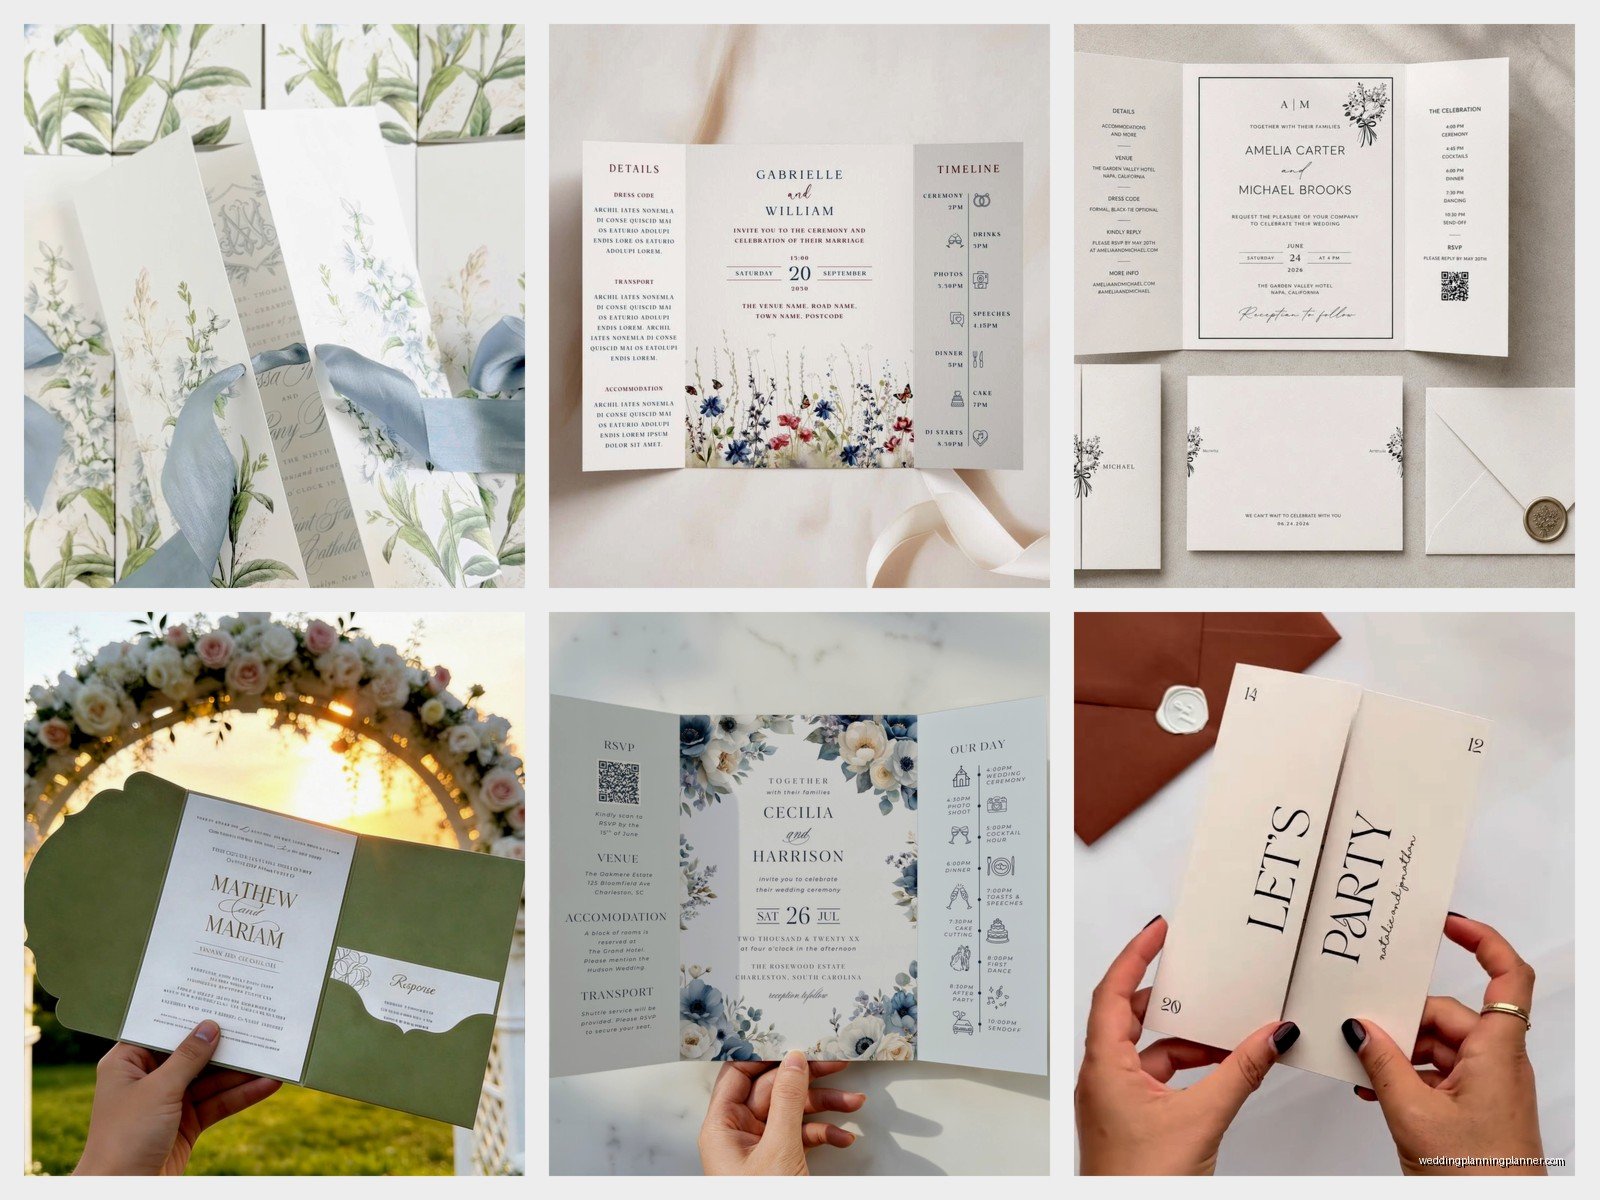
Gatefold Wedding Invitations: Two-Door Opening Designs
May
Okay so gatefold invitations are basically the fancy two-door things that open from the center
You know those invitations that have two panels that meet in the middle and open outward like little doors? That’s a gatefold. They’re honestly one of my favorite invitation styles because they feel so dramatic when guests open them, and you get this amazing moment of reveal that regular invitations just don’t have. The two panels fold inward to meet at the center, and when you open them, boom—there’s your invitation text or design in the middle.
I had this bride back in spring 2023 who was absolutely set on gatefolds because she’d seen them at her cousin’s wedding, and let me tell you, we went through like four different paper samples before she was happy. But when we finally got them right? They were stunning. The whole experience taught me that gatefolds need more planning than people think.
The basic structure you’re working with
So the standard gatefold has three panels total. The two outer panels are your “doors” and they fold inward to meet at a center point. The middle section—which is actually attached to one of the side panels or sometimes exists as a separate insert—is where your main invitation details go. Some people do a four-panel thing where there’s actually a separate backing panel, but that gets complicated and honestly kinda expensive.
The typical dimensions I work with are 5×7 inches when closed, which means your flat template before folding is roughly 10×7 inches (though you need to account for the fold and any overlap). You can go bigger—I’ve done 6×9 gatefolds for black-tie weddings—but remember that bigger means heavier, and heavier means more postage, and suddenly your invitation budget is… anyway, watch your weight.
Paper weight matters SO much here
This is the thing that’s gonna make or break your gatefolds. You need cardstock that’s heavy enough to feel substantial but not so thick that it won’t fold cleanly. I usually recommend 80lb to 100lb cover stock for the panels. Anything lighter and they feel flimsy when someone opens them. Anything heavier and you’re fighting with the paper to make it fold properly.
One thing that really annoyed me last year was when a couple ordered gatefold invitations from an online template site without asking me first, and the company used 65lb paper. SIXTY-FIVE. The invitations arrived all bent and floppy, and we had to rush-order replacements three weeks before the wedding. I’m not still bitter about it or anything.

Design layout and what goes where
The fun part about gatefolds is deciding what guests see first. When the invitation is closed, your two door panels are facing outward, so that’s your first impression. A lot of couples put their names here, or a monogram, or some decorative element that hints at the wedding theme. I’ve seen floral patterns, geometric designs, even a couple who put a illustrated map showing the ceremony and reception venues on the outside panels.
Then when you open the doors, you’re revealing the main invitation text. This is where you put the actual important information—names, date, time, location, dress code. Some people get fancy and add another layer here with a separate insert card that’s attached or tucked into the center, but honestly that’s extra cost and extra assembly time.
You can also use the inside of those door panels. Like, when they’re opened, the inner sides of the doors are visible, right? That’s prime real estate for additional details, wedding website info, or decorative elements that complement your center design.
Printing considerations you gotta think about
Digital printing is fine for gatefolds if you’re doing simple designs, but if you want letterpress or foil stamping—which looks AMAZING on gatefolds, by the way—you need to work with a specialty printer. Letterpress on the outer panels creates this beautiful dimensional effect that you can feel when you run your fingers over it.
Make sure your printer understands that this is a gatefold design. I’ve had printers mess up the orientation before because they’re used to standard flat invitations. Give them a clear template with fold lines marked, and if possible, send them a physical mockup. I usually create a paper dummy using regular cardstock just so everyone’s on the same page about which panel folds where.
Assembly is where things get real
Okay so here’s what nobody tells you about gatefolds: assembly takes forever. If you’re doing DIY assembly, block out way more time than you think you need. For 100 invitations, I’d say plan for at least 3-4 hours if everything is pre-scored and you’re just folding and inserting. If you need to add belly bands, ribbons, wax seals, or any other embellishments, double that time.
Scoring the fold lines is crucial. You can’t just fold heavy cardstock without scoring it first or you’ll get weird uneven folds and potential cracking along the fold line. Most professional printers will score the folds for you as part of the printing process, but if you’re printing at home or using a print shop that doesn’t offer scoring, you need to score them yourself using a bone folder and a ruler, or get a scoring board.
I always fold along the score line with the bone folder first, then crease it firmly with my fingers. The panels should meet evenly in the center—if they’re overlapping or leaving a gap, your measurements were off and you might need to trim them. This happened to me with a batch once and I spent an entire evening with my cat judging me from the corner while I trimmed 150 invitation panels by hand with a paper cutter. Not fun.
Keeping them closed
So you’ve got these beautiful gatefolds assembled, but they want to spring open because paper has memory and doesn’t like staying folded. You need some kind of closure mechanism. The most common options are:
- Belly bands—these are paper or vellum strips that wrap around the middle of the closed invitation
- Wax seals—classic and elegant, but they add weight and can break in the mail if you’re not careful
- Stickers or decorative seals—less formal but totally functional
- Ribbon—tied around the invitation, though this is probably the most time-consuming option
- Small clear stickers on the inside where the panels meet—invisible but effective, though some people think this looks cheap
I’m personally a big fan of belly bands because they’re sleek and you can customize them with printing, but they’re another component you have to order and another step in assembly.
Envelope sizing and mailing logistics
Standard A7 envelopes (5.25 x 7.25 inches) work for most 5×7 gatefolds, but it’s gonna be a tight fit. I usually go up to a 5.5 x 7.5 envelope to give a little breathing room. The invitation needs to slide in and out easily without catching on the envelope flap or edges.
Here’s the thing about mailing gatefolds though—they’re almost always going to require extra postage because of thickness and weight. A fully assembled gatefold with belly band and inserts can easily exceed the 1-ounce limit for standard postage. Take a complete assembled invitation to the post office and have them weigh it before you buy stamps. I learned this the hard way in summer 2021 when half a batch of invitations got returned for insufficient postage and we had to re-mail them. The couple was not thrilled.
Also consider hand-canceling. This is where the post office processes your envelopes by hand instead of running them through the sorting machines. It costs extra (currently 30 cents per envelope I think?) but it prevents your beautiful gatefolds from getting mangled by machinery. Worth it for high-end invitations.
Inner envelopes and extra protection
Some couples use double envelopes—an inner unsealed envelope that holds the invitation, which then goes into the outer mailing envelope. This is super traditional and adds extra protection, but it also adds cost and weight. If you’re doing gatefolds, which are already a bit of a splurge, the double envelope might be overkill unless you’re going for ultra-formal vibes.
Tissue paper inserts are another traditional element that some people include, but I’m gonna be honest, most guests just throw them away immediately. They were originally used to prevent ink smudging when printing methods were… well, when printing was different. Now they’re purely decorative, so decide if that’s worth the extra cost and assembly time.
Cost breakdown because let’s be real
Gatefolds are more expensive than regular flat invitations or even standard folded invitations. You’re using more paper, the printing setup is more complex, and assembly takes longer. For professionally printed and assembled gatefolds, you’re looking at anywhere from $8 to $25+ per invitation depending on paper quality, printing method, and embellishments.
If you’re going DIY to save money, you can get the cost down to maybe $3-5 per invitation, but remember you’re paying with your time instead. And your sanity. I’ve had couples who started out enthusiastic about DIY assembly and by invitation number 40 they’re ready to throw the whole box out the window.
Budget roughly for these components when you’re planning:
- Cardstock for gatefold panels
- Printing costs (per panel/per side)
- Scoring service if not included
- Closure mechanism (belly bands, seals, whatever)
- Envelopes
- Any inserts or additional cards
- Assembly labor if you’re outsourcing
- Extra postage
Design mistakes I see all the time
People get so excited about the gatefold format that they forget about readability. I’ve seen invitations where the text is split across the panels in a way that makes no sense, or where you have to hold the invitation at a weird angle to read everything. Your text should flow naturally—guests shouldn’t have to work to figure out the important details.
Another common issue is not leaving enough margin space. You need at least a quarter-inch margin from all edges, and you need to account for the fold—don’t put important text or design elements right on the fold line because they’ll get lost in the crease.
Color matching across panels can also be tricky. If you’re printing the panels separately or at different times, you might get slight color variations that look weird when the panels are next to each other. Always print all components in the same batch if possible.
When gatefolds might not be the right choice
Look, I love gatefolds, but they’re not for every wedding. If you’re having a casual backyard wedding, a super elaborate gatefold might feel off-brand. If your budget is tight and you’d rather spend money on flowers or catering, a simpler invitation style makes more sense. If you’re inviting 300+ guests, the cost and assembly time for gatefolds can get out of control quickly.
Also if your wedding timeline is rushed—like you need invitations out in less than six weeks—gatefolds might not be feasible unless you’re willing to pay rush fees, which are gonna hurt.
Working with a stationer vs DIY
A professional stationer can handle the design, printing, assembly, and even addressing and mailing if you want. They’ll have relationships with printers who specialize in gatefolds and can troubleshoot issues before they become problems. The downside is cost, obviously.
If you’re going DIY, use templates from reputable sites that specifically offer gatefold layouts. Don’t try to wing it in Microsoft Word or something—you need proper design software or at least a good template that accounts for fold lines and panel sizing. And order samples before you commit to printing 150 invitations. I cannot stress this enough. Order. Samples.
There are also hybrid options where you do the design yourself but outsource printing and assembly, or you handle assembly but have a professional do the printing. Figure out where your skills and patience end, and get help for those parts.
Timeline for getting these done
Start working on gatefold invitations at least 4-5 months before your wedding date. That gives you time to design, order samples, make revisions, do final printing, assemble, address, and mail with buffer time for inevitable delays. Invitations should go out 6-8 weeks before the wedding (3-4 months for destination weddings), so work backward from there.
The design phase alone can take several weeks if you’re going back and forth on details. Printing takes 2-3 weeks typically, sometimes longer for specialty printing methods. Assembly depends on your guest count and whether you’re doing it yourself or hiring it out.
I had a couple once who waited until 10 weeks before their wedding to start thinking about invitations, and they wanted gatefolds with letterpress and custom illustration and… yeah, that was a stressful few weeks. We made it work but barely, and it cost them extra in rush fees. Don’t be those people.
One last random thing—I was watching this show the other night where they were planning a wedding and the bride just picked invitations off a website in like five minutes, and I was yelling at the TV because that is NOT how this works, but anyway, gatefolds require actual planning and decision-making, so give yourself time to think through all the options and details.