Planning Guides, Style Guide
Invitation Letter For Wedding Ceremony: Design & Ordering Guide
Jun
Okay So About Wedding Invitation Letters
The invitation letter is basically the first real impression your guests get of your wedding vibe and honestly I’ve seen so many couples mess this up by either ordering too late or not thinking through what they actually need to communicate. Like there’s the formal invitation card itself but then there’s also this whole letter component that people kinda forget about until the last minute.
So first thing – you gotta figure out if you even need a separate invitation letter or if everything’s going on the invitation suite itself. Most traditional weddings have the main invitation card plus like four or five inserts and it gets overwhelming real fast. I had this couple back in spring 2023 who wanted to include literally everything in writing because the groom’s family was super traditional and they ended up with seven different pieces of paper in one envelope and the postage alone was like nine dollars per invite. Not gonna lie, I was annoyed because I’d told them three times we could condense some of this information but they didn’t listen until they saw the final quote.
What Actually Goes In An Invitation Letter vs The Card
The main invitation card should have the basic ceremony details – who’s getting married, who’s hosting (if you’re doing that traditional thing), date, time, location, and maybe the reception info if it’s at the same place. That’s it. Keep it clean.
The invitation letter or the detail cards are where you put:
- Accommodation information and hotel blocks
- Transportation details if you’re providing shuttles
- Weekend event schedules if you’re doing like a whole wedding weekend thing
- Dress code specifications beyond just “black tie” – like if it’s outdoor or beach
- Website information where they can find MORE details
- Special instructions that don’t fit on the main card
Honestly though I’m increasingly telling couples to just put most of this stuff on their wedding website and include one simple details card with the website URL and maybe hotel info. Nobody wants to read through a novel when they open an invitation.
Design Decisions That Actually Matter
You need to pick your design direction before you do anything else because it affects literally every other decision. I’ve worked with probably 200+ couples on invitations at this point and the ones who waffle on design end up either settling for something they don’t love or paying rush fees because they took too long deciding.
Your main style choices are gonna be:
- Traditional engraved or letterpress (expensive, gorgeous, takes forever)
- Flat digital printing (affordable, quick, still looks nice)
- Foil stamping (middle ground price-wise, very pretty)
- Thermography (raised printing, cheaper than engraving)
- Fully custom illustrated ($$$$$ but unique)
The thing that annoyed me most about invitation design trends is when people try to cram every single trendy element into one invite. Like I’ll see someone wanting vellum overlays AND wax seals AND silk ribbon AND a custom watercolor crest AND… it’s too much. Pick two or three special elements max.
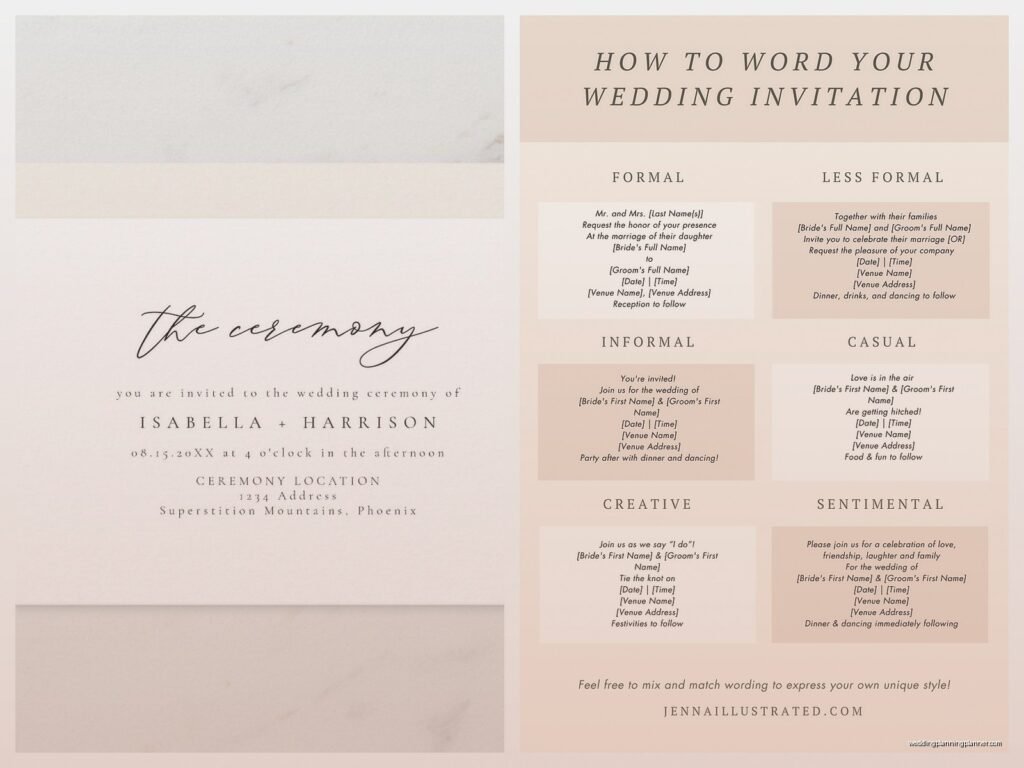
Wording For The Actual Letter Part
If you’re doing a separate welcome letter or details letter, the tone should match your invitation but can be slightly more casual. I usually write something like:
Dear Friends and Family, We’re so excited to celebrate with you in Charleston this June! Below you’ll find helpful information to make your weekend comfortable and fun. We can’t wait to see you there.
Then you list out your info in clear sections. Don’t try to be too cute with the wording or people won’t actually absorb the information. I learned this the hard way when a bride insisted on writing everything in like poetry format and then half her guests showed up not knowing there was a shuttle situation.
Timeline For Ordering (Don’t Screw This Up)
Alright so here’s where people really mess up the timeline and then panic:
6-8 months before the wedding: Start looking at designs, reach out to stationers or browse online companies. If you’re doing custom work, you need even more time. I worked with a letterpress studio once that had a four-month lead time and the couple had reached out only three months before their wedding and it was just… stressful for everyone.
5-6 months out: Finalize your design, place your order. For printed invites you’re usually looking at 3-4 weeks production time minimum, but give yourself 6-8 weeks to be safe because things go wrong. Proofs get delayed, you’ll want to make changes, whatever.
4 months out: Receive your invitations, check them immediately for errors. I cannot stress this enough – open the box the day it arrives and check everything. I had a bride who didn’t open hers for two weeks and there was a spelling error on 150 invitations and by then it was too late to reorder without paying rush fees.
3 months out: Address envelopes (or hire a calligrapher, or use a digital printing service). Assemble everything. This takes longer than you think if you’re doing it yourself.
10-12 weeks before wedding: Mail them. Yes really, that early. You want RSVPs back at least 3-4 weeks before your wedding so you can give final counts to your caterer.
My cat literally walked across a pile of unsealed invitations once while I was working from home and I had to redo like 15 envelopes because of paw prints, so maybe don’t assemble on the floor if you have pets.
Quantities And Extra Invites
Order about 10-15% more than you think you need. So if you’re inviting 150 households (not 150 people – households!), order like 165-170 invitations. You’ll mess up addressing some envelopes, you’ll want keepsakes, someone will inevitably say “oh I never got mine” even though they definitely did, and you might want to frame one or send them to family members who want extras.
Most printers have quantity break points so sometimes ordering 175 costs almost the same as ordering 150 because of how they set up their pricing tiers. Check that before you finalize.
The Actual Ordering Process
Whether you’re going with Minted or Paperless Post or Artifact Uprising or a local stationer or whoever, the process is kinda similar:
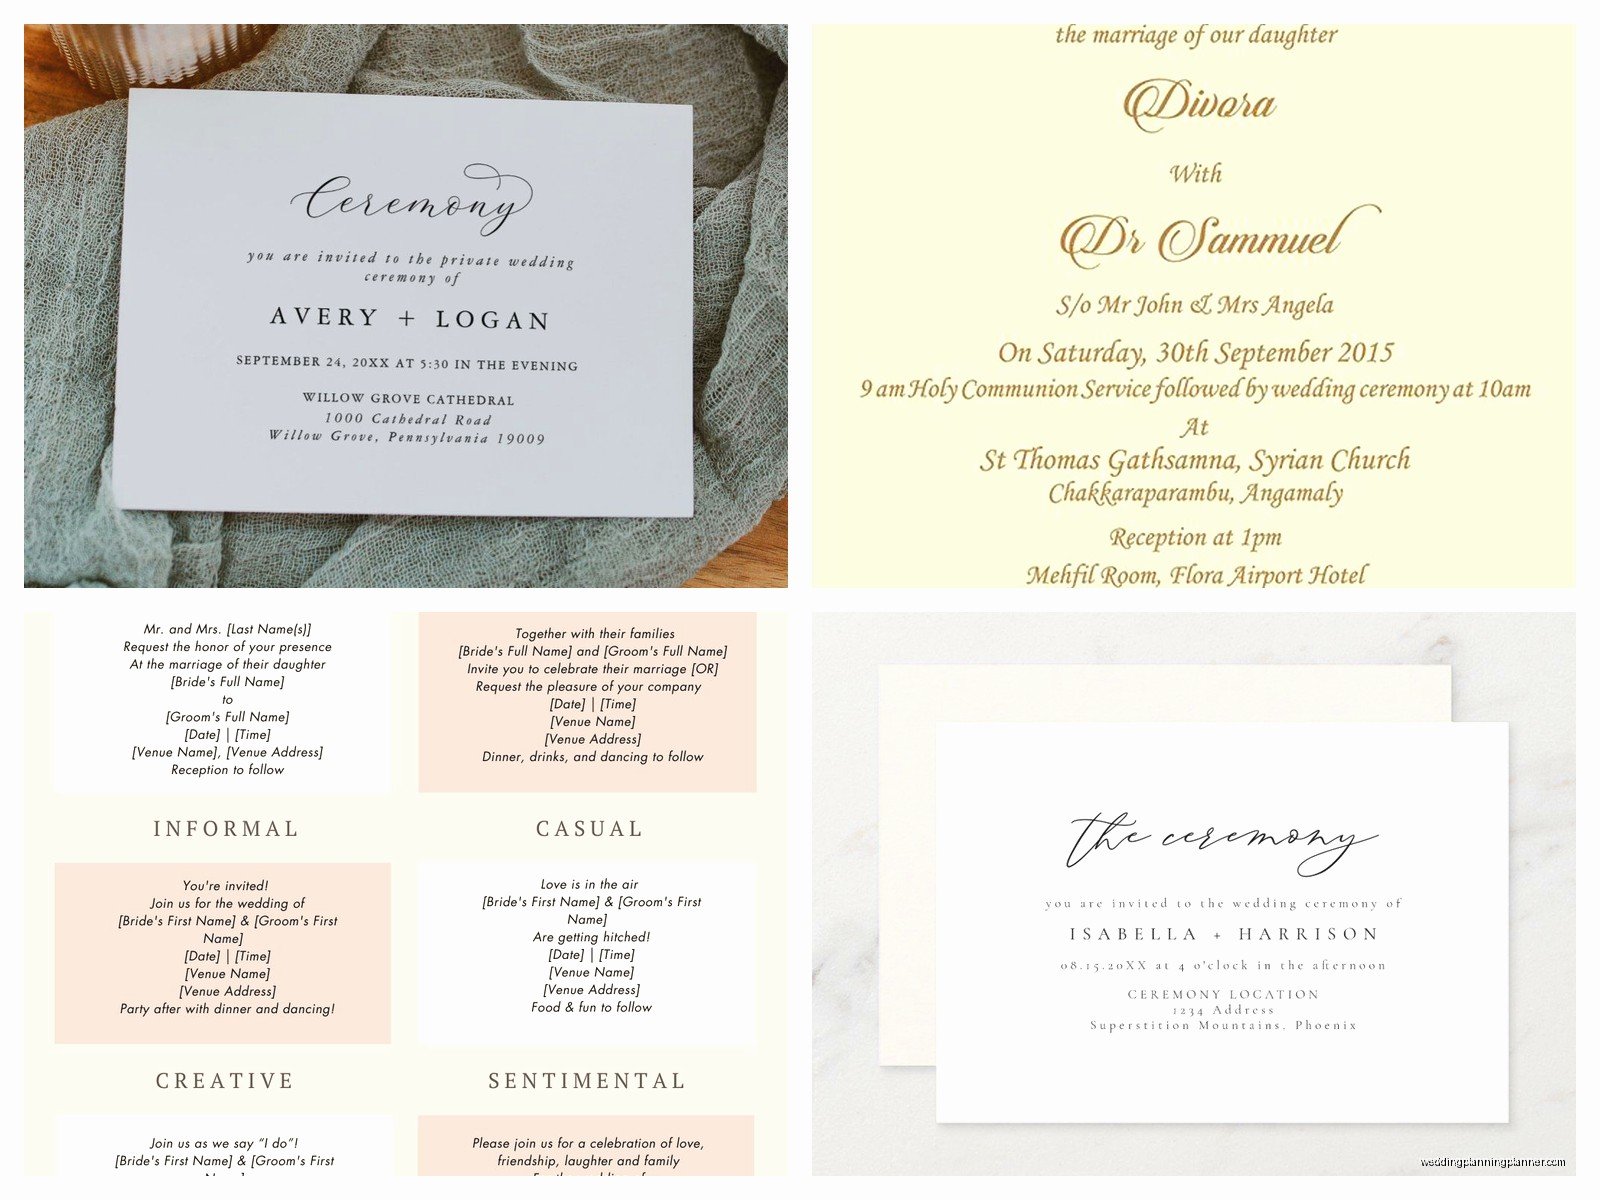
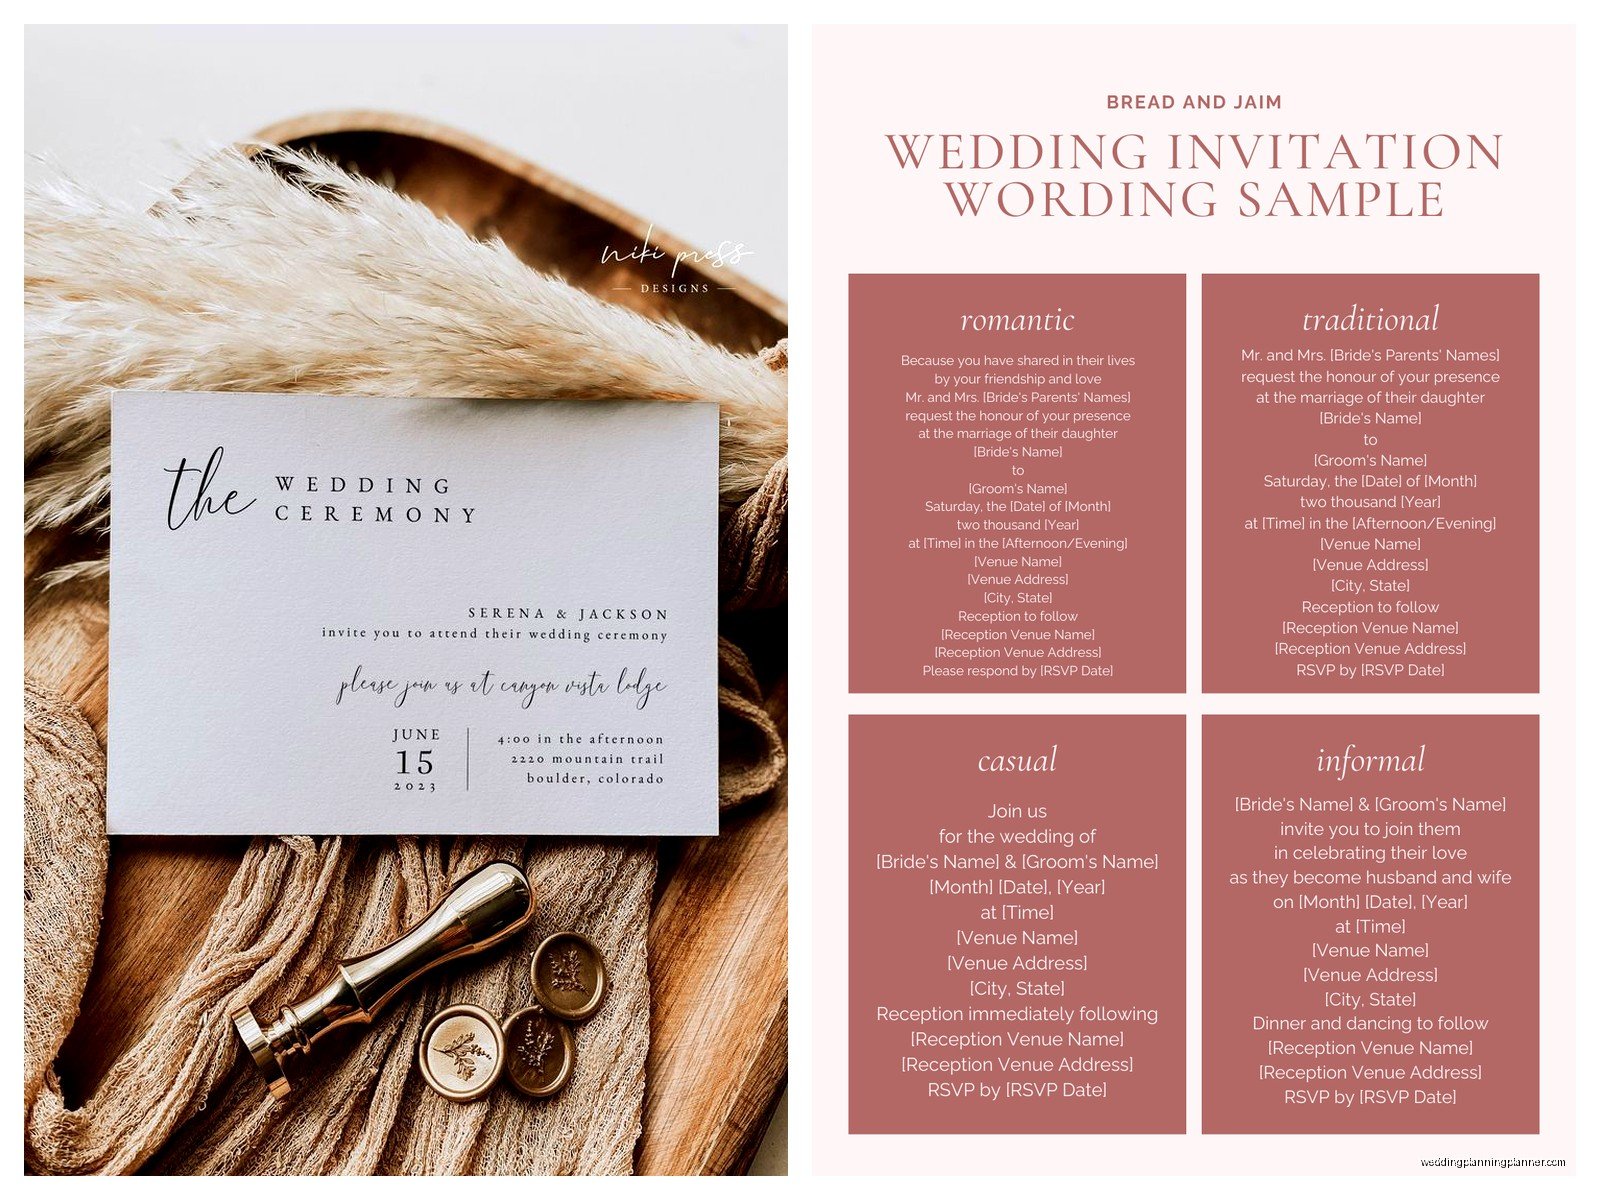
Pick your design: Browse their templates or work with a designer on something custom. If you’re doing templates, you can usually customize colors and fonts at minimum.
Customize wording: They’ll have standard wording options but you can change literally anything. Just keep it readable – I’ve seen people pick fonts that are so swirly you can’t actually read the date and that’s a problem.
Review proofs: You’ll get a digital proof to approve. Read every single word out loud. Check the date and time like five times. Verify the venue address is correct. I once had a couple approve a proof with the wrong year and didn’t catch it until the invites arrived. We overnighted new ones but it cost them an extra $800.
Approve and wait: Once you approve, production starts. This is when you can’t make changes anymore without starting over.
Receive and inspect: Check your whole order as soon as it arrives. If there’s a printing error that was their fault, most companies will rush you replacements at no charge, but you gotta catch it immediately.
What To Include In Your Invitation Suite
Okay so a complete invitation suite usually has these pieces, though you definitely don’t need all of them:
- The main invitation card
- Reception card (if reception is separate location or different time)
- RSVP card with a pre-addressed and stamped envelope (yes you pay for their postage, that’s proper etiquette)
- Details/information card with hotel blocks, website, dress code
- Weekend events card if you have multiple events
- Direction or map card (kinda outdated now that everyone has GPS but some people still do this)
- Inner envelope (traditional but lots of people skip this now)
- Outer envelope
Honestly most modern couples just do: main invite, RSVP card with envelope, one details card, and the outer envelope. That’s plenty.
Digital vs Physical Invitation Letters
So there’s this whole debate about whether you can do digital invitations for weddings and like… you can do whatever you want, it’s your wedding. But know that older generations might be confused or even offended by a fully digital invite. I had a groom’s grandmother who literally called him crying because she thought a Paperless Post invitation meant she wasn’t really invited since there was “nothing to put on her fridge.”
A compromise I suggest a lot is sending physical invitations but having all the detailed information on your wedding website. That way people get the tangible keepsake but you’re not spending a fortune printing seven different insert cards.
If you do go digital, use a proper platform like Paperless Post or Greenvelope, not just a Facebook event or god forbid a group text. And still send physical invites to your VIPs – grandparents, parents’ close friends, anyone over like 65 probably.
Budgeting For Invitations
This is where couples get sticker shock. Invitations can range from like $1.50 per suite to $25+ per suite depending on what you’re doing.
Budget breakdown roughly:
- Super basic online template, digital printing: $200-500 for 100 invites
- Nice online template with some upgrades: $500-800 for 100
- Semi-custom with a stationer: $800-1500 for 100
- Fully custom or letterpress: $1500-3000+ for 100
Don’t forget to budget for postage too! Wedding invitations are usually over one ounce so they need extra postage. Take a fully assembled invite to the post office and have them weigh it before you buy stamps. In summer 2021 I watched a bride put regular forever stamps on 200 invitations and they all got returned for insufficient postage and she had to re-mail everything. What a mess.
Also if you’re doing any fancy envelope shapes or wax seals, those might not go through the sorting machines and you’ll need hand-canceling which costs extra. Some post offices are weird about this so just ask.
Common Mistakes To Avoid
Not ordering samples first – most online companies let you order physical samples for like $5-10 each. Do this. Colors look different in person and you wanna feel the paper quality.
Forgetting to account for plus-ones in your count – if you’re giving 50 people plus-ones, you don’t need 100 invitations, you need 50, because couples get one invite. But you DO need to account for those extra people in your headcount obviously.
Choosing an envelope color that makes addresses hard to read – dark envelopes with black ink looks chic until the mail carrier can’t read the address. Use light ink on dark envelopes or just… don’t do dark envelopes.
Not including an RSVP deadline – put a date that’s at least 3-4 weeks before your wedding so you have time to track down the people who don’t respond (and there will be many, trust me).
Making your RSVP process too complicated – I’ve seen RSVP cards that ask for meal choices, song requests, dietary restrictions, plus-one names, and like three other things. Keep it simple or people won’t fill it out correctly. Just ask if they’re coming and maybe meal choice if you have plated dinner options. Everything else can go on the website.
Envelope Addressing Options
You’ve got a few ways to address envelopes and they all have different vibes and price points:
Hand calligraphy: Gorgeous, expensive ($3-8 per envelope usually), takes time to find someone good. Worth it if invitations are a priority for you.
Digital calligraphy/printing: Looks nice, way cheaper (some online services include it free), faster turnaround. Purists will say it’s not as nice but honestly most people can’t tell.
Your own handwriting: Free, personal, time-consuming. Only do this if you have nice handwriting and patience. I tried to handwrite my own holiday cards last year and gave up after 20 because my hand cramped.
Printed labels: Some people think this looks cheap for weddings but if you design them nicely it can work for a modern aesthetic.
Guest addressing: Some companies will print your guest addresses directly on the envelopes when they print everything else. Super convenient.
Working With A Stationer vs DIY
If you’re crafty and have time, you can definitely DIY your invitations. There are tons of templates on Etsy or Canva and you can print at a local print shop. Just know it’s gonna take way more time than you expect. Assembly alone for 150 invitations can take like 6-8 hours if you’re doing anything beyond just stuffing envelopes.
Working with a professional stationer costs more but they handle the design, proofing, printing, and often can do assembly and addressing too. For my couples who are busy or not detail-oriented, I always push them toward a stationer because the stress reduction is worth the money.
Local stationers are great if you want that personal service and the ability to see everything in person. Online companies like Minted or Zola are good if you want more affordable options and don’t mind doing it all digitally. Both can produce beautiful invitations, it just depends on your budget and how much hand-holding you want.
One thing about online companies – read reviews specific to their customer service because if something goes wrong, you wanna know they’ll fix it quickly. I’ve had good experiences with most of the major ones but occasionally you get a dud customer service rep who makes everything harder than… anyway, just read recent reviews.
Info Your Printer Needs From You
Get this stuff together before you start the ordering process so you’re not holding things up:
- Final guest list with correctly spelled names and accurate addresses
- Exact venue name and address (verify this is correct!)
- Ceremony and reception times (be specific – 4:00 PM or 4:00 in the afternoon or four o’clock, pick a style)
- Host line if you’re including parents’ names
- Dress code
- Wedding website URL
- RSVP deadline date
- Return address for RSVPs
Having all this ready makes the whole process so much smoother and you won’t be that couple emailing your stationer at 11 PM because you can’t remember if your venue’s street name has a period after “St” or not.