
Planning Guides, Style Guide
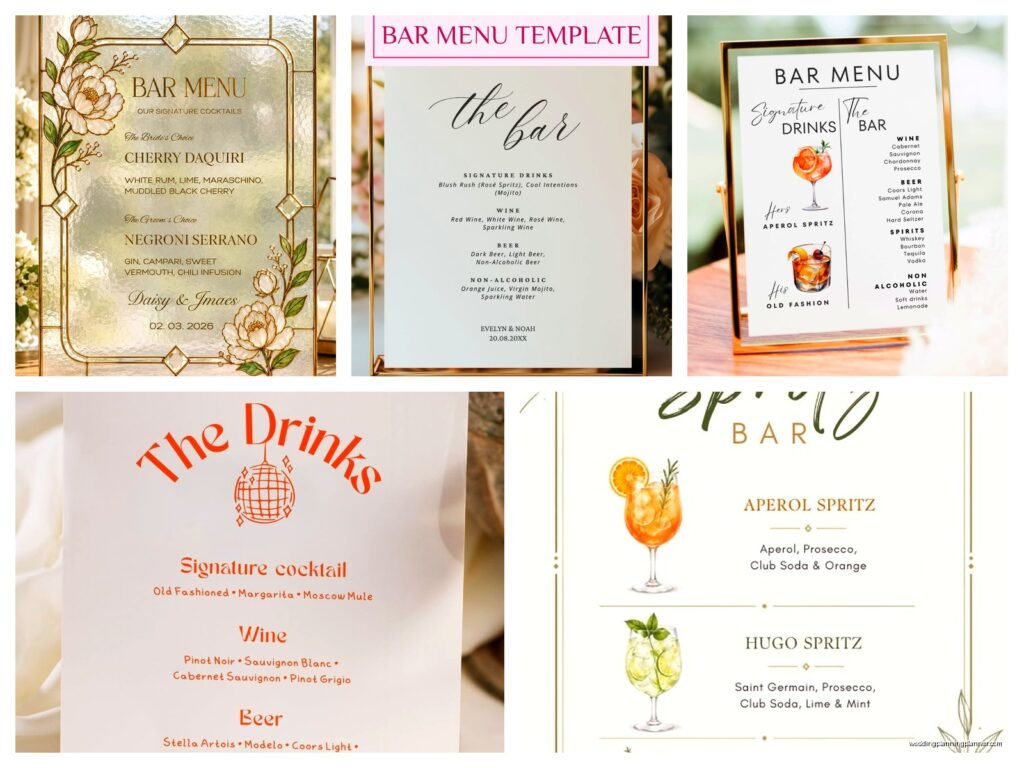
Wedding Bar Menu Template: Cocktail Card Downloads
Jul
Why You Actually Need These Cocktail Cards
Okay so wedding bar menus are one of those things that seems super optional until you’re standing there three weeks before the wedding and the bartender is texting you asking what cocktails to prep and your guests keep DMing about whether there’ll be vodka options and you’re like… I should’ve just made the cards.
I learned this the hard way in summer 2021 when I had a bride who insisted she didn’t need cocktail cards because “everyone knows what drinks are” and then her aunt spent literally fifteen minutes at the bar asking the poor bartender to explain every single liquor option they had. The line backed up, people got cranky, and I got an earful during the reception. Never again, honestly.
The thing is, cocktail cards serve like three purposes at once. They tell your guests what’s available so they’re not playing twenty questions with the bartender. They make your bar setup look intentional and pretty (which matters for photos). And they give you a chance to add personality to your wedding through custom drink names or little descriptions.
What Actually Goes On These Cards
So before you download any template, you gotta know what information you’re actually putting on there. Most couples overthink this part or forget something crucial.
Basic stuff you need:
- Signature cocktail names (if you’re doing them)
- Brief ingredient lists or descriptions
- Beer options (brands matter here)
- Wine selections (red, white, rosé, sparkling)
- Non-alcoholic options (please don’t forget these, it’s 2024)
- Any liquor available for mixed drinks
You don’t need to list every possible combination the bartender can make. Like, no one needs to know that technically they could get a whiskey sour if they ask. Just list what you’re actively offering or what you want people to order.
One thing that annoys me SO much is when couples make the font size like 8pt because they’re trying to cram everything onto one card. Your 70-year-old guests can’t read that in dim reception lighting. I’ve watched people literally pull out their phone flashlights to read bar menus and it’s just… pick a bigger font or make two cards.
The Signature Cocktail Situation
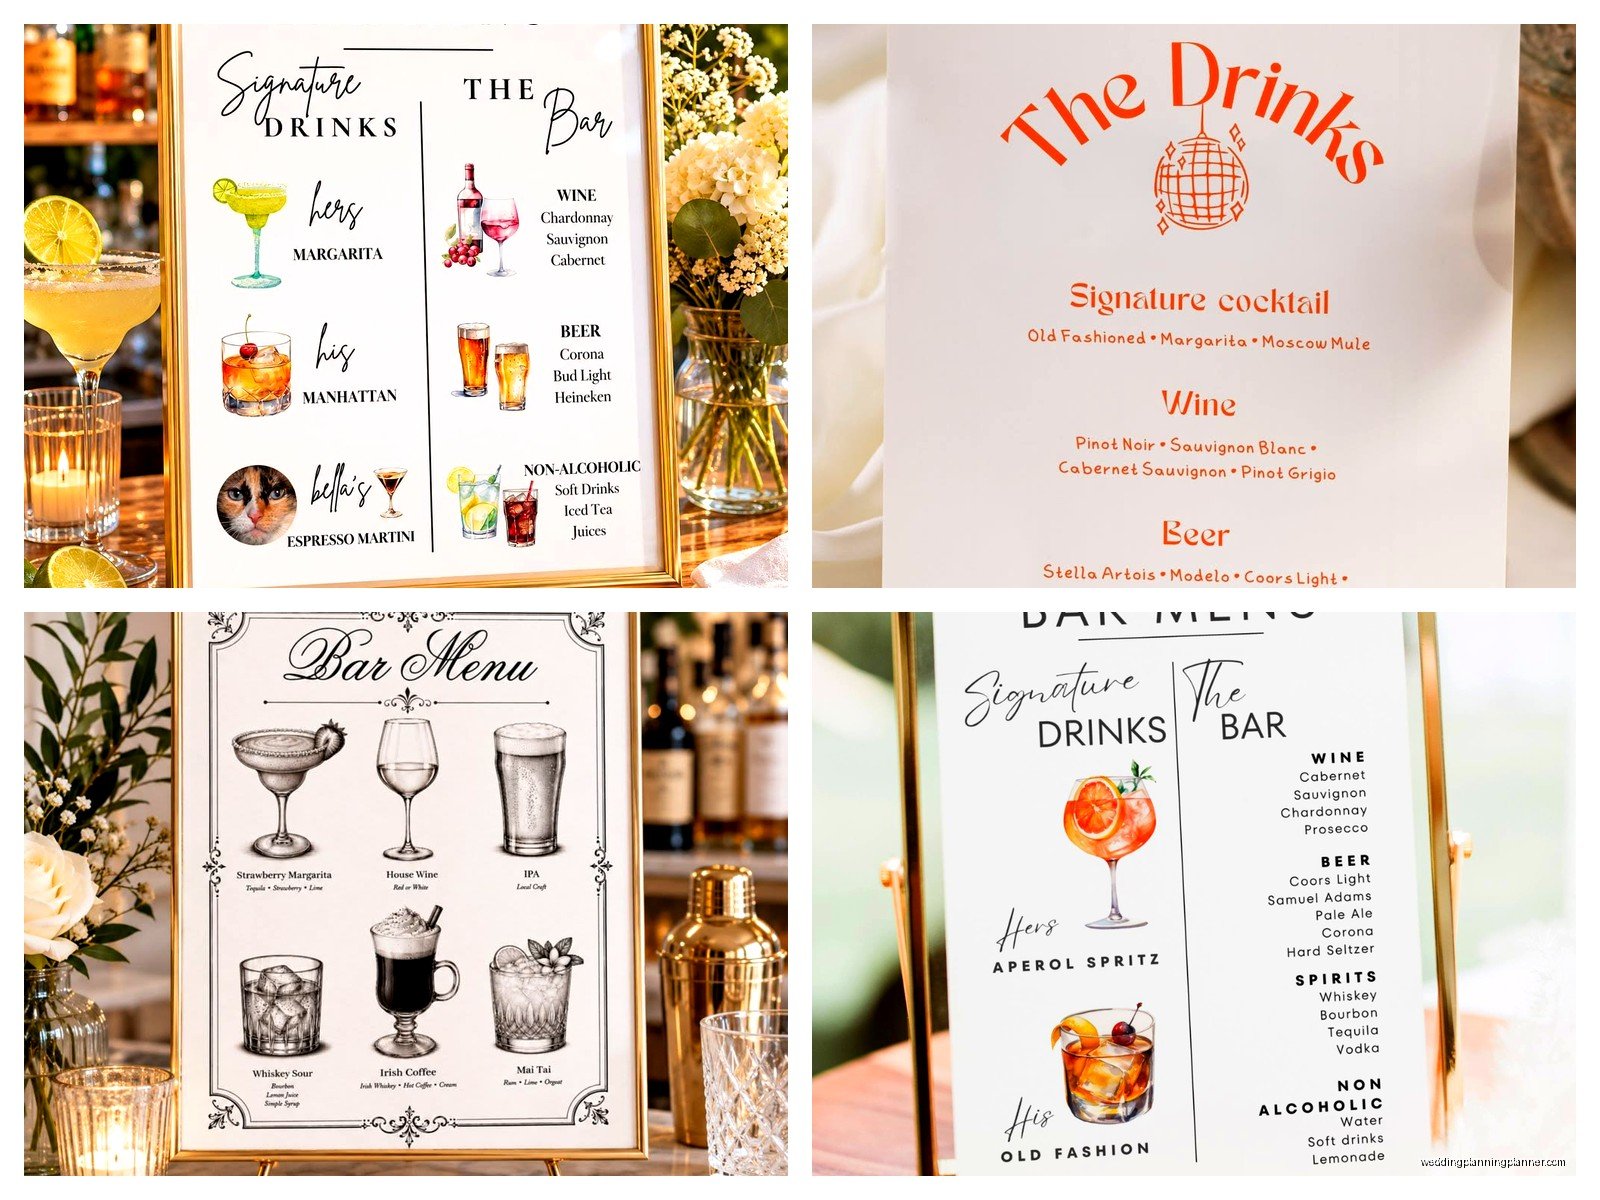
Most couples do 1-3 signature cocktails. More than that and you’re just confusing people and slowing down the bartender. I usually recommend two – one lighter/refreshing option and one stronger/spirit-forward option so you’re covering different preferences.
Naming them is where people get weird. You can do cute couple names like “The Sarah” and “The Mike” or tie them to your love story like “First Date Fizz” or whatever. Honestly do what feels right but also… if the name doesn’t make sense to anyone but you two, maybe reconsider? I had a couple once who named drinks after inside jokes and literally no one understood the references and it just created awkward conversations.
For the descriptions, keep it simple. “Vodka, elderflower, cucumber, lime, soda” is perfect. You don’t need flowery language about how the botanicals dance on your palate or whatever. This isn’t a cocktail bar in Brooklyn, it’s your wedding.
Template Options You Can Actually Use
Alright so there are basically three routes you can go for templates and they each have pros and cons.
Canva Templates
This is gonna be most people’s choice because Canva is easy and you probably already have an account. They have a million wedding bar menu templates – some free, some paid.
The good stuff: super customizable, lots of fonts and graphics, you can match it to your other wedding stationery pretty easily. You can add your wedding colors, change layouts, drag and drop elements around.
The annoying stuff: if you use a popular free template, there’s a decent chance another wedding that same weekend is using the exact same one. Also the free version has limited font options and you can’t resize things quite as precisely as you might want.
Pro tip – search for “cocktail menu” not just “wedding bar menu” because you’ll get more variety. Some of the restaurant-style cocktail menus actually look more sophisticated than the wedding-specific ones.
Etsy Digital Downloads
This is where you buy a template (usually $5-15) and get an editable file, either as a Canva link, PowerPoint, Word doc, or sometimes a Templett template.
I kinda love Etsy for this because you’re supporting small designers and the templates tend to be more unique. Plus a lot of sellers will do minor customizations for free if you message them.
What to watch for: make sure it’s actually EDITABLE before you buy. Some listings are just PDFs where you have to fill in by hand (which… nah). Read the reviews to see if other people had trouble with the file format. And check what’s included – some come with multiple size options (like 5×7, 8×10, 11×14) which is super helpful.
DIY in Word or Google Docs
Look, if you’re not picky about aesthetics or you’re on a tight budget, you can absolutely make something clean and simple in Word or Google Docs. It won’t be as pretty as a designed template but it’ll get the job done.
Use a simple layout, a nice readable font (I like Montserrat or Cormorant for wedding stuff), and just list everything clearly. You can add a simple border or use a template from Word’s built-in options. My cat just knocked over my coffee while I’m writing this and I’m choosing to ignore it, but anyway – the point is functional beats nothing.
Sizing and Printing Decisions
This is where people get confused and honestly I don’t blame them because there are too many options.
Common sizes:
- 5×7 inches – good for framing, fits on most bars nicely, easy to hold
- 8×10 inches – more visible from a distance, better if you have a lot of info
- 4×6 inches – cute for individual table cards but kinda small for a main bar menu
- 11×14 inches or bigger – statement piece, good for one large display
You don’t need a huge poster unless your bar is like 20 feet long. Most bars are better served by 2-3 medium sized menus placed at different spots along the bar so people aren’t crowding around one sign.
For printing, you’ve got options. You can print at home if you have a decent printer and use cardstock from any office supply store. This works fine for smaller sizes. For 8×10 or bigger, I usually tell people to go to FedEx or Staples or even CVS – their photo printing is surprisingly good quality and not expensive.
If you want something fancier, Minted and Shutterfly both do custom printing and they have nice paper options. More expensive but the quality is noticeably better. Or if you’re already ordering other stationery from somewhere, see if they’ll print your bar menus too for a discount.
To Frame or Not To Frame
Frames make everything look more polished but they’re also another expense and another thing to deal with. I usually say yes to frames if you’re doing an upscale wedding or if your venue has kind of plain bars that need dressing up.
You can get cheap frames from IKEA, Target, or Amazon. Just buy them early so you can make sure your printed menus actually fit properly – I’ve seen people realize the night before that their 8×10 print doesn’t quite fit in their 8×10 frame because of matting issues or whatever.
Acrylic frames are having a moment right now and they do photograph really well. They’re more expensive but reusable and modern looking.
Or honestly? Just mount the printed menus on foam board from the dollar store and put them on little easels. Totally works and costs like $3 total.
What to Actually Put on Your Template
Let me give you a realistic example of what a good bar menu might say:
Signature Cocktails
The Emma – gin, lavender syrup, lemon, prosecco
The James – bourbon, maple, bitters, orange
Beer
Corona Light, Blue Moon, Local IPA
Wine
Pinot Grigio, Chardonnay, Cabernet Sauvignon, Prosecco
Full Bar Available
Vodka, gin, rum, tequila, whiskey, and mixers
Non-Alcoholic
Sparkling water, soda, juice, mocktail upon request
See? Not complicated. You’re not writing a novel here.
Design Tips That Actually Matter
Okay so I’m not a graphic designer but I’ve seen enough wedding menus to know what works and what doesn’t.
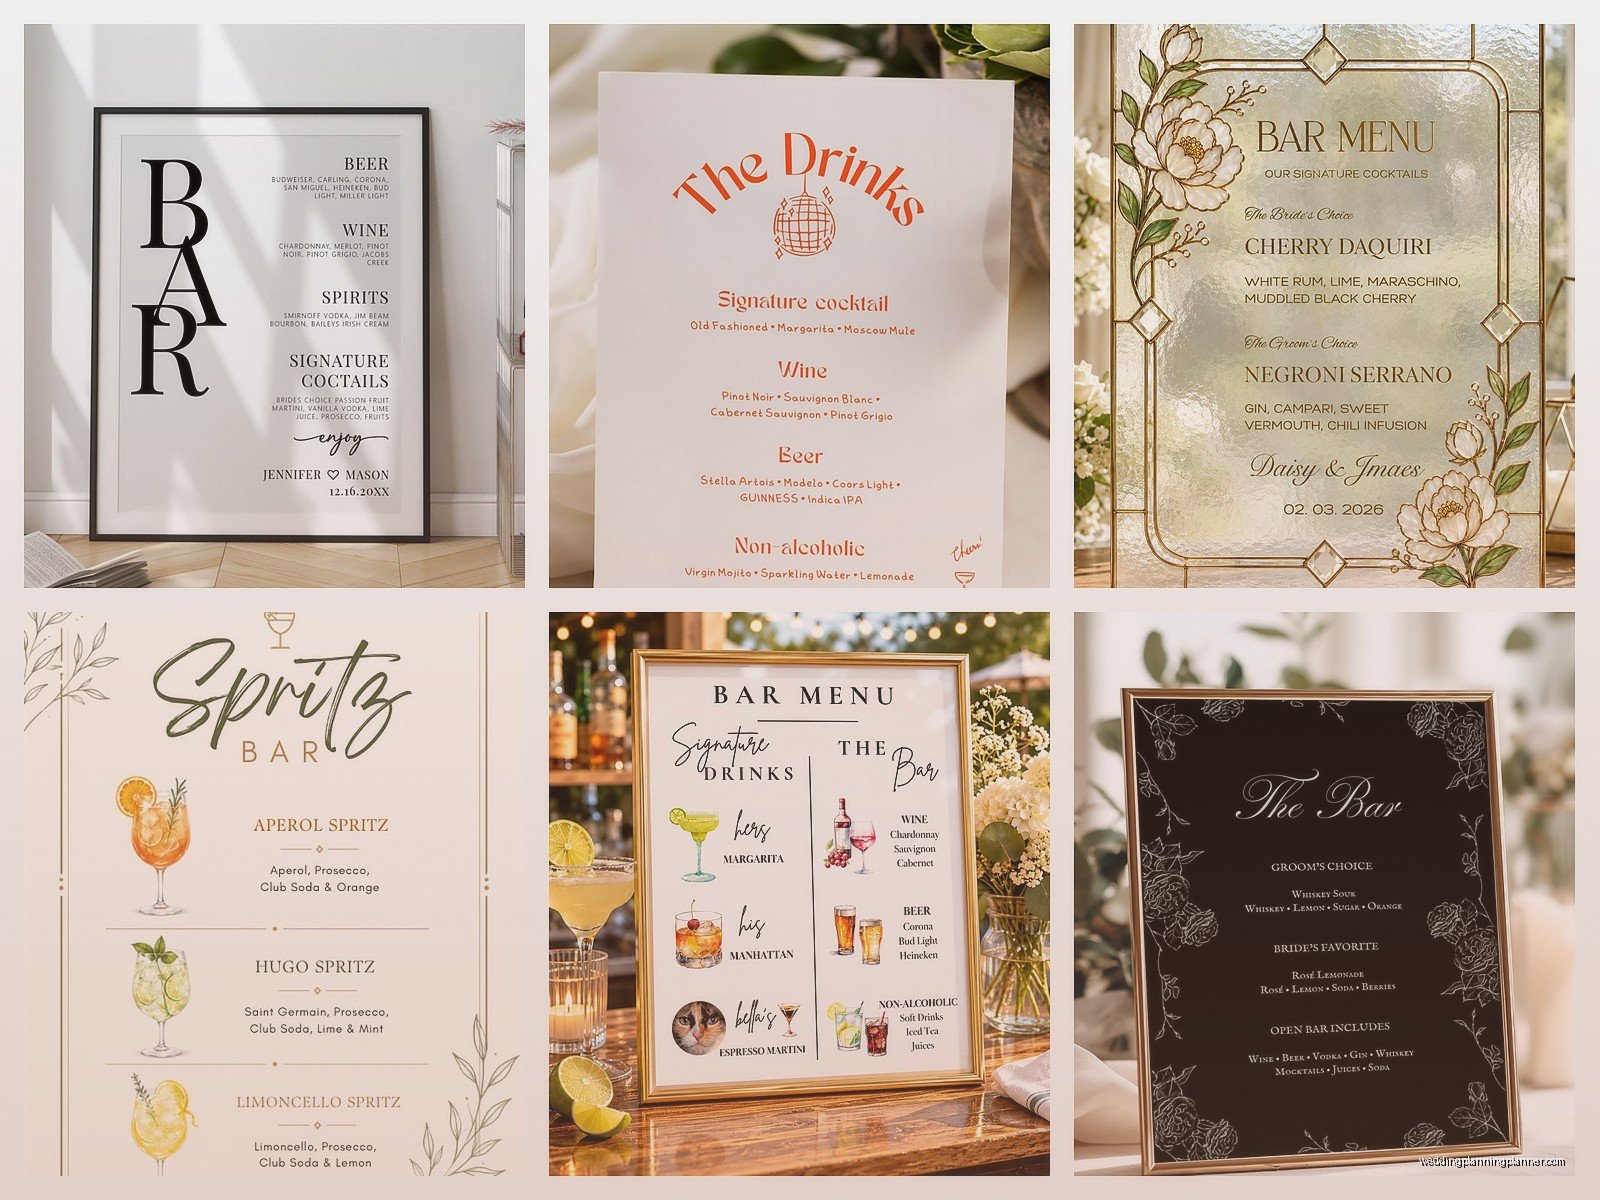
Keep your fonts to 2-3 maximum. One for headers, one for body text, maybe one for accents. More than that looks chaotic. And please make sure they’re readable – I know that super swirly calligraphy font is pretty but if people can’t read it quickly, what’s the point.
White space is your friend. Don’t cram every inch of the card with text or graphics. Let it breathe. A simple, clean menu looks way more expensive than a cluttered one.
Match your wedding colors but don’t go overboard. If your wedding colors are navy and blush, you don’t need to make the entire menu navy with blush text that no one can read. Use colors as accents – maybe a navy border or blush graphic elements.
Graphics and illustrations can be cute but keep them small and minimal. A little sprig of greenery in the corner? Cute. Massive florals covering half the menu? Too much.
Common Design Mistakes
Things I see all the time that you should avoid:
- Center-aligning everything (left-align your drink lists, it’s easier to read)
- Using colors that don’t have enough contrast with the background
- Making the couple’s names bigger than the actual drink information
- Forgetting to proofread and having typos on the final printed version
- Using photos of cocktails that don’t match what you’re actually serving
That last one is weirdly common? Like people will put a photo of a bright pink drink on the menu and then serve something that’s clear and people get confused. Just… don’t use photos unless they’re accurate or keep it illustration-based.
How Many Do You Actually Need
This depends on your setup but here’s my general rule: one menu per 25-30 guests, minimum. So if you have 150 guests, you want at least 5 menus.
But also consider your venue layout. If you have multiple bars, each bar needs its own set of menus. If you have a really long bar, put menus at both ends so people aren’t walking back and forth.
Some couples also like to put smaller versions on cocktail tables during cocktail hour, which is actually smart because it prevents that rush at the bar where everyone’s trying to read the menu at once.
I had a spring 2023 wedding where we did one large framed menu at the main bar and then printed a bunch of 4×6 versions that we scattered on the cocktail tables and it worked perfectly. People could browse the options while mingling and then go to the bar knowing exactly what they wanted.
Digital Versions Are a Thing Now
Okay so this is newer but some couples are adding QR codes that link to a digital bar menu. This is kinda extra but also… it works? Especially if you have a really extensive bar selection that would be too much for a physical menu.
You can create a simple Google Doc or Canva design, get a QR code for free from like a million websites, and print that on a small card. People scan it and see the full menu on their phones.
The downside is older guests might not want to deal with it and you’re assuming everyone has their phone on them and charged. So I’d say do this as a supplement to physical menus, not a replacement.
Timeline for Getting This Done
Don’t leave this until the last minute even though it’s tempting because it seems like a small thing. Here’s a realistic timeline:
6-8 weeks before: finalize your actual bar selections with your venue or caterer, decide on signature cocktails
4-6 weeks before: choose and customize your template, get it exactly how you want it
3-4 weeks before: print everything, order frames if needed
1-2 weeks before: assemble everything, do a test setup to make sure it all works
The thing people forget is that you need to finalize your bar package before you can make the menus, and sometimes that takes longer than expected because you’re waiting on venue responses or trying to decide between beer brands or whatever. Build in buffer time.
Coordinating with Other Stationery
If you’re doing custom stationery for other parts of your wedding – like welcome signs, table numbers, programs – you probably want your bar menu to match that aesthetic. Most template sellers offer coordinating sets which makes this easy.
Or if you’re designing everything yourself in Canva, just save your color palette and fonts and reuse them across all your signage. Consistency makes everything look more professional and intentional.
But also don’t stress if your bar menu doesn’t perfectly match your invitations or whatever. It’s really not that deep and most guests won’t notice or care. As long as it looks neat and matches your general vibe, you’re fine.
Working with Your Bartender
One thing people don’t think about – show your bartender the menu before you print it. Sometimes they’ll catch issues like “actually we don’t have elderflower syrup” or “that cocktail takes too long to make for a wedding pace” and you can adjust.
Also ask them where they want the menus placed. Some bartenders have specific preferences about where signage goes based on their workflow, and you don’t want to put a frame right where they need to set down glasses or whatever.
If you’re bringing your own bartender to a venue, make sure they know what’s on the menu ahead of time so they can prep properly. Nothing worse than a bartender scrambling because they didn’t realize they needed to make 200 lavender cocktails.
