
Planning Guides, Style Guide
Wedding Table Template: Seating Chart Layout
Jul
Okay So You Need to Actually Make a Seating Chart
Right so the seating chart is probably gonna be one of those things you put off until the last minute and then panic about at 11pm two weeks before the wedding. I’ve seen this happen like… honestly I can’t even count how many times. The template itself isn’t complicated but the actual process of filling it in? That’s where people lose their minds.
First thing – you need to know your venue layout. Like actually know it. Not just “oh there’s a room with tables” but the specific dimensions, where the dance floor is, where the DJ setup goes, bathrooms, entrance, the works. I had this bride in summer 2021 who swore she knew her venue layout because she’d been there once for a tasting and then we got the actual floor plan from the coordinator and it was COMPLETELY different from what she remembered. The whole chart had to be redone.
Getting Your Numbers Straight
Before you even think about templates, you gotta have your final headcount. And I mean final final. Not “well Aunt Susan said she’s coming but she hasn’t sent the RSVP” – you need confirmed numbers. Here’s what annoys me SO much: couples who start making seating charts before RSVPs are done. Like why are you doing this to yourself? You’re just gonna have to redo it seventeen times.
Once you have numbers, decide on table sizes. Most venues offer round tables in 60-inch (seats 8-10) or 72-inch (seats 10-12) sizes. Some have 48-inch rounds for smaller groups. Rectangular tables are usually 6ft or 8ft long. You can mix and match but honestly keeping it uniform makes the template layout SO much easier.
Template Options That Actually Work
There are basically three ways to create your template and I’ve used all of them:
Digital tools: Wedding planning software like AllSeated, WeddingWire’s table planner, or even just Canva templates. These let you drag and drop guest names and usually have venue dimensions built in. The annoying thing is some of them have paywalls for the good features but the free versions are usually fine for basic layouts.
Excel/Google Sheets: This is my personal go-to because I’m kinda a spreadsheet nerd. You can create a grid system where each cell represents a seat, color-code by family/friend groups, and sort by dietary restrictions or other notes. It’s not visual like the fancy software but it’s practical and you can share it easily with your planner or coordinator.
Actual physical templates: Some people still prefer poster board and sticky notes. Not gonna lie, there’s something satisfying about physically moving names around. My cat knocked over my coffee onto one of these once during a client meeting and we all just stared at the brown stain spreading across table 7… good times.
Building Your Layout Step by Step
Alright so you’ve picked your template method. Now what? Start with the fixed elements – head table, cake table, gift table, DJ booth, dance floor. These don’t move so plot them first. The head table is usually centered on one wall with the best view of the room. Some couples do a long rectangular sweetheart table, others do a king’s table with the wedding party, or you might skip it entirely and sit with your parents.
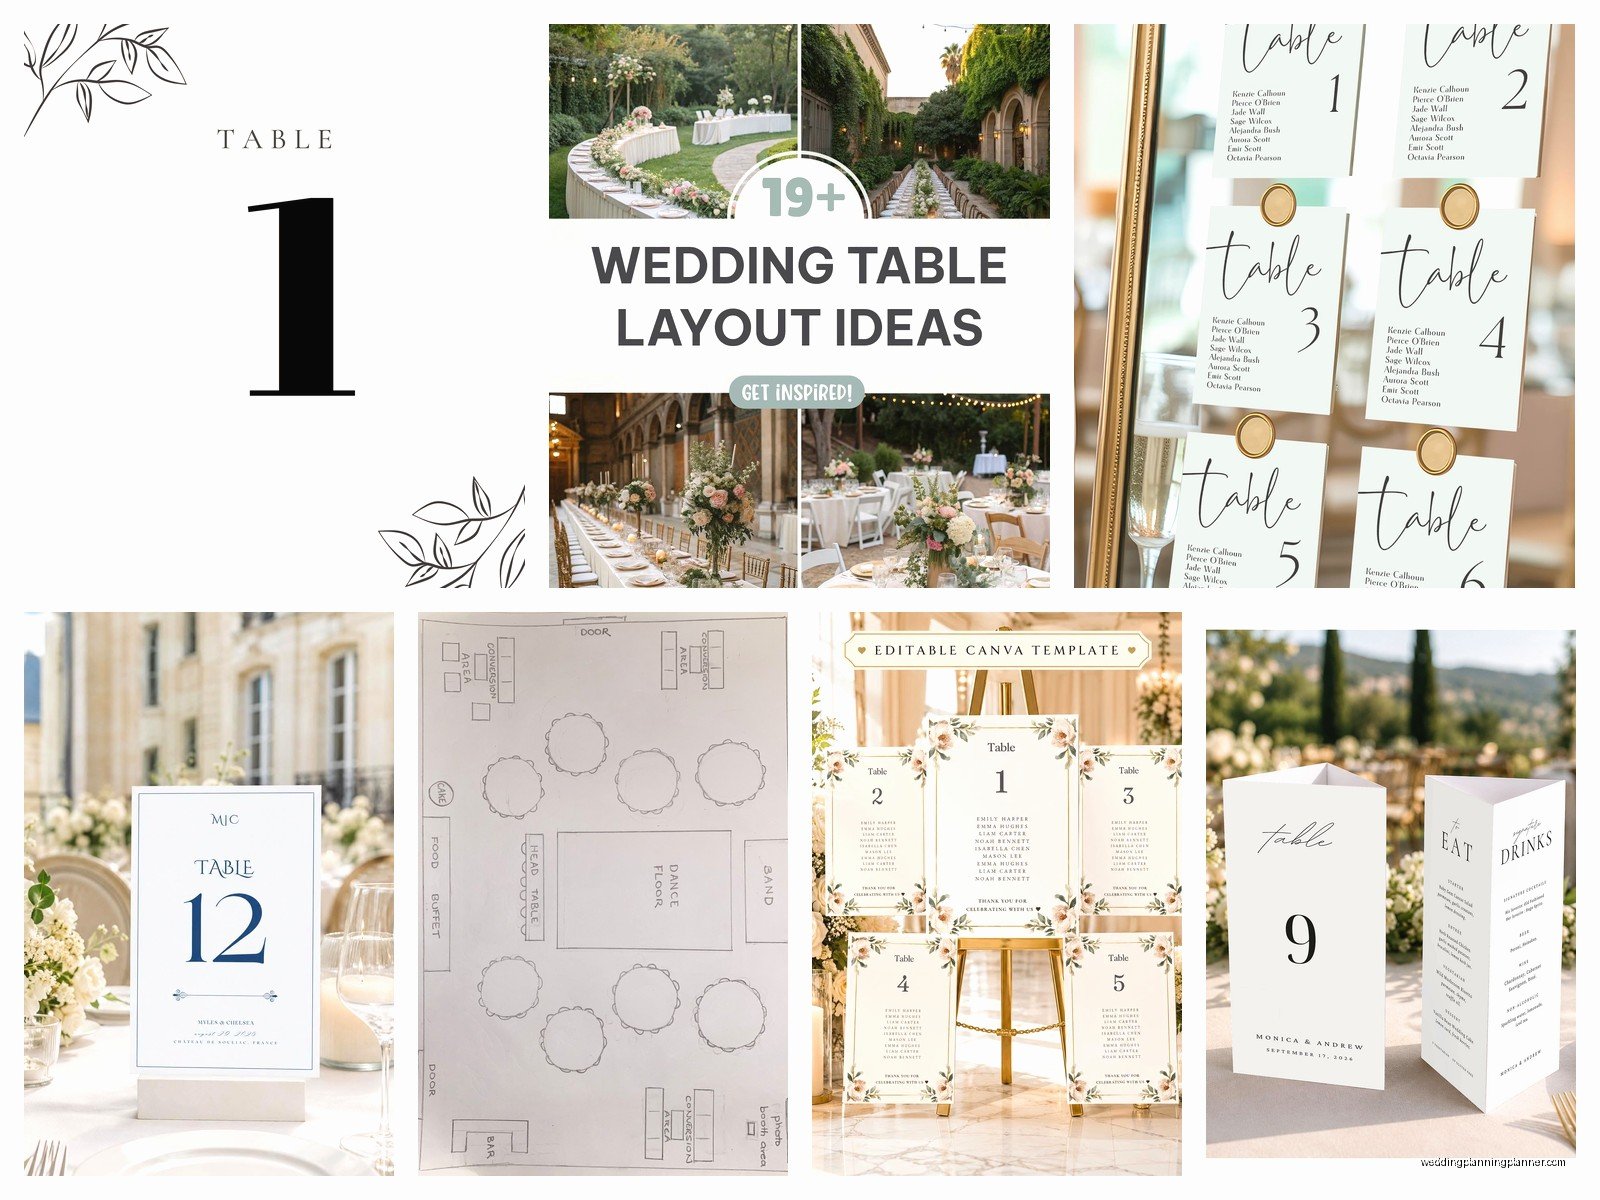
Next place your guest tables around these fixed points. You want clear pathways for servers and guests – nobody should have to squeeze between chairs to get to the bathroom. I usually recommend at least 4-5 feet between table edges for walkways. When I’m creating the template I literally draw lines showing traffic flow because spring 2023 I had a couple who didn’t do this and their elderly grandparents couldn’t navigate the room without bumping into chairs.
The Actual Assignment Part
This is where it gets messy. You’re basically solving a puzzle where some pieces hate each other and some pieces NEED to sit together or they’ll be offended for the rest of their lives.
Start with your VIPs – parents, grandparents, wedding party if they’re not at the head table. Put them close to you but not so close they’re right next to the speakers. Trust me on this. Then work outward with family groups, friend groups, coworker tables, etc.
Some people organize by relationship to bride vs groom but honestly that can look weirdly divided. I prefer mixing it up by age groups, interests, or how people know each other. Like if you have college friends and the groom has college friends who all like craft beer, maybe they sit together even though they’re from “different sides.”
The Rules That Aren’t Really Rules But Kinda Are
Don’t seat divorced parents together unless they specifically request it. Just don’t. Even if they say they’re fine, create buffer space.
Kids table – yes or no? If you have a bunch of children coming, a kids table can be great (put it near their parents so they can supervise). But if you only have like two kids, just seat them with their parents because a table of two random children is awkward.
Singles and plus-ones need special attention. Don’t just dump all the single people at one table and call it the “singles table” like it’s 1987. Mix them with friendly couples or other singles they might actually get along with. And plus-ones who don’t know anyone? Seat them with your most welcoming, chatty friends.
Table size matters for conversation flow – tables of 8 are ideal because everyone can talk to everyone. Tables of 12 get broken into smaller conversation groups which is fine but less intimate. Tables of 6 feel small unless it’s a tiny wedding.
Template Formatting Details
Okay so in your actual template document, here’s what you need to track:
- Table number or name
- Guest names (first and last – you’d be surprised how many John’s there are)
- Meal choice if you’re doing plated dinner
- Dietary restrictions
- Any special notes (needs wheelchair access, hard of hearing, etc.)
Some templates also include a second version that’s just table numbers with seat counts for the venue coordinator. They don’t need to know everyone’s life story, just “Table 5 has 10 people, Table 6 has 8” and so on.
For the visual layout template – the one that shows where tables are physically located – use shapes to represent tables. Circles for rounds, rectangles for long tables. Label each one clearly. Some people get fancy with this and make it look like actual design with colors and fonts but honestly a simple black and white diagram works just fine.
Display Options for the Actual Day
Your template is done but guests need to know where to sit. Most common options:
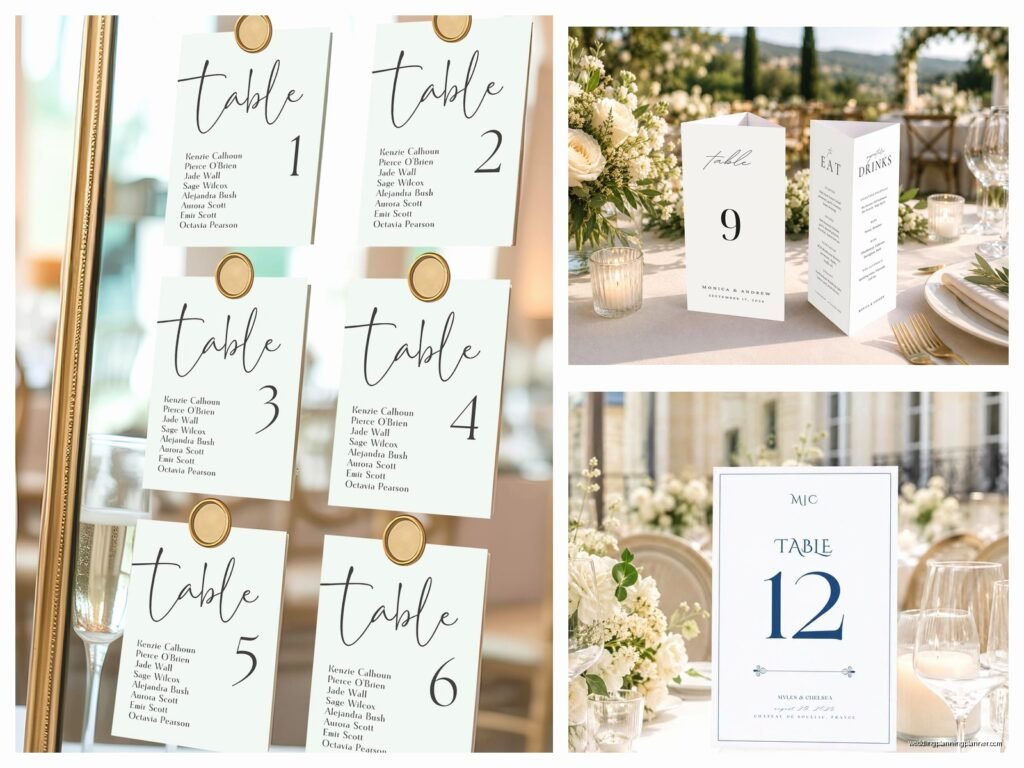
Seating chart display: An alphabetical list of names with table assignments, usually on a board or large printed sheet at the entrance. This is separate from your planning template – it’s the pretty version guests see.
Escort cards: Individual cards (one per guest or per couple) with their name and table number. These sit on a table alphabetically and guests pick up their own.
Place cards: Cards at each specific seat with the guest’s name. This assigns exact seats, not just tables. More formal and more work.
I usually recommend seating chart display OR escort cards for the table assignment, then place cards at each seat if you want to control exactly who sits where. But that’s like… a lot of control and most people don’t care that much about whether they sit in seat 3 or seat 7 as long as they’re at the right table with people they know.
Common Template Mistakes I See All The Time
Forgetting to account for the band or DJ equipment. They take up SPACE and you can’t put a table where the speaker needs to go. When you’re making your template, ask the venue or your vendors for their equipment footprint.
Not numbering tables logically. If you number them 1-15 going clockwise from the entrance, that’s fine. If you randomly assign numbers, guests wander around confused looking for table 8 which is somehow between tables 2 and 13. Just… make it make sense.
Putting the quiet grandma who goes to bed at 8pm right next to the dance floor speakers. Your template should consider personality and needs, not just names on a list.
Forgetting about yourself and your photographer/videographer meals. They need to eat too and they need to sit somewhere. Add them to your template count.
The Revision Process Is Gonna Happen
Listen, you’re not gonna get this right the first time. Or the second. I revise seating charts an average of 4-6 times per wedding and that’s WITH professional experience. Someone will call and say they’re bringing their new boyfriend. Someone will have a falling out with their sister. Your college roommate will suddenly remember she’s deathly allergic to seafood and needs to be noted on the template even though she already submitted her meal choice.
Save multiple versions of your template with dates in the filename. “Seating-Chart-Draft-Nov-15.xlsx” or whatever. That way when your mom calls and says “actually can we move Aunt Carol” you can go back to the previous version if needed.
Share your working template with your planner or day-of coordinator at least two weeks before the wedding. They need time to review it, catch any issues (like you accidentally have 11 people at a table that seats 10), and prepare their own materials.
Software Specific Tips
If you’re using AllSeated, the 3D view is cool but don’t spend hours perfecting it – the overhead 2D view is what actually matters for planning. The visualization is just for fun.
Google Sheets users – use data validation to create dropdown menus for meal choices and dietary restrictions. Makes it cleaner and prevents typos. You can also use conditional formatting to highlight tables that aren’t full yet or guests who haven’t been assigned.
Canva templates look gorgeous but they’re harder to edit when you need to move people around. I’d use Canva for the final display version that guests see, not your working planning template.
Special Situations
Long tables vs rounds – if you’re doing farm tables or banquet style, your template layout is different. You’ll have two long sides and two end seats per table. I usually do alternating boy-girl-boy-girl type arrangements for long tables because it looks more balanced and encourages conversation.
Cocktail style receptions with no assigned seating – you still need a template for this! Just track high-top tables, lounge areas, and approximate capacity. Not everyone sits but you need enough seating for like 60-70% of guests.
Outdoor weddings where weather might force you inside – have TWO templates ready. One for outside, one for the backup indoor space. I know it’s extra work but trust me, you don’t wanna be redoing this in a panic if it starts pouring.
When to Lock It In
Your template should be finalized about one week before the wedding. Earlier is better but realistically you’ll have last-minute changes up until then. After that, no more revisions unless someone literally can’t attend. You need time to create your display materials and get everything printed or designed.
Send the final version to your caterer (they need it for meal counts), your venue coordinator, your planner if you have one, and keep a copy on your phone. Someone will ask you day-of where someone is sitting and you’ll be glad you have it accessible.
The template itself isn’t the hard part – it’s basically just a list and a diagram. The hard part is all the emotional labor of deciding who sits where and managing everyone’s expectations and avoiding family drama. But that’s… that’s a whole different conversation that I could talk about for hours because wow do people have FEELINGS about wedding seating.
Anyway yeah that’s the main stuff for creating a functional seating chart template that won’t make you want to scream into a pillow at midnight three days before your wedding.
