
Planning Guides, Style Guide
Wedding Guest List Template Google Sheets: Cloud Spreadsheet
Jul
Setting Up Your Guest List in Google Sheets
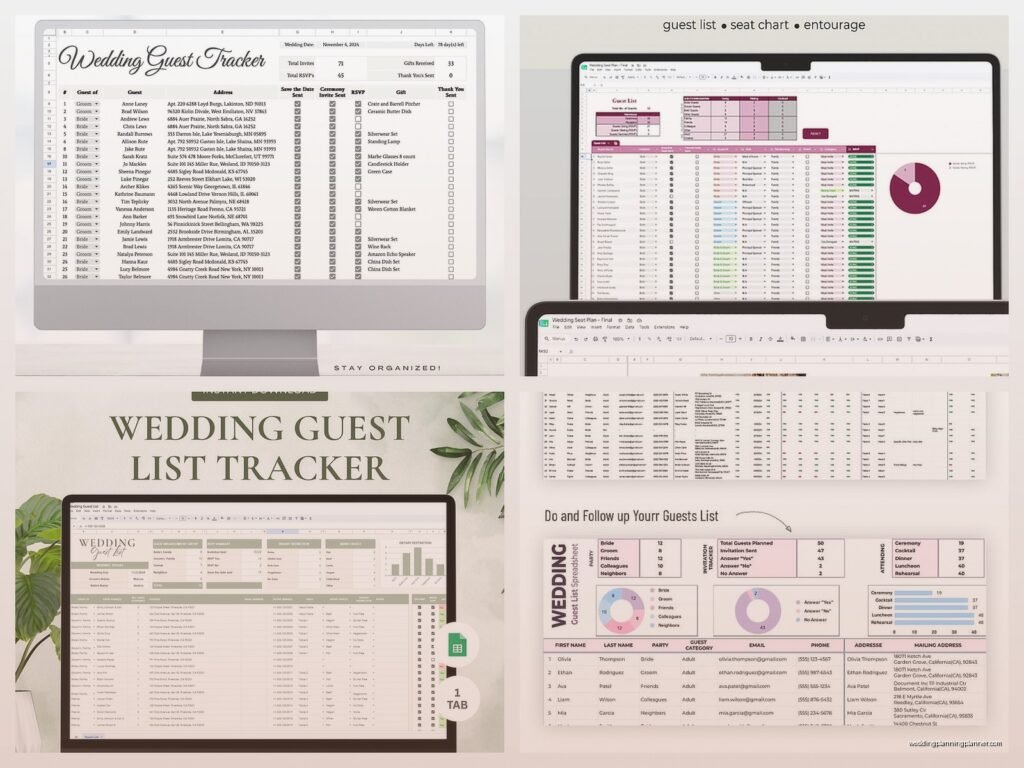
Okay so Google Sheets is honestly the best thing that ever happened to wedding guest lists and I’m gonna tell you exactly how to set one up because I’ve been using this system since like 2019 and it’s saved my butt so many times. First thing you need to do is open Google Sheets—just go to sheets.google.com and click the big plus sign to start a new spreadsheet. Don’t use Excel unless you absolutely have to because the cloud aspect of Google Sheets is what makes this whole thing work.
The basic columns you need are: Guest Name, Plus One Name, Address, Phone Number, Email, Invited To (ceremony/reception/both), RSVP Status, Meal Choice, and Dietary Restrictions. But honestly you’re gonna want more columns than that and I’ll get into it.
The Column Setup That Actually Works
Here’s what I do for every single client and what I use for my own spreadsheet tracking (yes I track everything in my life this way, my cat’s vet appointments are in a Google Sheet). Start with these columns in this order:
- Guest Number (just 1, 2, 3, etc.)
- First Name
- Last Name
- Relationship (bride’s college friend, groom’s cousin, etc.)
- Category (family, friends, coworkers, etc.)
- Plus One Allowed (YES/NO)
- Plus One Name
- Street Address
- City
- State
- ZIP Code
- Country (if you have international guests)
- Phone Number
- Email Address
- Invitation Sent Date
- Save the Date Sent (YES/NO)
- RSVP Status (Pending/Yes/No/Maybe)
- RSVP Received Date
- Number Attending
- Meal Choice 1
- Meal Choice 2 (if they have a plus one)
- Dietary Restrictions
- Table Assignment
- Gift Received (YES/NO)
- Thank You Sent (YES/NO)
- Notes
I know that looks like a lot but trust me you’ll use every single one of those columns. Back in spring 2023 I had this bride who didn’t track the “Invitation Sent Date” and she literally could not remember who she’d sent invites to and we had to cross-reference with her mom’s memory and it was a total mess.
Formatting Tricks That Make It Easier
Alright so once you have your columns set up, you gotta make this thing functional. Freeze the top row so when you scroll down you can still see your headers—go to View > Freeze > 1 row. This seems obvious but you’d be surprised how many people don’t do this and then get confused.
Use data validation for columns where you want consistent answers. Like for “RSVP Status” you don’t want someone typing “yes” and someone else typing “attending” and another person typing “confirmed”—that makes it impossible to sort later. Click on the column letter to select the whole column, then go to Data > Data Validation. Choose “List of items” and type: Pending, Yes, No, Maybe. Do the same thing for Plus One Allowed (YES, NO), Category (Family, Friends, Coworkers, Other), and any other column where you want standardized responses.
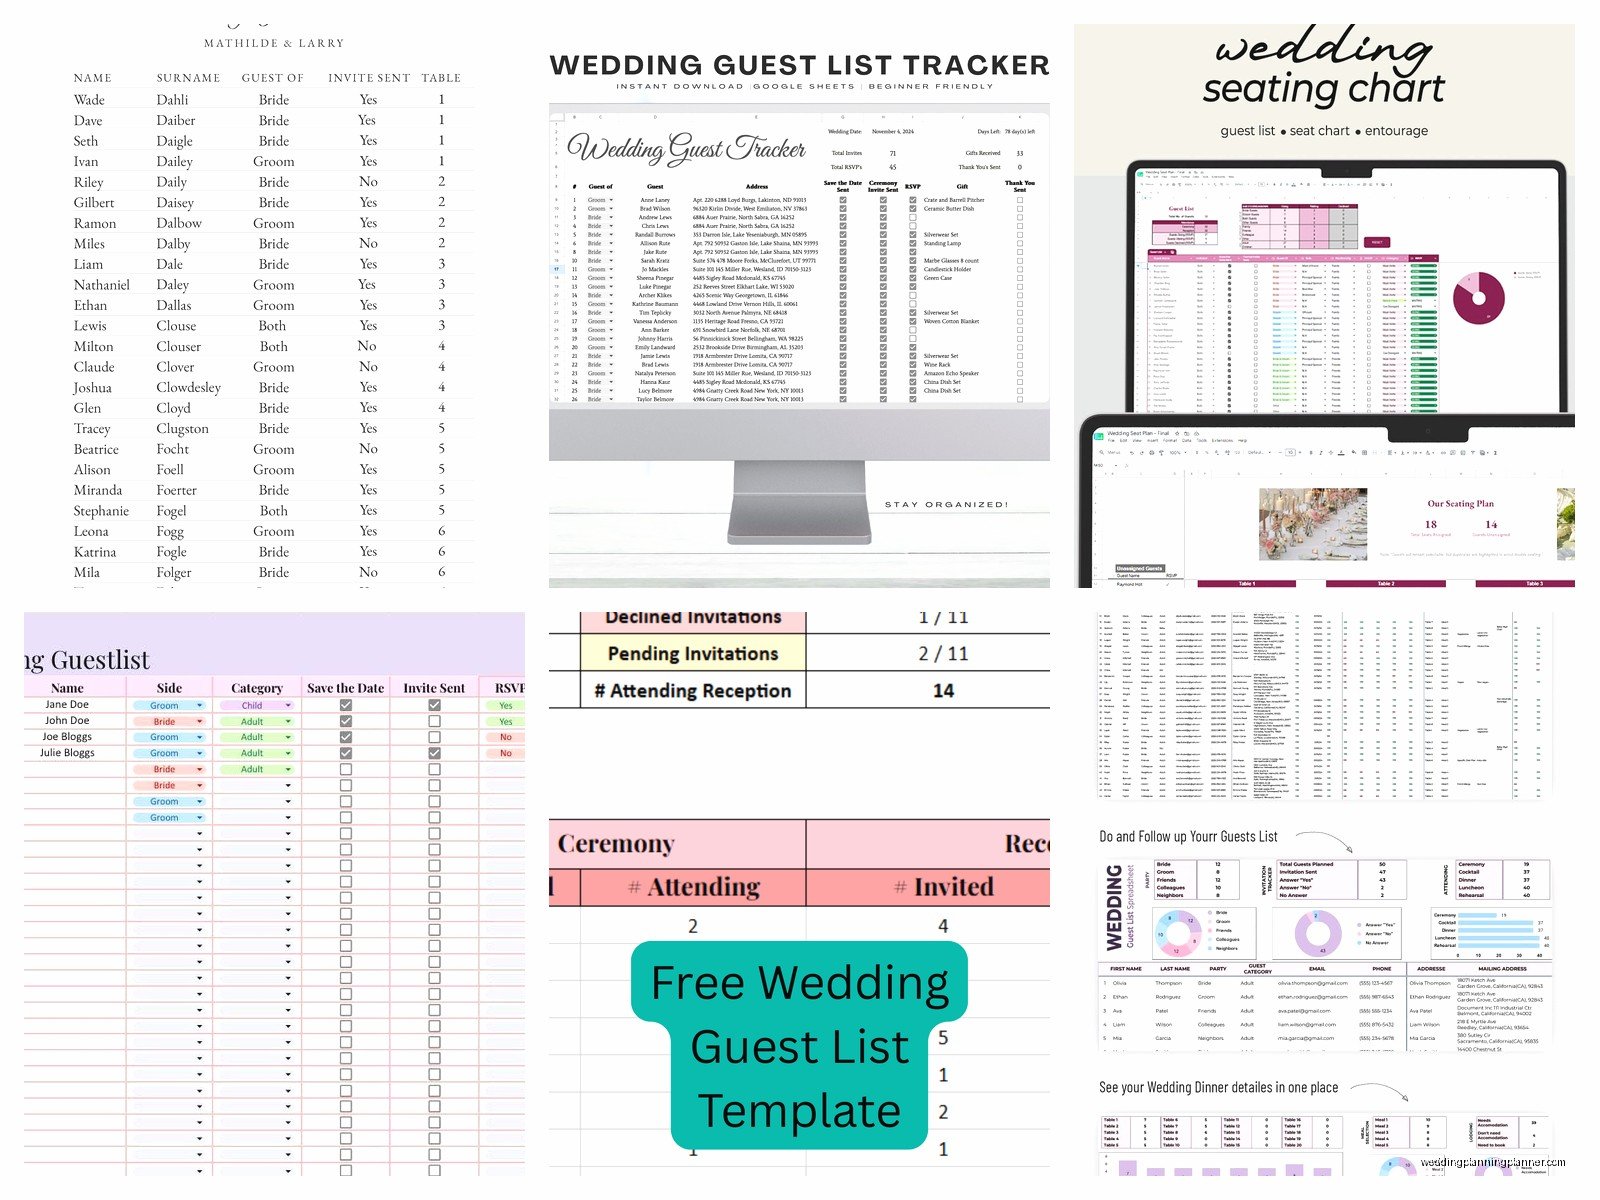
Color coding is your friend but don’t go crazy with it. I usually do conditional formatting where cells in the RSVP Status column turn green if they say “Yes” and red if they say “No” and yellow if they say “Pending.” To do this, select the RSVP Status column, go to Format > Conditional Formatting, and set up rules for each value. Makes it super easy to see at a glance who’s coming.
The Sharing and Collaboration Part
This is where Google Sheets absolutely destroys regular Excel files or god forbid a paper list. Click the “Share” button in the top right corner and you can add your fiancé, your mom, your wedding planner, whoever needs access. But here’s what annoys me—people don’t understand the permission settings and they give everyone “Editor” access and then someone accidentally deletes a whole column and nobody knows who did it.
Set permissions correctly: give your fiancé Editor access obviously, but maybe give your mom or bridesmaids Commenter or Viewer access unless they really need to edit. You can also set it so that people can only edit certain columns if you’re fancy with Google Sheets protections (right-click on a column > Protect range).
The other thing about sharing is you can work on this thing at the same time as someone else. I’ve literally sat on the phone with a bride while we both updated the guest list simultaneously—her adding addresses while I was updating RSVP statuses. You can see their cursor moving around with their name on it which is kinda cool actually.
Formulas That’ll Save Your Life
Okay so you don’t need to be a spreadsheet wizard but a few basic formulas will make this so much better. At the bottom of your Number Attending column, put this formula: =SUM(S2:S500) (assuming column S is where you track number attending and row 500 is way more than you’ll need). This gives you a running total of how many people are actually coming.
You can also use COUNTIF formulas to count specific things. Like if you want to know how many people have RSVP’d yes, you’d put: =COUNTIF(Q2:Q500,”Yes”) where Q is your RSVP Status column. Same thing for counting how many people ordered chicken vs beef for their meal.
Create a little dashboard section at the top or on a separate tab with these key numbers: Total Invited, Total Yes Responses, Total No Responses, Still Pending, Total Attending (including plus ones), and maybe break it down by category so you know how many family vs friends are coming. I usually put this on a separate tab called “Summary” because it keeps the main list cleaner.
Address Management and Mail Merge
Since you’ve got all these addresses in your spreadsheet, you might as well use them for your invitations. Google Sheets works with mail merge add-ons that let you automatically print addresses on envelopes or labels. I use an add-on called “Avery Label Merge” but there are others too. You basically connect it to your spreadsheet and it pulls the address data and formats it for whatever label template you’re using.
One thing though—make sure you clean up your address data before you try to mail merge. Get rid of extra spaces, make sure the format is consistent, check for typos. I learned this the hard way when a client sent 30 save-the-dates to the wrong addresses because there were random extra characters in the spreadsheet.
For international guests, you gotta be careful with address formatting because different countries do it differently. I usually add extra rows in the address section or use the Notes column to make sure I’ve got the right format before printing.
Tracking RSVPs and Following Up
When RSVPs start rolling in, you update that RSVP Status column and the RSVP Received Date column. This is where having everything in the cloud is clutch because you can update it from your phone while you’re checking your mail or listening to voicemail messages from Aunt Carol who doesn’t do email.
Set up a filter view to show you only the people who haven’t responded yet. Click on Data > Create a filter, then click the little filter icon in the RSVP Status column header and uncheck “Yes” and “No” so you only see “Pending” responses. Now you’ve got your follow-up list right there.
About two weeks before your RSVP deadline, you’re gonna need to start chasing people down. Use that filtered view to see who’s left, and reach out via text or call. Don’t just send another email because if they ignored the first one they’ll probably… wait I’m getting off track.
Table Assignments and Seating Charts
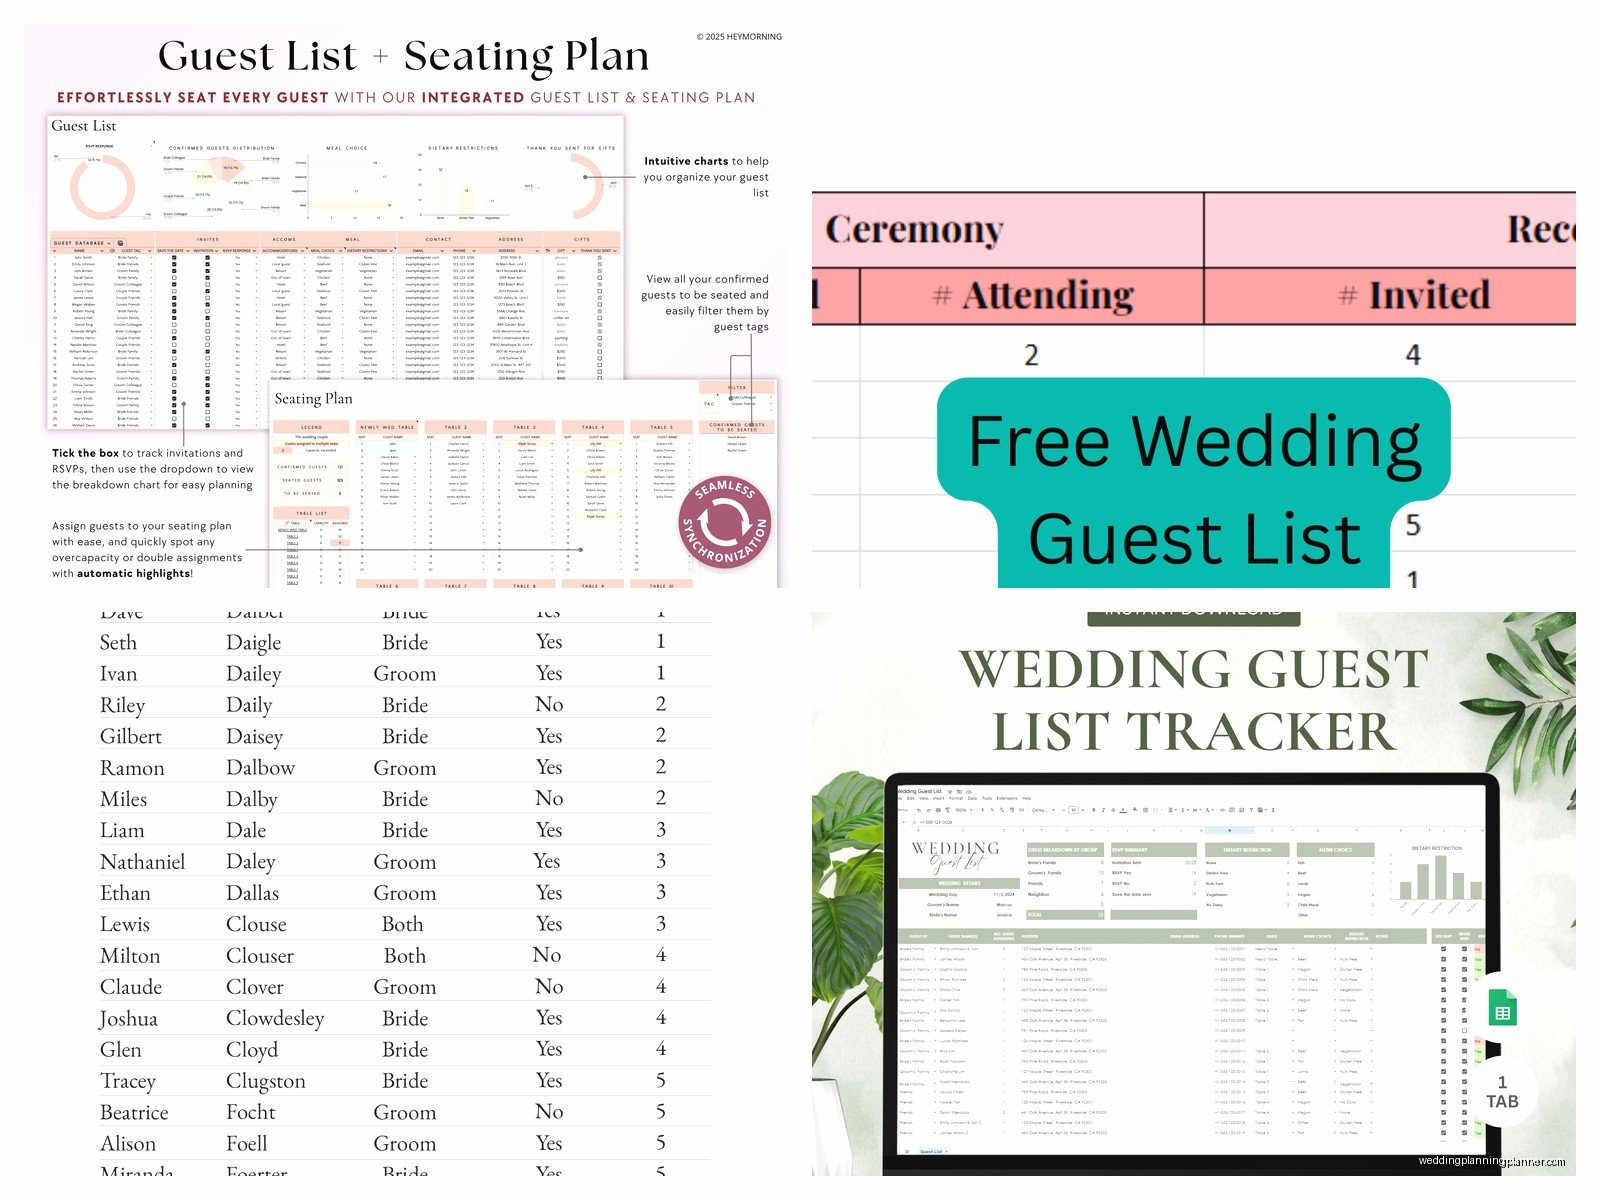
Once you know who’s actually coming, you can use your Google Sheet to plan table assignments. I add a “Table Number” or “Table Name” column and assign people to tables right there in the spreadsheet. Then you can sort by table number to see who’s sitting together and make sure you didn’t accidentally put two people who hate each other at the same table.
Some people create a separate tab for seating chart planning where they list out each table and the guests assigned to it. That’s fine too, whatever works for your brain. You can use the FILTER function to pull specific guests into a seating chart tab if you wanna get fancy: =FILTER(A2:C500, W2:W500=”Table 1″) where W is your Table Assignment column.
During summer 2021 I had a wedding where we had to completely redo the seating chart three times because of COVID capacity changes and having everything in Google Sheets meant we could adjust it in real-time without starting from scratch each time. It was still annoying but at least the data was all there.
Gift Tracking and Thank You Notes
Don’t forget about those last two columns—Gift Received and Thank You Sent. As gifts come in, note what you got in the Notes column and mark YES in Gift Received. Then when you send thank you notes, mark those too. This prevents the nightmare scenario where you forget to thank someone or accidentally thank them twice.
You can also add a “Gift Description” column if you want to track exactly what each person gave you. This is helpful for insurance purposes if you’re getting expensive gifts, and also just nice to remember who gave you what when you use that item later.
Mobile Access and On-the-Go Updates
Download the Google Sheets app on your phone because you’re gonna need it. You’ll be at a family dinner and someone will ask if they’re invited or tell you their plus one’s name or give you their new address, and you can just pull up your phone and update it right there. The app is pretty good actually, though editing on a small screen can be kinda annoying for complex formulas.
The offline mode is useful too if you’re gonna be somewhere without internet—you can enable offline access in Google Drive settings and your most recent spreadsheets will be available even without WiFi. Changes sync automatically when you get back online.
Backup and Version History
Google Sheets automatically saves and keeps version history, which is honestly amazing. If someone accidentally deletes a bunch of data or messes something up, you can go to File > Version History > See Version History and restore an earlier version. I’ve used this feature more times than I can count.
That said, I still recommend making a backup copy every so often, especially before major updates or before you share it with someone new who might mess things up. Just go to File > Make a Copy and save it with a date in the filename like “Guest List Backup March 2025”.
Common Mistakes People Make
Don’t put multiple people in one row unless they’re a couple. Each guest should have their own row, even if they’re from the same family. This makes counting and tracking way easier. So if you’re inviting the Smith family with three kids, that’s five rows, not one.
Don’t forget to update the spreadsheet consistently. If you get an RSVP via text message, put it in the spreadsheet immediately, not “later when you have time” because you’ll forget. I’ve seen couples lose track of RSVPs because they wrote them on sticky notes and forgot to transfer them over.
Don’t share the spreadsheet with your entire guest list or post it anywhere public—this sounds obvious but I’ve heard stories. Keep it private between you and your planning team.
And honestly just keep it simple at first. You can always add more columns later if you need them, but starting with 47 columns is gonna overwhelm you. Begin with the basics and expand as you figure out what information you actually need to track for your specific wedding.
