Planning Guides, Style Guide
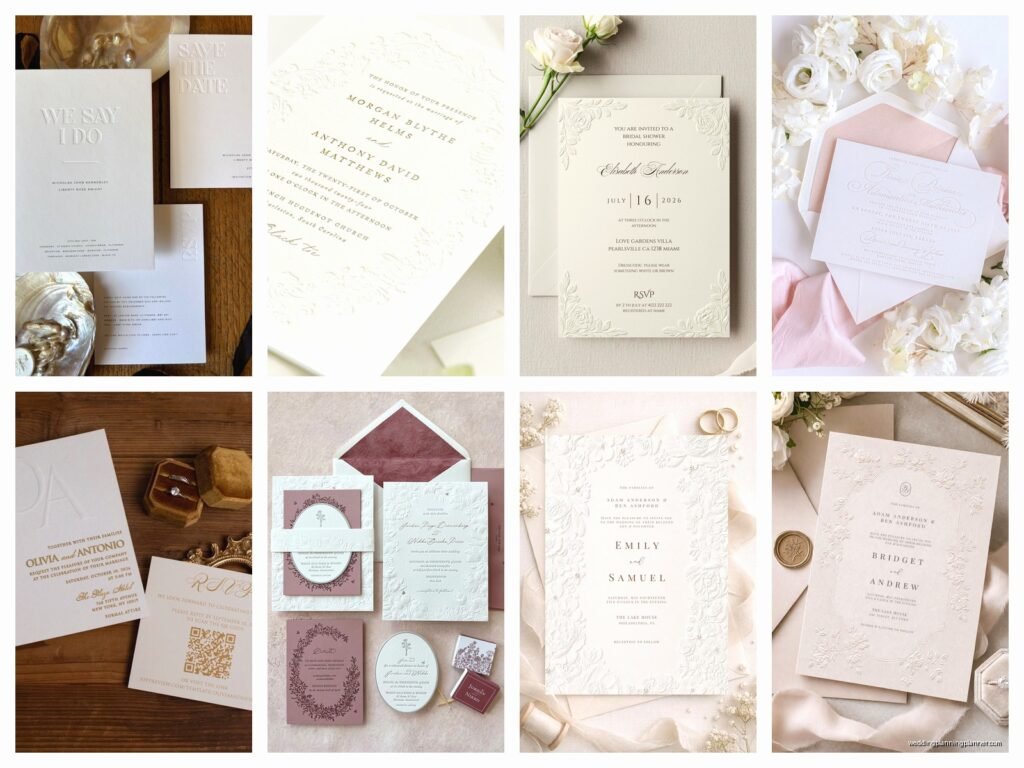
Embossed Invitations: Raised Texture Printing Technique
May
What Embossed Invitations Actually Are
So embossing is basically when you create raised lettering or designs on paper by pushing the material up from underneath. It’s the opposite of debossing which presses down into the paper, and honestly I used to mix these up all the time until a printer in Dallas corrected me in front of a bride back in spring 2023 and I wanted to disappear into the floor. Anyway, the raised texture you feel when you run your fingers over embossed invitations – that’s what makes them feel expensive and formal.
The technique uses metal dies and heat and pressure to physically change the paper surface. You’ve got two dies that work together like a sandwich with your paper in the middle. One die has the raised design, the other has the recessed part, and when they press together with heat the paper fibers get permanently reshaped. It’s kinda amazing when you see it happen in person.
Different Types of Embossing You Should Know About
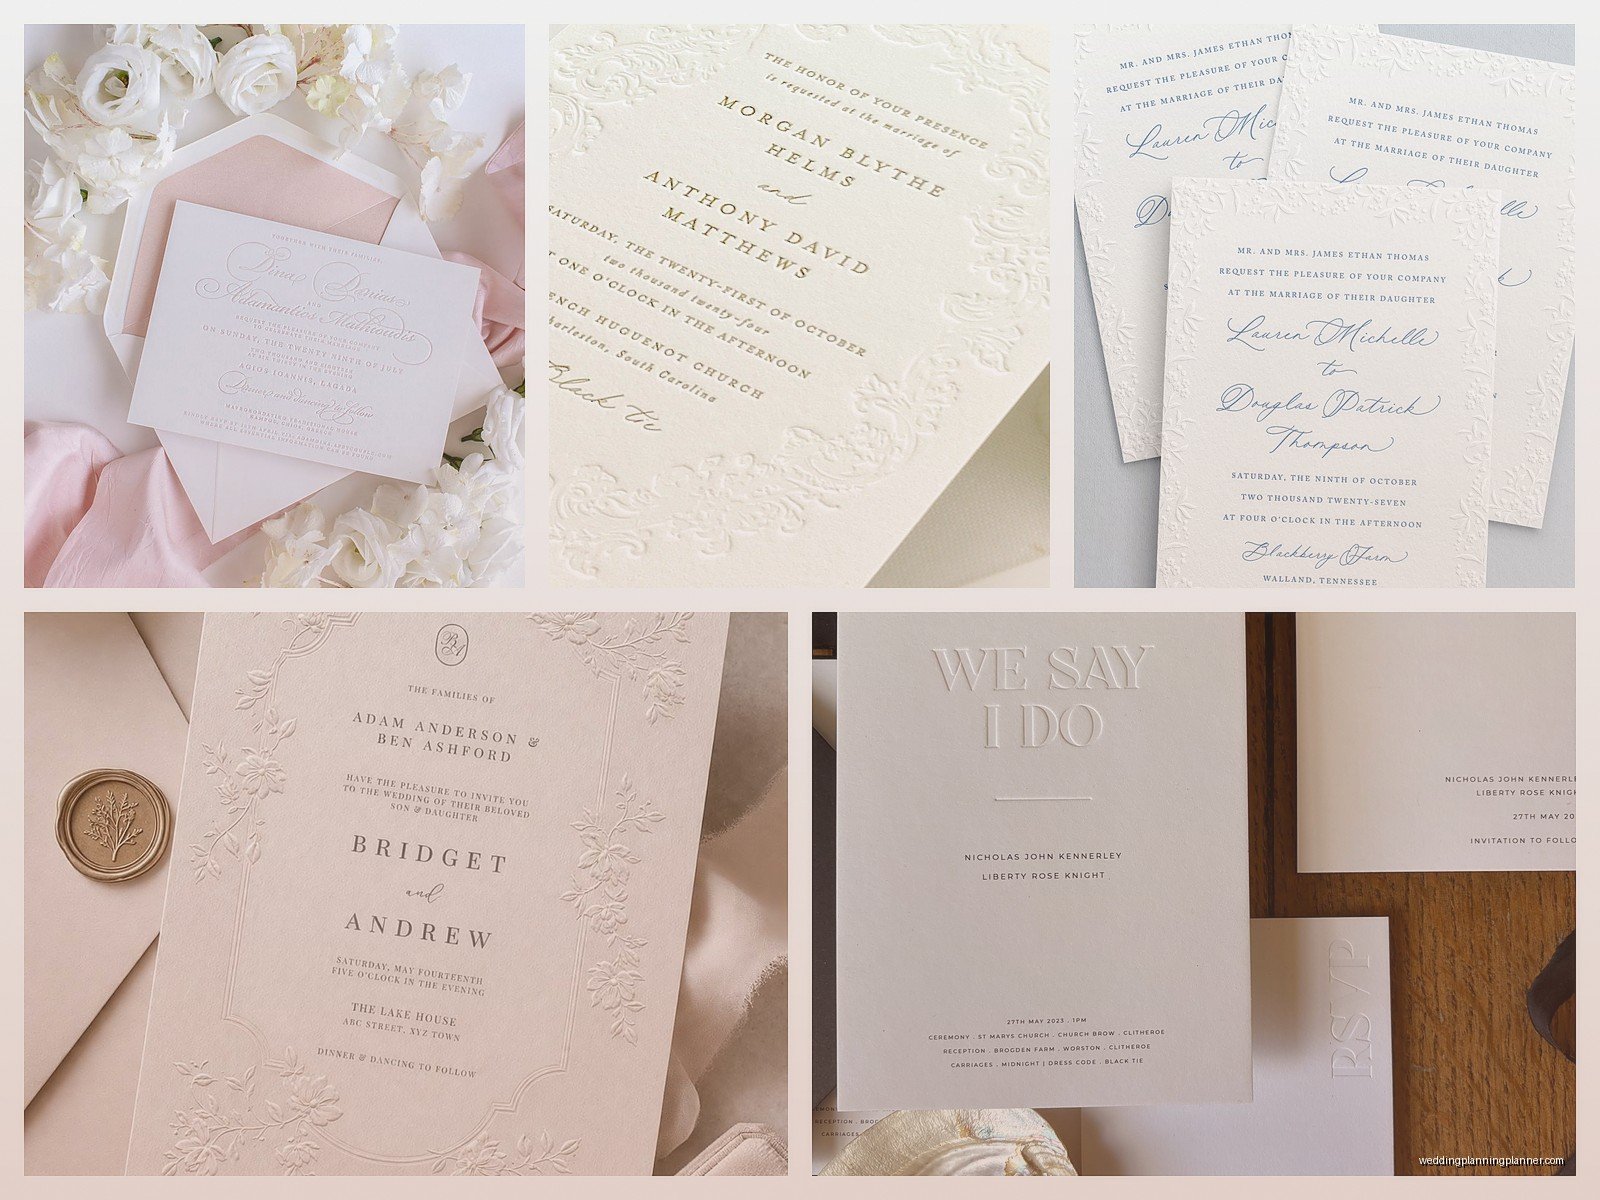
There’s blind embossing which is just the raised impression with no ink or foil – super elegant and understated. Then you’ve got registered embossing where they add ink or foil that lines up exactly with the raised area. This is trickier and costs more because everything has to align perfectly or it looks terrible.
Combination embossing is when you do both embossing and printing in one piece, like having your names embossed but the rest of the text flat printed. And then there’s glazing or tipping where they add a different colored layer to just the raised portions. I rarely see couples go for glazing anymore though, it feels very 1990s to me.
Blind Embossing Details
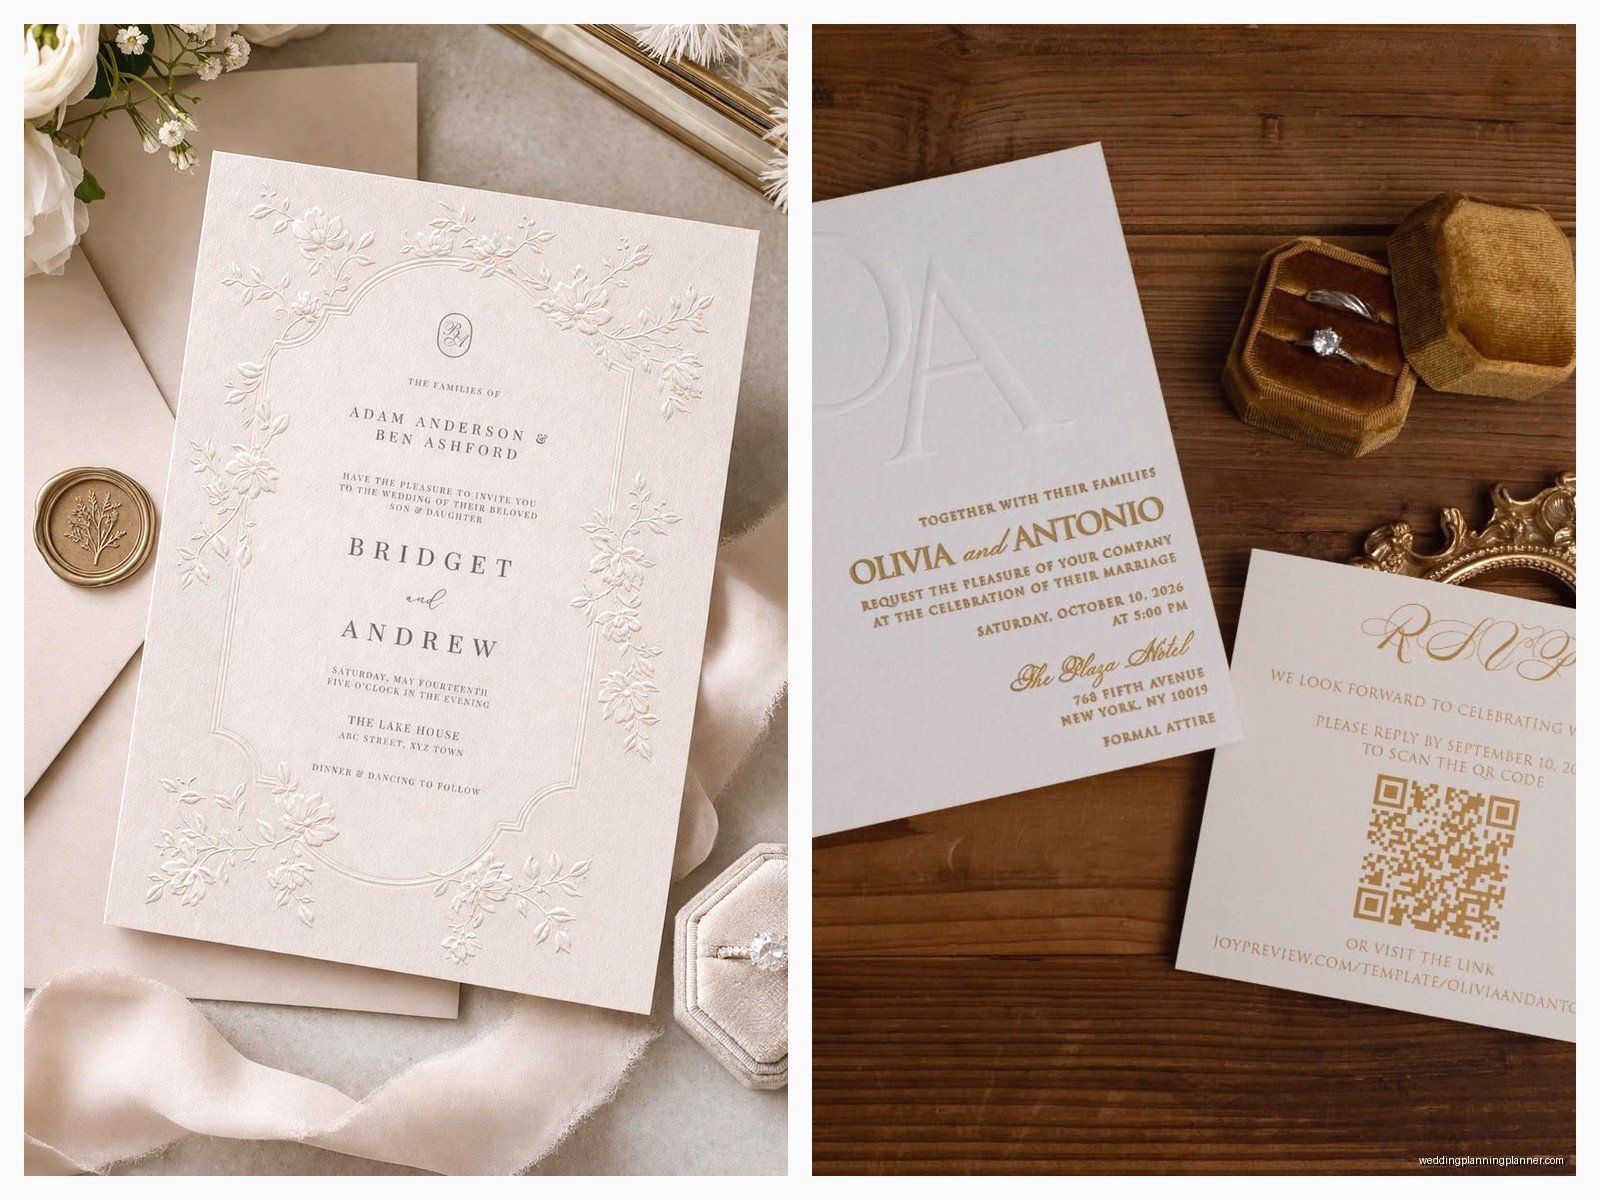
This is my personal favorite because it’s so subtle but you can feel the quality immediately. Works best with thick paper stock – like 110lb cover weight minimum. The design shows up because of shadows and the way light hits the raised surface. Perfect for monograms, borders, or even full text if you want that super formal look. Your guests will literally run their fingers over it at the mailbox.
Registered Embossing with Foil or Ink
This is where you combine embossing with metallic foil stamping or ink, and the color sits right on top of the raised area. It’s gorgeous but here’s the thing that annoyed me so much when I first started offering this – the registration has to be PERFECT. Even being off by a millimeter looks sloppy, and I had a printer once deliver 150 invitations for a September wedding where the gold foil was shifted just slightly to the left of the embossing and we had to rush reprint everything. The bride cried, I almost cried, my cat knocked over my coffee that morning… it was a whole situation.
Best Paper Types for Embossing
You need thick, sturdy paper with good cotton content. I’m talking 110lb cover weight minimum, but honestly 118lb or 130lb works even better. The paper needs to hold the impression without tearing or looking flimsy. Cotton fiber papers like Crane’s Lettra or Strathmore are ideal because the fibers compress beautifully and hold the shape.
Avoid thin papers obviously, but also be careful with papers that have too much texture already – like a heavy linen finish can fight against the embossing and you won’t get clean edges. Smooth or slightly textured works best. And I always tell couples to avoid dark colored papers for blind embossing because you just can’t see the detail as well, the shadows don’t show up… you want lighter colors ideally.
Paper Weight Recommendations
For the actual invitation card go with 110lb to 130lb cover weight. Reply cards can be slightly lighter at 80lb to 100lb cover. Envelopes don’t usually get embossed on the body but if you’re doing an embossed return address on the flap you want at least a 70lb envelope, preferably the thick baronial style.
The Design Process and What Actually Works
Not everything translates well to embossing and this is where I see couples get disappointed. Super fine details smaller than about 8pt font get lost or look mushy. Thin script fonts can work but they need to be sized up – I usually recommend nothing smaller than 14pt for script, and even then some letterforms just don’t emboss cleanly.
Simple, bold designs work best. Think clean serif fonts, substantial sans serifs, bold monograms, thick borders. Those delicate watercolor florals your bride found on Pinterest? Nah, those need to be printed, not embossed. You can combine techniques though – print the florals and emboss the text.
Leave enough space around embossed elements. You need at least a quarter inch margin from the edge of the paper or the die might crack the edge. Between embossed elements I like to leave at least an eighth of an inch, more if possible.
Fonts That Work Well
Garamond, Baskerville, and Didot are classic serif choices that emboss beautifully. For script fonts I love Copperplate for formal invitations – it’s thick enough to hold up. Edwardian Script can work if sized properly. Sans serif fonts like Futura or Gotham give a modern look and emboss with really clean edges.
Working With Printers and Getting Quotes
You gotta ask the right questions upfront. How much are the dies gonna cost? This is usually a one-time setup fee ranging from like $75 to $300 depending on the complexity. Then there’s the per-piece cost which includes paper, printing time, and labor. For embossing you’re looking at probably $4 to $12 per invitation just for the embossing, not including the paper or other printing.
Ask if they do in-house embossing or send it out. In-house usually means better quality control and faster turnaround. Ask to see samples of their work – specifically samples on the paper stock you’re considering. Paper behaves differently and you want to see how deeply they can emboss without cracking through.
Timeline is important too. Embossing takes longer than flat printing because it’s done in smaller batches and the setup is more involved. I usually tell couples to allow 3-4 weeks for embossed invitations, longer during peak wedding season or if there are multiple colors or techniques involved.
Questions to Ask Your Printer
Can I see the dies before production starts? What’s your policy on reprints if the registration is off? Do you charge for adjustments to the design after I’ve approved it? How many proof prints will I get? What happens if the embossing cracks the paper – is that on me or you?
These questions saved me so much headache over the years. Summer 2021 I had a printer who refused to reprint invitations where the embossing cracked on like 30 pieces out of 200, said it was “normal” and within acceptable range. It absolutely was not normal and I never used them again.
Realistic Budget Expectations
I’m gonna be straight with you – embossing is expensive. For a basic blind embossed invitation with simple printing you’re looking at minimum $8-12 per invitation suite. If you add foil stamping with the embossing, or multiple embossed elements, or thick luxury paper, you can easily hit $15-25 per suite. I’ve seen couples spend $40+ per invitation for elaborate multi-layer embossed designs.
The die cutting setup is usually $100-250 per die, so if you want your names embossed, a monogram embossed, and a border embossed, that’s potentially three different dies. Some designs can combine elements into one die which saves money.
Don’t forget the other pieces in your suite. If you want the reply card embossed, the details card embossed, the envelope flaps embossed – each adds cost. I usually recommend picking one or two elements to emboss for maximum impact without destroying the budget.
Common Problems and How to Avoid Them
Paper cracking is probably the biggest issue. This happens when the embossing is too deep for the paper weight, or the paper is too dry, or the design has sharp angles that stress the fibers. Solution is to use thicker paper, avoid super deep embossing, and make sure your printer stores paper in a humidity-controlled environment.
Uneven impression depth drives me crazy. You’ll see some letters raised higher than others, or one corner of a monogram deeper than the rest. This usually means the dies aren’t level or the pressure isn’t calibrated right. A good printer checks this constantly during the run but you need to inspect your proof carefully.
Registration issues with foil or ink like I mentioned before. The only real solution is working with an experienced printer who has quality equipment. Ask to see samples and don’t go with the cheapest quote if embossing quality matters to you.
Inspecting Your Proof
When you get your proof invitation check it under good light at different angles. Run your fingers over the embossing – does it feel consistent? Look at the edges of the design – are they clean and crisp or mushy? If there’s foil or ink, is it perfectly aligned with the raised area? Check the back of the paper for any breakthrough or cracking.
Don’t approve it if something feels off. I learned this the hard way and now I’m annoyingly picky about proofs.
Combining Embossing With Other Techniques
You can layer embossing with letterpress, foil stamping, edge painting, even digital printing. Some of the most stunning invitations I’ve done used blind embossing for a monogram, letterpress for the text, and hand-painted edges. It’s expensive but wow.
Thermography is sometimes confused with embossing but it’s totally different – that’s when powder is melted onto ink to create a raised effect. It’s cheaper than embossing but doesn’t look or feel the same. You can tell the difference immediately by touch… thermography feels kind of plasticky and shiny while embossing changes the actual paper.
Foil stamping plus embossing is probably the most popular combination. The metallic foil catches light and the embossing adds dimension. Gold, rose gold, and silver are classic choices. I’m seeing more copper and champagne colors lately which are gorgeous with blush or ivory paper.
Envelope Addressing Options
You can’t really emboss directly onto envelope faces because they’re not flat and the dies would damage the envelope structure. But embossing the return address on the back flap is common and looks polished. Or you can emboss a monogram on the flap.
For addressing the fronts you’ll need to do calligraphy, digital printing, or… actually I just remembered I need to call my calligrapher about those November invitations. Anyway, some couples do embossed address labels that they adhere to the envelopes but honestly that looks kind of dated to me unless the whole design is very traditional and formal.
Timing Your Order
Order samples like 4-6 months before you need to mail invitations. This gives you time to see the embossing in person, make changes, and not feel rushed. Once you approve the design, allow 3-4 weeks for production. During peak season (April through October for most of the country) add another week or two.
Rush fees for embossing are brutal because you can’t really speed up the process that much. It’s a manual technique that takes time. I’ve seen rush fees of 50-100% of the printing cost and even then the printer might say no if they’re busy.
Order 15-20% extra invitations beyond your guest count. Embossing has a higher waste rate than flat printing, plus you’ll want extras for keepsakes, last minute additions to the guest list, and mistakes during assembly.
DIY Embossing – Is It Possible?
There are small embossing machines for home use but they’re really limited. You can do small designs, single letters, borders – stuff like that. For full invitation embossing with custom text? Not really feasible. The machines cost $200-500 and you still need custom dies made which eliminates most of the cost savings. Plus the quality doesn’t compare to professional embossing.
I had a bride in 2022 who insisted she was gonna DIY emboss 180 invitations and she gave up after doing like 20. They looked okay but not consistent, and she was so stressed. We ended up finding a printer who could rush the job but it cost her more in the end than if she’d just hired a pro from the start. Sometimes I think watching those crafting videos on YouTube makes everything look easier than it actually is.
Storing and Handling Embossed Invitations
Keep them flat in a cool, dry place. Don’t stack too many on top of each other or the weight can flatten the embossing over time. I learned this when I stored a client’s extra invitations in my garage over a hot summer and the embossing on the bottom ones got partially compressed. Oops.
When you’re assembling the invitation suites, handle embossed pieces by the edges to avoid fingerprints and oils from your skin. Some papers show fingerprints easily especially light colored cotton papers.
For mailing, use envelope liners or tissue sheets between the layers if you have multiple cards in the suite. This protects the embossing from rubbing against other pieces during mailing. And obviously don’t fold or roll embossed invitations – they need to go in envelopes that fit them flat