Planning Guides, Style Guide
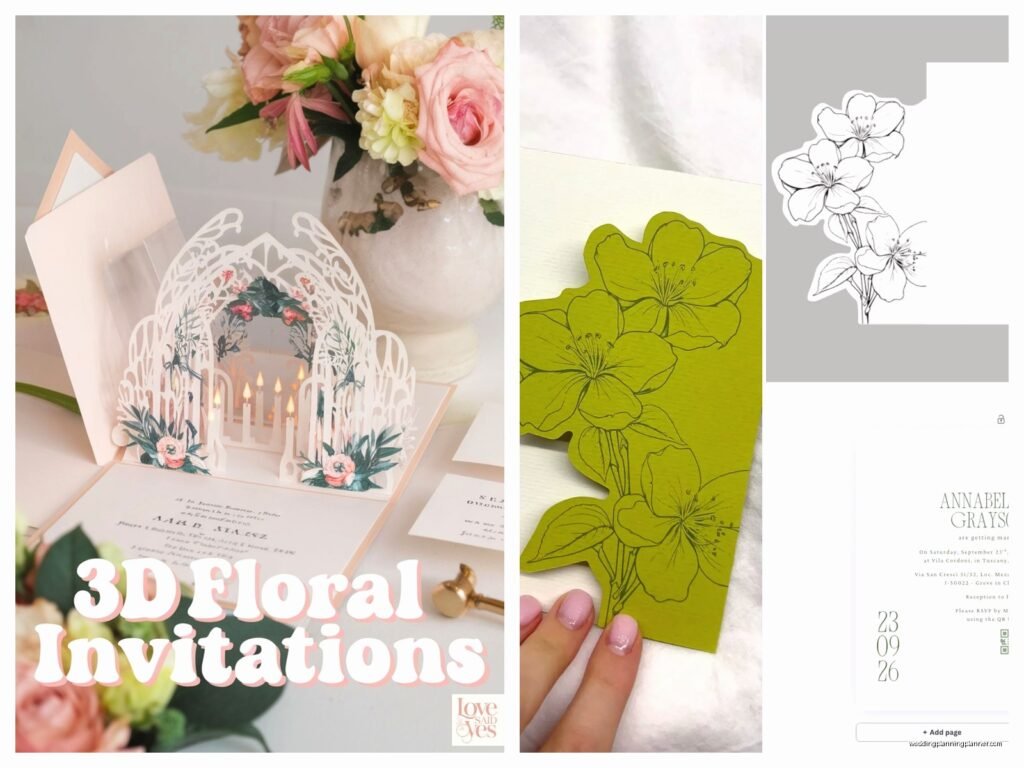
3D Wedding Invitations: Pop-Up Dimensional Designs
Jun
So You Want 3D Pop-Up Wedding Invitations
Okay so 3D pop-up invitations are having a MAJOR moment right now and honestly they’re not going anywhere. I had this bride in spring 2023 who showed me a pop-up castle design she found on Etsy and was like “I need this but make it a beach house” and that’s when I really dove deep into understanding how these work from a planning perspective.
First thing you gotta know is that 3D invitations are not the same as letterpress or foil stamping. They’re actual dimensional pieces that pop up or fold out when someone opens them. We’re talking paper engineering here which sounds fancy but it’s basically strategic cutting and folding.
Types of 3D Designs You Can Actually Do
There are like five main categories I usually show clients:
- Classic pop-ups – the kind where you open a card and something springs up in the middle, like a church or hearts or whatever
- Layered dimensional cards – these have multiple paper layers stacked with foam dots or spacers between them so it creates depth
- Fold-out designs – they unfold into a scene or display, kinda like those old pop-up books
- Box invitations with pop-up elements – the invitation comes in a box and when you lift the lid something pops up
- Slider or pull-tab designs – you pull a tab and elements move or reveal themselves
The layered dimensional ones are honestly the easiest to pull off if you’re working with a tighter budget because they don’t require as much precise engineering. You can literally order die-cut shapes and stack them yourself with foam adhesive squares.
Budget Reality Check
Alright so here’s what annoys me about 3D invitations – everyone sees them on Pinterest and thinks they’ll cost the same as flat invitations. Nah. The pricing is completely different and you need to set expectations early.
Basic flat invitations: $3-8 per suite typically. Simple layered dimensional: $8-15 per suite. Actual engineered pop-ups: $15-40 per suite depending on complexity. Custom fully-designed pop-up scenes: $30-75+ per suite and I’ve seen them go even higher.
Why so expensive? Labor. Even if a machine does the cutting, someone has to assemble these by hand usually. The paper engineering design work is specialized. You’re paying for expertise and time.
I always tell clients to budget at least $12-20 per invitation if they want something truly dimensional. If you’ve got 150 guests that’s $1,800-3,000 just for invitations which is… a lot for some people.
Timing Is Everything With These
You need MORE time than regular invitations. Like way more. Here’s my typical timeline:
6-8 months before wedding: Start researching designs and reaching out to designers or companies that specialize in pop-ups. Don’t wait on this because good paper engineers book up.
5-6 months out: Finalize your design and place your order. If it’s custom you’ll probably go through 2-3 rounds of prototypes.
3-4 months out: Receive your invitations (production takes 6-10 weeks usually for pop-ups, sometimes longer).
2.5-3 months out: Assemble if needed and mail them. Yes you’re mailing earlier than traditional invites because…
The Postage Situation Nobody Warns You About
This is where it gets annoying. 3D invitations almost never qualify for standard first-class letter rates. They’re too thick, too rigid, or they’re non-machinable which means the post office charges extra.
Standard letter postage right now is like $0.68 or whatever. Your 3D invitation? You’re probably looking at $1.50-3.00 PER PIECE depending on weight and thickness. I had one client whose pop-up castles cost $2.76 each to mail and she nearly fainted when we did the math.
Take one fully assembled invitation to the post office BEFORE you order 150 of them. Have them weigh it and tell you exact postage. Also ask if it needs hand-canceling (which means they don’t run it through machines and there’s usually an extra fee).
Pro tip: some designs can be mailed flat with assembly instructions for guests but honestly most people want the wow factor of it arriving fully formed so… you’re gonna pay for postage.
DIY vs Professional – Let Me Be Honest
Can you DIY pop-up invitations? Technically yes. Should you? Depends on your skill level and honestly your patience.
I’ve seen successful DIY dimensional invitations using Cricut machines or Silhouette cutters. You can buy templates on Etsy for like $10-30 and cut them yourself. But you need to be realistic about time – cutting, scoring, folding, and gluing 150 invitations takes HOURS. Like probably 40-60 hours total if you’re doing actual pop-ups.
My cat knocked over an entire stack of partially assembled invitations once during a DIY session with a bride and we both just… stared at the mess for a solid minute before laughing because what else can you do.
If you’re crafty and you’ve got time and you’re only inviting like 50-75 people, DIY might work. If you’ve got a big guest list or you’re already stressed about planning, just hire someone. Your sanity is worth the money.
Working With Designers and Vendors
When you’re reaching out to pop-up invitation designers, ask these questions:
- How many rounds of revisions are included?
- Do you provide a physical prototype before full production?
- What’s the production timeline?
- Is assembly included in the price or is that separate?
- Can you provide samples of previous pop-up work?
- What’s your policy if pieces arrive damaged?
That last one is important because dimensional pieces are more fragile in shipping. Make sure you order 10-15 extra invitations beyond your guest count for damaged ones, mistakes, and last-minute additions.
Design Elements That Actually Work
Not every wedding theme translates well to pop-up format. I’ve learned this the hard way. Here’s what works really well:
Venues with distinct architecture: Barns, churches, gazebos, city skylines – these all pop up beautifully because they have clear shapes and structures.
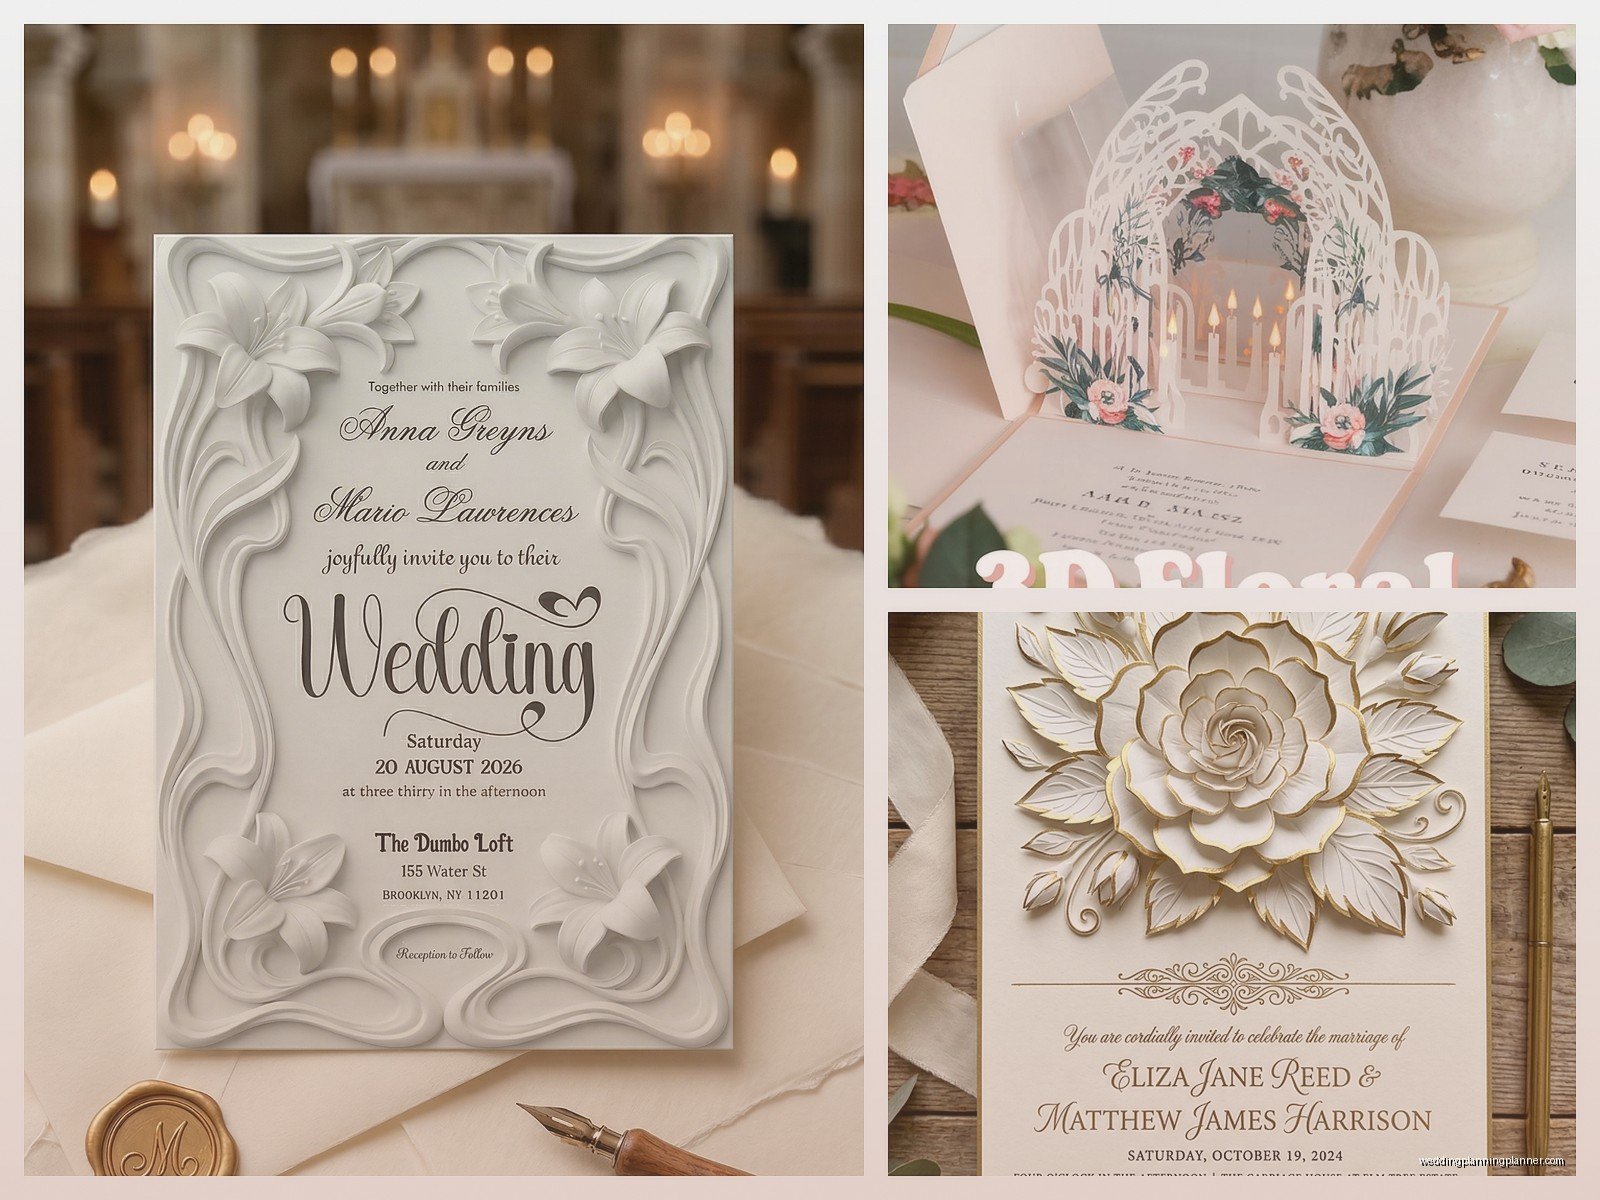
Nature scenes: Trees, flowers, gardens create gorgeous layered effects. A cherry blossom tree with dimensional petals? Chef’s kiss.
Geometric patterns: Modern couples love geometric pop-ups because the clean lines and shapes work perfectly with paper engineering.
Symbolic elements: Hearts, rings, doves, these classic symbols are easy to engineer and instantly recognizable.
What doesn’t work as well: really intricate details, faces or portraits (they look weird when dimensional), super abstract concepts that don’t have physical form.
Color and Paper Choices
The paper you choose affects how well the pop-up functions. Thinner cardstock (around 80-100 lb) works better for the actual pop-up mechanisms because it folds and springs back more easily. Thicker cardstock (110-130 lb) is better for the base card that holds everything.
Metallics and pearlescent papers look AMAZING in dimensional designs because light hits them at different angles and creates this really dynamic effect. But they’re more expensive and sometimes harder to score cleanly.
Color-wise, I usually recommend no more than 3-4 colors in a pop-up design because more than that gets visually chaotic when everything’s jumping out at different depths. Your eye doesn’t know where to focus and it just looks… busy.
The Assembly Process If You’re Doing It Yourself
Okay so if you’ve decided to DIY or partially DIY, here’s basically how it works:
You’ll receive pre-cut pieces (either you cut them yourself with a machine or you order them pre-cut). Then you need to score the fold lines – this is crucial because if you don’t score properly the folds won’t be crisp and the pop-up won’t work right.
Use a bone folder or a scoring tool, not just your fingernail. Trust me on this.
Then you fold according to the template instructions. Valley folds vs mountain folds – sounds like origami because it basically is. If the instructions say valley fold, fold it toward you. Mountain fold, fold it away from you. Getting these backwards will ruin the mechanism.
Gluing is where people mess up most. You need barely any glue – like a tiny dot or a thin line. Too much glue and the paper buckles or the mechanism gets stuck. I use glue dots or a precision tip glue bottle.
Let each invitation dry completely flat under a book or weight before you stack them. Otherwise they stick together or warp.
Envelope Considerations
Your envelopes need to be bigger and sturdier than normal. Most 3D invitations need 5×7 or 6×8 envelopes at minimum, and you’ll want thicker envelope paper (at least 28 lb, preferably 32 lb) so they don’t tear.
Box envelopes are a thing – they’re more like shallow boxes that hold dimensional pieces flat. These are expensive (like $2-4 per envelope) but they protect the invitation really well.
Some couples do outer envelopes with inner sleeves or folders to protect the pop-up during mailing. It adds cost but also adds presentation value.
Testing Before You Commit
Never ever order full quantity without testing. Order 5-10 samples first. Mail one to yourself at your address. Mail one to a friend across the country. See how they arrive.
I cannot stress this enough – what looks perfect in your hands might arrive completely crushed after going through postal machinery. The test mailings will tell you if you need sturdier envelopes, hand-canceling, or a different packaging approach entirely.
Alternatives If Full Pop-Ups Are Too Much
If you love the idea of dimensional invitations but the full pop-up thing is too expensive or complicated, there are middle-ground options:
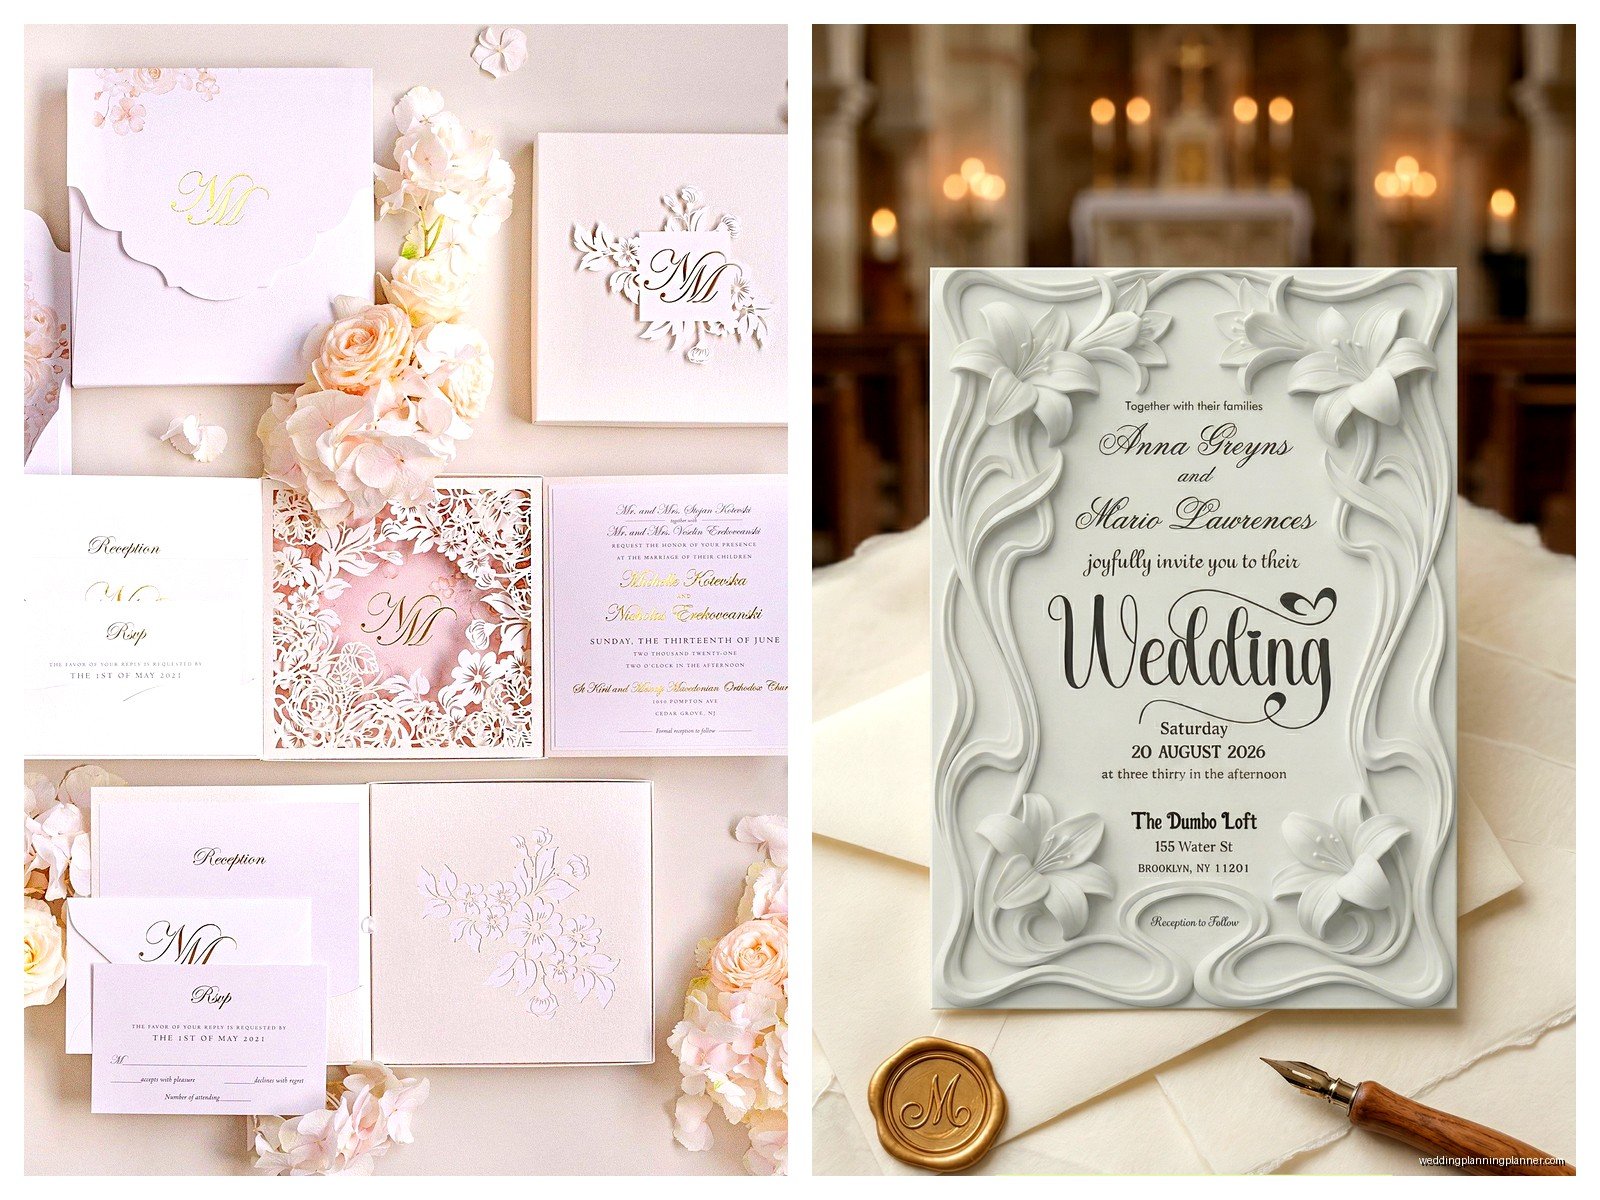
Laser-cut covers: A flat invitation with an intricate laser-cut cover layer creates dimension without actual pop-up mechanics. These run about $6-12 per suite.
Belly bands with dimensional elements: Keep the invitation flat but add a belly band with a dimensional flower or charm attached.
Folded reveal designs: The invitation folds out to reveal information but nothing actually pops up – it’s just a creative fold pattern.
Vellum overlays with layering: Stack vellum over cardstock with offset printing so text appears dimensional even though it’s flat.
These give you some of that wow factor without the full engineering complexity.
What To Include In Your Pop-Up Suite
Here’s the thing about dimensional invitations – you can’t fit as much text on them as flat invitations because you need space for the mechanism to work. So you might need additional enclosure cards for:
- RSVP cards (these should be flat, don’t make your RSVP card dimensional too, that’s overkill)
- Accommodation information
- Reception details if it’s at a different location
- Wedding website card
- Direction cards
Keep the dimensional piece as the main invitation with the essential info – who’s getting married, when, where. Put everything else on standard flat enclosure cards. This also helps with postage costs because you’re not making EVERYTHING dimensional.
Save The Dates vs Invitations
Some couples do dimensional save-the-dates instead of invitations because there’s less information to include and it’s an earlier wow moment. This can actually be smart budgeting – do a simpler dimensional save-the-date for $8-10 each, then do nicer flat invitations later for $5-6 each. You still get a dimensional piece but you’re spreading out the cost.
Or go the opposite way – flat save-the-dates and splurge on dimensional invitations closer to the wedding when you have a better handle on final guest count.
Digital Design Files and Proofs
If you’re working with a designer they should provide digital mockups but honestly it’s really hard to visualize a pop-up from a flat digital file. Always request a physical prototype. Yes it costs extra (usually $50-150) but you need to hold it and see how it actually functions before committing to 150 of them.
Check the prototype for: smooth folding action, clean cuts with no rough edges, proper alignment when closed, sturdy enough structure that it doesn’t collapse, and that all text is readable when the pop-up is in position.
Storage Until You Mail Them
Once your invitations arrive you need to store them flat in a cool dry place. Don’t stack too many on top of each other (no more than 20-25 in a stack) because the weight can compress the bottom ones and mess up the mechanisms.
Keep them away from humidity because paper absorbs moisture and dimensional pieces get wonky when the paper expands or warps. I learned this during summer 2021 when a client stored invitations in her garage in Florida and they arrived at my office looking like sad wilted flowers.
Addressing Envelopes for Dimensional Pieces
You can still do calligraphy or printing on the envelopes just like normal invitations. Just make sure if you’re using a printer that the thicker envelopes actually fit through your printer – test this first with blank envelopes.
If you’re hand-canceling anyway (which you probably are) you have more flexibility with envelope decorations, wax seals, ribbons, etc. Just keep the total thickness in mind for postage calculations.
What Guests Actually Do With These
Real talk – most guests will open it, say “wow that’s cool,” show a few people, then… either keep it as a memento or throw it away. Some people are really into saving dimensional invitations as keepsakes, others aren’t.
Don’t expect everyone to treasure it forever, but DO expect it to make an impact when they first open it. That initial wow moment is what you’re paying for. It sets the tone that this wedding is gonna be special and the couple put thought into details.
I’ve had guests tell me years later they still have a pop-up invitation on their bookshelf because it’s just too pretty to throw away, so some people really do keep them. But manage your expectations that not everyone will.
The other thing that happens is people take photos of dimensional invitations and post them on social media way more than flat invitations. So if you want that social media buzz before your wedding, 3D invitations deliver on that front.