
Planning Guides, Style Guide
Passport Wedding Invitation Template: Travel Theme Downloads
Jul
Okay So Passport Invitations Are Having a Moment
Look, passport wedding invitations have been popular for years but they’re still going strong and honestly I get it. If you’re planning a destination wedding or just love travel, they make so much sense. The template downloads have gotten really good too, which makes my job easier when clients come to me wanting something “unique” but don’t have a $2000 stationery budget.
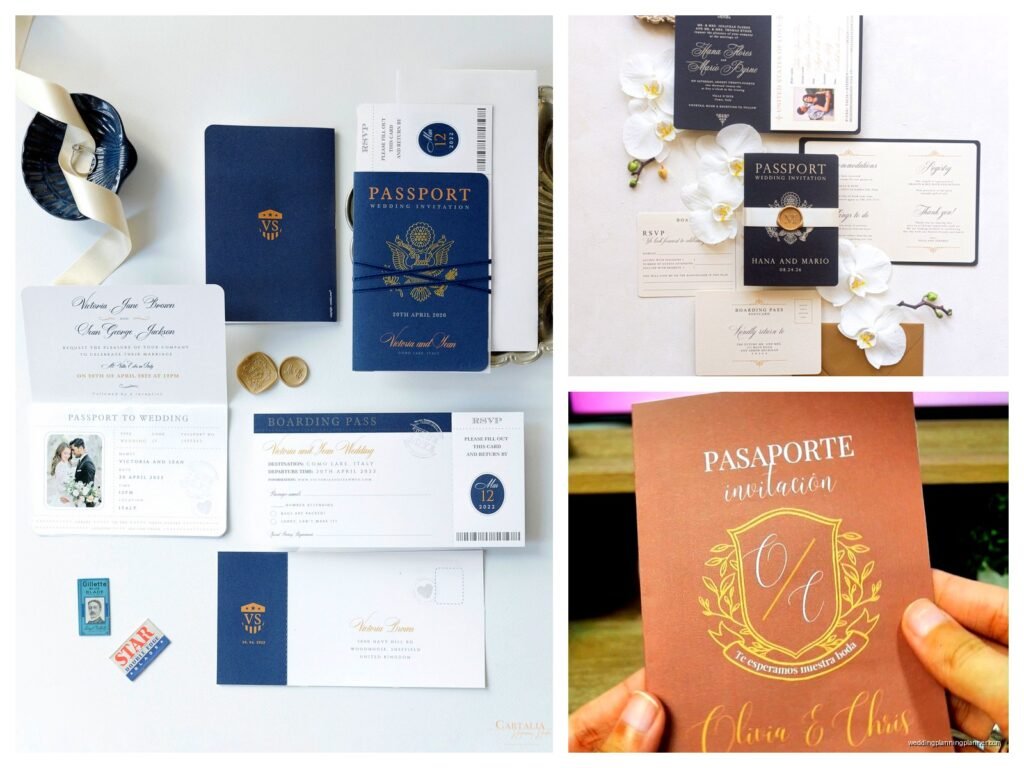
The main thing you need to know is that passport invitations come in basically two formats: the booklet style that actually folds and looks like a real passport, or the flat card that just has passport design elements. Both work, but the booklet ones require way more assembly and I learned this the hard way with a bride in spring 2023 who ordered templates thinking she’d DIY the whole thing and then called me crying two weeks before her wedding because she had 150 invitations that needed to be scored, folded, and bound.
Where to Actually Download These Templates
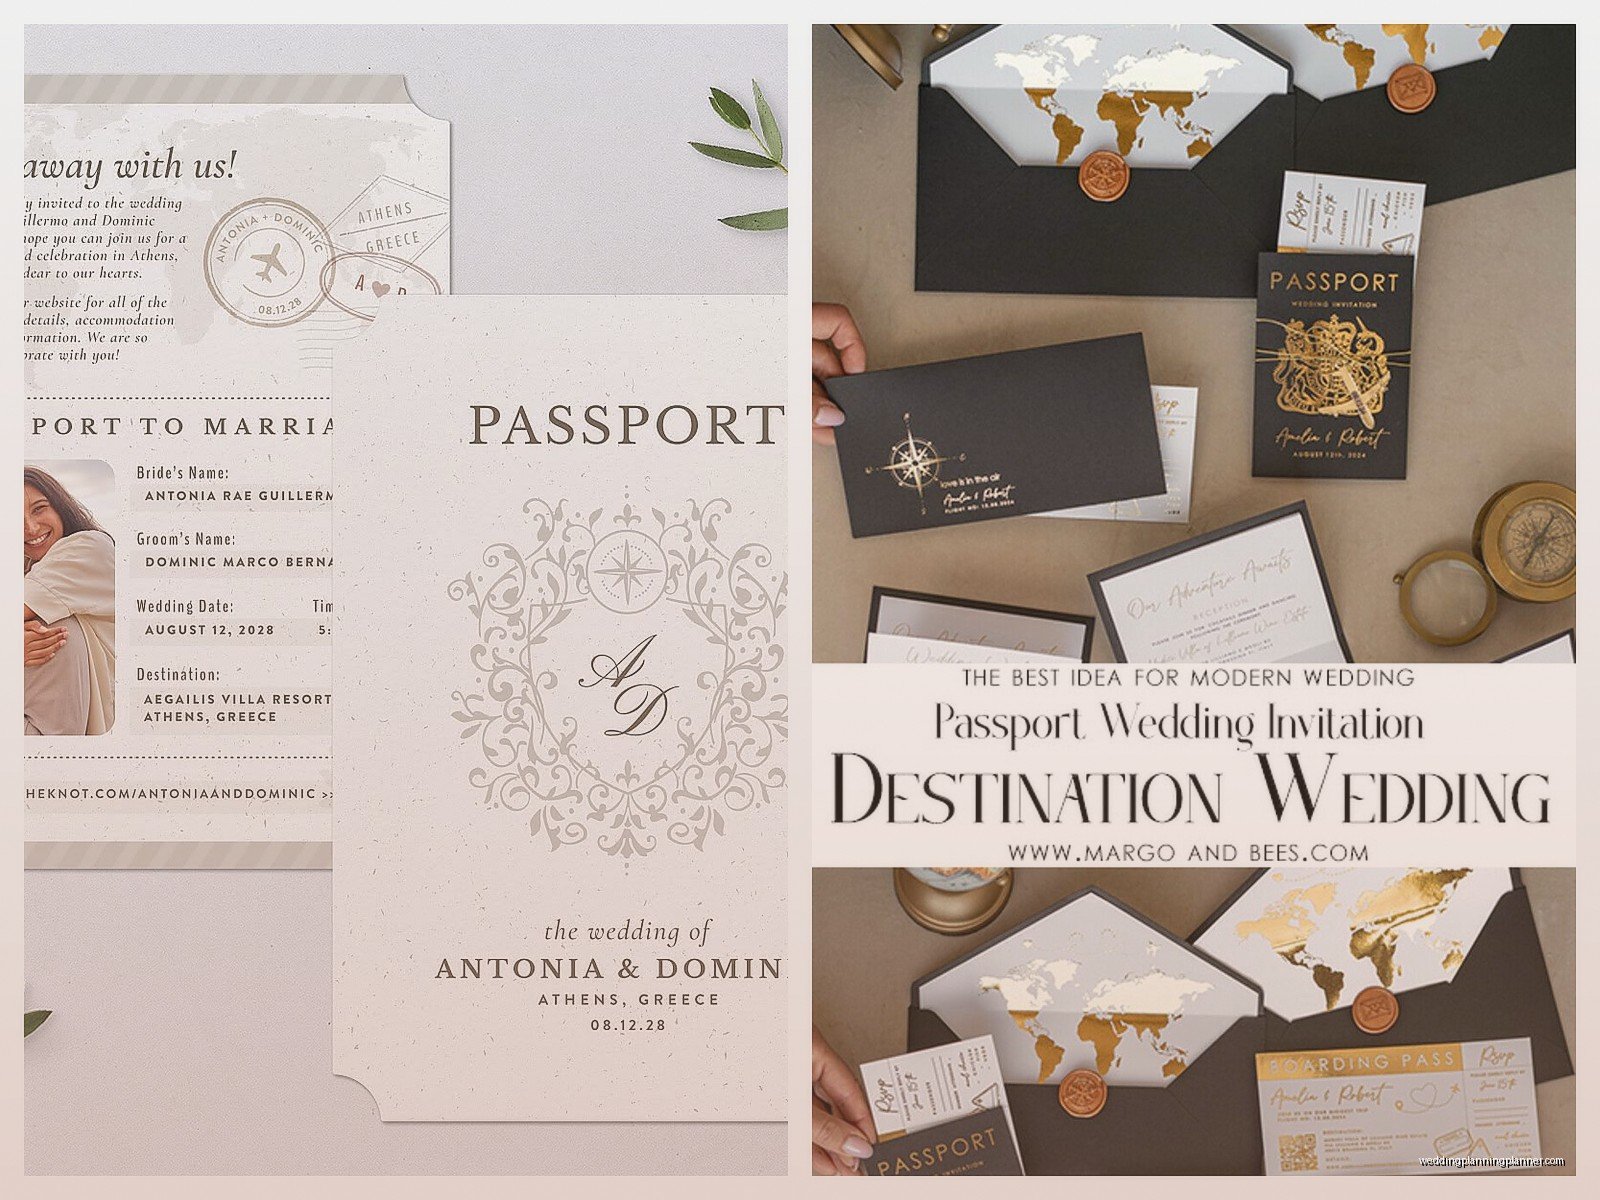
You’ve got options and some are definitely better than others. Etsy is kinda the obvious first stop because there are hundreds of sellers offering passport templates. I usually tell people to look for ones that include multiple pages because a real passport has like… stamps and visa pages and all that, so you want your invitation to feel authentic.
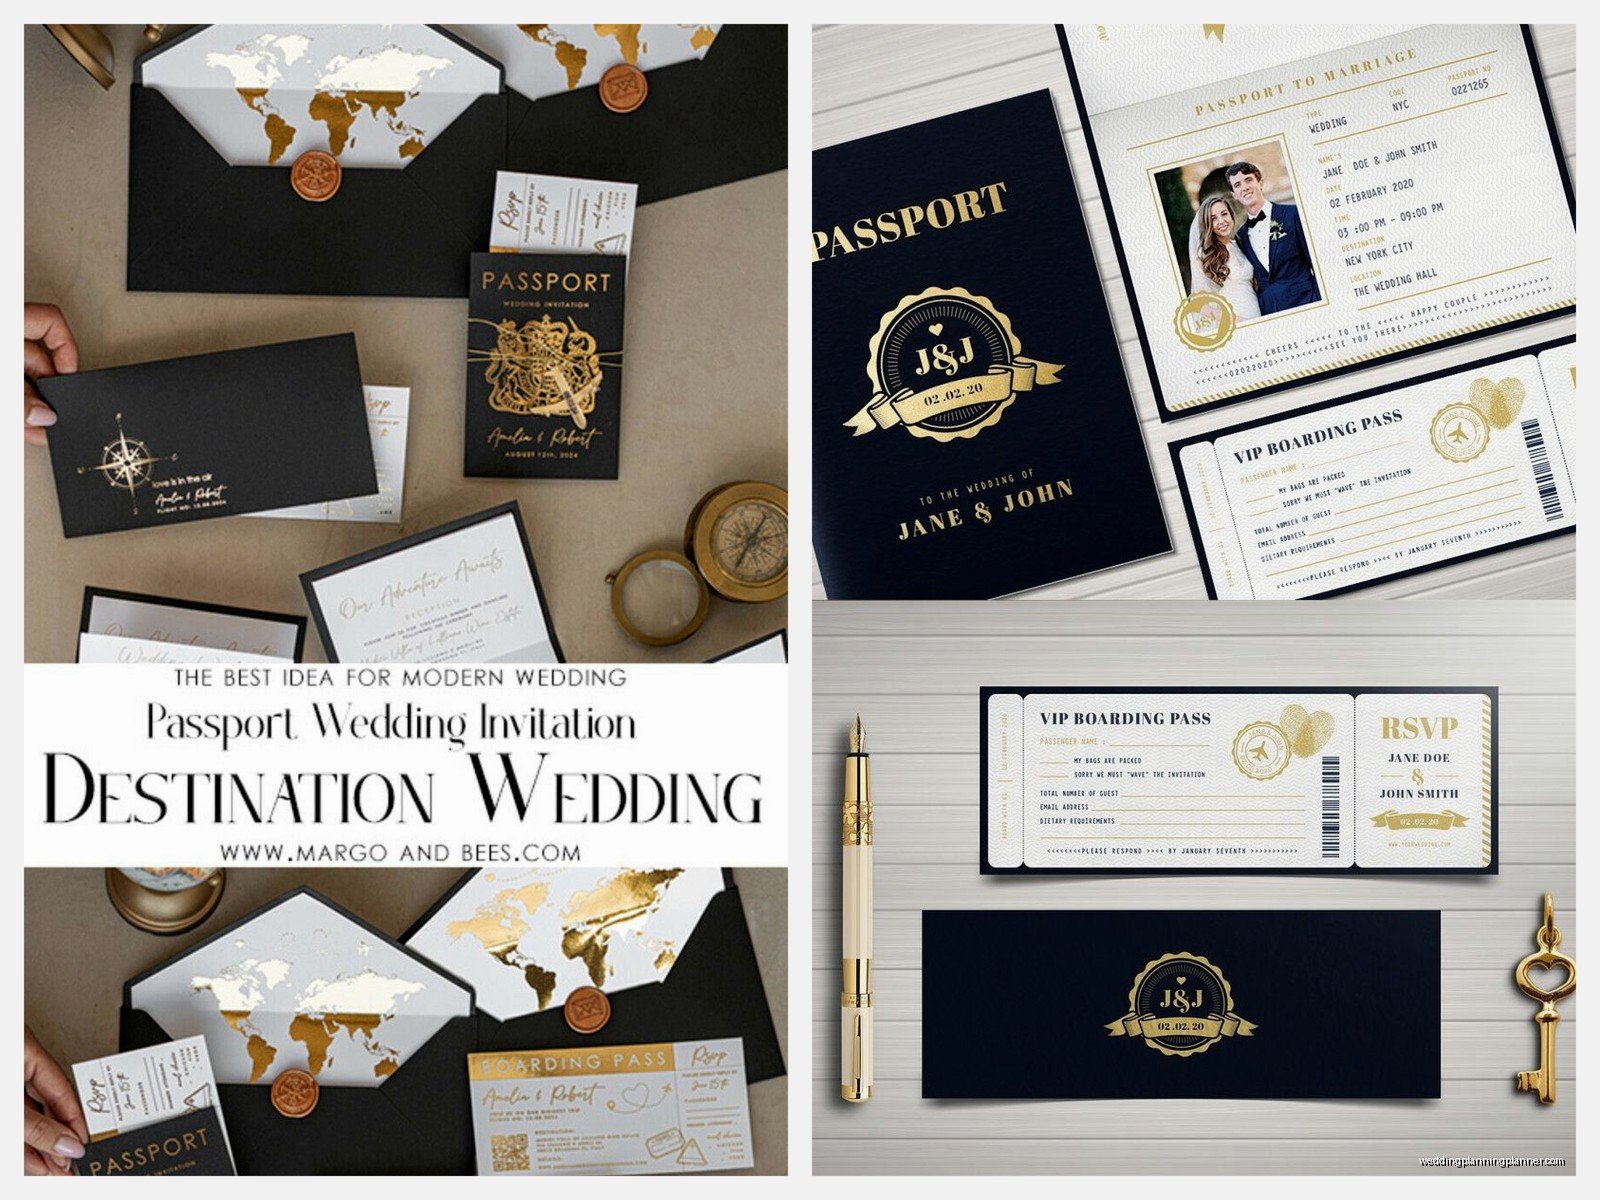
The good Etsy templates will give you editable PDFs or PowerPoint files (I know, PowerPoint sounds weird but it actually works really well for this). You’re looking at anywhere from $8 to $40 depending on how elaborate the design is. The more expensive ones usually include RSVP cards, detail cards, thank you cards, the whole suite.
Creative Market is another solid option and their quality control is generally better than Etsy, though you’ll pay a bit more. Canva also has passport templates now and if you already have Canva Pro, you can customize them right in the browser which is honestly pretty convenient. My cat keeps walking across my keyboard when I’m working in Canva though, so maybe that’s just a me problem.
What Should Actually Be In Your Template Download
This is where people get frustrated and I gotta say it annoys me when sellers don’t clearly list what’s included. You want to make sure you’re getting:
- The cover design (obviously)
- At least 2-3 interior pages for ceremony details, reception info, travel information
- A back cover
- Editable text fields that actually work
- Print guidelines or bleed marks
- Instructions for assembly if it’s a booklet style
Some templates also include boarding pass RSVP cards which are super cute and fit the theme perfectly. I always recommend getting those if they’re offered because consistency matters more than people think.
The Technical Stuff You Can’t Skip
Alright so you downloaded your template and you’re excited and you wanna just start customizing but hold on. First thing is checking what size the template is designed for. Most passport invitations are either 5×7 inches (standard invitation size) or they’re 3.5×5 inches to mimic actual passport dimensions.
If you’re going for the booklet style, you need to understand that you’re basically creating a mini book. The pages need to be printed double-sided in most cases, and the order matters SO much. I’ve seen people print everything and then realize page 2 and page 3 are on the wrong sides of the paper and then they’ve wasted 100 sheets of cardstock.
The flat style is way more forgiving. You just print front and back, cut to size, done. But it doesn’t have that same wow factor when someone opens the envelope, you know?
Customizing Without Making It Look Cheap
This is where I see people struggle the most. You’ve got this beautiful template but then you change the fonts to something weird or you use colors that clash with the vintage passport aesthetic. Here’s what actually works:
Stick with classic fonts. I’m talking Garamond, Bodoni, or even just a clean sans-serif like Helvetica for the details. Real passports aren’t flowery and swirly, they’re official documents. Your invitation should feel the same way even though it’s for a wedding.
For colors, navy blue is traditional passport vibes. Burgundy works too if you want something a bit different. I had a client do forest green once and it was gorgeous but she paired it with gold foil accents which elevated the whole thing.
Don’t go crazy with the personalization either. Yes, you want your names and details in there, but you don’t need to add seventeen photos of you and your fiancé. Maybe one small photo on the “ID page” and call it done.
Printing These Things Without Losing Your Mind
So you’ve customized everything and now you gotta print. You have basically three options here and they all have pros and cons.
Option one is print at home if you have a decent printer. This only works if you’re doing like 30 invitations max and you have a lot of patience. You’ll need good cardstock, probably 80lb or heavier. The thing is your home printer might not handle that weight well and I’ve seen so many jams and smudges… it’s just not worth it for large quantities.
Option two is a print shop like FedEx or a local printer. This is the middle ground option. They can handle the cardstock, they’ll do double-sided printing, and the quality is usually pretty good. You’ll pay maybe $2-4 per invitation depending on how complex it is. Make sure you bring a sample or mockup so they understand what you’re trying to create because sometimes the person at the counter doesn’t really get it and then—
Option three is online printing services like Catprint, Printique, or even Vistaprint though I’m not gonna lie, Vistaprint quality can be hit or miss. These services are great if you upload your files correctly (check their templates and guidelines carefully) and you’re not in a huge rush. Turnaround is usually 5-10 business days plus shipping.
Assembly Time Is Real Time
If you went with the booklet style, congratulations, you’ve signed up for arts and crafts time. You’ll need a bone folder for creasing, a paper trimmer if your prints aren’t pre-cut, and probably some kind of binding method.
Most people use small brads or eyelets to bind the pages together at the spine, which looks really professional. You can get these at any craft store. Some templates are designed to be stapled which is easier but looks less polished in my opinion.
There’s also the glue binding method where you literally glue the pages together along one edge, but this requires specific bookbinding glue and more patience than most people have. I tried this method once during a Netflix binge of The Crown and ended up with glue everywhere including somehow on my couch.
Set aside like 5-10 minutes per invitation for assembly if you’re new to this. Once you get into a rhythm it goes faster but your first few will take forever and probably look a bit wonky.
What About All The Extra Details
Your passport invitation isn’t gonna be alone in the envelope hopefully. You need to think about the whole package. I always recommend including a details card with accommodation information, a wedding website URL, and maybe a simplified timeline of events.
For destination weddings especially, people need to know about room blocks, transportation from the airport, weather expectations, all that stuff. You can design these detail cards to look like luggage tags or travel tickets to keep the theme going.
The RSVP situation is interesting with passport invitations because you can either do traditional RSVP cards or go digital. Honestly in 2024 most people prefer digital RSVPs anyway because it’s easier to track. You can include a small card with your wedding website and RSVP instructions.
One thing that really elevates these invitations is custom stamps or wax seals. You can get a wax seal made with your initials or wedding date and seal the envelope with it. Takes extra time but looks incredibly expensive even though wax seal kits are like $25 on Amazon.
The Envelope Matters More Than You Think
Don’t just shove your beautiful passport invitation into a basic white envelope. Please. I’m begging you. Get colored envelopes that match your theme – navy, burgundy, kraft paper, something with personality.
You can also add envelope liners which is basically a decorative paper that goes inside the envelope flap. These come in templates too and you can usually find them sold with the passport invitation templates. They’re kinda fussy to install but worth it.
For addressing, you can hand write them if your handwriting is decent, use a calligraphy pen, or print labels. There are also services where you can hire someone to do calligraphy addressing but that gets expensive fast. I had one bride spend $800 on envelope addressing which is just… I mean it’s your money but wow.
Common Mistakes I Keep Seeing
People forget to proofread and then send out 100 invitations with the wrong date. Sounds obvious but it happens all the time. Print one test invitation, show it to like five different people, sleep on it, then print the rest.
Another thing is not accounting for postage. Passport booklet invitations are thick and might require extra postage. Take a fully assembled invitation to the post office and have them weigh it before you buy stamps. Nothing worse than having invitations returned for insufficient postage.
Also people underestimate timing. If you’re ordering templates, customizing, printing, and assembling yourself, you need at least 6-8 weeks before you want to mail them. That might sound like a lot but trust me it’s not, especially if you’re working full time and can only dedicate evenings and weekends to this project.
Oh and this is kinda specific but it drove me crazy – someone once used a passport template and put their honeymoon destination as the “arrival city” on the invitation which confused everyone because people thought that’s where the wedding was happening. Be clear about what information goes where.
Digital Passport Invitations Are a Thing Now Too
If the printing and assembly sounds like too much, you can do digital passport invitations. These are animated or interactive PDFs that you email or text to guests. Some of them are really well done with clickable elements and everything.
The downside is they don’t have the same physical impact as receiving something in the mail. But for small weddings or elopements where you’re just notifying people after the fact, digital works fine. Plus it’s way cheaper and faster.
You can find digital templates on Etsy too, usually for less than $20. They typically come as video files or interactive PDFs that you can customize with online tools.
Matching Your Other Stationery
If you’re gonna do passport invitations, you should probably carry the theme through to your other wedding stationery. That means programs, menus, place cards, table numbers – all of it can tie back to the travel theme.
Place cards designed as luggage tags are super popular and easy to DIY. Table numbers can be named after cities you’ve visited together instead of just numbers. Programs can look like boarding passes. There are templates for all of this stuff and once you commit to the theme you might as well go all in.
Your thank you cards should match too. Some passport invitation template packages include thank you card designs which is convenient because then everything coordinates without you having to think about it too much.
