Planning Guides, Style Guide
Passport Wedding Invitations: Destination Travel Theme
Nov
So You Want Passport Invitations For Your Destination Wedding
Okay so passport invitations are absolutely having a moment right now and honestly they’re perfect if you’re doing a destination wedding or even just want that travel vibe. I’ve been doing these for couples since like 2019 and they never get old, though I will say the printing costs can be annoying if you don’t plan ahead but we’ll get to that.
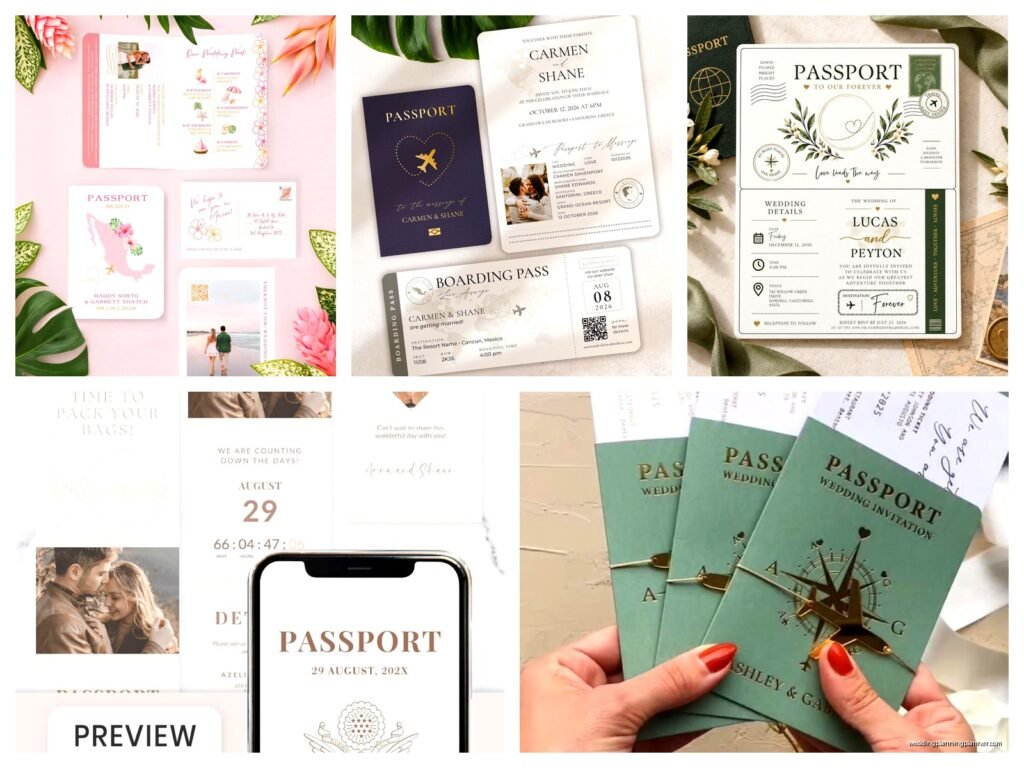
The basic concept is your invitation looks like an actual passport. You’ve got the cover that mimics a real passport – usually in that navy blue or burgundy, sometimes people do custom colors – and then the inside pages have all your wedding details laid out like visa stamps and passport pages. It’s kinda genius because it immediately tells your guests “hey, pack your bags, we’re going somewhere.”
What Goes Inside A Passport Invitation
The front cover should have your names and maybe “Wedding Passport” or just your initials styled like a country code. I had this couple in spring 2023 who wanted their cat’s face embossed on the cover which was… a choice, but hey, their wedding. Inside you’re gonna structure it like actual passport pages.
First page usually has a photo of the couple – think passport photo style, though honestly most people do a nice engagement photo because the stiff passport look is a bit much for a wedding invite. Then you include:
- The “issue date” which is your wedding date
- The “place of issue” which is your venue location
- Ceremony and reception times formatted like departure/arrival times
- Accommodation details as a “visa” section
- RSVP info as a “customs declaration”
- Travel tips and local information as additional pages
You can also add boarding pass RSVP cards, luggage tag save-the-dates, or travel-themed details cards. Some couples go absolutely wild with this theme and create entire booklets. I’ve seen ones that were like 12 pages long which is… look, your guests don’t need that much information, but if you want to spend the money on printing, go for it.
Design Elements That Actually Matter
The devil is in the details with these. You want it to look authentic enough that people get the reference, but not so authentic that it looks like you’re trying to forge documents (which sounds dramatic but I’ve seen some that were TOO realistic and it was weird).
Use design elements like:
- Watermarks or subtle background patterns
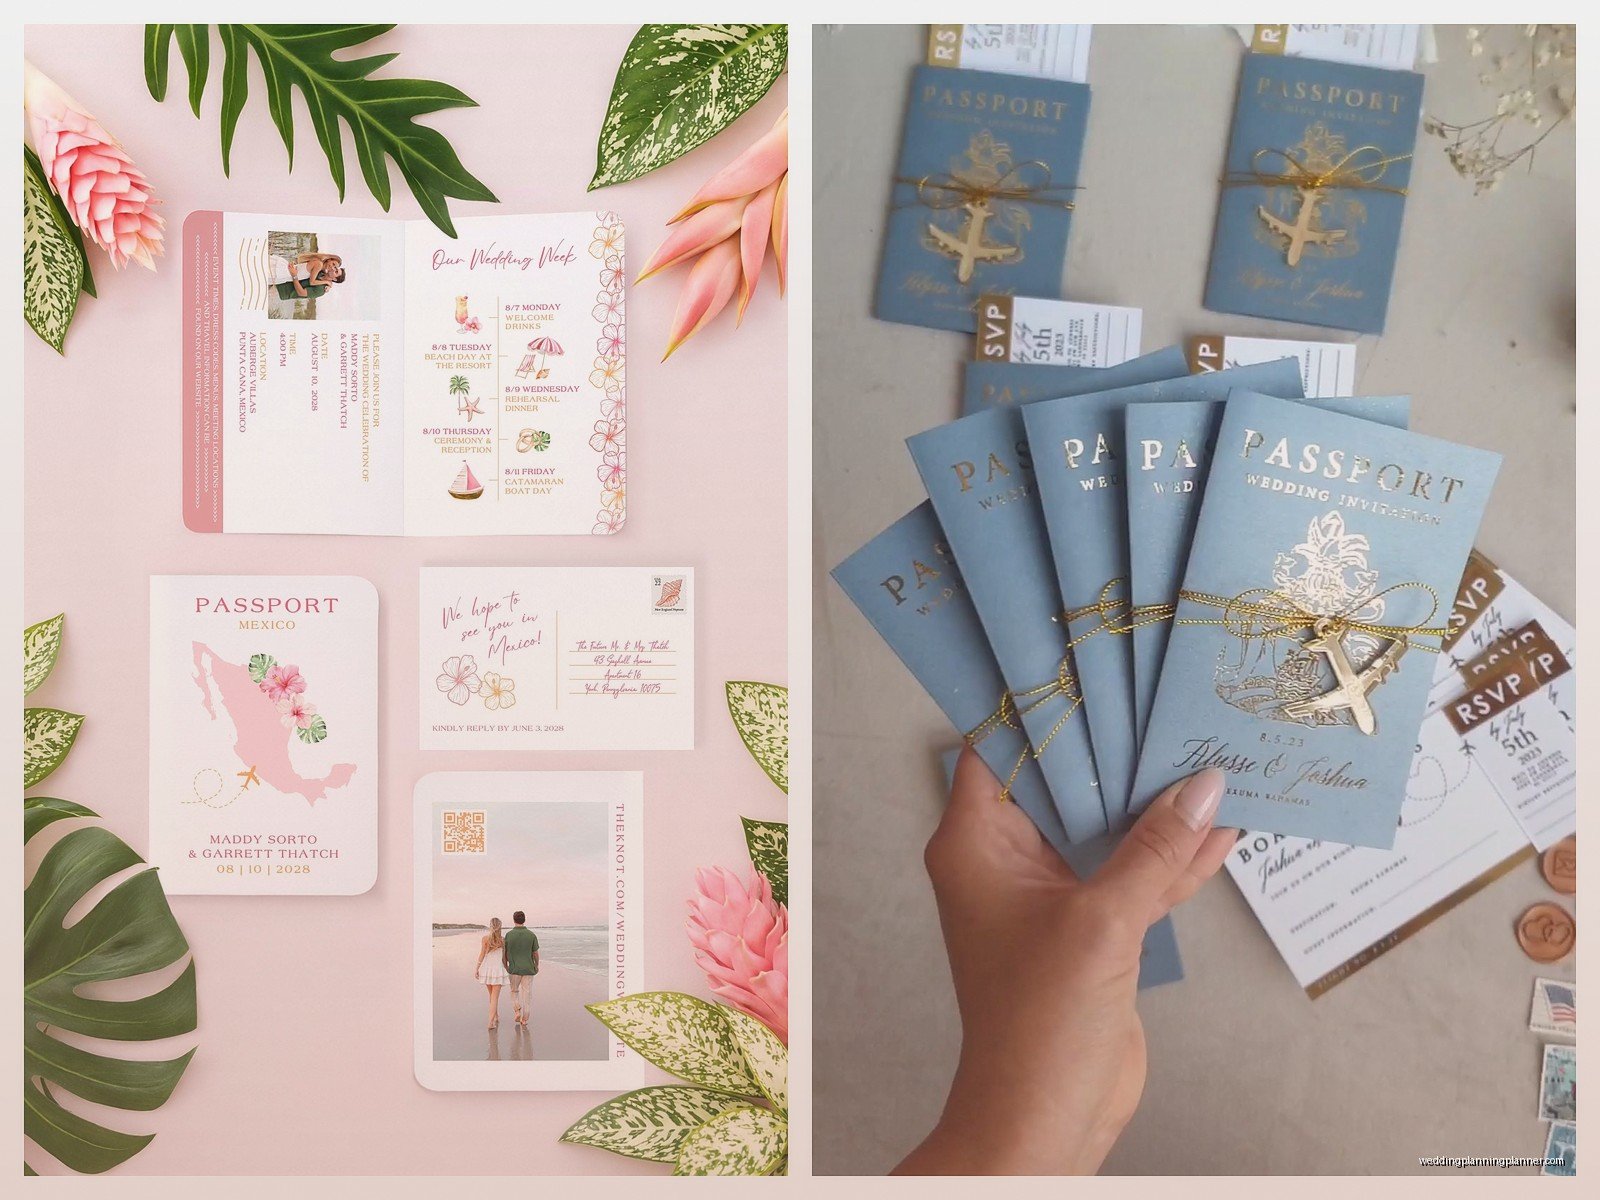
- Gold foil stamping for that official government document look
- Perforated edges if you’re doing tear-off RSVP sections
- Visa “stamps” that represent your relationship timeline or meaningful locations
- A barcode or booking reference number using your wedding date
The stamps thing is where you can get really personal. I worked with a couple who met in college, got engaged in Paris, and were getting married in Mexico. We created three custom stamps for those locations and it told their whole story without being cheesy about it. Well, maybe a little cheesy, but the good kind.
Paper Quality And Printing (This Is Where It Gets Expensive)
Alright so here’s what really annoyed me when I first started doing these – the paper quality makes or breaks the whole thing. You cannot use regular cardstock for passport invitations. It looks cheap and flimsy and defeats the entire purpose.
You need something with texture and weight. I usually recommend:
- 110lb or heavier cardstock for the cover
- Linen or felt textured paper gives that official document feel
- Matte finish, not glossy (passports aren’t shiny)
- For the inside pages, you can go slightly lighter, maybe 80lb text weight
Printing methods matter too. Digital printing is fine for most elements, but if you want that really elevated look, letterpress or foil stamping on the cover makes a huge difference. I’m talking like $8-15 per invitation difference, which adds up fast when you’re inviting 150 people, but… it does look incredible.
You’re looking at roughly $5-7 per invitation for basic digital printing on decent paper, or $12-20+ if you’re doing foil stamping, letterpress, or multiple special finishes. And that’s just the invitation itself, not including envelopes, RSVP cards, details cards, postage (which is gonna be higher because these are thick), and assembly time.
Assembly Is Gonna Take Forever
Nobody warns you about this part. If you’re doing the booklet style with multiple pages, you need to either bind them or use a saddle stitch (that’s the staple down the center fold). I spent an entire weekend in summer 2021 helping a bride assemble 200 of these things because her wedding was in three weeks and she’d underestimated the time, and let me tell you, my hands were cramping and I couldn’t watch Netflix properly because I was so focused on getting the pages aligned.
You can pay a print shop to do assembly, which I always recommend if your budget allows. They have the tools and experience. But if you’re DIY-ing it:
- Set up an assembly line system
- Get a long-reach stapler if you’re binding them yourself
- Print a few test copies first to make sure everything lines up
- Recruit friends and family (bribe them with wine and snacks)
- Give yourself at least 2-3 weeks for assembly
The cover usually wraps around the inside pages, so you need to score the fold lines properly or it looks sloppy. A bone folder is like $3 and makes this so much easier.
What Information You Actually Need To Include
Beyond the obvious wedding date, time, and location, destination wedding invitations need more details than regular ones. Your guests are traveling, possibly internationally, possibly taking time off work, definitely spending money. They need information and they need it early.
Include in the main invitation or details cards:
- Hotel room blocks with booking codes and deadlines
- Airport information and transportation options
- Weather expectations for that time of year
- Dress code (be specific – “beach formal” means different things to different people)
- Passport/visa requirements if you’re going international
- Your wedding website URL for additional details
- Itinerary if you’re doing multiple events
Actually, you know what, don’t try to cram all of this into the passport invitation itself. Use the passport for the main event details and the romantic stuff, then include a separate details card or direct people to your website. I see couples try to fit everything into the passport design and it becomes cluttered and hard to read.
Matching Suite Elements
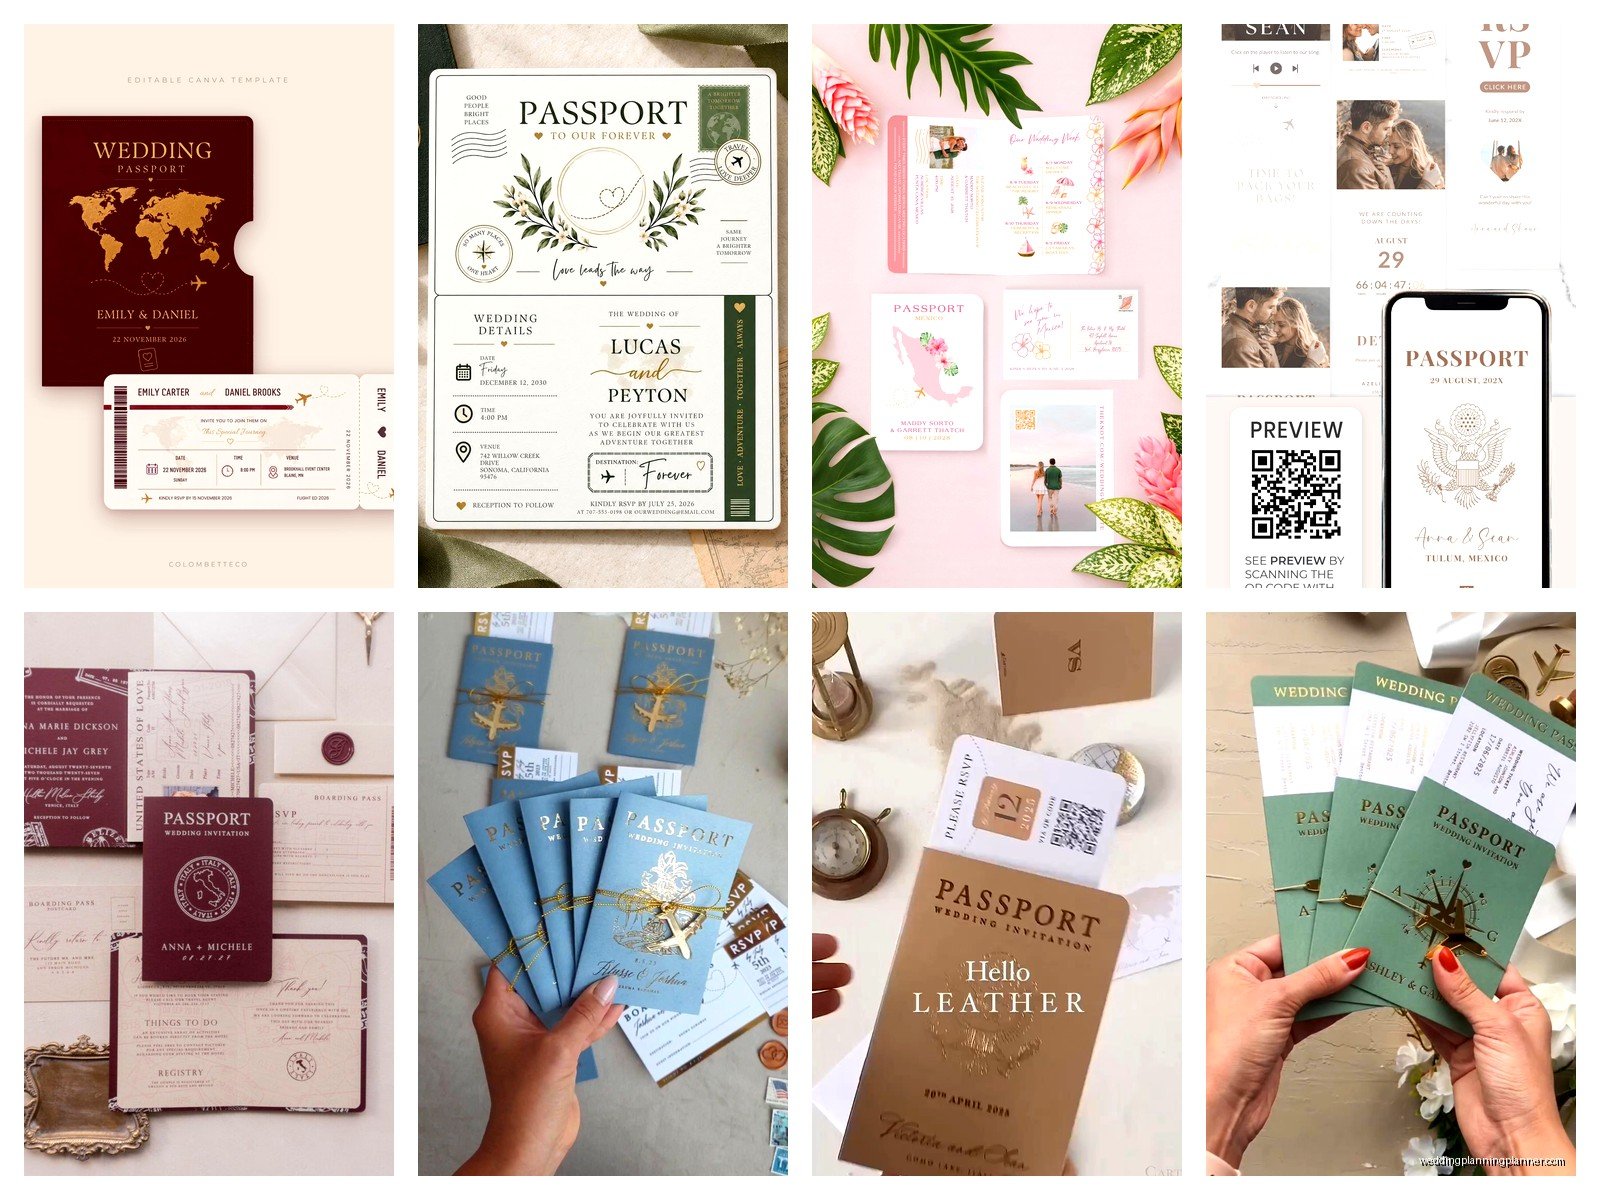
If you’re going full travel theme, you can carry it through to:
- Boarding pass save-the-dates (send these early, like 8-10 months out for destination weddings)
- Luggage tag escort cards at the reception
- Vintage map table runners or centerpieces
- Globe guest book where people sign countries they’ve visited
- Postcard thank you cards
I’m not saying you need to do all of this – actually please don’t, it can get theme-overload real quick – but picking 2-3 elements creates cohesion without being too much.
Timeline For Ordering And Sending
Destination weddings need longer lead times for everything. Here’s what I tell my clients:
Save-the-dates should go out 8-10 months before the wedding, maybe even a year if it’s during peak travel season or a holiday weekend. Your actual passport invitations should be mailed 3-4 months before the wedding date. This gives people time to request time off work, book flights when prices are still reasonable, and sort out travel documents if needed.
For the invitations themselves, order them at least 6-8 weeks before you need to mail them. This gives you time for:
- Proofing (always get a physical proof, screen colors lie)
- Printing (2-3 weeks depending on complexity)
- Assembly (1-2 weeks if you’re doing it yourself)
- Addressing envelopes (either by hand or printed)
- A buffer for when something inevitably goes wrong
Something always goes wrong. Always. I had a printer once mix up two orders and we got passports for a wedding in Cabo but with information for a wedding in Italy and didn’t catch it until the bride opened the box. Had to rush reprint everything and I aged like five years in those 48 hours.
DIY Versus Professional Design
You can find passport invitation templates online on Etsy, Creative Market, or even Canva now has some. These run anywhere from $15-50 for a template you customize yourself. This works if you’re crafty and have design software knowledge, but be honest with yourself about your skill level.
I’ve seen some truly tragic DIY attempts where the fonts are all wrong (don’t use Comic Sans on a passport invitation, I’m begging you), the spacing is off, or the colors are… just no. If you’re not confident in your design abilities, hire someone. A professional designer who specializes in wedding stationery will charge $300-800+ for custom passport invitations, but they’ll handle all the technical stuff like bleed lines, color profiles, and print specifications.
There’s also a middle ground – you buy a template and then pay a designer to customize it for you, which is usually cheaper than fully custom design.
Envelope And Postage Considerations
These invitations are thick. Like, really thick, especially if you’re doing the booklet style with multiple pages. That means:
- You need sturdy envelopes, probably A7 or larger depending on your passport dimensions
- You’re definitely paying extra postage – take a fully assembled invitation to the post office to get it weighed before you buy stamps
- Consider hand-canceling (asking the post office to manually process them instead of running them through machines) to prevent damage
The standard Forever stamp isn’t gonna cut it. You’re probably looking at $2-3 per invitation in postage, maybe more if you’re doing international or if it’s particularly thick. This adds up fast and people always forget to budget for it.
Also, if you’re doing a destination wedding abroad, figure out your mailing logistics early. Are you mailing from the US to all guests? Mailing from the destination country? Meeting in the middle somehow? International postage is expensive and slow, so plan accordingly.
Common Mistakes People Make
I’ve seen these errors more times than I can count:
Making it too literal. You don’t need to replicate every single element of a real passport. It’s a wedding invitation, not an actual travel document. Keep the design clean and elegant, not cluttered with unnecessary details.
Forgetting about older guests. Make sure your text is large enough to read easily. I know you want that authentic small-print passport look, but your grandmother shouldn’t need a magnifying glass to find out when your wedding is.
Not considering weight and thickness during design. Design choices affect printing and postage costs. That extra page you want to add? That’s additional printing, additional postage, additional assembly time.
Skipping the proofing stage. Always, always, ALWAYS get a physical proof before printing 150 invitations. Colors look different on screen versus paper. Text that seems fine on your computer might be too small in print. Mistakes are expensive to fix after you’ve printed everything.
Working With A Stationery Designer
If you’re hiring someone (hi, that could be me), here’s what makes the process smooth. Come to your first meeting with:
- Your wedding date, location, and venue name
- Guest count estimate
- Budget for invitations (be honest about this upfront)
- Examples of passport designs you like (Pinterest is your friend)
- Your wedding colors and overall aesthetic
- Timeline for when you need them
A good designer will ask you about your relationship story, how you met, where you’ve traveled together, meaningful locations – all of this informs the design. Those custom visa stamps I mentioned earlier? That comes from actually talking about your relationship, not just filling out a form.
The design process usually takes 2-4 weeks with revisions. You’ll typically get 2-3 rounds of revisions included, so don’t nitpick every tiny thing in round one, but also don’t say everything looks perfect if it doesn’t because you’re wasting a revision round.
Color Choices And Customization
While traditional passports are navy, burgundy, black, or green, your wedding invitations can be whatever color fits your wedding palette. I’ve done blush pink passports, sage green, even a gorgeous deep purple for a couple getting married in Napa Valley.
Just make sure there’s enough contrast between your text and background. Light text on a light background looks elegant in your head but is impossible to read in reality. This seems obvious but you’d be surprised how often I have to talk clients out of white text on cream paper or something equally low-contrast.
Metallics work really well for this theme – gold or rose gold foil stamping, metallic envelopes, wax seals with your initials. It elevates the whole thing and gives it that luxury travel vibe. Though wax seals add thickness which means more postage, so there’s that trade-off again… everything with wedding invitations is a trade-off between what looks good and what costs money.
Digital Alternatives
Some couples are doing digital passport invitations now, especially for smaller destination weddings or when they’re trying to be more eco-friendly. These can be interactive PDFs or even custom websites designed to look like a passport.
Honestly? I’m not the biggest fan. There’s something about receiving a physical invitation that feels special and important, especially for a destination wedding where you’re asking people to spend significant money and time. A digital invitation feels less… I don’t know, less committed somehow? But I also understand budget constraints and environmental concerns, so it’s a personal choice.
If you do go digital, make sure it’s mobile-friendly because most people will view it on their phones. And still send something physical, even if it’s just a simple card with the date and website URL.
The response rate for digital RSVPs is actually lower than physical ones in my experience, which is counterintuitive because clicking a button should be easier than mailing a card, but people forget or put it off. You’ll probably need to follow up more.