Planning Guides, Style Guide
Custom Invites: Personalized Design & Printing Services
May
Getting Started With Custom Invites
So the biggest thing you gotta understand about custom invitations is that they’re not just fancy cards—they set the literal tone for your entire event. I learned this the hard way back in spring 2023 when a bride came to me three weeks before her wedding with generic invites from a big-box store and wondered why the RSVPs were all over the place and guests kept asking her basic questions about the dress code. The invitation is your first communication, and if it’s confusing or doesn’t match your vibe, people show up confused.
Custom design means you’re starting from scratch or heavily modifying existing templates. It’s not just picking a design from a catalog and filling in your names. You’re choosing paper weight, fonts, colors that actually match your bridesmaid dresses or event theme, the layout, whether you want letterpress or digital printing, envelope liners, wax seals—like the options are actually overwhelming if you haven’t done this before.
Timeline: When To Start This Whole Process
You need way more time than you think. Like, way more. For a wedding, I tell clients to start the invitation process 6-7 months before the event. That gives you:
- 2-3 weeks to finalize your design and go back and forth with the designer
- 2-3 weeks for printing (longer if you’re doing letterpress or foil stamping)
- 1 week for assembly if you’re doing layers, belly bands, wax seals, etc.
- Time to actually address everything—people forget this takes FOREVER
- Mailing 8-10 weeks before the event (12 weeks if it’s a destination thing)
For other events like milestone birthdays or corporate gatherings, you can condense this a bit, but not by much. The design and printing phases don’t really speed up just because it’s not a wedding.
Finding The Right Designer or Service
Okay so you‘ve got basically three routes here, and each has pros and cons that nobody really explains clearly.
Independent Stationery Designers
These are people like me who do this full-time or as a serious side business. You’re gonna pay more—usually $800-$3000+ for a full wedding suite depending on complexity and quantity—but you get something totally unique. I work with clients on color matching their exact Pantone swatches, incorporating custom illustrations, even using their handwriting for certain elements.
The annoying part about working with independent designers (and this drove me crazy when I was first starting out and didn’t know how to communicate it) is that revisions cost time and money. Most designers include 2-3 rounds of revisions, but if you keep changing your mind about the font or the layout… that’s gonna cost extra. Just be decisive, or at least trust your designer‘s expertise.
Online Design Services
Places like Minted, Paperless Post (for digital), or Zazzle give you templates you can customize. They’re cheaper—maybe $200-$600 for a full print order—and faster. The quality is actually pretty good now. I used Minted for my own birthday party last year because I was so swamped with client work that I couldn’t deal with designing my own stuff, and honestly? They turned out great.
The limitation is that you’re working within their template structure. You can change colors and fonts and text, but you can’t usually move elements around or add custom illustrations or… you’re just kinda boxed in.
Local Print Shops With Design Services
This is the middle ground. You work with an in-house designer at a print shop, so they understand what’s actually possible with their equipment. Pricing varies wildly depending on your area, but it’s usually less than an independent designer and more flexible than online templates.
The quality of design varies a lot here. Some print shop designers are incredible, some are just okay at laying out text and clipart. Ask to see portfolios before committing.
What Information You Actually Need Ready
Before you even contact a designer, get your details together. I can’t tell you how many times clients come to me with like… half the information and then we have to pause the whole project. You need:
- Full names (spelled correctly—check IDs if you’re unsure)
- Date and exact time
- Complete venue address
- Dress code
- Your wedding website URL if you have one
- RSVP deadline and method
- Registry information if you’re including it (though I usually recommend keeping this on the website)
- Any accommodation block details
- Parent names if you’re doing formal wording
For the design direction, create a Pinterest board or folder of invites you like. But here’s the thing—don’t just save stuff randomly. Save things that have similar vibes or specific elements you want. Tell your designer “I like the font on this one, the layout of this one, and the floral illustration style on this one” rather than just dumping 47 pins on them and saying “something like these.”
Paper and Printing Methods
This is where it gets technical and honestly where most people’s eyes glaze over, but it matters for your budget and the final look.
Paper Weight and Types
Standard cardstock is 80-100 lb cover weight. It’s fine, it’s what most online services use. If you want something sturdier that feels expensive, go for 120-130 lb. Cotton paper (like Crane’s Lettra) feels amazing and looks high-end but costs more.
I’m obsessed with textured papers—linen, felt, even handmade papers with flower petals—but they don’t always play nice with certain printing methods, so you gotta check compatibility first.
Printing Methods
Digital printing is the most affordable and versatile. Modern digital presses produce really crisp colors and can handle photographs beautifully. There’s no setup fee usually, so it’s great for smaller quantities or if you need to print more later.
Letterpress is that gorgeous pressed-into-the-paper look. It’s expensive—like, really expensive—because it requires metal plates and specialized equipment. Expect to add $800-$2000+ to your budget for letterpress. It’s stunning though. I did a wedding invitation suite in summer 2021 with navy letterpress on thick cotton paper with gold edge painting and I still think about those invites.
Foil stamping adds metallic foil in your design. It catches light beautifully and photographs well. It’s cheaper than letterpress but still requires plates and setup, so you’re looking at an extra $300-$1000 depending on how much foil coverage you want.
Thermography creates raised printing that looks kinda like letterpress but isn’t. It’s a budget-friendly option that still feels fancy. The texture is slightly plasticky rather than pressed, but most guests won’t know the difference.
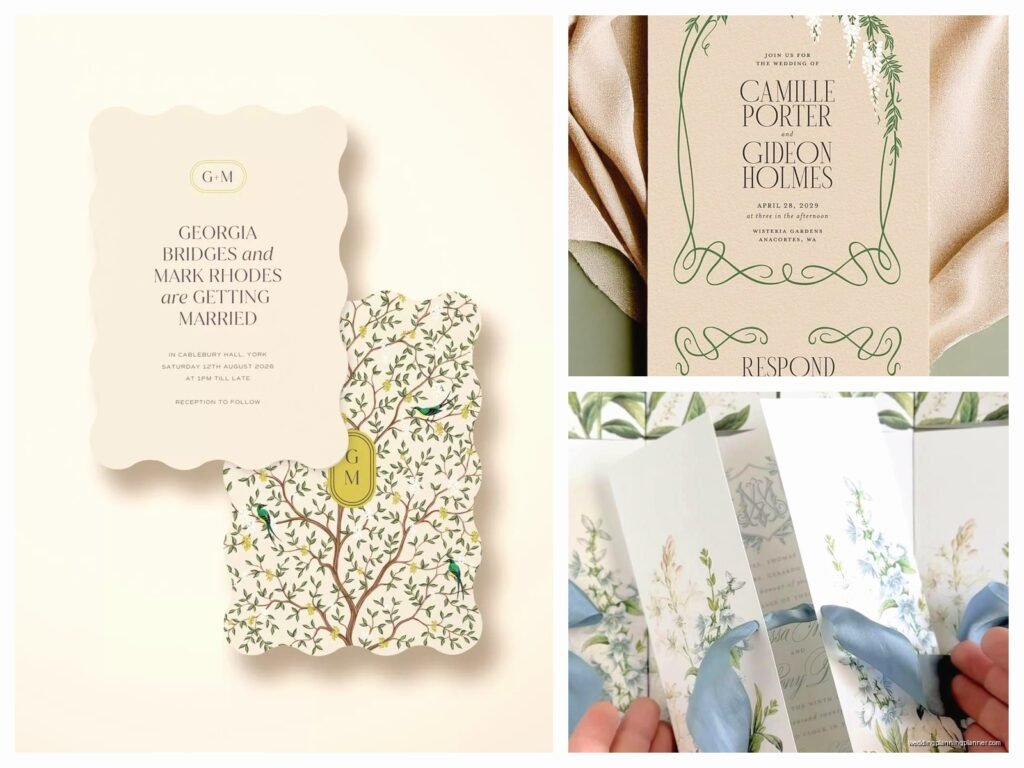
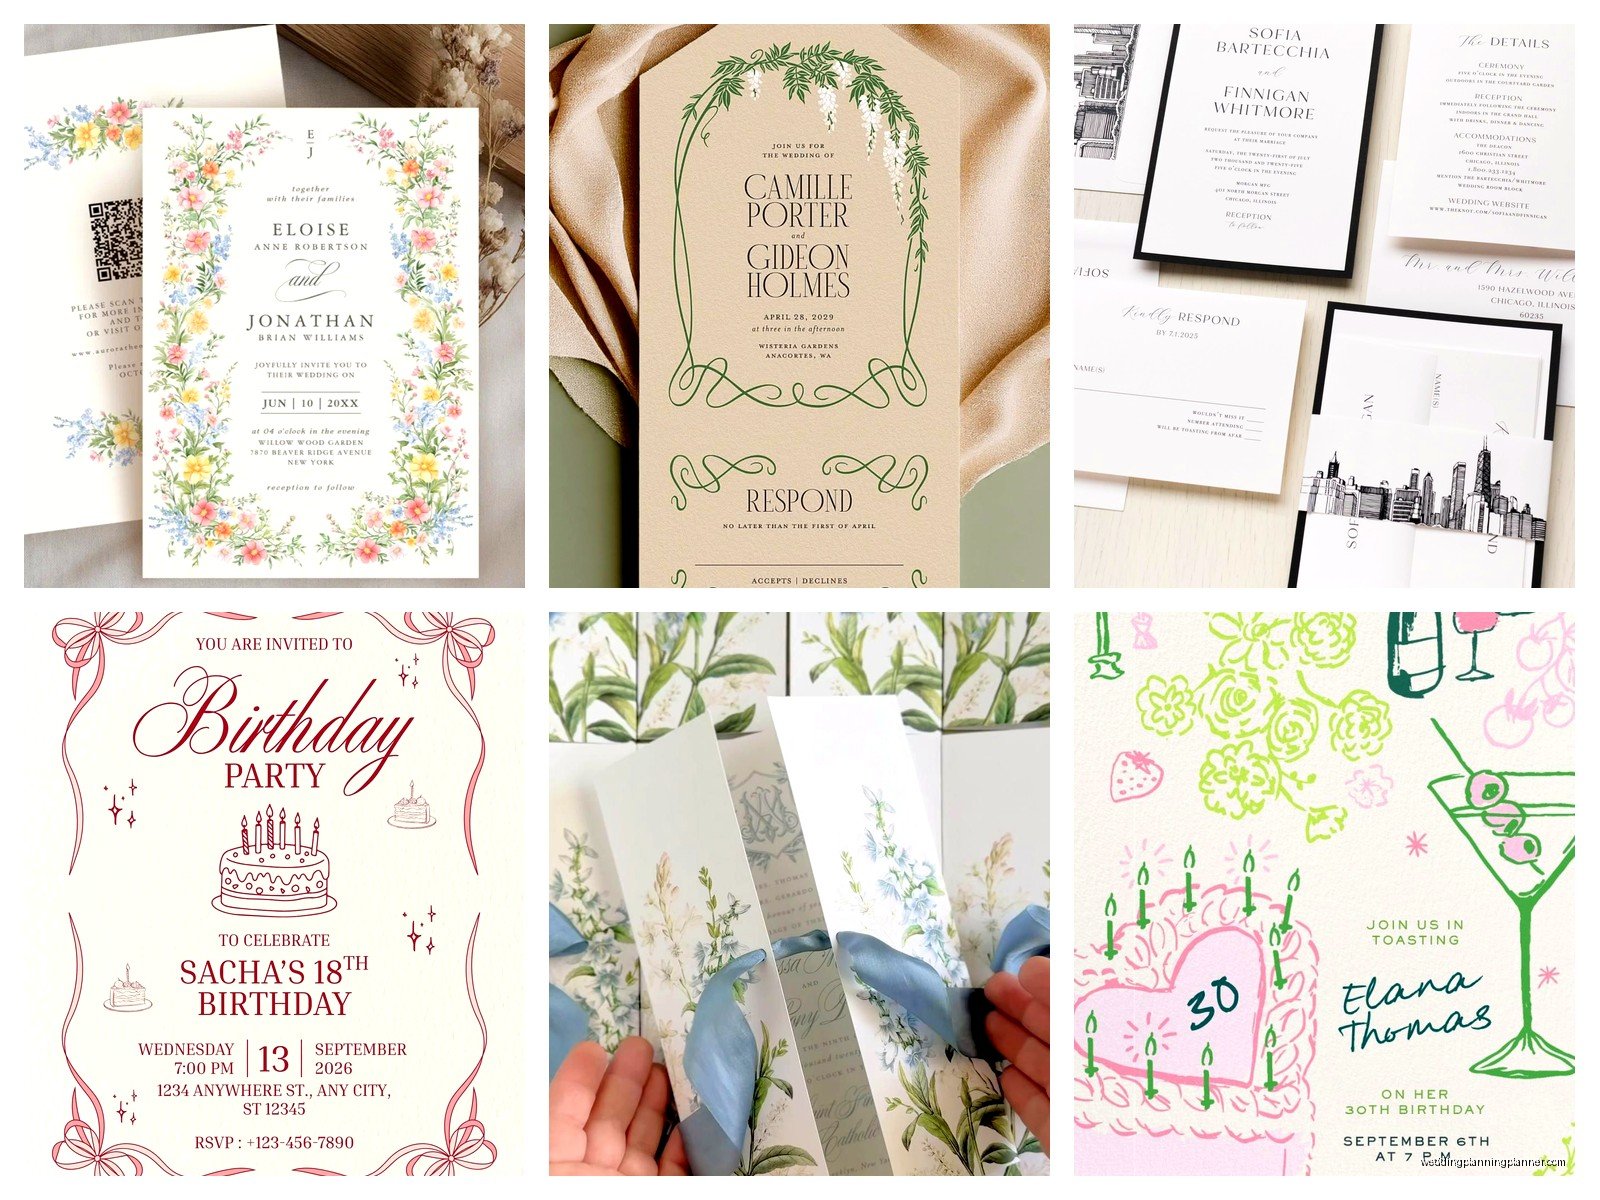
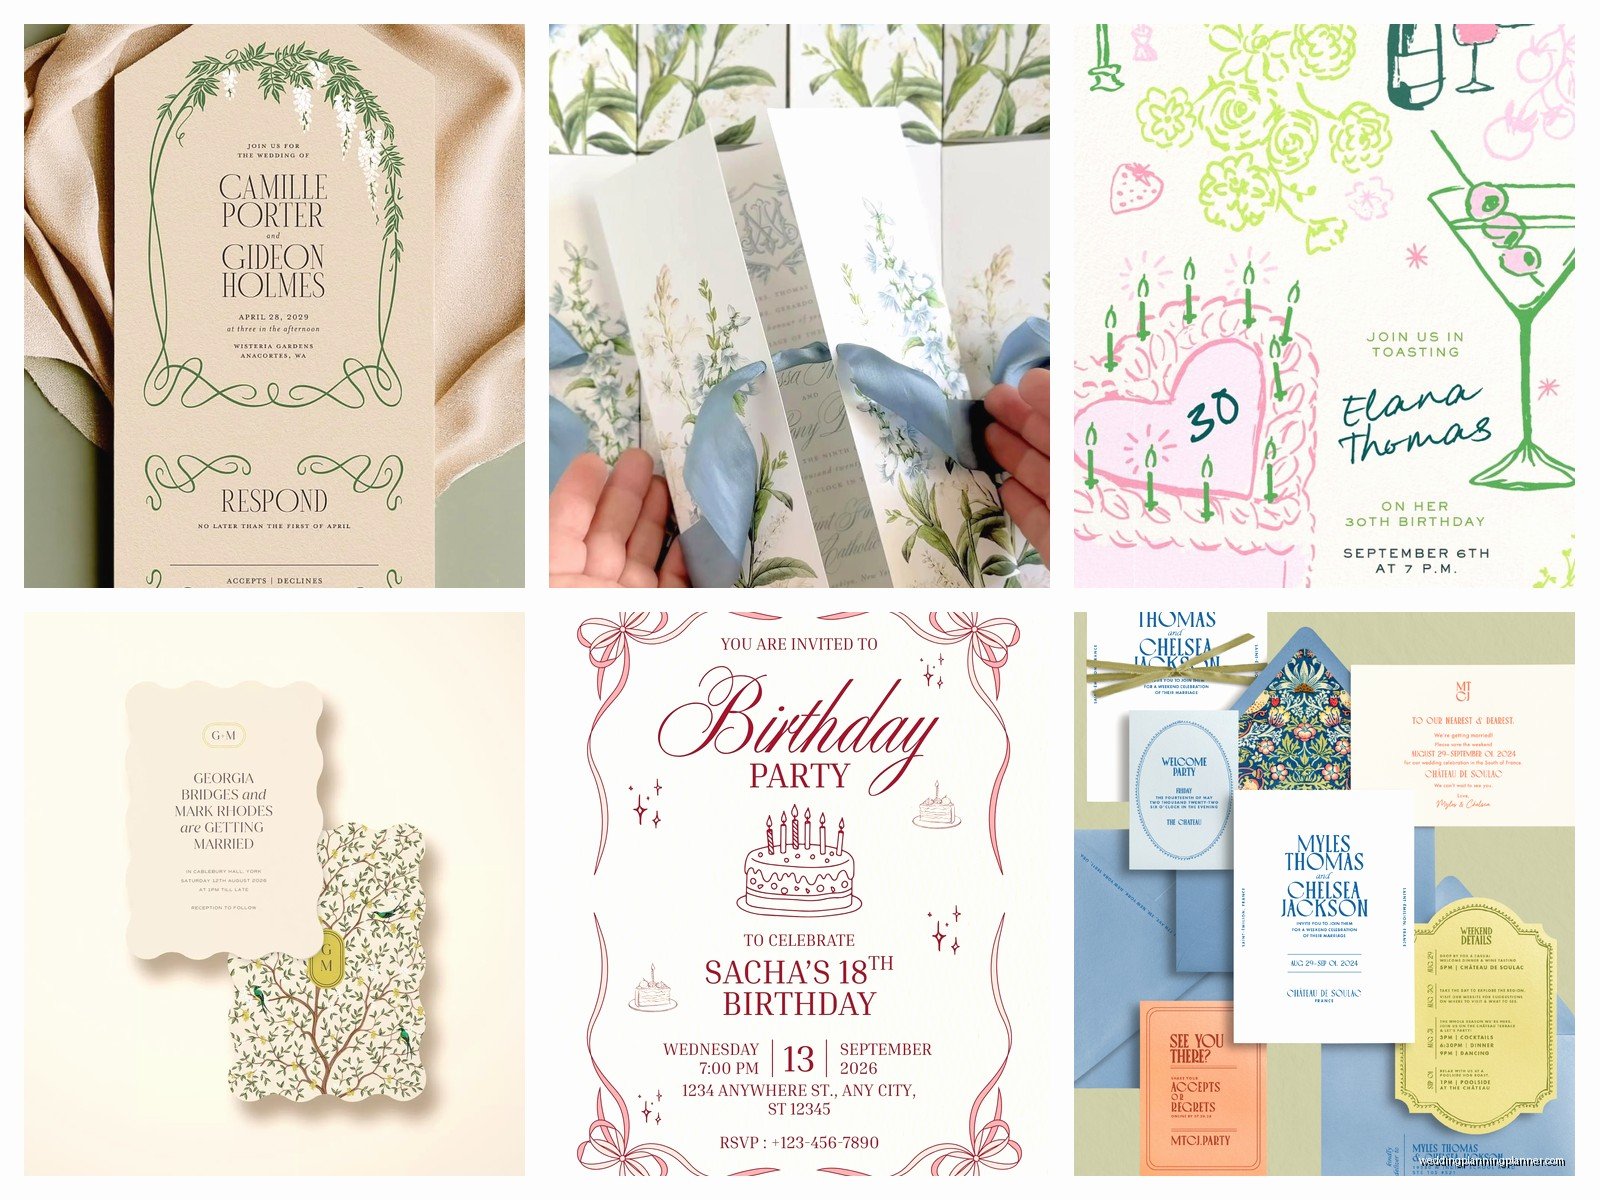
Suite Components Beyond The Main Invitation
A full suite typically includes multiple pieces, and you don’t need all of them, but here’s what exists:
- Main invitation card (obviously)
- RSVP card and envelope
- Details card (accommodations, directions, weekend events)
- Reception card (if ceremony and reception are separate)
- Envelope liner
- Belly band or vellum wrap
- Wax seal
- Outer envelope and inner envelope (formal style)
Most couples do the main invite, RSVP card, and details card. Everything else is optional and adds cost. I actually think envelope liners are one of the best bangs for your buck—they’re visible when someone opens the envelope and add a pop of color or pattern without being expensive.
Addressing and Assembly
Okay this is the part everyone underestimates. Addressing 150 envelopes takes hours. HOURS. You can handwrite them (classic, personal, time-consuming), print directly on them (efficient, less formal), use address labels (please don’t for weddings, it looks like junk mail), or hire a calligrapher ($2-$5+ per envelope).
I usually recommend printing guest addresses directly on envelopes for the RSVP envelopes since those are going back to you anyway, and then deciding on your preferred method for the outer envelopes based on your budget and formality level.
Assembly is tedious. If you’re doing layers or belly bands or wax seals, set aside an entire day and recruit friends. Make it an assembly party with wine and snacks. My cat knocked over an entire stack of assembled invitations once and I almost cried, so maybe lock up your pets during this process.
Proofing: The Most Important Step You’ll Want To Skip
Do not—I repeat, DO NOT—skip the proofing stage. Read everything out loud. Have multiple people read it. Check that dates match days of the week (yes, I’ve seen invitations with the wrong day). Verify venue addresses by actually googling them. Make sure RSVP dates make sense (should be 3-4 weeks before the event).
Order a printed proof if possible, not just a digital proof. Colors look different on screen than on paper, and you might notice spacing or size issues that weren’t obvious digitally. This costs like $20-$50 but saves you from reprinting an entire order.
Summer 2021 I had a client who approved everything digitally, we printed 200 invitations, and then she noticed we’d put the wrong year on the RSVP deadline. We had to reprint all the RSVP cards. She paid for it, but it was a whole thing that could’ve been avoided with a printed proof.
Common Mistakes I See All The Time
People forget to include critical info. Like, they’ll design this beautiful invitation and forget to put the actual time on it. Or they’ll say “reception to follow” but not mention where if it’s a different location.
The other thing is making fonts too small. What looks fine on a computer screen at 100% zoom is tiny on actual paper. Keep body text at least 10pt, preferably 11-12pt. Your grandmother should be able to read it without her reading glasses (okay maybe with her reading glasses but you know what I mean).
Budgeting For Custom Invitations
Real talk about costs because people get sticker shock:
- Budget digital printing: $1.50-$3 per invite
- Mid-range custom with nice paper: $5-$10 per invite
- High-end with letterpress or foil: $15-$30+ per invite
That’s per invitation, and you need to account for the full suite. So if you’re inviting 100 households and doing mid-range, you’re looking at $500-$1000 total. Add calligraphy and you’re easily at $1500.
Ways to save: skip envelope liners, print RSVP addresses yourself, use online RSVP through your website instead of printed cards (this also makes tracking responses easier), choose digital printing over letterpress, or reduce your suite to just the essentials.
Postage: The Thing Everyone Forgets About
Take your fully assembled invitation to the post office and have them weigh it before you buy stamps. Square envelopes cost extra. Anything over 1 oz costs extra. Wax seals might require hand-canceling (where they don’t run it through the machine) which sometimes costs extra.
Also, buy pretty stamps. The USPS has gorgeous vintage floral stamps, botanical stamps, love stamps—don’t just slap a flag stamp on your beautiful custom invitation. It matters.
Digital vs. Print: When To Choose What
I’m gonna be honest, digital invitations have come a long way and they’re not tacky anymore. Paperless Post has stunning designs. For casual events, milestone birthdays, baby showers, even less formal weddings, digital totally works.
The benefits are obvious: way cheaper (often free or under $50), instant delivery, easy RSVP tracking, eco-friendly, and you can send reminders without being annoying.
But for formal weddings, milestone anniversaries, or events where tradition matters, printed invitations still carry more weight. Literally and figuratively. People display them on their fridge or mantel. There’s something about receiving physical mail that feels special and makes the event feel important.
You can also do a hybrid approach—send save-the-dates digitally and formal invitations in print, or send printed invites to older relatives and digital to your friend group… though tracking who got what becomes a whole organizational thing.
Working With Your Designer: Communication Tips
Be clear about your budget upfront. Don’t make a designer create this elaborate letterpress suite and then reveal you have $300 to spend. It wastes everyone’s time.
Respond to revision requests within a few days. The timeline only works if you’re keeping things moving. If your designer sends you a proof and you take two weeks to look at it, that’s on you when things get tight.
Trust their expertise on technical stuff. If they say a certain color won’t print well or a font is too thin for letterpress, believe them. I once had a client insist on a pale yellow text on white paper and then was shocked—shocked!—when you couldn’t read it. Like… yeah.
Give specific feedback. “I don’t like it” doesn’t help. “The font feels too modern for our garden wedding—can we try something more romantic?” gives direction.
Timing The Mail
Mail invitations 8-10 weeks before the event for local guests, 12 weeks for destination events. Set your RSVP deadline for 3-4 weeks before the event—you need time to follow up with people who don’t respond (and trust me, there will be many) and give final counts to your venue and caterer.
Send save-the-dates 6-8 months before (or up to a year for destination weddings). These can be simpler and cheaper than formal invitations. Magnets are popular because people actually keep them on the fridge, or postcards to save on postage.
Don’t mail invitations more than 12 weeks out unless it’s a destination event. People lose them, forget about them, or just… it’s too far in advance and doesn’t stay top of mind.