Planning Guides, Style Guide
Semi Custom Wedding Invitations: Partially Personalized Designs
May
What Semi-Custom Actually Means
So semi-custom invitations are basically the middle ground between buying a template off Etsy and hiring a designer to create something completely from scratch. You’re working with an existing design framework but you get to modify certain elements to make it yours. Think of it like ordering a pizza with your choice of toppings versus having someone create a totally new food item just for you.
Most semi-custom suites let you change colors, fonts, wording obviously, and sometimes layout elements. What you usually CAN’T change is the overall design structure, the graphics or illustrations, and sometimes the paper type. It depends on the vendor though.
Why I Actually Recommend This Option A Lot
Okay so back in spring 2023 I had this couple who were totally overwhelmed by the invitation process. They’d been looking at fully custom options and the quotes were coming in at like $3,500-4,000 for 150 invitations. They were stressed, the bride was crying during our consultation call, and I was like… you don’t need to spend that much unless you genuinely want something no one has ever seen before.
Semi-custom saved their butts. We found a designer who had this gorgeous botanical suite that they could customize with their wedding colors (dusty blue and terracotta instead of the original sage and cream), swap the font to something more modern, and add a custom monogram. Total cost was $1,200. Same quality paper, same professional look, way less money.
The thing is, most wedding guests aren’t gonna analyze your invitation like “oh wow this illustration style is completely unique to them” – they’re looking at whether it’s pretty, whether it matches your vibe, and whether they can read the damn details. Semi-custom hits all those marks.
Price Breakdown Usually Looks Like This
Just so you know what to expect cost-wise:
- Semi-custom invitation suites typically run $800-2,000 for 100-150 invitations
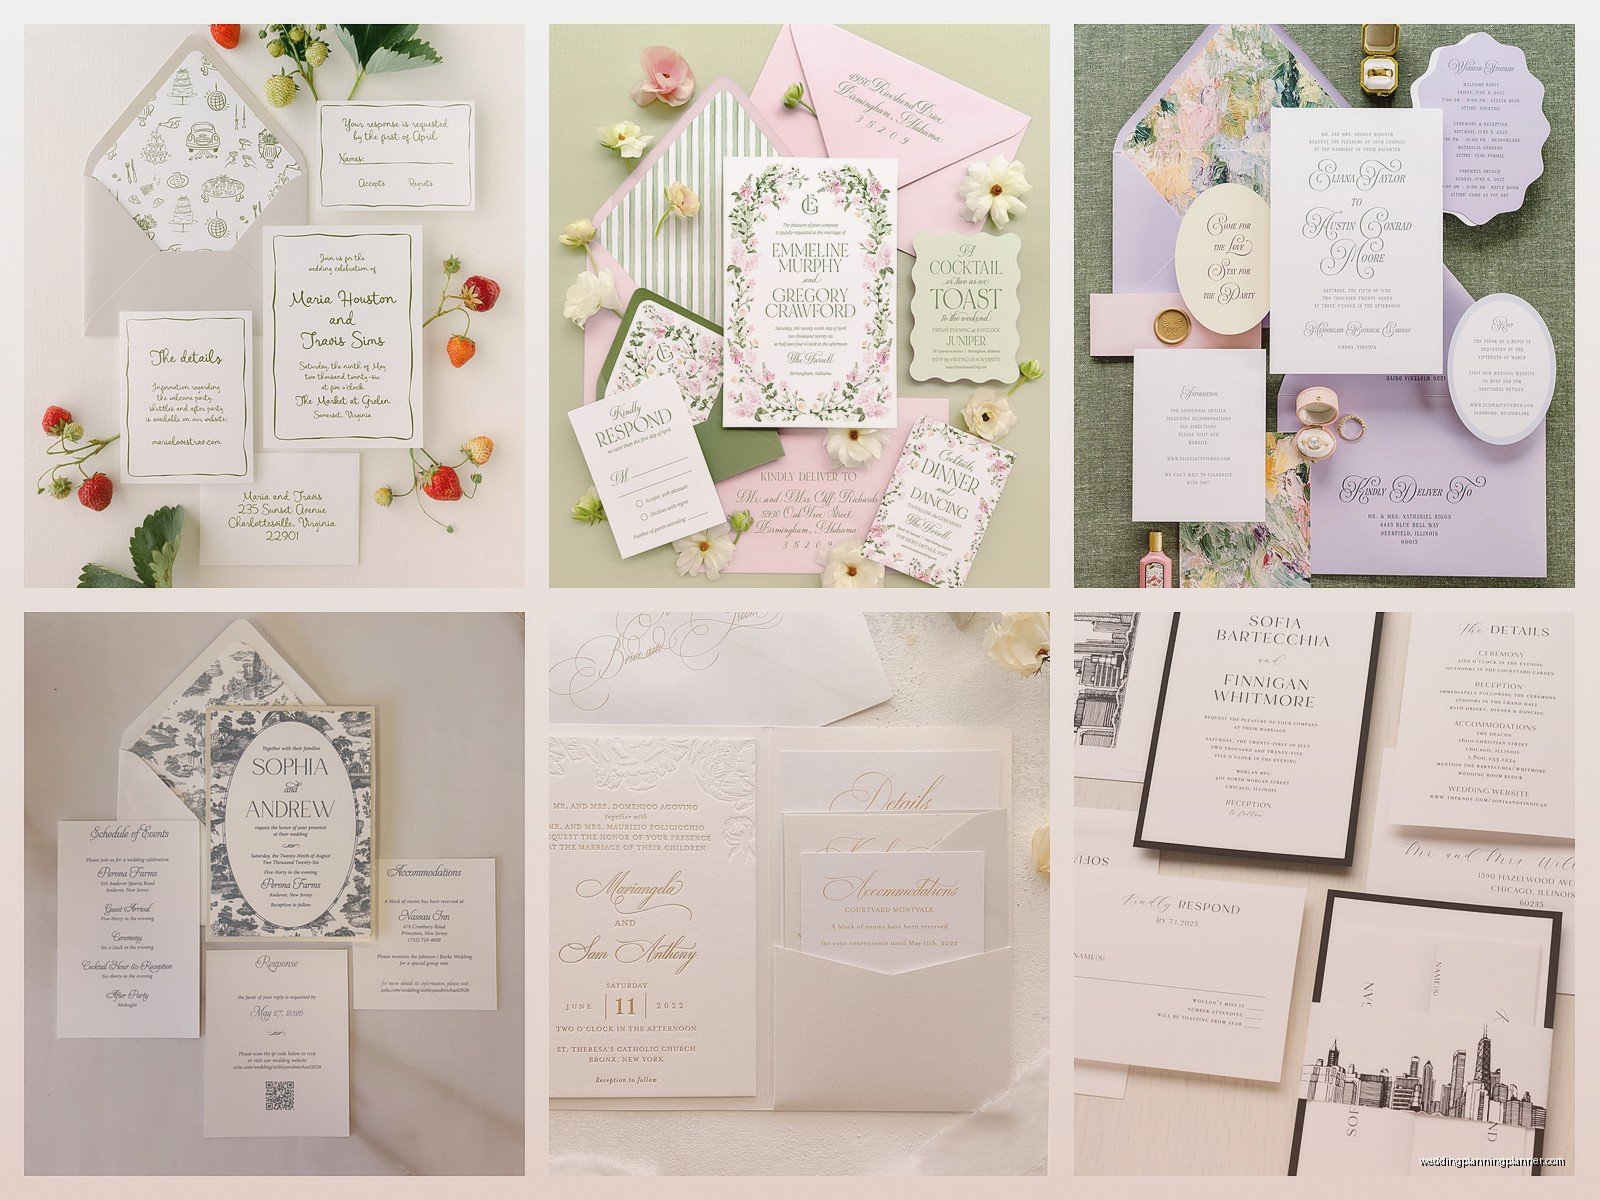
- That usually includes the main invitation, RSVP card, and one or two enclosure cards
- Envelope addressing is sometimes extra, sometimes included
- Rush fees apply if you’re ordering less than 8 weeks before you need them
- Printing method matters – digital is cheapest, letterpress is most expensive
Fully custom starts around $2,000 and goes up to like $8,000 if you’re doing letterpress with custom illustrations and foil stamping and all that. Templates you DIY yourself might only cost $30-80 but then YOU have to do all the work and printing, which… I’ll get to that.
Finding Semi-Custom Designers
There are basically three places to look:
Established stationery companies: Minted, Paperless Post (they have print options now), Artifact Uprising, and Basic Invite all offer semi-custom options. You pick a design, customize it through their online tools, and order. Super straightforward. The customization is more limited but the process is really smooth.
Independent designers on Etsy or their own sites: This is where you get more flexibility. Search for “semi-custom wedding invitations” and you’ll find tons of designers who have signature styles. You’ll usually fill out a questionnaire, have 1-2 revision rounds, and they handle the printing. My favorite finds have been designers who specialize in a specific aesthetic – like if you want modern minimalist, find someone whose whole portfolio is that vibe.
Local stationery boutiques: If you have a good stationery shop near you, they often work with designers who offer semi-custom lines. The advantage here is you can see paper samples in person, which actually matters more than you’d think.
What To Ask Before You Commit
I learned this the hard way – always ask these questions upfront:
- How many revision rounds are included?
- What specifically can I customize? (get a detailed list)
- What’s the timeline from order to delivery?
- Do you handle printing or do I need to find a printer?
- What’s your policy if I hate the proof?
- Are envelope liners included or extra?
- Can I see the actual paper stock before ordering the full quantity?
That last one is important because “white” paper comes in like 47 different shades and textures.
The Customization Process Step By Step
Alright so here’s generally how it works. You pick your base design first – this is the existing template the designer has created. You’re choosing this based on the overall look, the layout style, maybe there’s a floral border or geometric shapes or whatever.
Then you fill out a customization form or questionnaire. This is where you provide all your wedding details (obviously), but also your color preferences, font preferences if they offer options, and any specific elements you want to adjust. Be specific here. Don’t just say “I like blue” – say “dusty blue, similar to Pantone 5435” or send a swatch photo.
The designer creates a digital proof, which you’ll review. This is where I see people mess up – they approve the proof too quickly without checking every single detail. Read it out loud. Check the date format. Make sure the venue address is correct. Verify the website URL if you included one. I had a bride in summer 2021 who approved her proofs and then realized two days after they were printed that she’d put the wrong ceremony time. The invitations said 4pm, ceremony was actually at 5:30pm. We had to order stickers to cover the time, which looked… not great.
After you approve, they go to print. This takes anywhere from 1-3 weeks depending on the printing method and the designer’s workload. Then shipping is another few days to a week.
Revision Rounds Are Limited So Use Them Wisely
Most semi-custom designers include 2-3 revision rounds. This doesn’t mean you get to completely redesign the invitation three times – it means you get to make adjustments to the proof they send you. First round might be “can we make the font bigger and change the blue to a warmer tone?” Second round might be “actually can we try a different font option?”
If you go beyond the included revisions, you’re usually paying $50-150 per additional round. So like, have your decisions ready. Know your colors. Know your wording. Don’t use the designer as your brainstorming partner unless you wanna pay for that service.
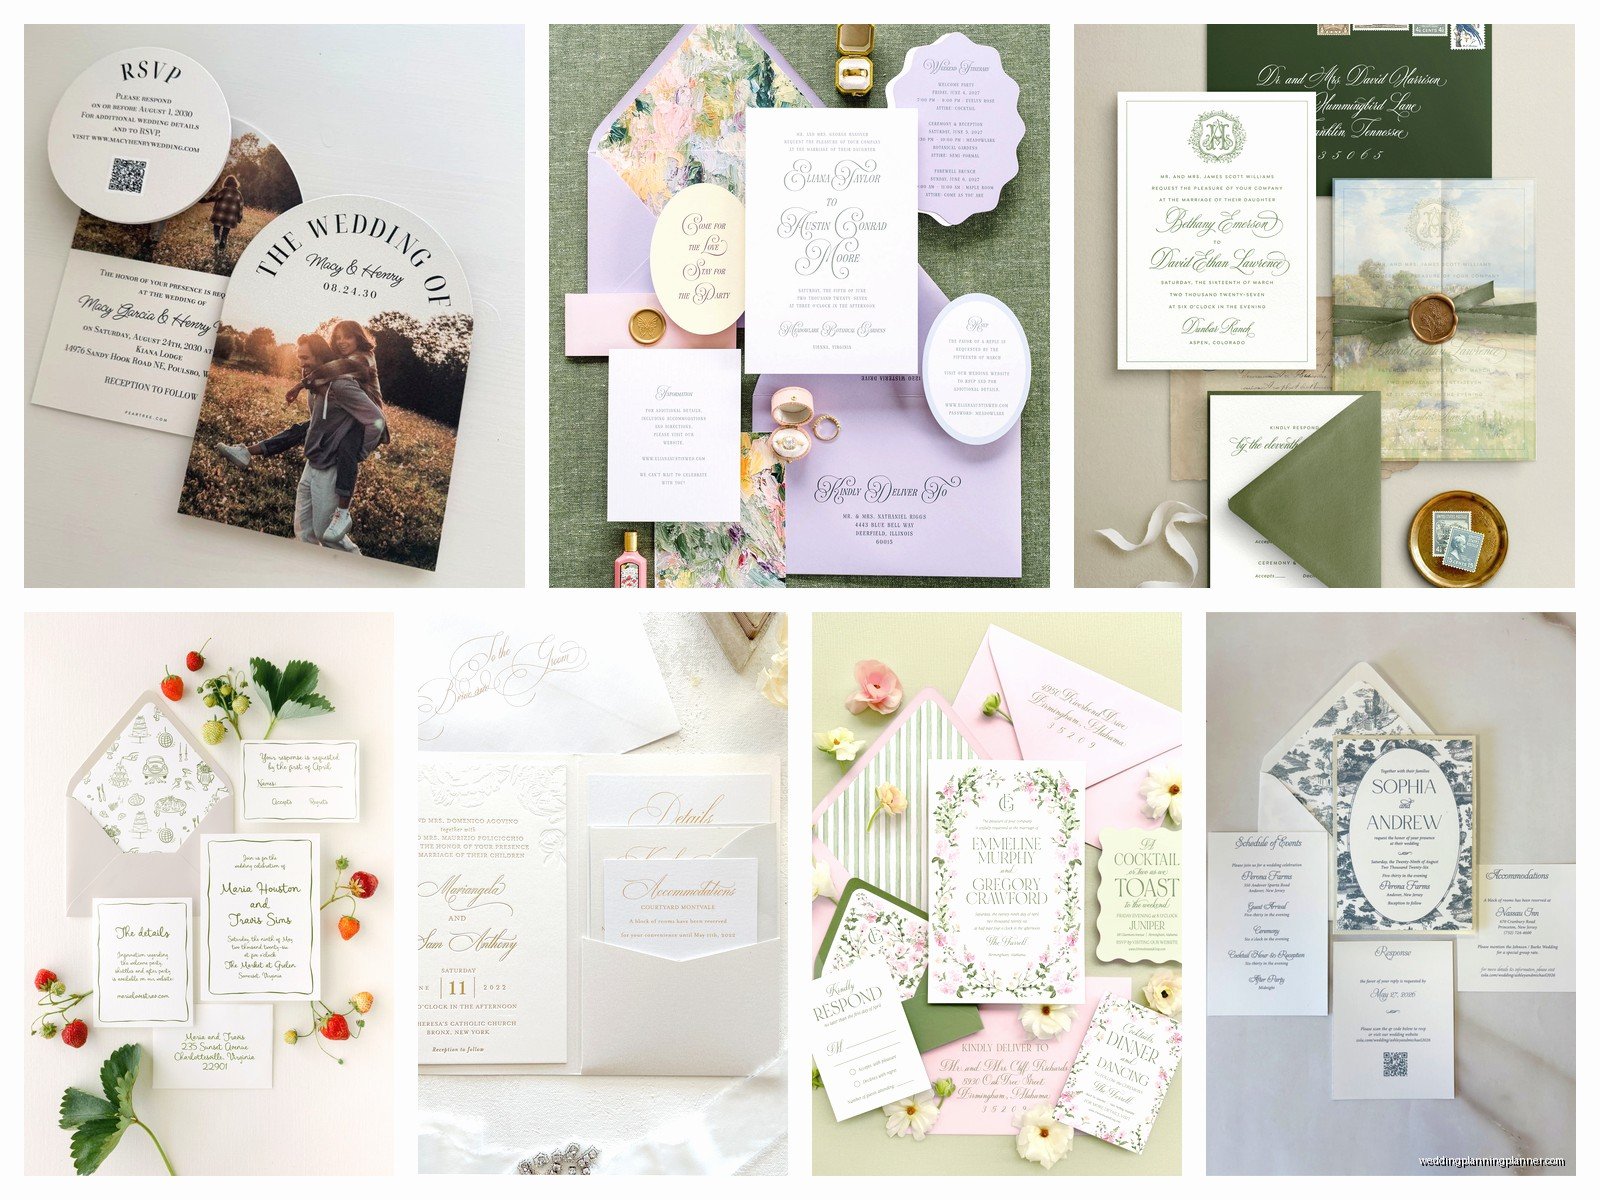
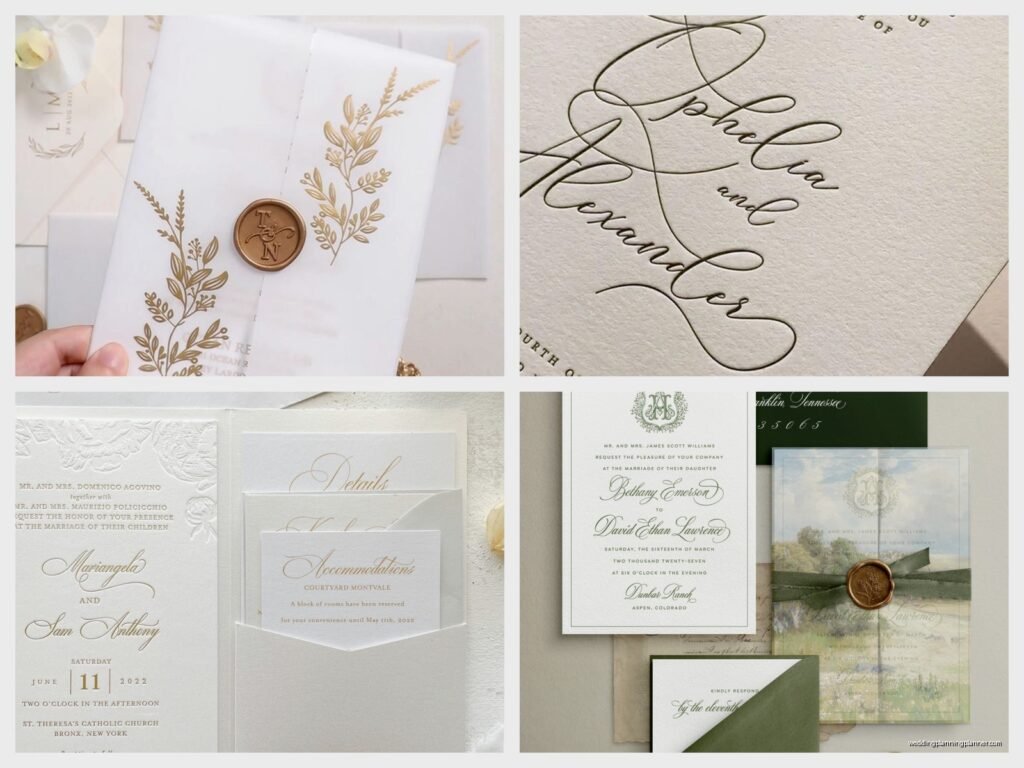
What You Can Usually Customize vs What You Can’t
Usually customizable:
- All text and wording
- Colors (within reason – sometimes they can’t match EVERY color exactly)
- Font choices from their available options
- Adding or removing certain text elements
- Monogram or initials
- Envelope colors
- Sometimes layout spacing
Usually NOT customizable:
- The actual illustrations or graphics
- Overall layout structure
- Paper type (they usually offer 2-3 options max)
- Printing method
- Card dimensions
Some designers are more flexible than others though. I’ve worked with designers who’ll do small illustration modifications for an extra fee, like changing the flower types in a botanical design.
DIY vs Semi-Custom: Why I Get Annoyed With The DIY Crowd
Okay so this is gonna sound judgy but I gotta say it – people underestimate how much work DIY invitations are. Sure, you can buy a Canva template for $35 and think you’re saving so much money, but then you gotta figure out printing, paper sourcing, cutting (if they’re not standard sizes), assembly, and addressing. It takes HOURS.
I had a bride last year who insisted on DIY to save money. She bought templates, spent probably 20 hours formatting everything and fighting with her printer, ordered paper from three different sources because she couldn’t find the right match, and then had a breakdown when her home printer couldn’t handle the card stock weight. She ended up taking everything to a professional print shop anyway, which charged her rush fees because she was behind schedule. Total cost ended up being like $900 when you factor in her time, all the supplies, and the printing fees. She could’ve done semi-custom for $1,100 and saved herself the stress.
Semi-custom is worth the extra money for the expertise and the time you save. Unless you genuinely enjoy design work and have tons of free time, just pay someone who knows what they’re doing.
Timing: When To Order Semi-Custom Invitations
Order 4-5 months before your wedding date. This gives you time for the customization process, printing, delivery, and then you need to mail them 6-8 weeks before the wedding.
Here’s the timeline breakdown:
- Weeks 1-2: Browse designs, choose your base design, submit customization details
- Week 3: Review first proof, request revisions
- Week 4: Review revised proof, final approval
- Weeks 5-7: Printing and production
- Week 8: Delivery to you
- Weeks 9-10: You assemble if needed, address envelopes, add postage, mail them out
If you’re doing envelope calligraphy or digital printing of addresses, add another week or two to that timeline.
Rush Orders Are Possible But Expensive
Most designers offer rush services if you’re behind schedule. Expect to pay 20-50% extra for rush production. And honestly, the quality might not be as good because they’re squeezing you into their production schedule. Better to plan ahead.
Common Mistakes People Make With Semi-Custom
Choosing a design that doesn’t actually match their wedding style because they fell in love with it in isolation. Like you’re having a modern minimalist wedding at an art gallery but you picked a design with watercolor florals and script fonts because it was pretty. It doesn’t work. The invitation sets expectations for your wedding vibe, so make sure they align.
Not ordering samples first. Spend the $15-30 to get a sample of the design printed before you order 150 of them. Colors look different on screen versus printed, and paper texture matters more than you think it will.
Forgetting about the weight for postage. If your invitation suite is thick – multiple cards, velvety paper, envelope liner – it might need extra postage. Take a fully assembled invitation to the post office and have them weigh it before you buy stamps. I’ve seen people waste hundreds of dollars on stamps that weren’t enough, and then their invitations got returned.
Not proofreading thoroughly. I mentioned this already but seriously, read everything multiple times. Have someone else read it too. Check the date, day of the week (make sure Saturday October 15th is actually a Saturday), venue spelling, website URLs, registry links if included, dress code wording… my cat literally walked across my keyboard while I was typing this which feels appropriate because proofreading is tedious but necessary.
Working With The Designer
Communication is everything here. When you submit your customization details, be clear and specific. Don’t say “I want it to feel romantic” – say “I’d like blush pink and gold colors, with elegant serif fonts, and I prefer the layout with centered text.” Designers aren’t mind readers.
Respond to their questions quickly. If they ask for clarification on something, get back to them within 24-48 hours or you’ll delay your timeline. Most designers are juggling multiple clients, so if you go silent for a week, you might lose your spot in their production schedule.
Be nice. I know this sounds obvious but the wedding industry is full of stressed brides who take it out on vendors. Your designer is trying to help you, they want you to love the final product, and being rude just makes everything harder. Also like… just be a decent human?
What If You Hate The Proof
This sometimes happens – you thought you’d love the design but seeing it with your actual wedding details makes you realize it’s not right. Most designers will let you switch to a different base design if you’re still early in the process, but you might pay a fee. If you’re already at the final proof stage, you’re probably stuck with it or you’ll need to start over and pay again.
This is why samples and detailed portfolios matter. Really look at the designer’s work, read reviews from past clients, and make sure their style actually matches what you want.
Add-Ons And Extras To Consider
Envelope addressing is a big one. You can handwrite them yourself (time-consuming), use a Cricut or printer (tricky to format), or pay for professional printing or calligraphy. Digital envelope printing usually costs $1-3 per envelope. Calligraphy is more like $3-8 per envelope depending on the style.
Envelope liners add a nice touch and usually cost $1-2 per invitation. They’re sheets of decorative paper inside the envelope flap. Not necessary but pretty.
Wax seals are having a moment right now. They look gorgeous but they add weight (postage issue) and they’re like $1-2 per seal. Also they can crack or smudge in the mail, so you might need to hand-deliver or use protective envelopes.
Belly bands, vellum overlays, ribbon… all pretty, all optional, all add to the cost and assembly time. Decide what actually matters to you versus what just looks good on Pinterest.
Assembly Tips Because You’ll Probably Do This Part Yourself
Set up a little assembly station with all your components organized. I usually tell clients to do this while watching TV or listening to podcasts because it’s mindless work once you get into a rhythm.
Do a test assembly first with just a few invitations to make sure you know the order and everything fits in the envelope properly. The usual order is: invitation on bottom (printed side up), then reception card, then RSVP card with its envelope tucked under it (printed side up so people see it), then any other enclosure cards.
If you’re using envelope liners, install those before you put anything in the envelope. If you’re using belly bands or ribbons, assemble the paper components first, then add the band/ribbon, then insert into envelope.
Address envelopes before you stuff them – easier to write on flat envelopes than bulky ones. And seriously, take a completed one to the post office to check postage before you do all 150.