
Planning Guides, Style Guide
Wedding Invitation Templates with Photo: Picture Card Downloads
Jul
Okay So Photo Wedding Invitations Are Everywhere Now
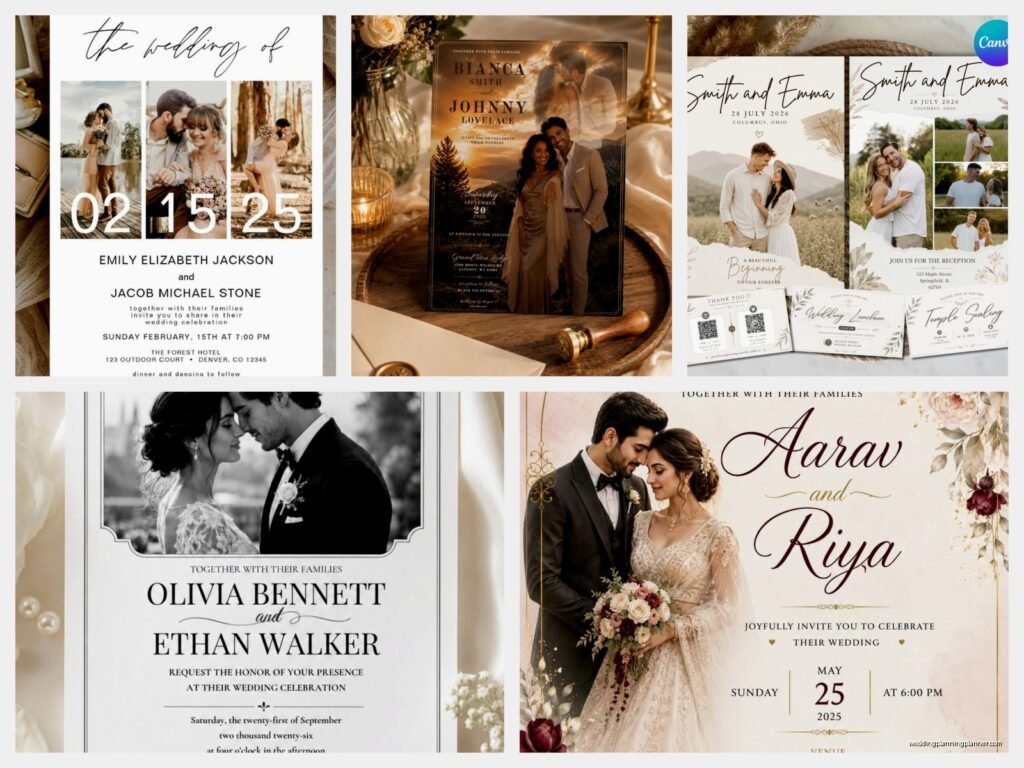
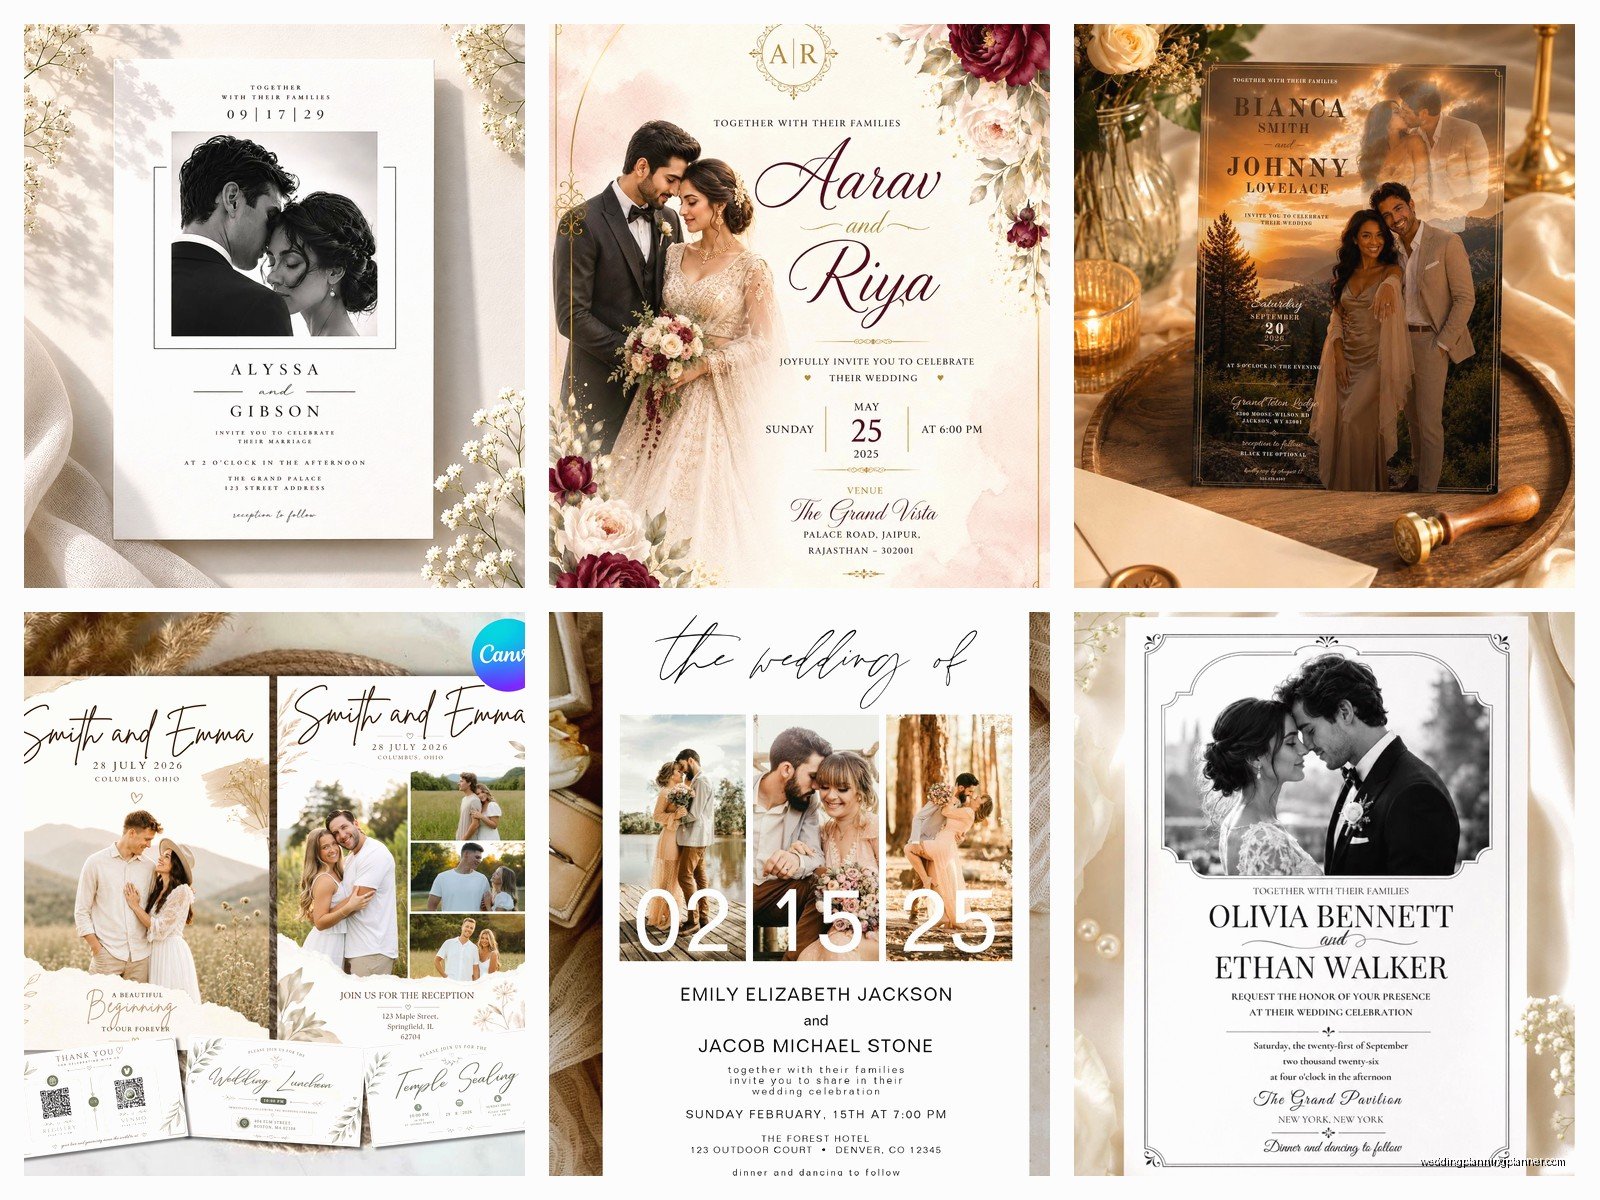
Listen, photo invitation templates are basically the easiest way to make your wedding invites feel personal without spending a fortune on custom design work. I’ve been working with couples on this since like 2019 and honestly the shift toward DIY photo cards has been massive. You download a template, drop in your engagement photos, and boom – you’ve got invitations that actually look like YOU two instead of some generic floral thing.
The main platforms you’re gonna want to look at are Canva, Etsy template shops, Creative Market, and honestly even some of the big printing sites like Minted or Zazzle have downloadable options now. Each has its own vibe and I’ll get into that.
Where To Actually Find These Templates
Canva is where most people start because it’s free for basic use and super intuitive. They have literally thousands of wedding invitation templates and probably half of them now include photo placeholders. You just click, upload your pic, and it drops right in. The paid version (Canva Pro) gives you way more fonts and the ability to resize stuff easily which is kinda crucial if you’re doing save-the-dates AND invitations AND thank you cards in matching designs.
Etsy is where I send clients who want something more unique. You’re buying from individual designers and the quality varies wildly but when you find a good one it’s *chef’s kiss*. Most Etsy templates come as Canva links now (which is convenient) or as Photoshop/Illustrator files if you’re more tech-savvy. Prices range from like $8 to $40 depending on how many pieces are included in the suite.
Creative Market is similar to Etsy but tends to have more professional designers. The templates here usually cost more – think $15-$50 – but you’re getting really polished designs. I had this bride in spring 2023 who was SO picky about typography and we finally found this gorgeous minimalist template on Creative Market that had the exact font pairing she wanted. Saved us probably three rounds of back-and-forth with a custom designer.
What File Format You’re Getting
This trips people up constantly. Templates come in different formats and you need to know what you’re downloading before you buy:
- Canva templates – You get a link, click it, it opens in your Canva account, you edit right there in the browser
- PDF templates – These are usually NOT editable unless they specifically say “editable PDF” and even then it’s clunky
- PSD files – Photoshop files, you need Adobe Photoshop to edit these
- AI files – Adobe Illustrator, same deal
- PowerPoint/Word templates – Honestly kinda outdated but some people still use them, easy to edit but limited design options
My cat just knocked over my coffee while I’m writing this and I’m choosing to ignore it… anyway, if you don’t have Photoshop or Illustrator, stick with Canva templates or make sure the Etsy seller offers a Canva version. Don’t buy a PSD file thinking you can figure it out – you can’t, and you’ll just get frustrated.
How Many Photos Should You Include
Here’s what actually works: one main photo on the front is the classic move. Clean, elegant, lets the photo shine. I see a lot of couples wanting to cram in like 4-5 photos and it just ends up looking cluttered and honestly a bit like a scrapbook page instead of a wedding invitation.
If you really want multiple photos, do a collage-style template with 2-3 max. Or use one photo on the invitation itself and then include a separate details card with another photo. That gives you the variety without overwhelming the main piece.
The photo you choose matters more than you think. Engagement photos work great obviously, but I’ve also seen couples use childhood photos of both of them side-by-side which is cute, or a photo from the proposal if you have a good one. Just make sure it’s high resolution – at least 300 DPI when printed. Grainy photos look terrible on printed invitations and there’s no fixing that in post.
Editing The Template Without Losing Your Mind
Okay so you’ve downloaded your template, now what. First thing I tell everyone is SAVE A COPY before you start editing. Seriously, save the original file somewhere safe because you WILL accidentally delete something or mess up the formatting and you’ll want to start over.
For Canva templates this is automatic – you can always duplicate your design. For Photoshop or other files, literally just duplicate the folder.
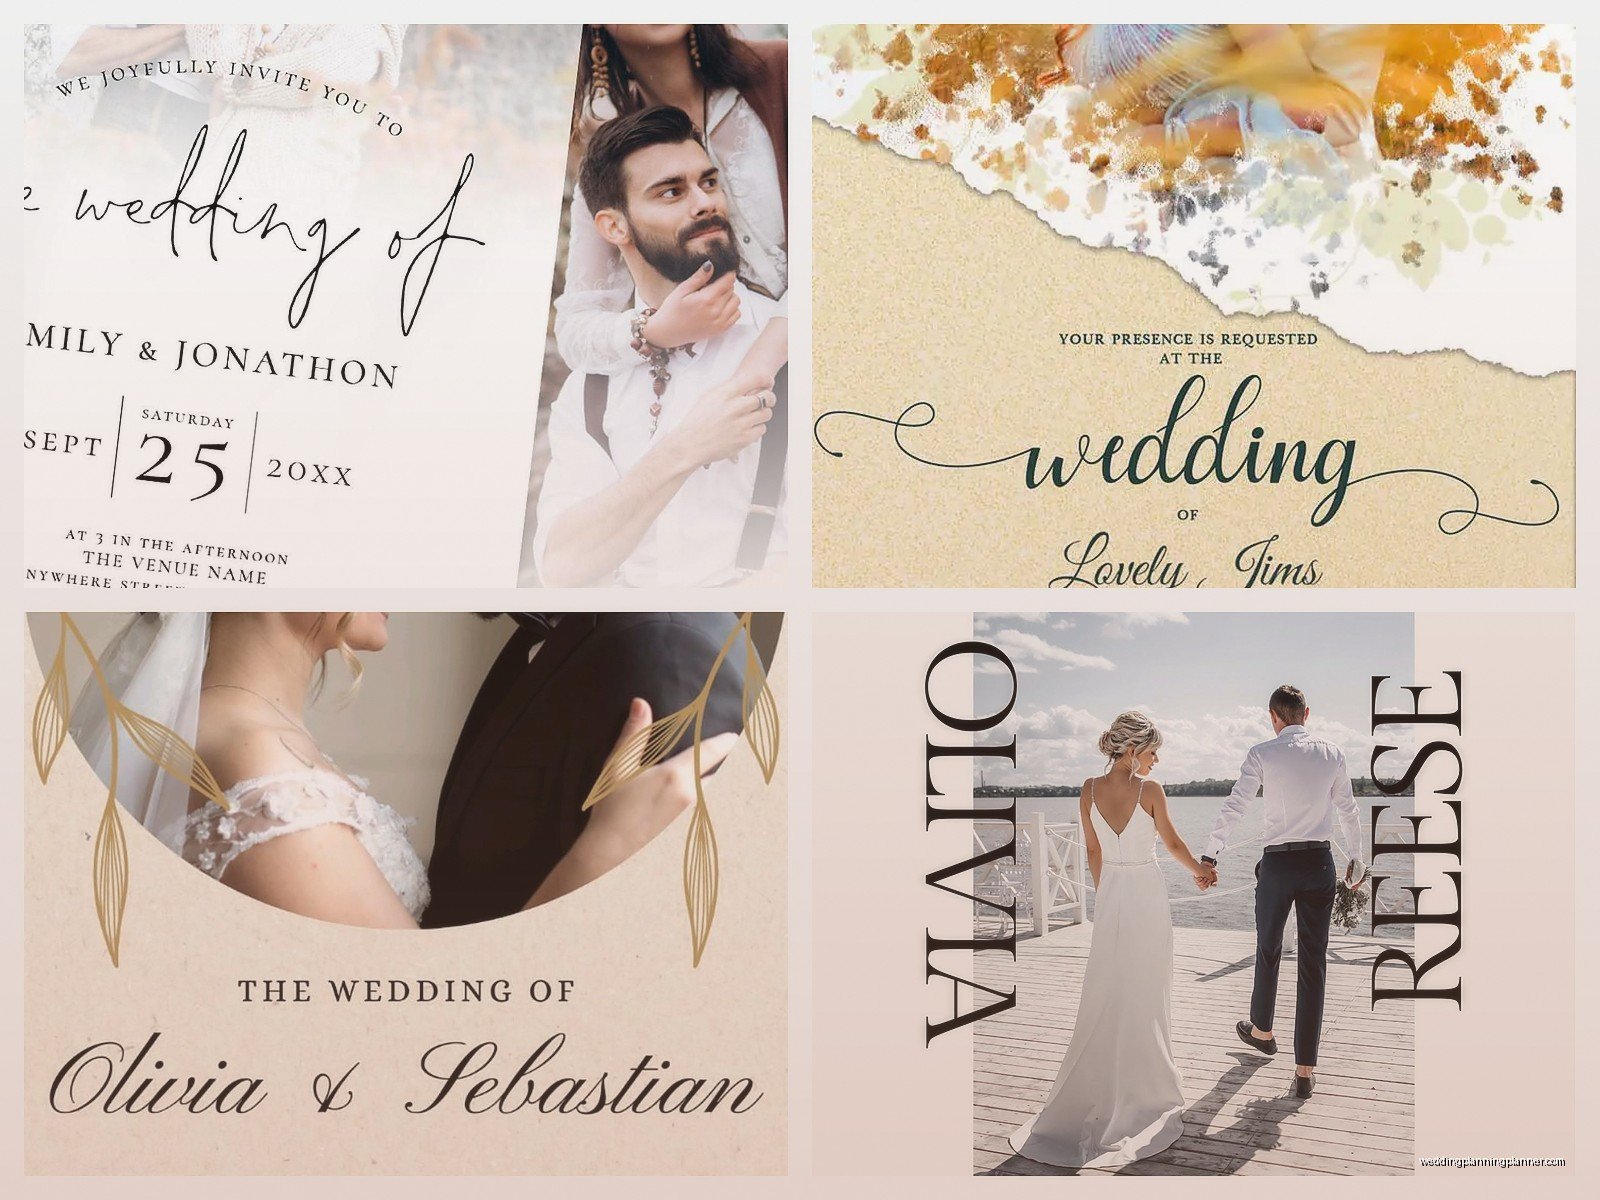
When you’re dropping in your photo, pay attention to the cropping. Most templates have a specific photo frame shape and your image needs to fit that. You might need to zoom in or reposition your photo so that your faces aren’t cut off weird or… I had this couple once where they used a horizontal photo in a vertical frame and it just looked awkward no matter how we adjusted it. Sometimes you gotta pick a different photo that actually fits the template layout.
Text Changes You’ll Need To Make
Obviously you’re changing the names, date, venue, all that basic info. But also think about:
- The wording style – formal vs casual
- Whether you’re including parent names or not
- Reception details on the same card or separate
- RSVP instructions
- Wedding website URL
- Dress code if you have one
One thing that annoys me SO MUCH is when templates have like 8 different fonts and text sizes and everything’s centered differently. Like pick a lane, you know? When you’re editing, try to stick with 2-3 fonts maximum. Usually the template designer has already done this but if you start swapping fonts around it can get messy fast.
And please please please proofread. Then proofread again. Then have someone else proofread. I cannot tell you how many times I’ve caught typos right before printing – wrong date, misspelled venue name, wrong time. In summer 2021 I had a couple who printed 150 invitations with the ceremony time as 4:00 PM instead of 4:30 PM and didn’t catch it until they were addressing envelopes. They had to reprint everything.
Color Adjustments And Matching Your Wedding Colors
Most templates let you change colors pretty easily. In Canva you just click on any element and pick a new color. In Photoshop it’s a bit more complicated with layers and color overlays but there are tutorials.
Here’s the thing about matching your wedding colors though – printed colors look different than screen colors. What looks like a perfect blush pink on your laptop might print as straight-up salmon. This is where ordering a printed proof sample before you print 200 invitations is gonna save you.
If you’re printing at home on your own printer, do test prints on the actual cardstock you’re using. If you’re using an online printing service, most of them offer sample prints for like $5-10. Worth it every single time.
What Paper To Print On
If you’re going the DIY printing route, cardstock weight matters. You want at least 80lb cardstock, preferably 100lb or 110lb. Regular printer paper is gonna feel cheap and flimsy. Michaels, Hobby Lobby, or online paper suppliers have tons of options.
Finishes to consider:
- Matte – classic, easy to write on, no glare
- Glossy – makes photos pop but can show fingerprints
- Linen or textured – feels fancy, photos might not print as crisp
- Shimmer/metallic – pretty but can mess with home printer settings
I usually recommend matte for DIY printing because it’s most forgiving. Glossy looks amazing but you need a good quality printer to pull it off.
Size Considerations That People Forget About
Standard invitation size is 5×7 inches. This fits in an A7 envelope (which you can buy anywhere) and has normal postage rates. If you go bigger – like 6×8 or 5×7 horizontal – you might need custom envelopes and you’ll definitely pay more for postage.
Square invitations look trendy and cool but heads up, they cost more to mail. The post office charges extra for non-standard sizes. A 5.5×5.5 square invite needs different postage than a rectangular one even if it weighs the same.
Also consider thickness – if you’re printing on heavy cardstock or adding layers (like a vellum overlay or a belly band), your invitation might be too thick for regular postage. Take a fully assembled invitation to the post office and have them weigh it before you buy stamps. Nothing worse than finding out after you’ve stamped 100 envelopes that they all need extra postage.
The Actual Printing Process
You’ve got three main options here:
Print at home: Cheapest option if you have a decent printer. You’ll need to do test runs to get the alignment right. Buy extra paper because you WILL mess some up. Set aside like a whole afternoon for this because it’s time-consuming. Make sure you have enough ink – running out halfway through is a nightmare.
Local print shop: Places like FedEx Office or local printers can print from your PDF file. Usually costs $1-3 per invitation depending on paper and size. You have more control and can see samples before committing to the full order. They can also help with cutting if you’re doing custom sizes.
Online printing service: Companies like Catprint, Vistaprint, or Printique. You upload your file, pick your paper and finish, they mail you the finished invitations. Takes longer (usually 1-2 weeks) but the quality is usually really consistent and you don’t have to do any of the work yourself.
I honestly think for most couples the online printing route makes the most sense unless you’re really crafty and enjoy that kind of project. Your time is worth something and spending 6 hours printing and trimming invitations might not be the best use of your weekend.
Common Mistakes I See All The Time
Not leaving enough white space – crowding too much text onto the card makes it hard to read and just looks chaotic. If you have a lot of info to include, use a details card or direct people to your wedding website.
Using photos with busy backgrounds – your photo should complement the design not compete with it. A simple background works better than a photo with tons of stuff going on behind you.
Forgetting about bleed – if your design goes to the edge of the card, you need to include bleed (extra space beyond the cut line) or you’ll get white borders or cropping issues. Most templates include this already but if you’re adjusting sizes make sure you’re accounting for it.
Not considering envelope liners or addressing – you’ve made these gorgeous invitations and then you write the addresses in ballpoint pen? Nah. Think about calligraphy (hire someone or DIY it), printed labels, or even printing directly on envelopes. The envelope is the first thing people see.
File Format For Sending To Printers
Most printers want PDF files, specifically PDF/X-1a or PDF/X-4 format which preserves all the color and quality info. If you’re using Canva, when you download just select “PDF Print” and it handles this for you. If you’re working in Photoshop or Illustrator, there are specific export settings – honestly just Google “export PDF for printing from [your program]” and follow those instructions because they change with software updates.
Make sure your PDF is high resolution – 300 DPI minimum. Canva sometimes defaults to lower resolution for the free version which is fine for digital stuff but not for printing.
Timeline For Getting This Done
Invitations should go out 6-8 weeks before your wedding. So work backwards from there. If you’re ordering printed invitations online, add 2 weeks for production and shipping. If you’re printing yourself, add a week for getting supplies and doing test runs. That means you need to have your template finalized and edited at least 8-10 weeks before the wedding.
And that’s assuming you already have your photos! If you haven’t done engagement photos yet, add another month for scheduling the session and getting the photos back from your photographer.
Honestly I’d say start looking at templates like 4-5 months before your wedding. That gives you breathing room for all the steps without feeling rushed or… I’m watching this show right now where they plan a wedding in two weeks and it’s giving me stress just watching it even though I know it’s fake.
Coordinating With Other Wedding Stationery
If you’re buying a template, check if the designer offers a full suite – save the dates, invitations, RSVP cards, details cards, programs, menus, thank you cards, etc. Having everything match is way easier than trying to recreate the design yourself for each piece.
Some Etsy sellers bundle these together for a better price. On Canva you can duplicate your invitation design and just swap out the text for different pieces which works pretty well.
Your photo doesn’t have to appear on every single piece though. Like maybe your invitation has your photo but your RSVP cards and details cards just use the same colors and fonts without photos. That’s totally fine and actually looks more sophisticated than photos on everything.
What About Digital Invitations
Okay slight tangent but if you’re thinking about digital invitations instead of printed ones – basically the same template process works. You’d just download your design as a JPEG or PNG instead of a PDF, and email it or text it to guests. Some couples do a digital save-the-date and printed formal invitations which is a nice compromise.
There are also services like Greenvelope or Paperless Post that have their own template systems for animated or interactive digital invites. Those can include photos too and they track RSVPs for you automatically which is kinda nice.
But we’re talking about downloadable templates for printing here so I’ll stop going off on that tangent.
Budget Breakdown
Just so you know what you’re looking at cost-wise:
- Template purchase: $0-50 (Canva free, Etsy/Creative Market $10-50)
- Printing: $0.50-3 per invitation depending on method
- Envelopes: $0.20-1 each
- Postage: $0.68-1.50 per invitation depending on size and weight
- Extras like envelope liners, belly bands, wax seals: $0.50-2 per invitation
So for 100 invitations you’re probably looking at $150-400 total if you’re doing photo templates and printing yourself or using an online service. That’s way cheaper than custom design work which starts around $500-800 for most professional designers.
The DIY route definitely saves money but it also takes your time and energy, so just factor that in when you’re deciding what to do. There’s no wrong answer – some people love the crafty project aspect and some people would rather just pay someone else to handle it. Both are totally valid approaches and I’ve worked with couples who went either direction and were happy with their choice.
