Planning Guides, Style Guide
Wedding Invitation Suites: Complete Stationery Packages
May
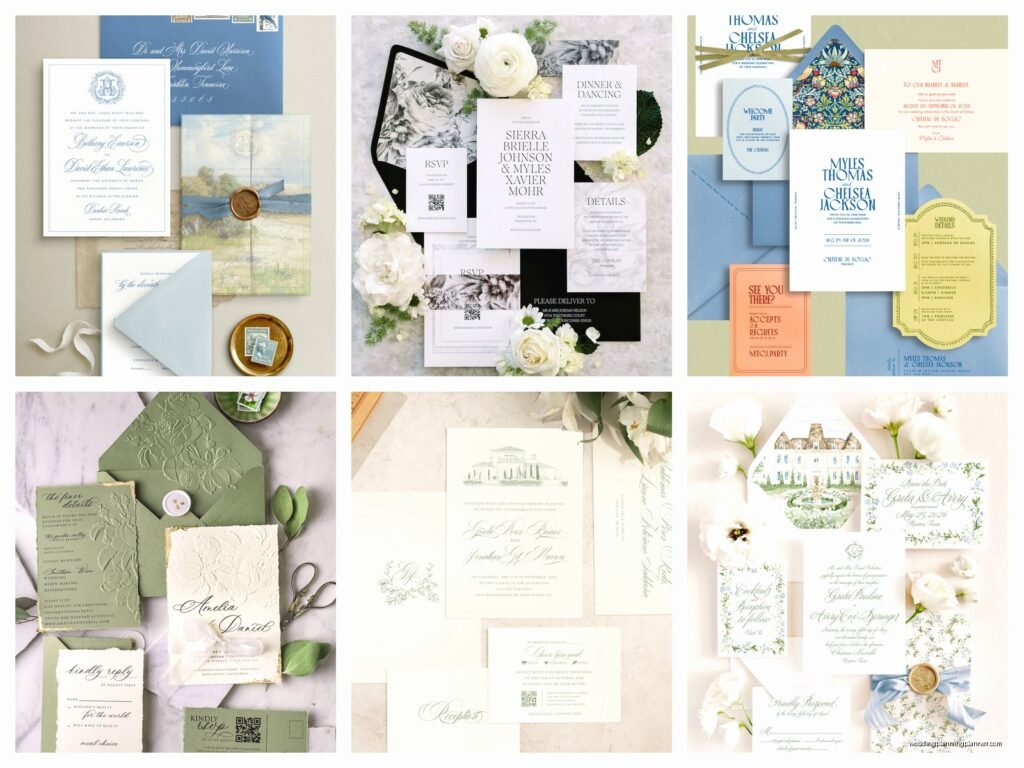
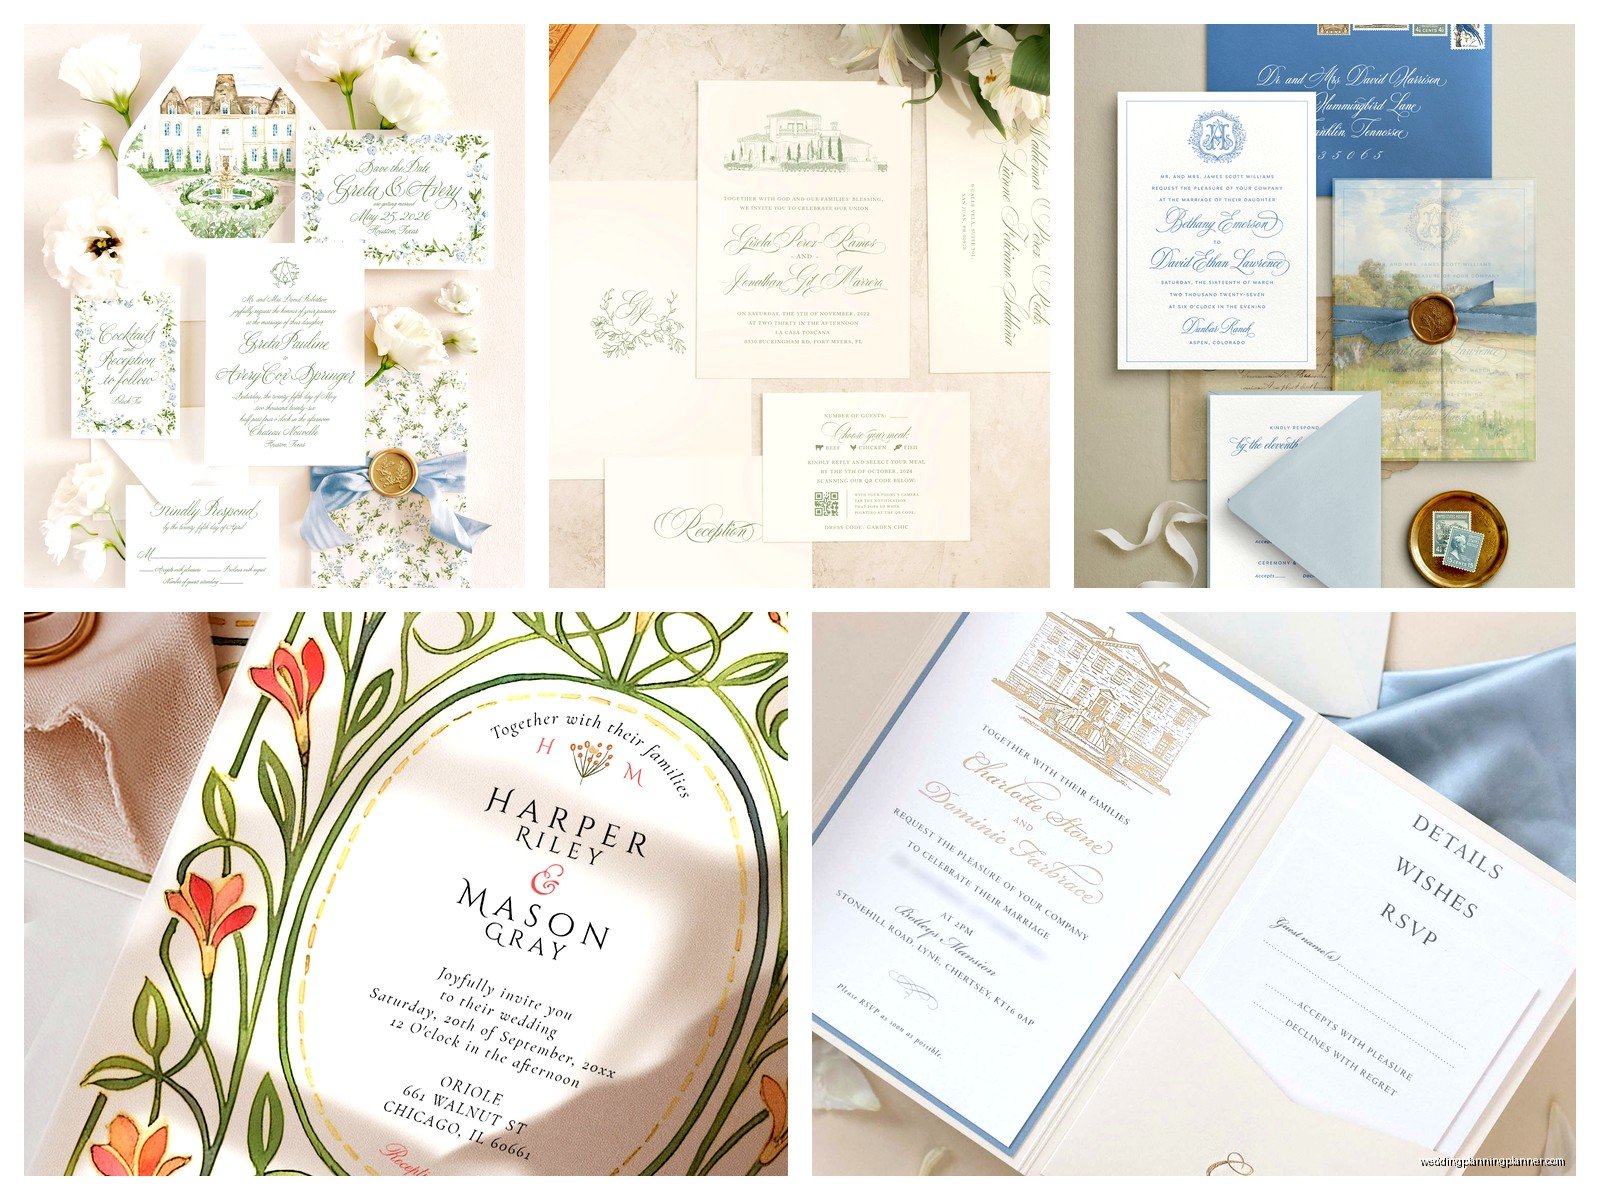
What Actually Goes in a Complete Wedding Invitation Suite
Okay so the main invitation is obviously the star but you’re gonna need more pieces than that. A complete suite typically includes the invitation itself, RSVP card with its own envelope, a details card (sometimes called an enclosure card), and the outer envelope. Some couples add an inner envelope too but honestly that’s becoming less common unless you’re doing a super formal wedding.
The invitation is the big announcement – who’s getting married, where, when, who’s hosting. Then your RSVP card needs to match the vibe and include a return-by date that’s like 3-4 weeks before your wedding. I always tell clients to put that date earlier than they think because people are terrible at mailing things back on time and it drove me absolutely crazy during spring 2023 when I had a bride who set her RSVP deadline only two weeks out and we were chasing down guests literally days before the final caterer count was due.
Details cards are where you put your wedding website, hotel block info, dress code, maybe transportation details. Don’t cram everything onto the main invitation because it looks cluttered and also you might need to… wait actually let me back up because I’m getting ahead of myself.
How to Actually Choose Your Suite Components
Start by figuring out what information you absolutely need to communicate. Make a list. I’m serious, make an actual list because you’ll forget something otherwise. Do you have multiple events? Rehearsal dinner invite needed? Welcome party? Each event doesn’t necessarily need its own card but you gotta think through the logistics.
For a basic wedding you can totally get away with just three pieces: invitation, RSVP card, details card. That’s it. The outer envelope holds everything and you’re done. But if you’re having a destination wedding or a weekend-long celebration, you might need a full itinerary card, a separate rehearsal dinner card, maybe a day-after brunch card.
I had this client in summer 2021 who wanted to include literally everything – a map card, a song request card, a dietary preferences card, a card about their dog who was the ring bearer, and I had to gently explain that at some point you’re just overwhelming your guests with paper. We consolidated down to four pieces and it was so much better.
The Outer Envelope Situation
Your outer envelope is what gets mailed and sees all the handling from the post office. This is where calligraphy or nice printing goes. You’ll address it to your guests with their full names and proper titles if you’re being formal about it.
Inner envelopes are optional and honestly kinda old-fashioned but they do serve a purpose – they clarify exactly who’s invited. Like the outer might say “The Anderson Family” but the inner envelope would list “Mr. and Mrs. Anderson, Sophie, and James” so there’s no confusion about whether the kids are invited. If you’re not using inner envelopes, you need to be crystal clear on your wedding website about who’s included in each invitation.
One thing that annoys me SO much is when couples don’t think about envelope sizing before they design their invitations. You fall in love with a 5.5×8 invitation and then realize you need a custom envelope size and suddenly your postage costs jump because it’s not a standard size. Always check standard envelope sizes first: 5×7 and 5.25×7.25 are your friends.
Matching Everything Without Looking Too Matchy
You want cohesion but not like… boring sameness. I usually suggest picking 2-3 design elements that carry through all the pieces. Maybe it’s a specific floral illustration, a color combination, and a font pairing. Those three things show up on every card but in different ways.
Your invitation might have the floral element as a large border, your RSVP card has just a small sprig in the corner, your details card has the flowers as a subtle background pattern. Same element, different applications. This keeps things interesting while still looking like they belong together.
Paper weight matters more than people think. Your main invitation should be on the heaviest stock – usually 120lb or higher. RSVP cards can be slightly lighter, maybe 100lb. Details cards can be even lighter since they’re just informational. This creates a hierarchy that your guests will subconsciously notice and it just feels more expensive and intentional.
The RSVP Card Controversy
Okay so there’s this whole debate about whether you even need physical RSVP cards anymore or if you should just direct everyone to your website. Personally I think it depends on your crowd. If you’ve got older relatives or guests who aren’t super tech-savvy, include the physical card. You can do both – put your wedding website on the details card for RSVPs but also include a traditional card for people who prefer that.
The RSVP card needs: a line for names, checkboxes or a fill-in-blank for accepting or declining, meal choices if you’re doing a plated dinner, and that return-by date I mentioned. Don’t forget to pre-address and stamp the return envelope. Yes it costs money but it dramatically increases your response rate. People are lazy and if they have to find a stamp they’ll put it off and forget.
I always number the RSVP cards on the back in tiny pencil that corresponds to my guest list spreadsheet because inevitably someone will send back a card with illegible handwriting and you’ll need to figure out who “The Johnstons” are when you have three different Johnston families invited.
Assembly and Extras That Make It Feel Fancy
Assembly order matters if you want to look like you know what you’re doing. The invitation goes face-up at the bottom, then you stack everything else on top of it in size order – largest to smallest. So details card, then RSVP card with its envelope, then any other inserts. If you’re using an inner envelope, all of this goes inside it unsealed with the guest names facing out when you pull it from the outer envelope.
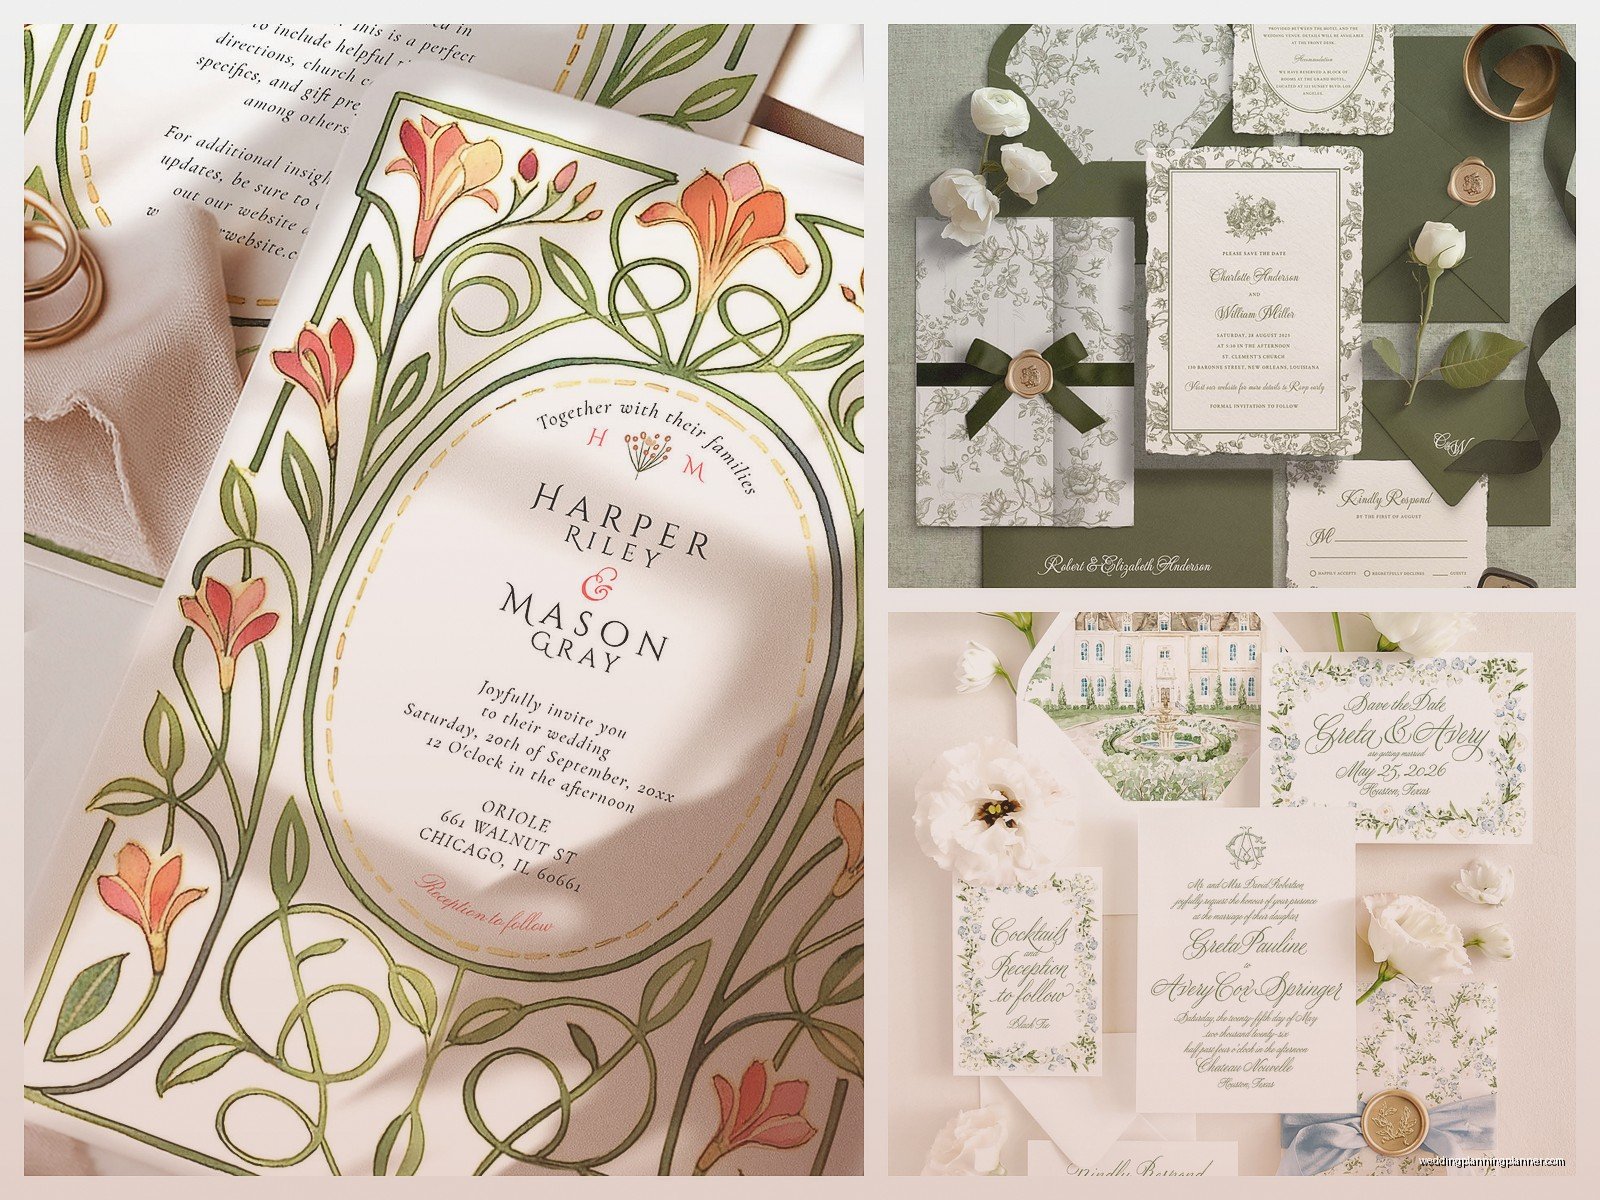
Belly bands are those paper strips or ribbons that wrap around the whole suite to keep everything together. They’re not necessary but they do make the unboxing experience feel more special. Vellum overlays are another popular add-on – it’s a translucent sheet that goes over your invitation with maybe your names or a design printed on it. Very pretty but also increases your printing costs.
Wax seals are having a moment and I get why because they look gorgeous but lemme tell you they can be a nightmare for mailing. The post office machines sometimes smush them or they add extra postage because of the thickness. If you’re gonna do wax seals, maybe use them on the inner envelope or on the RSVP envelope flap instead of the outer mailing envelope.
Printing Methods and What They Actually Mean
Digital printing is the most affordable and totally fine for most weddings. The quality has gotten really good and unless someone’s looking closely they won’t know the difference. Thermography is that raised printing that feels textured – it’s a step up in cost but gives you that fancy feel without the letterpress price tag.
Letterpress is gorgeous and I love it but it’s expensive. Like really expensive. The letters are actually pressed into thick cotton paper and you can see the impression on the back. It’s a whole vibe and if you have the budget it’s stunning, but don’t stretch yourself financially for printing when that money could go toward your bar or your photographer or literally anything else.
Foil printing adds metallic or colored foil elements – gold, rose gold, silver, copper, whatever. It catches the light and photographs beautifully. This is my personal favorite upgrade if you’re looking to splurge on one special element because it has such impact for the cost compared to full letterpress.
Timing and Ordering Quantities
Order your invitations at least 4-5 months before your wedding. This gives you time for design, proofs, printing, assembly, addressing, and mailing. You should mail invitations 6-8 weeks before the wedding date, so work backward from there.
For quantities, order extras. I usually say order 15-20% more than your guest count. You’ll want extras for keepsakes, mistakes during assembly, last-minute additions to your guest list, and that one person who swears they never got their invitation even though you definitely mailed it. My cat actually knocked over a whole box of assembled invitations once and I had to reorder because some got bent… anyway yeah, extras are worth it.
Don’t forget about postage. Take a fully assembled invitation to the post office and have them weigh it before you buy stamps. Anything over 1 ounce needs additional postage, and square envelopes or odd sizes cost more. Also those pretty vintage stamps everyone loves? You can use them but you’ll probably need multiples to reach the required postage amount which is currently $0.73 for a standard letter but like, check because it keeps going up.
Working With Designers vs DIY Templates
If you’re hiring a stationer or designer, expect to pay anywhere from $800 to $3000+ for a complete custom suite depending on printing methods and complexity. You’ll usually do a consultation, they’ll create designs based on your wedding vibe, you’ll go through revision rounds, then they handle printing and sometimes even assembly.
DIY templates from Etsy or Minted or other online services are way more affordable – like $30-150 for the template files – but you’re doing the work yourself. You customize the text and colors, order the printing through an online service, and assemble everything. It’s totally doable if you’re organized and have time but don’t underestimate how long assembly takes for 100+ invitations.
Semi-custom is a middle ground where you work with a designer who has pre-made templates that they customize for you. Costs less than fully custom but you still get professional help and don’t have to figure out printing on your own.
Details That People Forget
Return address. You need it on the outer envelope and on the RSVP envelope. Use your address or whoever’s collecting RSVPs. I prefer printed return addresses because they look cleaner but labels or stamps work too.
Tissue paper inserts are traditional but honestly unnecessary unless you’re using printing methods that might smudge. They were originally used to prevent ink transfer but modern printing doesn’t really need them. Some people include them anyway for the vintage aesthetic which is fine, do what you want.
Proofreading. Triple check everything before it goes to print. Have multiple people read through every card. I once had a client who misspelled the groom’s last name on 200 invitations and didn’t notice until they arrived and that was a whole expensive disaster that could’ve been avoided.
Your wedding website URL should be easy to type – don’t get cute with weird spellings or long complicated domains. Put it on your details card clearly because this is where guests will find registry info, accommodations, and probably where they’ll RSVP if you’re doing online RSVPs.
Map cards are mostly obsolete now that everyone has GPS on their phones, but if your venue is tricky to find or you’re having an outdoor wedding in the woods or something, maybe include basic directions or at least note that GPS might be weird in that area.
Suite Styles and What Works for Different Wedding Types
Formal black-tie weddings usually call for traditional suites – classic fonts, formal wording, engraved or letterpress printing, probably inner envelopes, the whole deal. Your invitation might have a formal border, classic serif fonts, and stick to traditional colors like black, navy, or deep jewel tones.
Casual or rustic weddings can be more playful with kraft paper, twine details, floral illustrations, or watercolor elements. The wording can be more relaxed and you might skip inner envelopes entirely. Your suite might include just two or three pieces total.
Destination weddings need more information so your suite will probably be more extensive. You’ll want a details card with travel info, maybe a full itinerary card, information about welcome bags or events throughout the weekend. Consider a pocket folder style invitation where everything tucks into a folded holder – keeps all the pieces organized for your guests.
Modern minimalist weddings are all about clean lines, lots of white space, simple sans-serif fonts, and maybe one pop of color or a subtle geometric pattern. Less is more with these suites – you might do just black text on white paper with one foil element and call it done. It’s elegant and saves money on printing.
I actually just watched this whole documentary about paper-making last week which sounds boring but it was kinda fascinating and made me appreciate good stationery even more, but anyway the point is that your suite should match your actual wedding vibe or it feels disconnected.