Planning Guides, Style Guide
Embossed Wedding Invitations: Raised Texture Printing
May
What Embossing Actually Is
Okay so embossing is basically when you create a raised design on paper by pressing it between two metal plates – one that pushes up from underneath and one that presses down from above. The result is this gorgeous textured effect where parts of your invitation literally stick up from the surface. You can feel it when you run your fingers over it, which is honestly the whole point because tactile invitations just hit different.
I had this bride back in spring 2023 who was absolutely convinced she wanted “embossed” invitations but what she actually meant was thermography (which is that shiny raised printing that looks similar but costs way less). Spent like forty minutes explaining the difference before she got it, and honestly it was kinda frustrating because I’d sent her samples beforehand but she hadn’t actually touched them, just looked at photos on her phone.
The Different Types You Should Know About
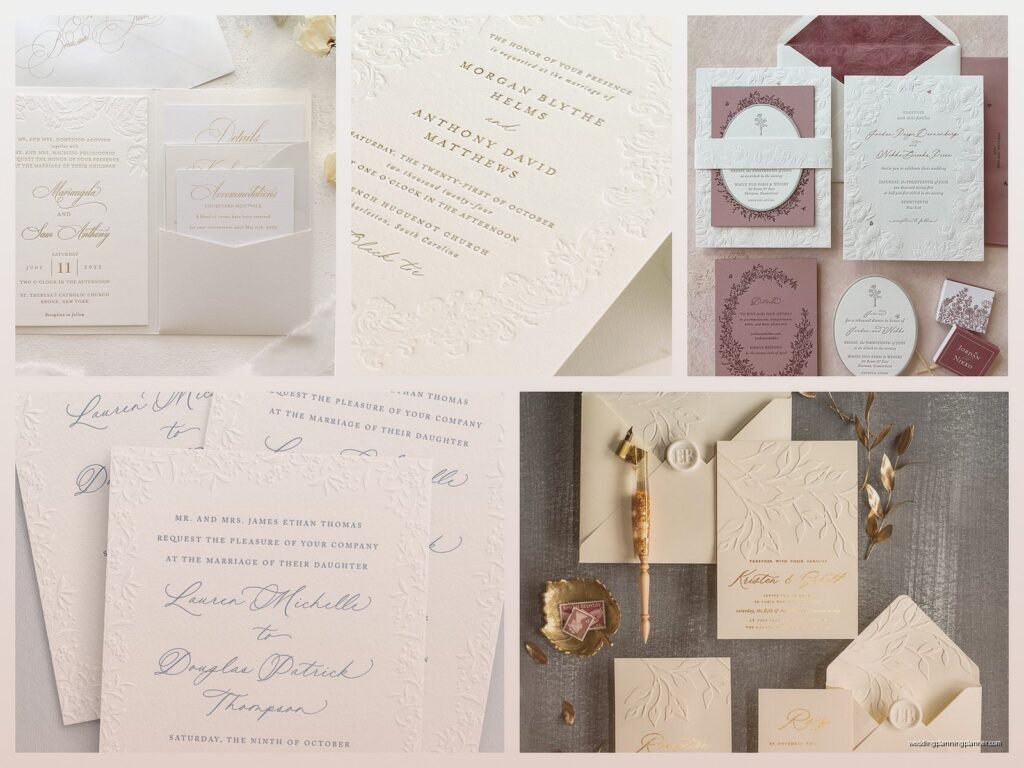
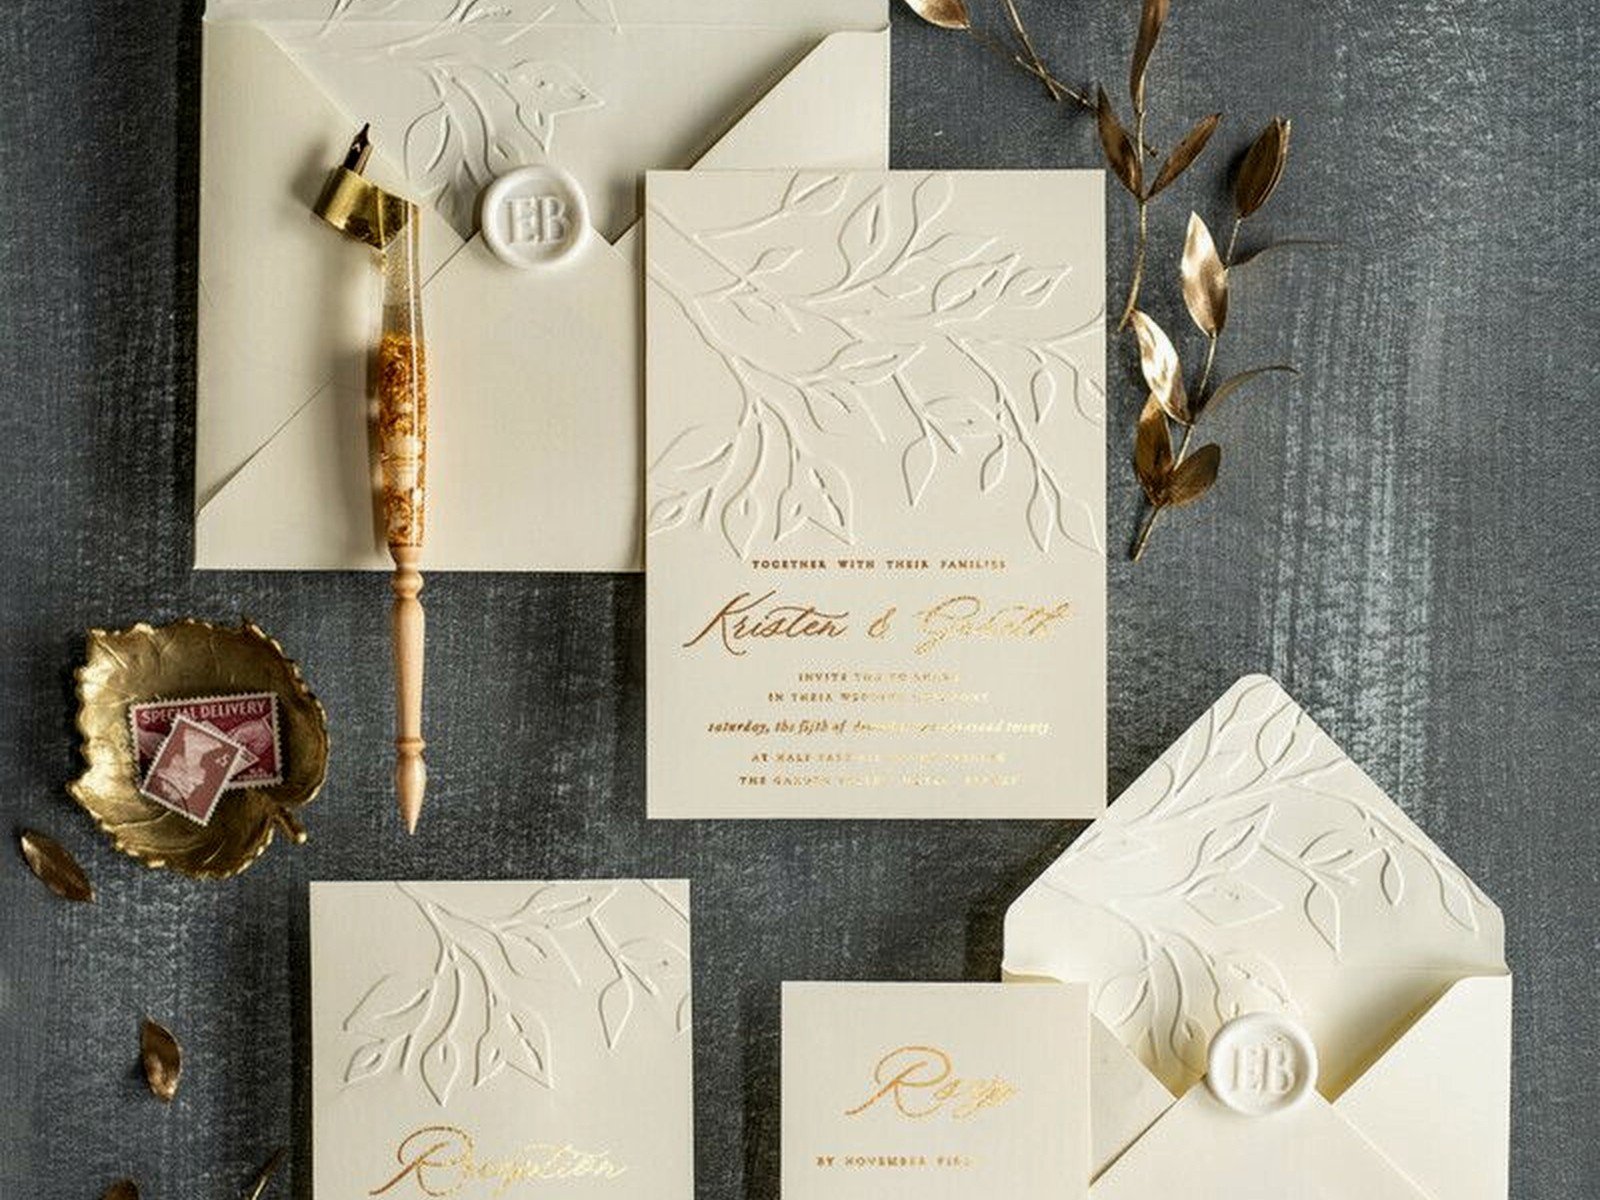
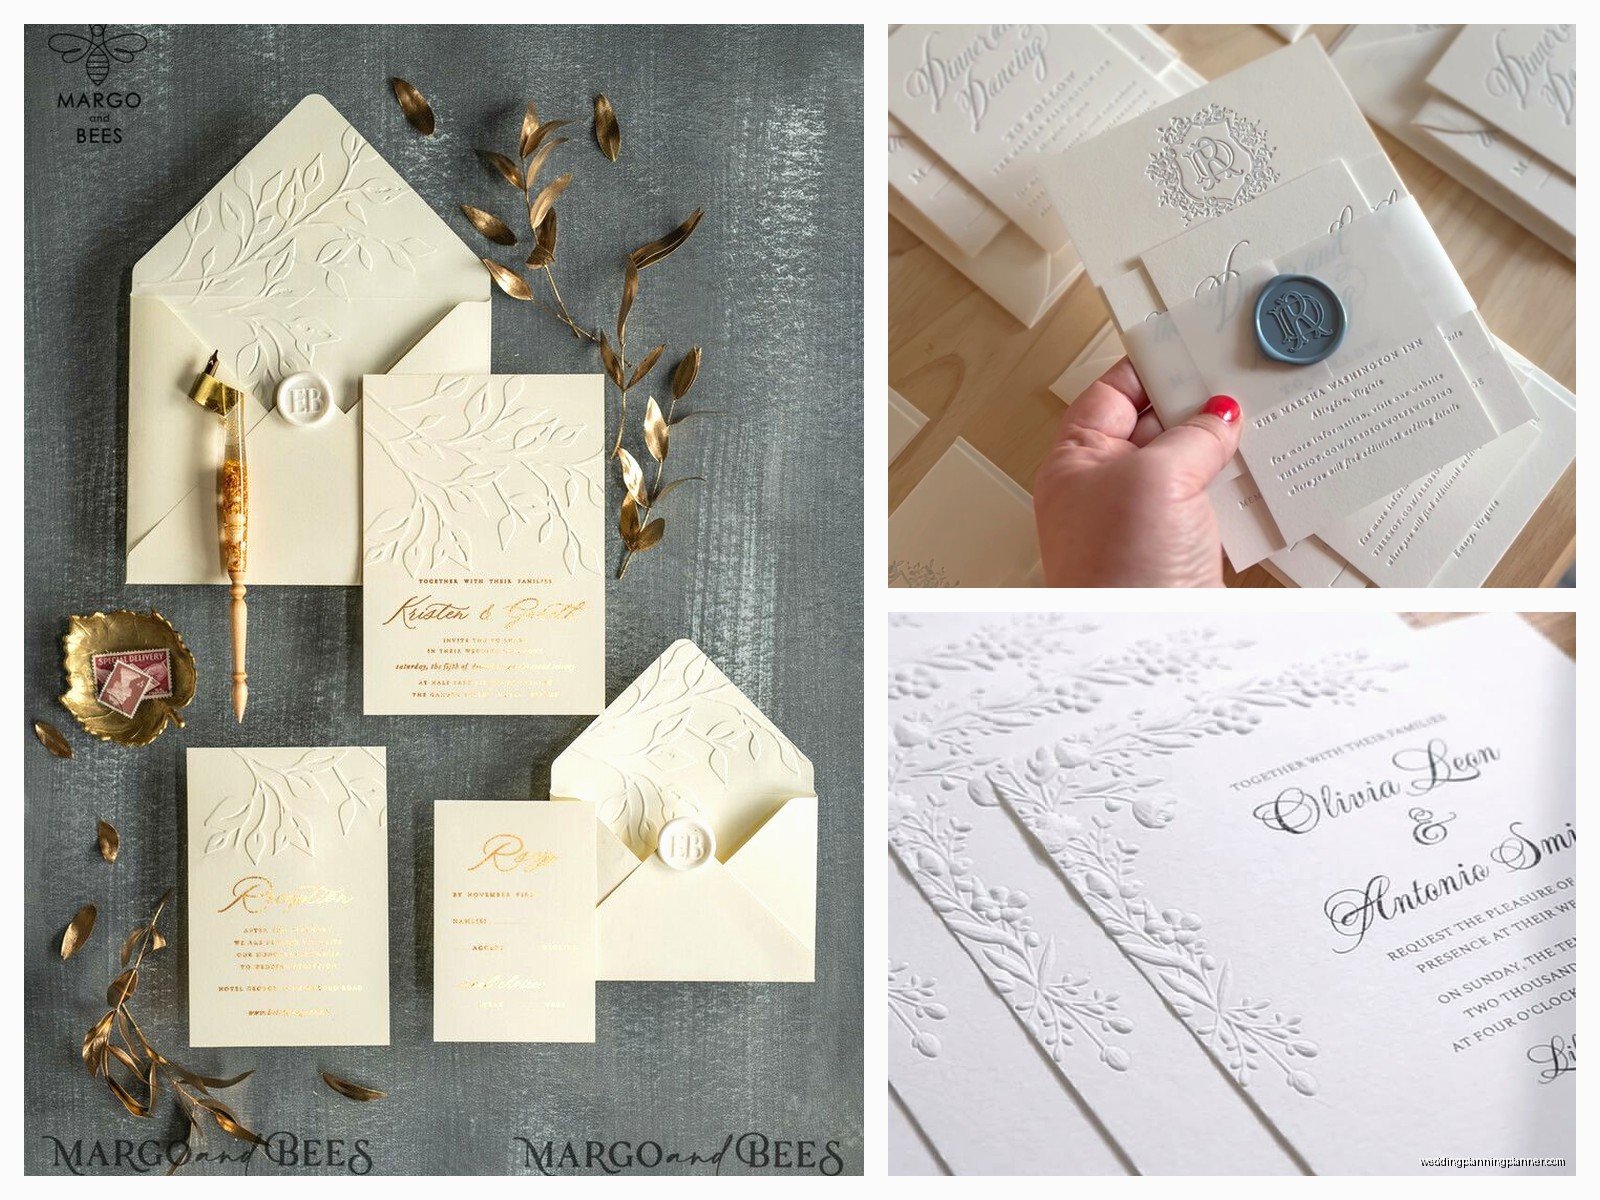
There’s blind embossing, which is when there’s no ink involved at all – just the raised impression in the paper. This creates this really elegant, subtle effect that catches the light. Then you’ve got embossing with foil, where metallic foil gets pressed into the raised area, or embossing with ink where the raised parts are also printed in color.
Blind embossing is my favorite for monograms or borders because it’s so sophisticated without being flashy. The foil combo is stunning for formal weddings – I’m talking black tie affairs where the invitation itself needs to communicate that level of formality. Regular ink embossing is sort of the middle ground where you get texture plus color.
Debossing Is the Opposite
Quick side note – debossing is when the design is pressed INTO the paper instead of raised up. Some people like this better because it feels more modern and the shadows it creates can be really dramatic. Just mentioning it because vendors sometimes use these terms interchangeably which drives me absolutely nuts.
Paper Weight Matters Way More Than You Think
You’re gonna need heavy paper for embossing. I’m talking minimum 80lb cover weight, but honestly 100lb to 130lb is better. Thin paper will just tear or buckle under the pressure of those metal plates. This is where couples get sticker shock because quality cardstock costs money, and when you’re ordering 150+ invitations, it adds up fast.
Cotton paper works beautifully for embossing because it has those natural fibers that compress well without cracking. Crane’s Lettra is like the gold standard – it’s 100% cotton and comes in different weights. I also love Pearl White or Ecru finishes because they show off the dimensional quality of embossing better than stark white.
Textured papers can work but you gotta be careful because if there’s already too much tooth to the paper, the embossing won’t read as clearly. Smooth or slightly textured is ideal.
Design Considerations That’ll Save You Headaches
The design needs to be appropriate for embossing, which means you can’t just take any old invitation template and emboss it. Fine lines that are too thin won’t show up well, and super intricate details might get lost. You want bold enough elements that the dimensionality actually registers when someone looks at the invitation.
Text should be at least 10pt for embossing, though I prefer 12pt or larger for body text. Script fonts can be embossed but they need to have substantial enough strokes – those super delicate calligraphy fonts with hairline thin parts? Nah, they won’t work well.
I always tell clients to think about negative space because embossing creates shadows and highlights. If your design is too crowded, it’ll just look like a bumpy mess instead of an intentional textured effect.
Die Creation Takes Time and Money
Here’s what annoys me most about embossing – the die costs. To emboss, a printer needs to create custom metal dies (sometimes called plates) specifically for your design. These aren’t cheap, usually running $100-$300 or more depending on complexity and size. And you can’t reuse someone else’s die because it’s literally made for your specific design.
This is a one-time setup cost but it’s significant, especially if you’re doing multiple embossed elements (like one die for the monogram, another for a border, etc). Some couples decide to only emboss their names or monogram to save money, then use regular printing for everything else.
Working With a Printer Who Actually Knows What They’re Doing
Not every print shop does embossing. You need a letterpress printer or a specialty stationer who has an embossing press. Online print shops usually can’t do true embossing – they might offer thermography and call it embossing, which is misleading.
When you’re interviewing printers, ask to see physical samples. Like actually hold them in your hands because photos don’t show texture. Ask about their paper recommendations, die costs, and how many impressions they do (sometimes they’ll press it twice for deeper relief).
Timeline is crucial because embossing is done by hand or on specialized equipment that can’t rush. I usually tell couples to allow 4-6 weeks for embossed invitations after design approval, though some printers are faster. My cat knocked over my coffee while I was proofing embossing samples last week and nearly ruined this bride’s final approval set – had a mini heart attack.
Combining Embossing With Other Printing Methods
You can totally combine embossing with other techniques and honestly that’s where things get really beautiful. Foil stamping plus embossing is incredible – the foil adds metallic shine while the embossing adds dimension. Or you could do letterpress printing with embossed elements, which gives you crisp inked impressions plus raised areas.
I did this invitation suite in summer 2021 that had blind embossed borders, letterpress text in navy, and then gold foil embossed monograms. It was like $45 per invitation but the couple had a smaller wedding (only 60 guests) so it fit their budget and wow, those invitations were stunning. People kept them as keepsakes.
Digital printing plus embossing is another option that’s more budget-friendly. You print most of the invitation digitally, then add embossed accents. This gives you the texture without paying for full letterpress or foil stamping on every element.
Pricing Reality Check
Embossed invitations typically start around $8-$12 per invitation for basic designs, but can easily hit $20-$50+ for elaborate multi-technique suites. That’s just for the invitation itself, not including RSVP cards, details cards, envelopes, or assembly.
The cost breakdown usually includes: design fees, die creation, paper, printing/embossing labor, and any additional elements. If you’re adding envelope liners, wax seals, or calligraphy addressing, you’re looking at even more.
I always recommend couples allocate at least $1,500-$3,000 for embossed invitation suites for 100-150 guests if they want quality work. You can find cheaper options but the paper quality and craftsmanship usually suffer.
Envelope Considerations Because They Matter
Your envelopes need to match the formality of embossed invitations. Flimsy standard envelopes look cheap next to a heavily embossed invitation. I usually suggest heavyweight envelopes in coordinating colors – if your invitation is ivory, go with ivory or champagne envelopes.
You can emboss the envelope flap with a monogram or return address, which is a gorgeous detail. Some couples do blind embossing on the flap so when guests open the envelope, there’s this subtle surprise.
Addressing is another thing to think about… calligraphy or digital printing both work, but I’d avoid basic inkjet printing because it looks too casual next to embossed invitations.
What Can Go Wrong (And How to Avoid It)
Paper can crack if it’s too thin or if the embossing is too deep. This is why you need an experienced printer who knows how much pressure to use. Always order extra invitations – I recommend 15-20% overage – because some won’t turn out perfect and you’ll need extras for last-minute additions or mistakes.
Registration issues happen when the embossing doesn’t line up properly with printed elements. If you’re doing embossing plus printing, the printer needs to be really precise with alignment. Ask to see test prints before they do the full run.
Sometimes the embossing doesn’t show up as dramatically as you hoped, especially on darker papers or if the design elements are too small. This is why samples are so important – you need to see how your specific design translates to embossed reality before committing to 150 invitations.
Timing Your Order
Start the invitation process 6-8 months before your wedding date. That gives you time for design revisions, sample approvals, production, and mailing (invitations should go out 8-10 weeks before the wedding, or 12 weeks for destination weddings).
The design phase alone can take 2-4 weeks if you’re working with a custom designer. Then die creation and production adds another 4-6 weeks. If there are any issues or you need revisions after seeing samples, that’s even more time.
Don’t wait until the last minute because embossing can’t be rushed without sacrificing quality or you might end up with… I mean, I’ve seen couples try to rush embossed invitations and end up having to switch to digital printing because they ran out of time.
DIY Embossing? Probably Not
I’m gonna be honest – embossing isn’t really a DIY-friendly technique. You need specialized equipment and dies, plus the skill to operate an embossing press without ruining expensive paper. There are small manual embossers you can buy for simple designs (like those label-maker style tools), but they don’t create the same effect as professional embossing.
If budget is tight, consider embossing just one element (like your names) and doing the rest with digital printing. Or use embossing only on the main invitation and skip it on the RSVP and details cards. These compromises still give you that luxe textured element without the full cost.
Questions to Ask Your Printer
When you’re getting quotes, make sure you ask: What’s included in the die fee? How many impressions will you do? What paper weights do you recommend? Can I see samples of similar projects? What’s the production timeline? What’s your overage policy? Do you offer assembly services?
Also ask about their revision process because you’ll probably want to tweak things after seeing the first proof. Some printers include one round of revisions, others charge for each change.
Making It Work With Your Wedding Aesthetic
Embossing works for basically any wedding style if you design it right. Classic formal weddings can do traditional embossed monograms and borders. Modern weddings might use geometric embossed patterns or bold typography. Garden or romantic weddings could incorporate embossed florals or vines.
The key is matching the embossed elements to your overall design scheme. If your wedding has an art deco vibe, emboss those geometric patterns. If it’s botanical, emboss leaf or flower motifs. The texture adds sophistication no matter what style you’re going for.