Planning Guides, Style Guide
Design Invitation Cards: Design & Ordering Guide
Apr
Okay so you wanna design invitation cards
Start with your paper weight because honestly this is where most people mess up right from the beginning. You need at least 80lb cardstock for anything that’s going standalone, but I usually tell clients 100lb or 110lb feels more substantial in your hands. Spring 2023 I had this bride who insisted on 65lb paper because it was cheaper and omg the invitations arrived so flimsy they were literally bending in the envelopes before we even mailed them. We had to reorder everything.
The actual design part that everyone overthinks
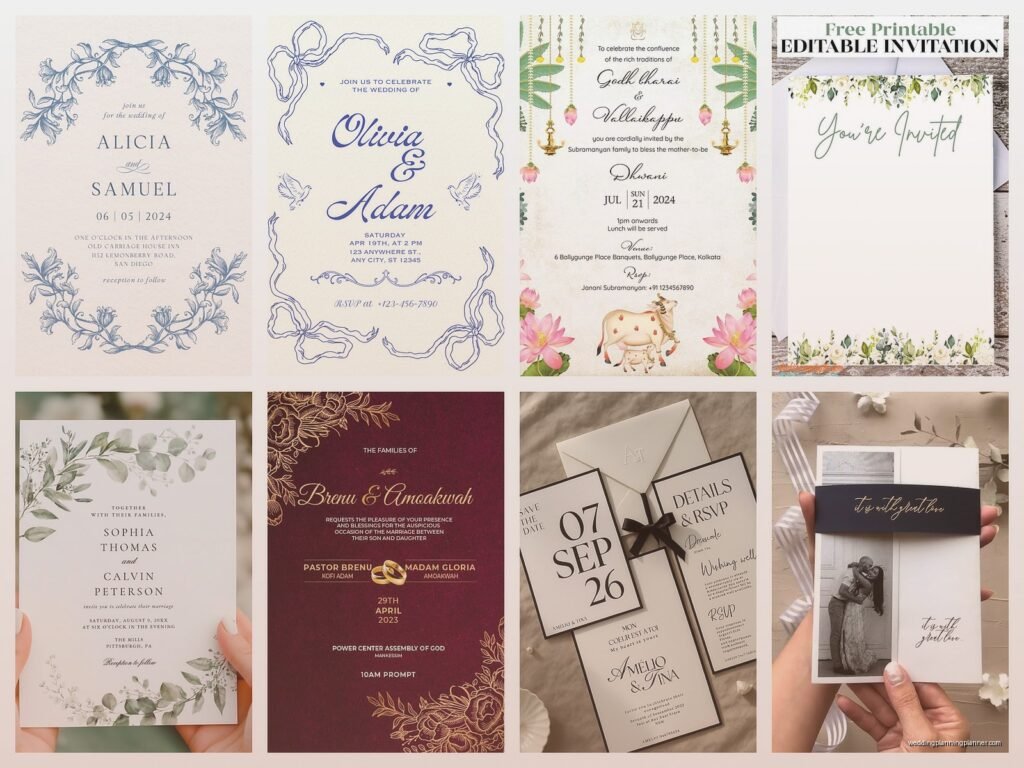
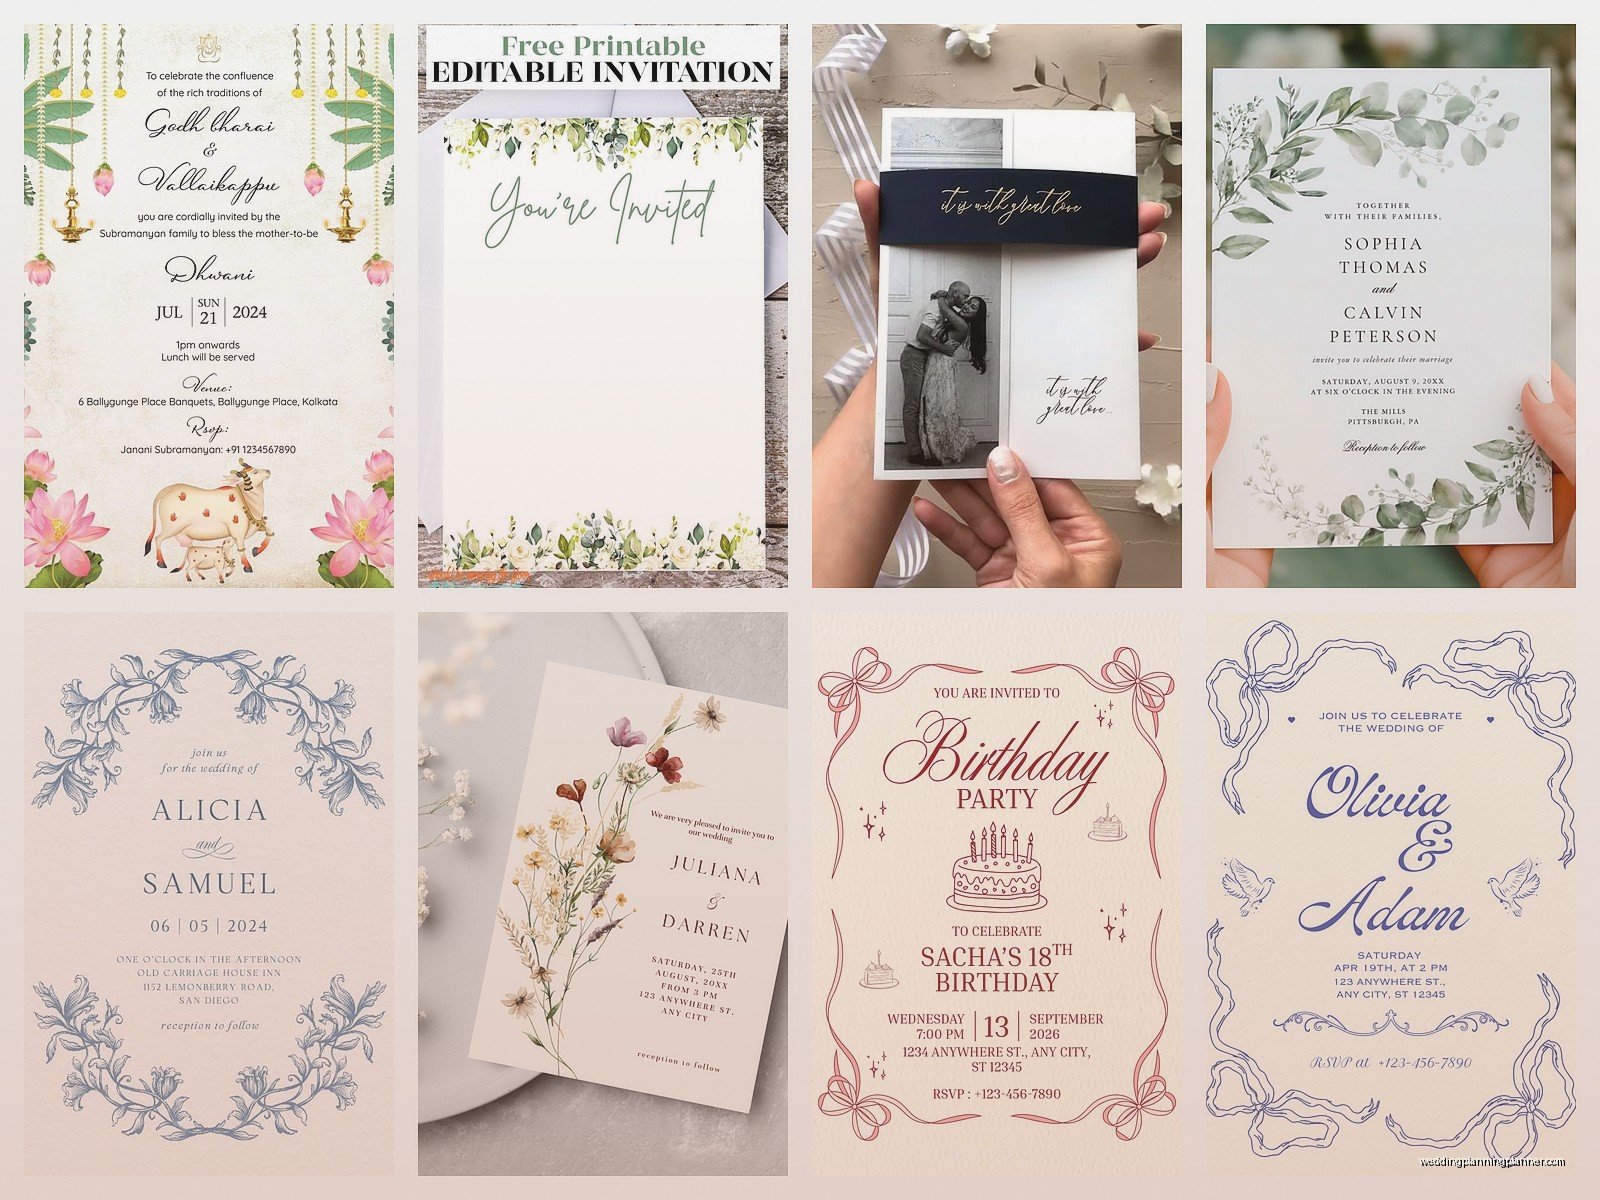
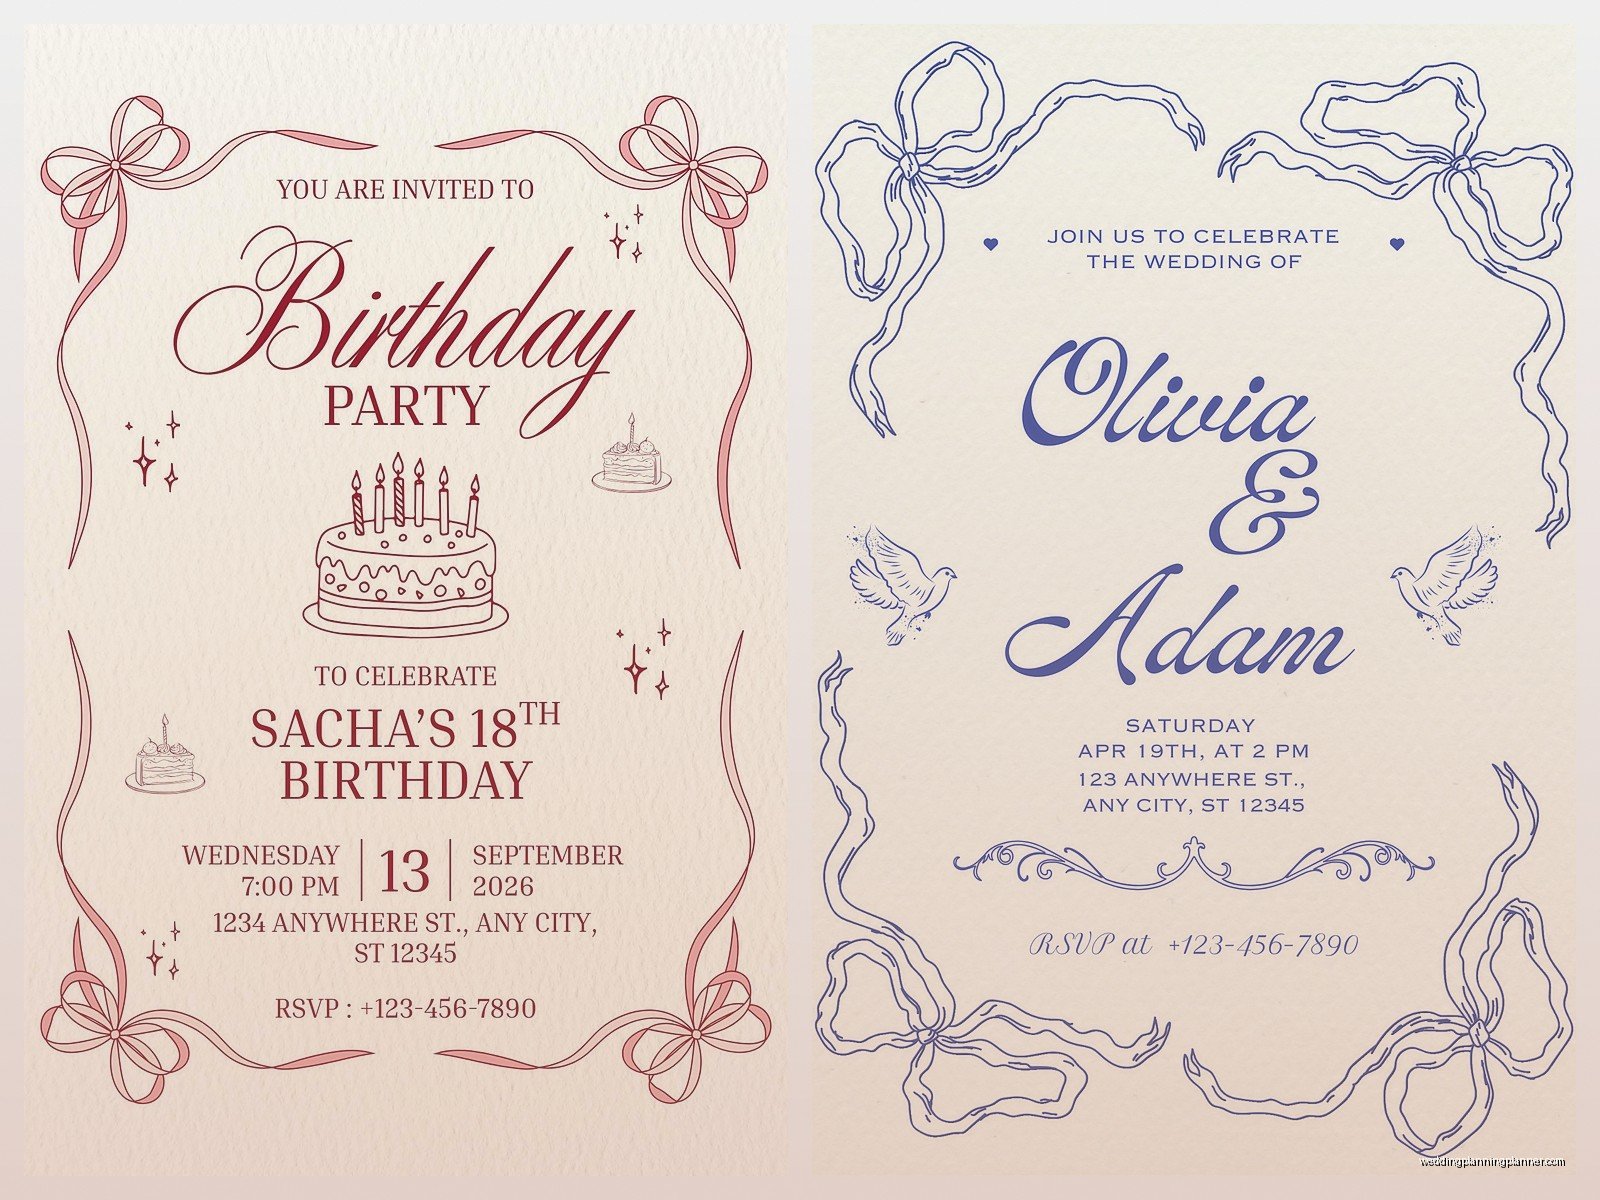
Pick your card size first. Standard is 5×7 inches because it fits in normal envelopes and doesn’t cost extra postage. But 4×6 works if you’re doing something minimal, and square cards (like 5.5×5.5) look really modern but here’s the thing—square envelopes cost more to mail. The post office charges extra for non-standard sizes which is super annoying because nobody tells you this until you’re at the counter with 150 invitations.
For the design itself, you gotta think about hierarchy. That’s just a fancy way of saying what do you want people to see first. Usually it’s the names or the event type. I use font sizes like this: main text should be 18-24pt for names, 10-12pt for details like time and venue, and maybe 8-10pt for RSVP info at the bottom.
Don’t use more than two fonts. Maybe three if one is just for a monogram or something decorative but honestly two is safer. Pick one for headers (your fancy script or serif font) and one for body text (something readable like a clean sans-serif). I learned this the hard way in like summer 2021 when I designed a invitation with four different fonts and it looked like a ransom note.
Color choices that actually matter
If you’re printing at home, stick to designs that don’t have large solid color blocks because your inkjet printer is gonna streak or run out of ink halfway through. Ask me how I know. For professional printing, you can go wild but remember that printing in full color (CMYK) costs more than one or two spot colors.
Metallics look gorgeous but they require special printing techniques. Foil stamping, letterpress, that kind of thing. It adds $2-5 per invitation easily. You can fake it with metallic cardstock or metallic envelopes instead if budget is tight.
The technical stuff nobody explains properly
When you’re setting up your file—whether you’re using Canva, Adobe Illustrator, whatever—you need bleed. That’s an extra 0.125 inches around all edges of your design. So if your card is 5×7, your actual design file should be 5.25×7.25 inches. The printer cuts it down and this prevents white edges if the cut is slightly off.
Save your file as a PDF with embedded fonts. Not a JPEG, not a PNG for print stuff. PDF keeps everything crisp and the colors accurate. Make sure you’re working in CMYK color mode, not RGB, because RGB is for screens and CMYK is for print and they look different. That bright blue on your screen might print as purple-ish, I’ve seen it happen so many times.
What to actually put on the invitation
This seems obvious but you’d be surprised how many people forget stuff. You need: who’s getting married (or celebrating, or whatever the event is), what the event is, date, time, location with full address, and RSVP details. Optional but recommended: dress code, wedding website, registry info goes on a separate card though not on the main invitation.
For wedding invitations specifically there’s traditional wording formats but honestly nobody cares anymore. You can say “together with their families” or list both sets of parents or just put the couple’s names. Do what feels right for your situation. The only thing that really annoys me is when people don’t include the year in the date—like just writing “Saturday, June fourteenth” without the year leaves your guests confused about which June fourteenth you mean.
Ordering from print shops vs doing it yourself
Alright so if you’re ordering from a professional printer, get samples first. Most online print shops like Minted, Zola, Shutterfly will send you samples for free or like $5. Do this because colors look different in person and paper texture matters more than you think.
For quantities, order 10-15% extra. You’ll mess up addressing some envelopes, you’ll want keepsakes, aunt whoever will lose hers and need another one. It’s cheaper to order extras upfront than to do a tiny reorder later.
Local print shops are great if you need something custom or quick turnaround. Bring your PDF on a USB drive or email it. Ask about their paper options because they usually have stuff in stock you can choose from. Online printers have more design templates but less flexibility—you’re basically customizing their existing designs which is fine for most people honestly.
Timeline because timing is everything
Start designing 4-5 months before your event. Order invitations 3-4 months out. Mail them 6-8 weeks before the event. Wedding invitations go out 8 weeks before, save-the-dates go out 6-8 months before. For other parties you can compress this but don’t mail invitations less than 3 weeks before or people won’t be able to plan.
Proof everything like three times before you order. Read it forwards, backwards, have someone else read it. Check the date is correct, the venue name is spelled right, the time includes AM or PM. I cannot stress this enough because reprinting is expensive and embarrassing.
Envelope situation
Your envelopes should match or coordinate with your invitation. White is classic, kraft paper is trendy and casual, colored envelopes make a statement. Make sure you get the right size—A7 envelopes fit 5×7 cards, A6 fits 4.5×6.25 cards.
Inner envelopes are kinda old-fashioned now but some formal weddings still use them. The outer envelope has the mailing address, the inner envelope has just the names and holds the actual invitation. Most people skip inner envelopes to save money and because it’s extra packaging waste honestly.
Envelope liners are those decorative paper pieces inside the envelope flap. They’re pretty but totally optional. You can buy them pre-made or DIY with scrapbook paper and a template. My cat knocked over my coffee onto a stack of envelope liners once and I had to redo like 40 of them, so do your crafting away from pets and beverages.
Printing at home if you’re brave
Buy good cardstock from an actual paper store, not just whatever’s at Target. Neenah, Strathmore, Georgia-Pacific are decent brands. Make sure it’s compatible with your printer—some cardstock is too thick for inkjet printers.
Do a test print on regular paper first. Then test on one piece of cardstock. Check your printer settings—you want highest quality, and select “cardstock” or “thick paper” as the paper type. Print in small batches because if something jams or misprints you haven’t wasted your whole stack.
Let the ink dry completely before handling. Inkjet ink can smear for like 30 seconds after printing. Don’t stack them immediately or they’ll stick together or transfer ink.
Assembly and extras
If you’re including multiple cards (invitation, RSVP card, details card, map, whatever), stack them in size order with the largest on bottom. The invitation is usually the biggest piece, then smaller cards go on top. Some people use belly bands or ribbon to hold everything together which looks nice but is time-consuming to put together.
RSVP cards need their own envelopes—pre-addressed and pre-stamped if you want people to actually send them back. Yeah you gotta pay for postage both ways, it’s annoying but response rates drop significantly if you don’t include a stamp. Or just skip RSVP cards entirely and use your wedding website for RSVPs, saves money and trees.
Postage is more complicated than you think
Weigh your fully assembled invitation at the post office. If it’s over 1 ounce or if it’s square or if it’s rigid or has lumps from ribbons or wax seals, you need extra postage. A standard invitation suite usually needs 70-90 cents postage but decorated ones can need $1.20 or more.
You can get custom stamps or vintage stamps which look way better than flag stamps. Zazzle does custom photo stamps. Etsy sellers curate vintage stamp collections by color which is really cool for matching your wedding colors or theme.
Hand canceling means the post office stamps your envelopes by hand instead of running them through the machine. This prevents the machine from eating your fancy envelopes or smudging them. You gotta ask for this specifically at the post office and some locations charge 20 cents extra per envelope but it’s worth it for expensive invitations.
Digital options because we live in the future
Electronic invitations are totally acceptable now for casual events, some weddings, birthday parties, whatever. Paperless Post, Greenvelope, and Evite are the main platforms. They track RSVPs automatically which is super convenient. You can still make them look formal and fancy with good design.
The problem is older relatives sometimes don’t check email regularly or they don’t know how to RSVP online. So you might need to do paper invitations for like 20% of your guest list and digital for everyone else, which is fine just requires tracking two systems… or you can just call grandma directly to invite her and skip the invitation entirely honestly.
Addressing etiquette quickly
Use full names and proper titles. “Mr. and Mrs. John Smith” is traditional but outdated if the wife has her own identity like maybe use both first names. For unmarried couples living together, both names on one line. Kids under 18 get listed under parents’ names on the inner envelope or just include “and family” if you’re inviting the whole household.
No plus-ones unless you write “and guest” specifically. Just because someone is dating doesn’t mean they automatically get to bring that person—you’re inviting who you’re inviting. This is gonna sound harsh but it’s your event and your budget.
Handwrite addresses if possible because it looks personal and elegant. Or hire a calligrapher if your handwriting is terrible like mine. Print labels are fine too for casual events, nobody really judges that anymore except maybe for very formal weddings. There are also digital calligraphy services where you send them your list and they send back addressed envelopes which is a good middle ground.