
Planning Guides, Style Guide
Wedding Belly Bands: Invitation Wrap Decorative Assembly
May
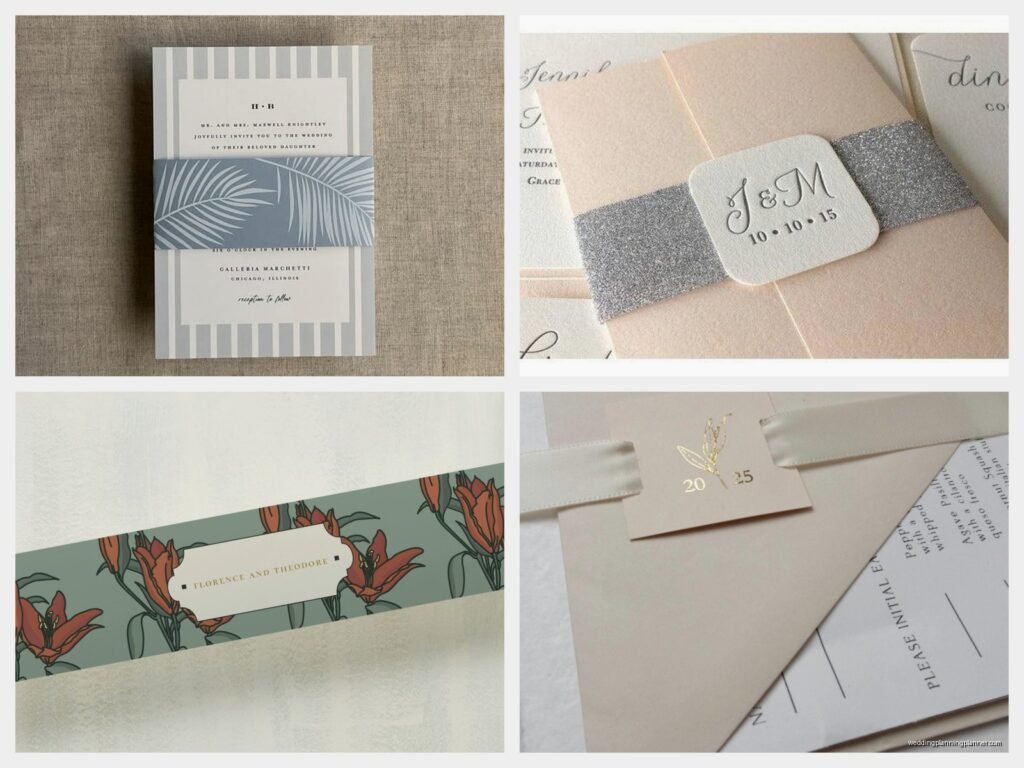
What Belly Bands Actually Are
So belly bands are basically those decorative paper strips that wrap around your wedding invitations to hold everything together. They’re kinda like a belt for your invite suite, which is where the name comes from obviously. You slide them around the middle of your stacked invitation pieces and they keep all your cards, RSVP envelopes, details cards, and whatever else from sliding around everywhere.
I started using these heavily around 2019 when couples wanted something more interesting than just shoving everything in an envelope. They add this polished look without being too fussy, and honestly they’re way easier than those ribbon-tied invitations that take forever to assemble. Though I did have this one bride in spring 2023 who insisted on BOTH belly bands AND ribbon and I wanted to scream because the assembly took literally three times as long.
Why You’d Even Want These Things
Belly bands serve a few purposes beyond just looking pretty. First, they hold your invitation suite together so when someone pulls it out of the envelope, everything stays stacked nicely instead of cards flying everywhere. Second, they give you another spot to add design elements or information—you can print your names, wedding date, a pattern, whatever. Third, they create this nice reveal moment when guests slide the band off to see all the details.
You don’t NEED them for every invitation style, but they work great when you’ve got multiple inserts or when you’re going for a more formal or designed look. For super casual weddings or simple one-card invitations, nah, they’re probably overkill.
Materials You’ll Need
The paper stock matters more than people think. You want something sturdy enough to hold its shape but not so thick that it’s hard to wrap around your suite. I usually recommend 80lb to 100lb cardstock. Anything lighter and it looks flimsy, anything heavier and you’re gonna struggle with the wrapping.
You’ll need a paper cutter or scissors, a ruler, double-sided tape or a glue stick, and your actual invitation suite already assembled and stacked. Some people use those fancy scoring tools but honestly I just fold carefully and it works fine. Oh and you need a clean workspace because nothing’s more annoying than getting fingerprints on 150 belly bands.
For printing, you can do it at home if you have a good printer, but I usually send clients to a print shop for anything over like 50 invitations because home printing gets tedious and you will run out of ink at the worst possible moment.
Sizing Your Belly Bands
This is where people mess up constantly. You need to measure your actual stacked suite, not just guess. Stack everything exactly how you want it to look—invitation on bottom, then details card, RSVP card and envelope, whatever order makes sense. Measure the width and height.
For the belly band width, I usually go with 1.5 to 2 inches. Narrower than that and it looks skimpy, wider and it covers too much of your invitation design. For the length, you need the height of your suite times two, plus the width of your suite, plus about an inch for overlap where you’ll seal it. So if your suite is 5 inches wide and 7 inches tall, you’d do: (7 x 2) + 5 + 1 = 20 inches long.
Actually that formula works for most standard rectangles but if you’re doing square invitations or something weird, you’ll need to adjust. Just wrap a measuring tape around your suite and add an inch, that works too.
Design Considerations That Actually Matter
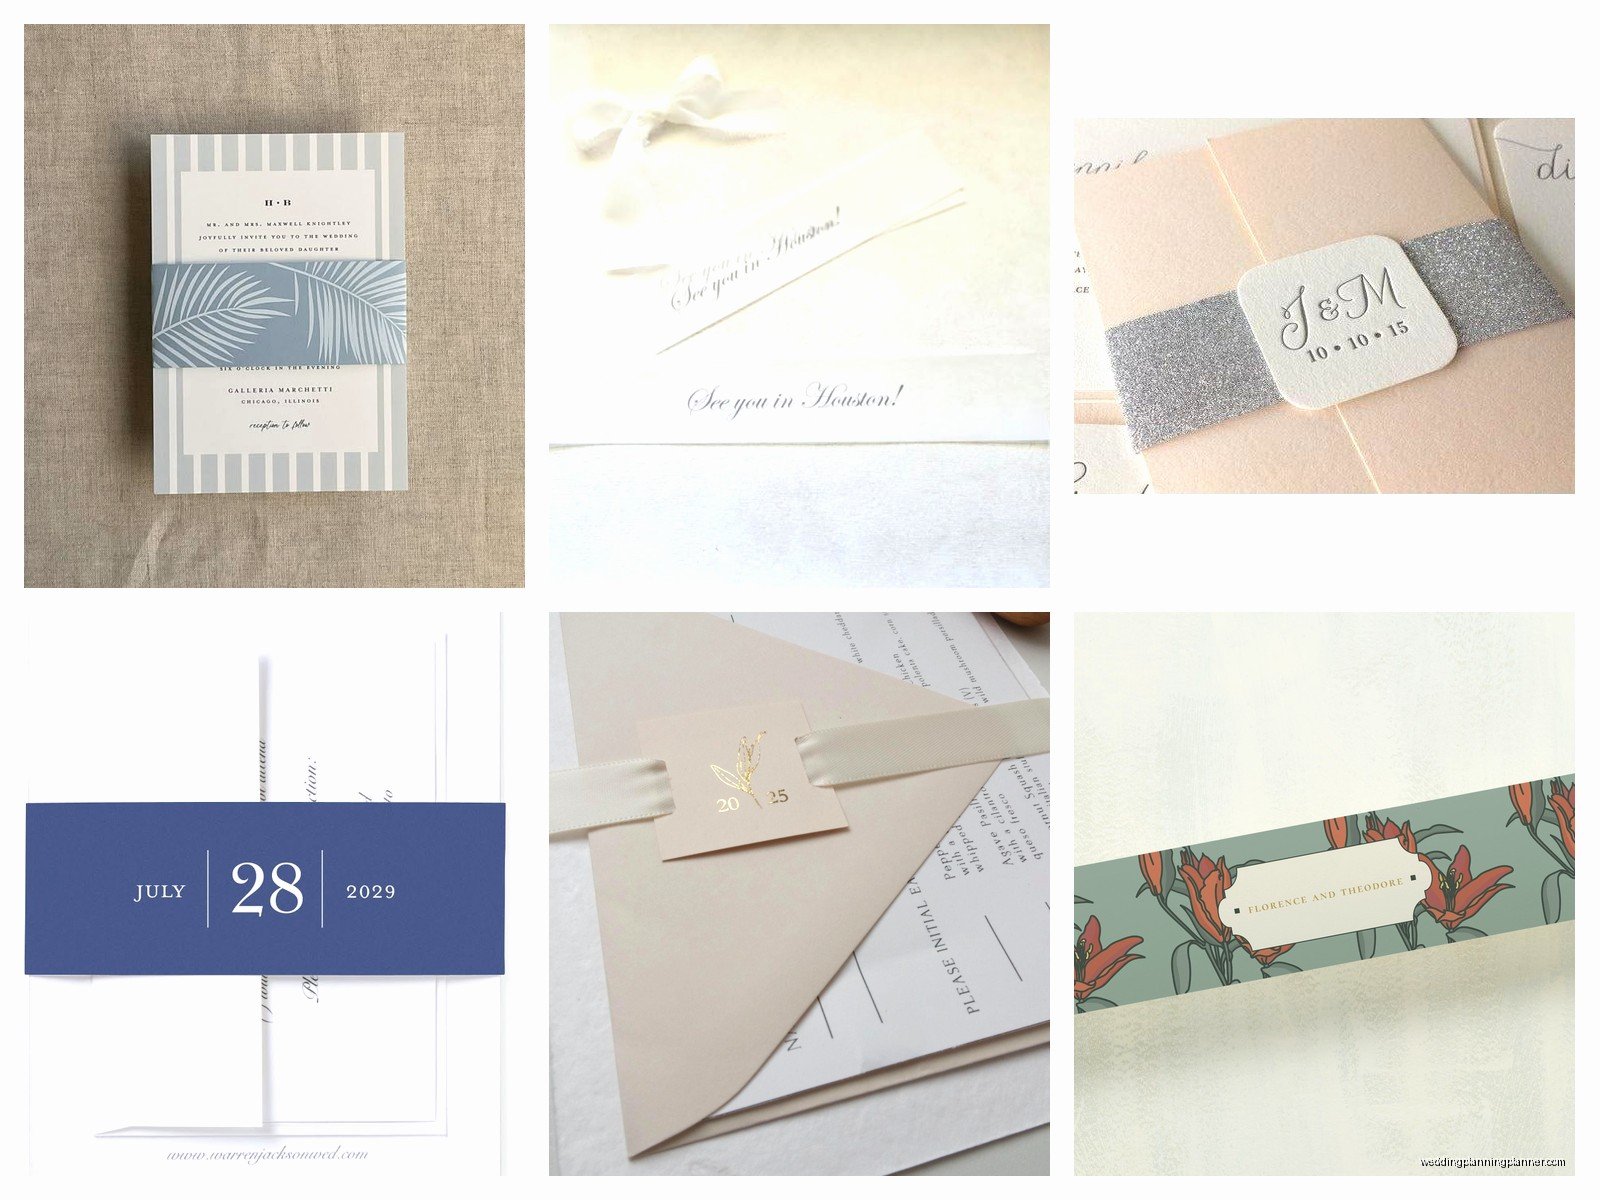
The design should complement your invitation, not compete with it. I see couples try to put too much on the belly band and then it just looks cluttered. Simple is usually better—maybe your names and wedding date, or just a pattern that matches your invitation design, or even a solid color.
Think about orientation too. You can run text horizontally across the front, or vertically along the side. Horizontal is easier to read but vertical looks more elegant sometimes. Whatever you do, make sure any text is centered on the band so it shows nicely when wrapped.
One thing that annoyed me SO MUCH was when a couple designed their belly band without considering where the seam would be. They put their names right where the overlap would happen and half the text got covered by the seal. Test your design by printing one sample first.
Printing Tips
If you’re printing at home, do test prints on regular paper first to check alignment. Nothing worse than wasting expensive cardstock because your printer margins were off. Most home printers can’t print full bleed, so leave at least a quarter-inch margin on all sides or you’ll get white edges.
For professional printing, ask about scoring if you’re using heavier cardstock. A score line where the band folds makes assembly way easier and looks cleaner. Some print shops include this, some charge extra, just ask upfront.
Print a few extras because you will mess some up during assembly. I always tell clients to print 10-15% more than they need. You’re gonna have adhesive failures, crooked wraps, smudges, whatever.
The Actual Assembly Process
Alright so once you’ve got your belly bands cut and ready, set up an assembly line situation. Clear a big table—I use my dining room table and my cat Miso always wants to sit right in the middle of everything which is super helpful obviously.
First, stack your invitation suite in the correct order. I usually go with the invitation on the bottom facing up, then any details cards, then RSVP card and envelope on top. Some people do it differently depending on their design, just be consistent.
Take your belly band and figure out which side will show as the front. If it has a design or text, position it face-down on your table. Place your stacked suite face-down in the center of the band. The invitation should be touching the band.
Wrap the left side of the band up and over the suite, then wrap the right side over that, creating an overlap on the back of the suite. This is where you’ll seal it. The overlap should be about half an inch to an inch—enough to get a good seal but not so much that it’s bulky.
Sealing Methods
Double-sided tape is my go-to. It’s clean, it’s strong, and it doesn’t add bulk. Use a thin tape, not that foamy stuff. Place a strip along the edge of the top flap, press firmly to seal. Done.
Glue sticks work too but they can get messy and if you use too much, it seeps out the edges and looks gross. If you go this route, use a high-quality glue stick meant for paper crafts, not like a kids’ Elmer’s stick.
Some people use stickers or wax seals on the belly band which looks pretty but adds time and cost. Wax seals especially—they look gorgeous but they’re fragile and can break in the mail, plus they add thickness which might require extra postage.
There are also these belly band sleeves you can buy that just slide on without any adhesive, but I’ve found they slip around too easily and kinda defeat the purpose of holding everything together.
Assembly Line Efficiency
When you’re doing a lot of these, you gotta set up stations. I learned this during a massive wedding in summer 2021 where we had 300 invitations to assemble and I initially tried to do each one start to finish. Took forever.
Instead, do it in batches by step. First, stack all your suites. Then, position all the belly bands face-down. Then, place all the suites on the bands. Then, wrap all the left sides. Then wrap all the right sides. Then seal all of them. It sounds like it wouldn’t make a difference but you get into a rhythm and it’s so much faster.
Get help if you can. Bribe friends with wine and pizza. Just make sure everyone knows the process because you don’t want someone wrapping them backwards or sealing them crooked. Quality control matters when these are going to all your wedding guests.
Common Problems and Fixes
Bands that are too loose: Your measurement was off or your suite isn’t stacked tightly enough. You can’t really fix a too-long band except to cut new ones, which is why test runs matter. Make sure you’re stacking your suite tightly when you measure.
Bands that are too tight: They’ll buckle or you won’t be able to wrap them at all. Again, measurement issue. This is worse than too loose because at least a loose band can be secured with extra tape or… actually nah, it still looks bad. Just remeasure and recut.
Adhesive showing: You used too much or it squeezed out when you pressed. Use less next time, and press firmly but don’t smoosh it. If it’s already happened, sometimes you can carefully trim the excess with a craft knife, but honestly it might be easier to just redo that one.
Crooked wraps: This happens when you’re rushing or not centering the suite on the band properly. Slow down. Make sure the suite is centered before you start wrapping. If you catch it before sealing, just unwrap and try again.
Variations and Fancy Options
You can do vellum belly bands which look super elegant and ethereal. They’re a bit trickier because vellum is more delicate and shows fingerprints easily, but the translucent effect is really pretty. You’ll need to be more careful with adhesive because it shows through vellum.
Patterned or metallic cardstock adds interest without extra design work. You can find cardstock with foil patterns, embossed textures, whatever. Just make sure it coordinates with your invitation design and doesn’t clash.
Some people do belly bands with cutouts or die-cut edges, like scallops or geometric shapes. These are cool but you’ll need professional cutting unless you have a Cricut or similar machine and a lot of patience.
Layered belly bands are when you use two different colors or patterns stacked slightly offset. It creates dimension but doubles your assembly time, so… think about whether you really want to commit to that.
What About Pockets or Extras
You can attach small pockets to belly bands for things like accommodation cards or weekend itineraries. I’ve seen this done with small envelopes glued to the band. It works but adds bulk and complexity. Usually I suggest just including those cards in the main stack unless there’s a specific design reason to separate them.
Tags or decorative elements can be threaded through a slit in the belly band or attached with string. This looks custom and expensive but again, time investment. For DIY brides with lots of time, sure. For anyone with a job or other responsibilities, maybe skip it or only do it for special invitations like family or wedding party.
Mailing Considerations You Can’t Ignore
Belly bands add a tiny bit of thickness but usually not enough to change postage. Still, assemble one complete invitation with the belly band, put it in your envelope with all the inserts, and take it to the post office to get it weighed. Don’t just guess because if you underestimate postage, invitations get returned or guests have to pay the difference which is awkward.
The belly band should fit in your envelope without bunching or bending. If you’re using square envelopes or odd sizes, you’ll pay extra postage anyway, but factor that into your budget. I had a couple once who designed these beautiful oversized invitations with belly bands and nearly had a heart attack when they found out postage was like three dollars per invite.
Make sure the belly band is secure enough that it won’t slip off during mailing. Test by shaking your assembled invitation gently—if the band slides around, your seal isn’t strong enough or the band is too loose.
Time and Cost Reality Check
Budget at least 2-3 minutes per invitation for belly band assembly if you’re new to it. Once you get fast, maybe a minute each. So for 100 invitations, plan on 2-3 hours of assembly time just for the bands, not including the rest of the suite assembly.
Cost-wise, belly bands are relatively cheap if you’re printing them yourself. Cardstock runs maybe 50 cents to a dollar per sheet, and you can get multiple bands per sheet depending on your size. Professional printing costs more but saves time and usually looks better. Expect maybe $1-2 per belly band for professional printing and cutting, less if you’re ordering in bulk.
Don’t forget to factor in your time cost too. If you’re spending 10 hours assembling belly bands, that’s 10 hours you could be doing other wedding planning or like… I dunno, watching that new season of whatever show everyone’s talking about. Sometimes paying for professional assembly is worth it just for your sanity.
When to Skip Them Entirely
If you’ve got a super simple invitation with no extra inserts, you probably don’t need a belly band. Just put the invitation in the envelope. Done.
If your budget is tight, belly bands are decorative, not functional. You can hold your suite together with the envelope itself or use a small piece of tape on the back that nobody sees.
If you’re short on time and doing everything yourself, belly bands might be the thing to cut from your list. They’re pretty but not essential, and your guests care way more about the actual information than how it’s packaged, even though we all pretend otherwise.
