
Planning Guides, Style Guide
Ribbon for Wedding Invitations: Decorative Tie Embellishment
May
Okay so ribbon on wedding invitations
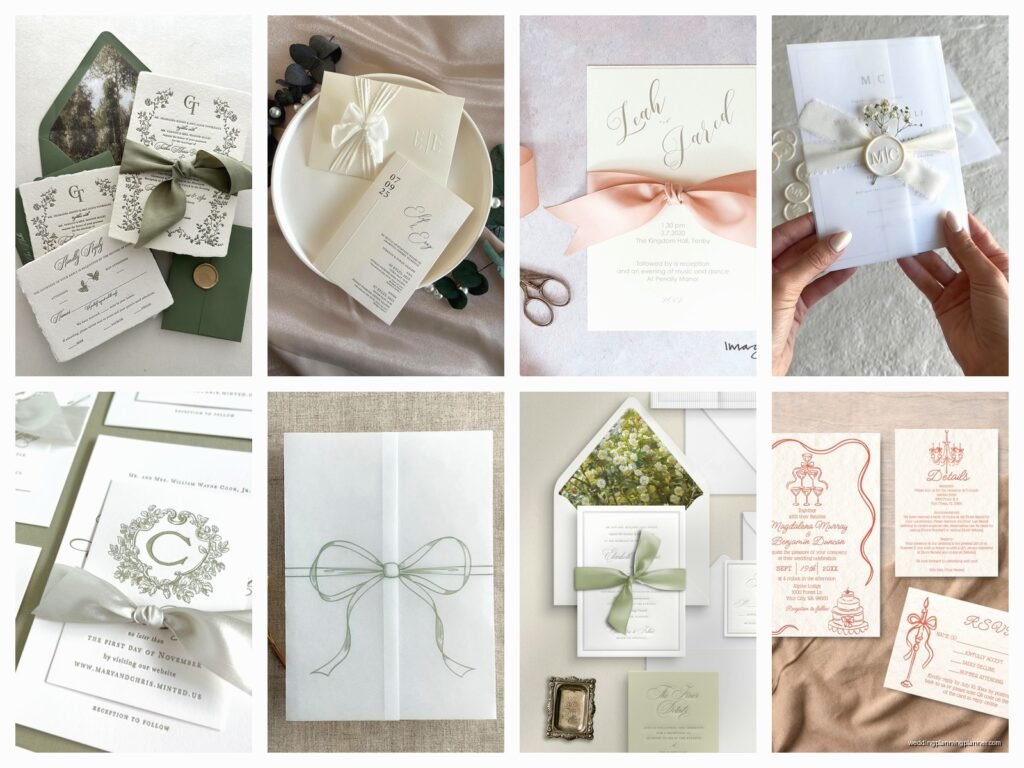
Right so you’re probably looking at those gorgeous invitation suites on Pinterest with the silky ribbon tied around them and thinking yeah I want that. And honestly? It’s one of the easiest ways to make your invitations look expensive without actually spending a fortune. I’ve been doing this since like 2012 and ribbon is still my go-to when couples want that elevated look but don’t have the budget for letterpress or custom wax seals.
The thing is, there’s actually a technique to it. You can’t just tie any ribbon around your invite and call it a day. Well, you can, but it’s gonna look kinda sloppy and the ribbon will slip around during mailing which drives me absolutely insane.
Types of ribbon you should actually consider
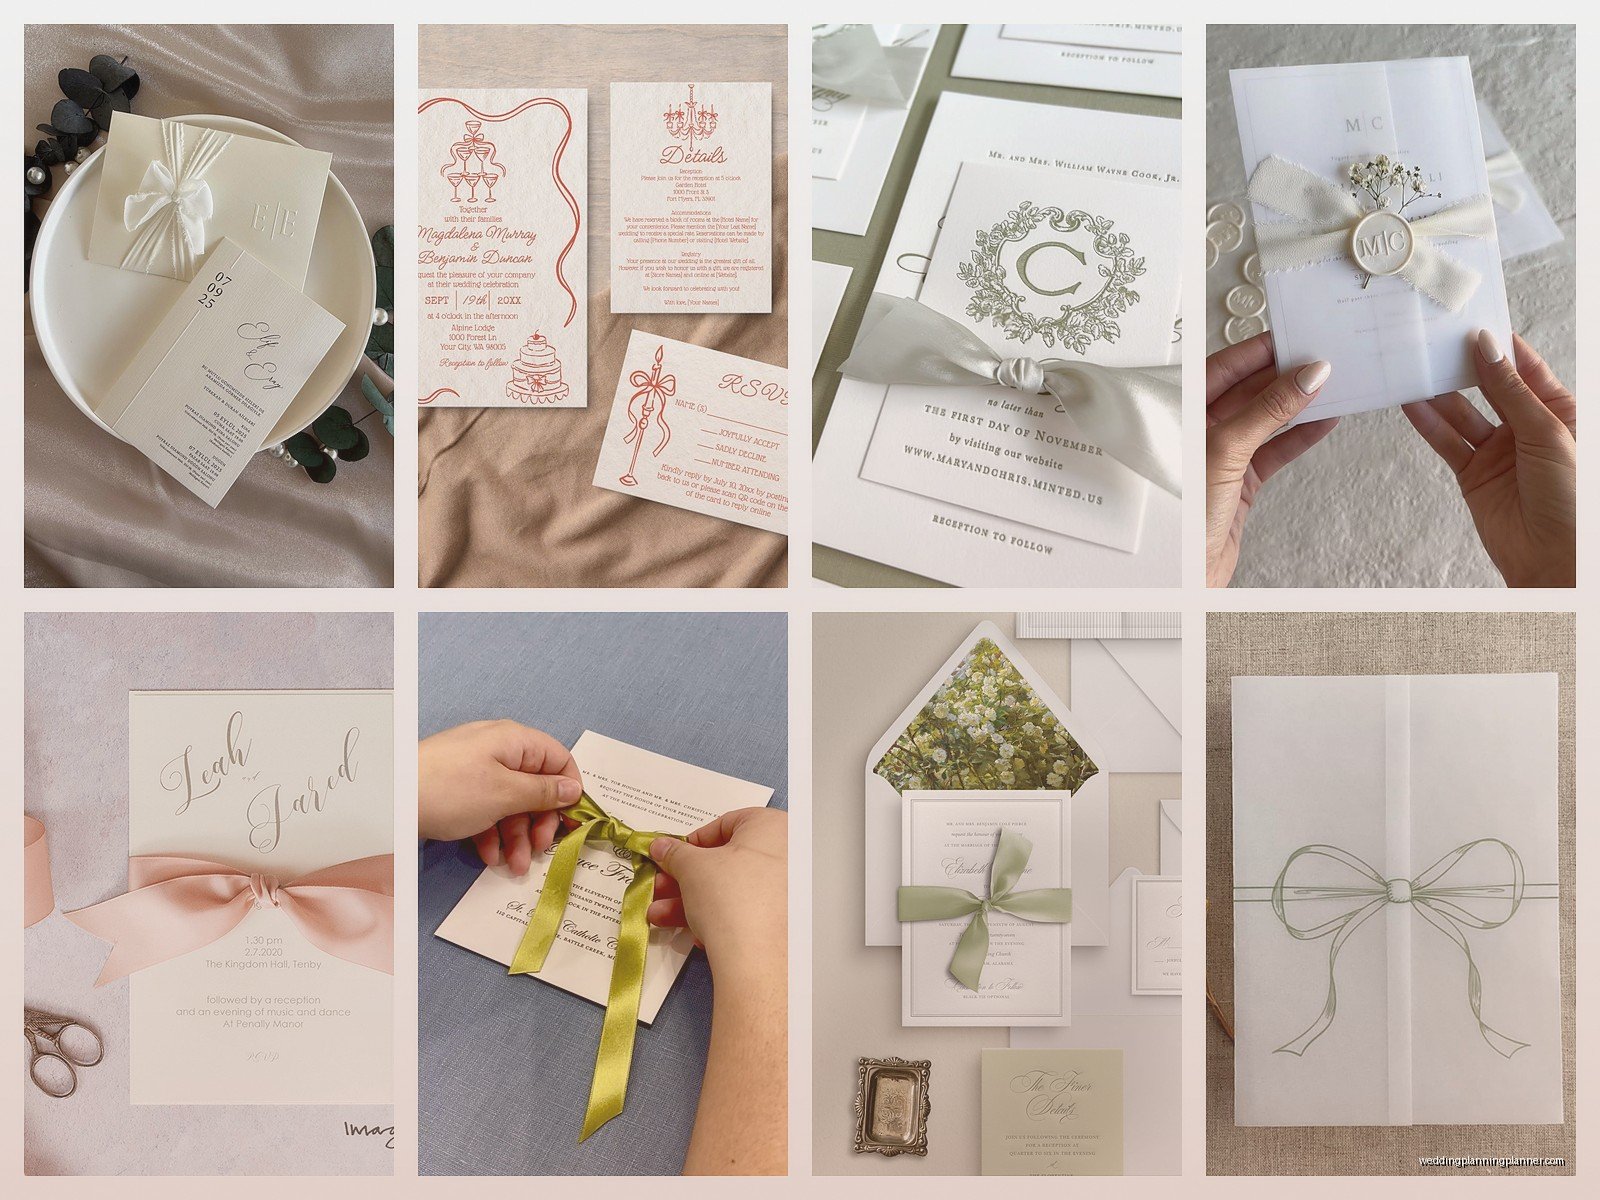
Satin ribbon is the most popular and for good reason. It photographs beautifully, comes in literally every color you can imagine, and it’s affordable. I usually tell clients to go with double-faced satin so both sides look finished. Single-faced satin has that dull back side and if your ribbon twists at all it’s super obvious.
Silk ribbon is gorgeous but pricey. Like really pricey. I had this bride in spring 2023 who insisted on hand-dyed silk ribbon for 200 invitations and the ribbon alone cost her almost $400. It was beautiful, don’t get me wrong, but you gotta decide if that’s where you want your budget going. The silk did have this amazing texture though and the way it held the knot was *chef’s kiss*.
Grosgrain ribbon has that ribbed texture and it’s actually my personal favorite for a more casual or rustic wedding. It doesn’t slip as much as satin which is helpful. Plus it comes in fun patterns sometimes.
Organza ribbon is sheer and pretty but honestly? It’s annoying to work with. It frays like crazy and the knots don’t stay tight. I only recommend it if you‘re layering it with another ribbon or if you’re absolutely set on that ethereal look.
Velvet ribbon screams luxury and it’s perfect for fall or winter weddings. The only downside is it adds bulk so you need to account for that when you’re figuring out envelope sizes and postage.
What width should you use
This depends on the size of your invitation but here’s what I usually do. For a standard 5×7 invitation, I like 1.5 inch width ribbon. It’s substantial enough to make a statement but not so wide that it overwhelms the design. If you’re doing a smaller invite like 4×6 or those skinny DL size ones, go with 1 inch or even 3/4 inch.
For larger invitations like 6×8 or square formats, you can go up to 2 inches. I did this wedding in summer 2021 with these massive 8×8 invitations and we used 2.5 inch ribbon and it looked incredible but those envelopes required extra postage and the bride was NOT happy when she found out each invite would cost like $2.50 to mail.
How to actually attach the ribbon
Alright so there are a few methods and I’ll walk you through them. The most common is the belly band style where the ribbon wraps around the middle of your invitation suite.
First you need to figure out how much ribbon you need per invitation. Take your invitation, wrap the ribbon around it where you want it to sit, and add about 12-14 inches for the bow or knot. So if it takes 8 inches to wrap around, you’re cutting pieces that are about 20-22 inches long. Always cut a test piece first because there’s nothing worse than cutting 150 pieces and realizing they’re all too short.
For assembly, stack your invitation suite in the order you want—usually the invitation on bottom, then any insert cards, then RSVP stuff, then details card. Wrap the ribbon around and tie it on the front or back depending on your preference. I usually do front because that’s what people see first when they open the envelope.
The bow situation is where people get stressed. A simple knot actually looks really elegant and it’s way easier than trying to make 100 perfect bows. If you do want bows, practice until you can do them in your sleep because they need to look consistent across all your invitations.
The adhesive method
Some people prefer to glue the ribbon down instead of tying it. This works well if you’re doing a ribbon accent rather than a full wrap. You can run a strip of ribbon across the invitation horizontally and secure the ends on the back with double-sided tape or a glue runner.
I kinda prefer this method when the invitation has a lot of layers because it keeps everything secure. Like if you’ve got a vellum overlay or a belly band plus ribbon plus… it can get messy and things shift around. Gluing the ribbon means everything stays put.
Just make sure you’re using acid-free adhesive so it doesn’t yellow over time or damage your paper. I learned this the hard way with a client who used regular tape and the invitations looked gross after sitting in her garage for like three weeks before mailing.
The threading technique
This is more advanced but it looks so professional. You punch small holes or slits in your invitation and thread the ribbon through, then tie it on the back. It’s similar to how you’d lace a corset which is kind of a fun parallel for wedding stuff.
You need a hole punch or a craft knife for this. I use a Japanese screw punch because it makes clean holes in different sizes. You punch two holes about an inch apart, thread the ribbon through from back to front, then tie it. The ribbon sits flat against the invitation which is a really clean look.
The annoying thing about this method is it’s time-consuming and if you mess up the hole placement you’ve basically ruined that invitation. So you gotta be precise. I usually create a template so every hole is in the exact same spot.
Dealing with envelopes and mailing
Okay so here’s where ribbon gets tricky. If your ribbon is too bulky or the bow is too puffy, your invitations won’t fit in the envelopes or they’ll get damaged in the mail. I cannot tell you how many times I’ve had to break this news to a bride who’s already assembled everything.
You have a few options. One is to put the invitation suite in the envelope without the ribbon, then tie the ribbon around the outside of the envelope. This actually looks really pretty and it’s a nice surprise when guests receive it. The downside is the ribbon might get torn off during mailing or it adds extra thickness which means more postage.
Another option is to tie the ribbon loosely enough that the suite still fits in the envelope but the bow or knot sits flat. This takes some experimenting. Or you can skip the bow entirely and just do a simple knot or even just a ribbon strip glued down.
Always take a fully assembled invitation to the post office and have them weigh it before you buy stamps for all of them. I had this whole situation where a client insisted her invitations were fine with regular stamps and then half of them got returned for insufficient postage. She was furious but like… I told her to check first.
Color coordination tips
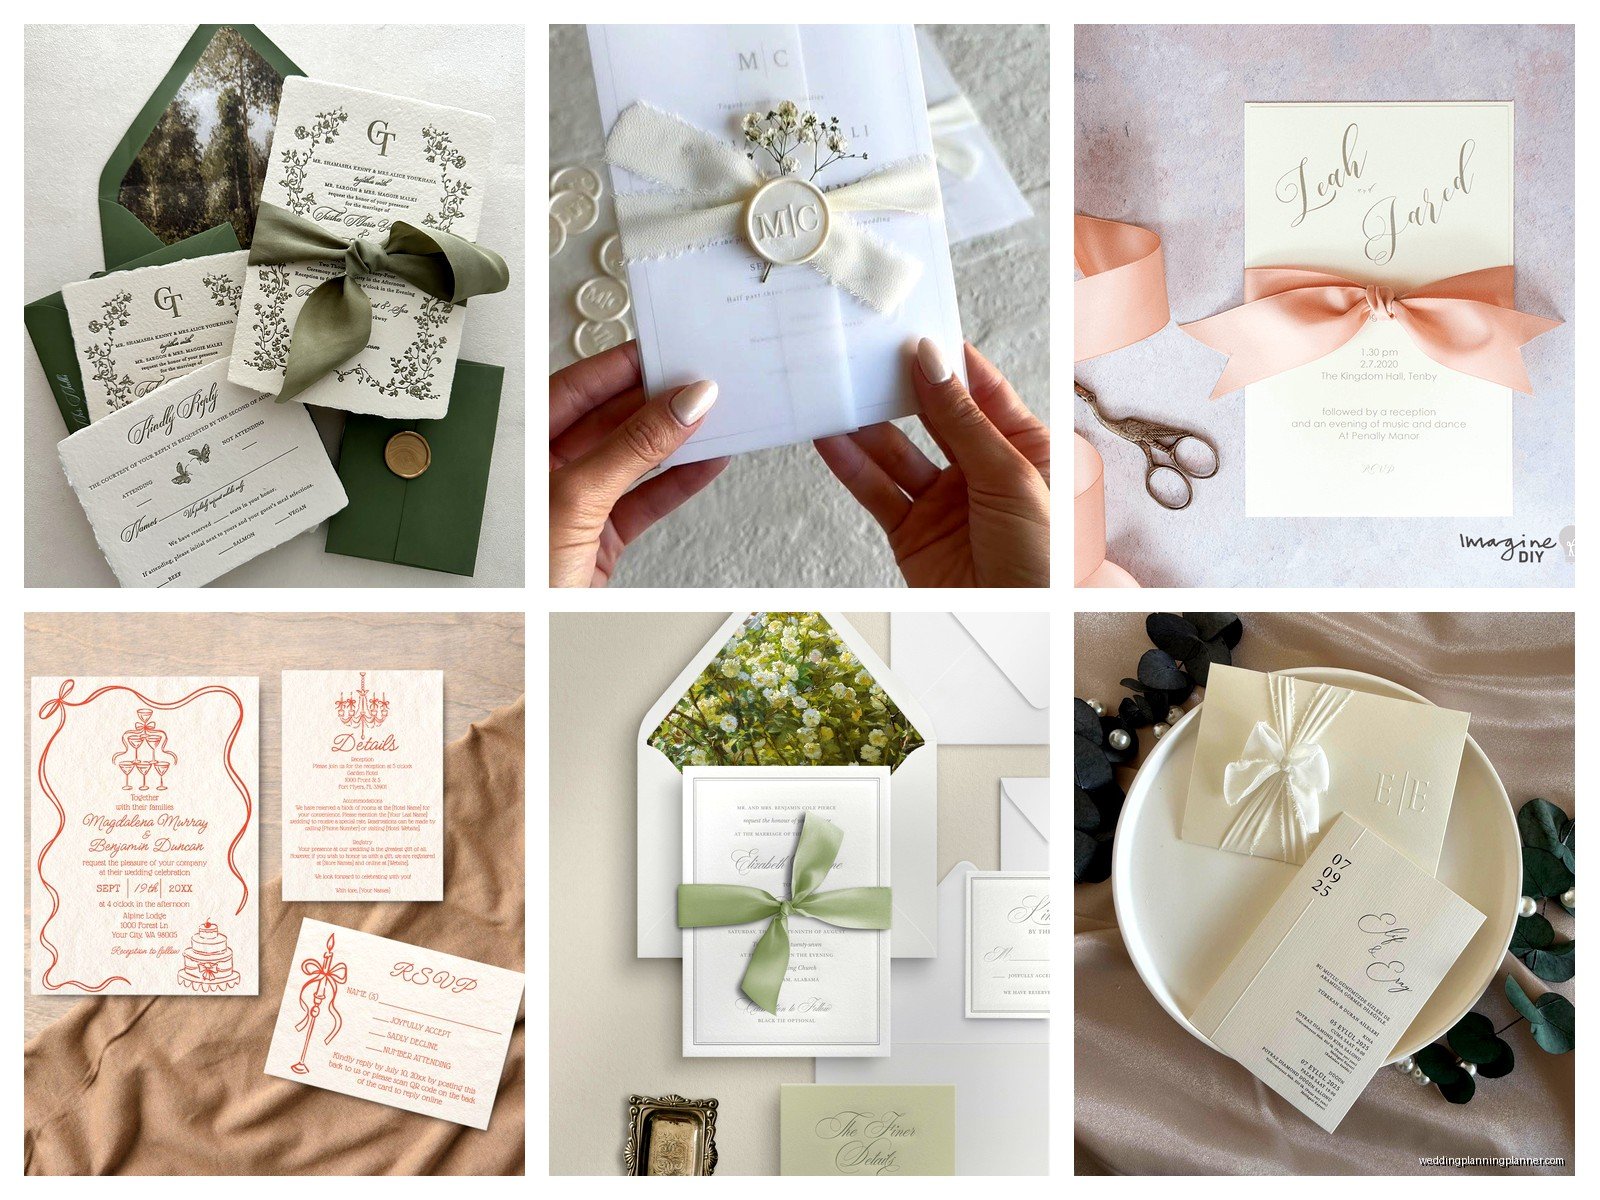
Matching ribbon to your wedding colors seems obvious but there’s actually some strategy to it. If your invitation paper is white or ivory, you can go bold with the ribbon color. If your invitation already has a lot of color or pattern, choose a ribbon that complements rather than competes.
I usually suggest pulling a color from your floral arrangements or bridesmaid dresses. That way the invitation feels cohesive with the overall wedding design. Metallic ribbons like gold or rose gold are super popular right now and they work with almost any color scheme.
One thing though—be careful with really dark ribbons like navy or black on light-colored invitations because the dye can sometimes transfer if the invitations get damp or if people have sweaty hands. I know that sounds gross but it happens and then you’ve got smudges on your pretty white paper.
Ordering the right amount
Ribbon is usually sold by the yard or in spools. You need to do the math on how much you need total. So if each invitation needs 22 inches of ribbon and you’re doing 120 invitations, that’s 2,640 inches which is 220 feet or about 73 yards. I always add 10-15% extra for mistakes and practice.
It’s usually cheaper to buy one big spool than multiple smaller ones. I order most of my ribbon from wholesale suppliers or sometimes Etsy shops that specialize in wedding ribbon. The craft stores are convenient but marked up.
Make sure you order all your ribbon at once because dye lots can vary. I learned this lesson when I had to reorder ribbon halfway through a project and the new spool was like two shades different. It was subtle but noticeable when you put them side by side and we had to redo like 40 invitations.
DIY assembly tips that actually help
Set up an assembly line if you’re doing this yourself. I usually have the invitation stacks already organized, then a cutting station for ribbon, then a tying station. Put on a good podcast or Netflix show—I personally got through an entire season of some baking competition while doing ribbon for a wedding last year, my cat kept trying to attack the ribbon spools which was… distracting.
Cut all your ribbon pieces first before you start tying. It’s so much faster than cut-tie-cut-tie. Use a ruler and rotary cutter if you have one for super clean edges. Or fabric scissors work fine too.
If you’re doing bows, use a bow-tying tool or even just a fork to keep them consistent. There are tutorials on YouTube that show you how to make perfect bows every time using weird tricks and they actually work.
Take breaks because your hands will cramp up. I usually do batches of 25 at a time and then I walk away for a bit. Trying to power through 150 invitations in one sitting is how you end up with sloppy bows at the end because you’re tired and frustrated.
Alternative ribbon applications
You don’t have to do the traditional wrap-around style. Some other ideas that I’ve done: ribbon bookmark attached to a booklet-style invitation, ribbon used to tie a tag with guest names, ribbon woven through a laser-cut invitation cover, ribbon as a closure for a gatefold invitation.
I also love using ribbon to bundle the RSVP card and envelope separately from the main invitation. It keeps things organized and it’s an unexpected detail. Or you can tie multiple invitation pieces together like a little package which is really sweet for destination weddings where you’re including lots of information cards.
Some people do ribbon seals on the back of the envelope which looks fancy but you gotta make sure it doesn’t interfere with the mailing barcode area or the post office gets annoyed.
What ribbon widths work with what invitation sizes
I mentioned this earlier but let me break it down more specifically because I get asked this constantly. For a 4×6 invitation use 5/8 to 1 inch ribbon. For 5×7 which is the most standard size go with 1 to 1.5 inches. For anything larger like 6×9 or square formats you can do 1.5 to 2 inches.
If you’re doing a skinny invitation like those tall rectangular ones that are trendy right now, use a narrower ribbon like 3/4 inch or even 1/2 inch. The proportions matter more than you’d think and a too-wide ribbon on a small invitation looks awkward.
Timing and when to add ribbon
Add ribbon after you’ve printed everything but before you stuff the envelopes obviously. I usually recommend doing ribbon assembly about 2-3 weeks before your mail date. Don’t do it too far in advance because the ribbon can get dusty or wrinkled if the invitations are sitting around for months.
If you’re having a stationer or calligrapher address your envelopes, get that done first, then add ribbon, then stuff and seal. The order matters because you don’t want to be handling the invitations too much after the ribbon is on—it can slip or get messed up.
Also like… don’t underestimate how long this takes. I can do about 30-40 invitations per hour when I’m moving fast and I’ve done this a million times. If it’s your first time expect it to take longer, maybe 15-20 per hour especially if you’re being particular about the bows looking perfect.
