Planning Guides, Style Guide
Destination Wedding Save the Date: Travel Theme Announcements
May
Getting Your Travel-Themed Save the Dates Actually Right
So you’re doing a destination wedding and need save the dates that actually communicate all the important stuff without looking like a cheesy airport poster from 1987. I’ve designed probably three hundred of these at this point and honestly the travel theme thing can go really right or really wrong depending on how you approach it.
First thing – and I cannot stress this enough – is that your save the date needs to include way more information than a regular one. Like, you can’t just slap “Save the Date! June 2025! Details to follow!” on a postcard with a palm tree and call it done. People need to know WHERE specifically (country AND city, sometimes even the resort name if you’ve booked it), and they need this info like 8-10 months out minimum. For international destinations I actually push for a full year because flights get expensive and people need to apply for passports or renew them.
Back in spring 2023 I had this couple who wanted to do Tulum and they waited until 6 months before to send save the dates because they were being perfectionists about the design. Half their guest list couldn’t afford the flights by that point and they ended up with like 40% of their expected attendance. It was honestly heartbreaking and could’ve been avoided if they’d just sent something earlier, even if it wasn’t Pinterest-perfect.
What Information You Gotta Include
Your names obviously, the destination (be specific – “Mexico” isn’t enough, say “Cabo San Lucas, Mexico”), the wedding date or at least the weekend, and here’s the thing people forget: the travel dates. If you’re doing a Thursday ceremony, people need to know they should probably arrive Wednesday. I usually write something like “Wedding Weekend: June 15-18, 2025” so guests know it’s not just a pop in for one day situation.
You should also include your wedding website URL. This is where you’ll put all the actual details about hotel blocks, airport information, things to do, dress code, all of it. The save the date is basically just the teaser that says “block off these dates and start planning.”
One thing that annoys me SO much is when couples don’t include a way for guests to contact them with questions. Like you’re asking people to potentially spend thousands of dollars on travel and you can’t put an email address on there? Come on. I always add a small line at the bottom with an email or phone number.
Design Directions That Actually Work
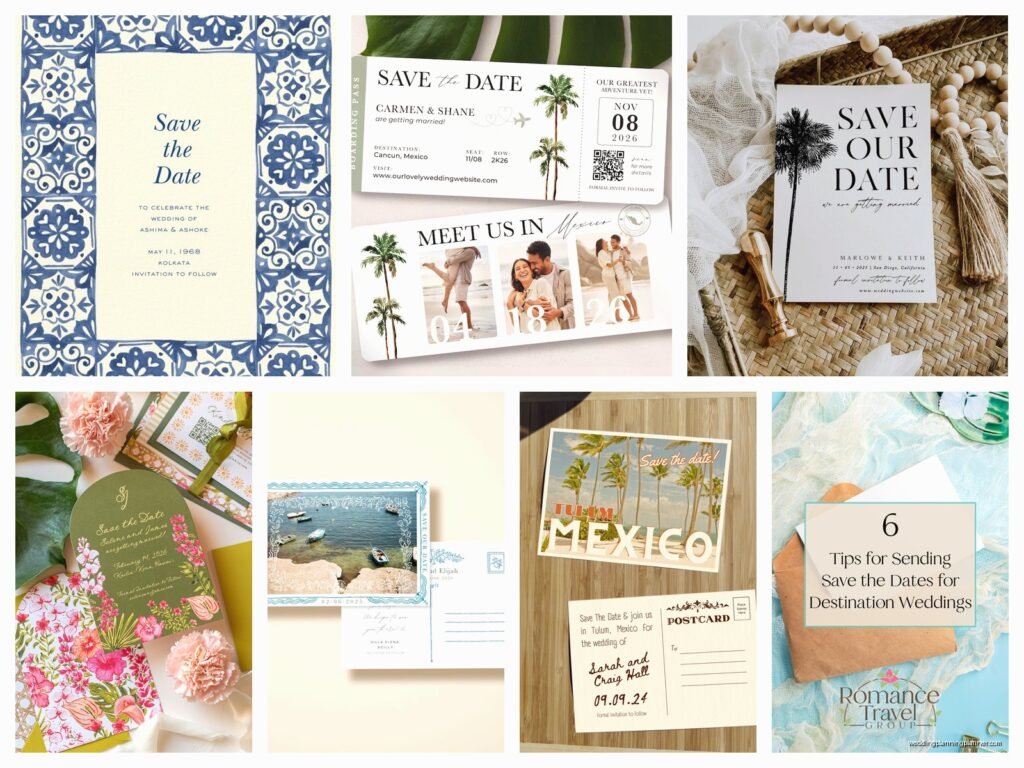
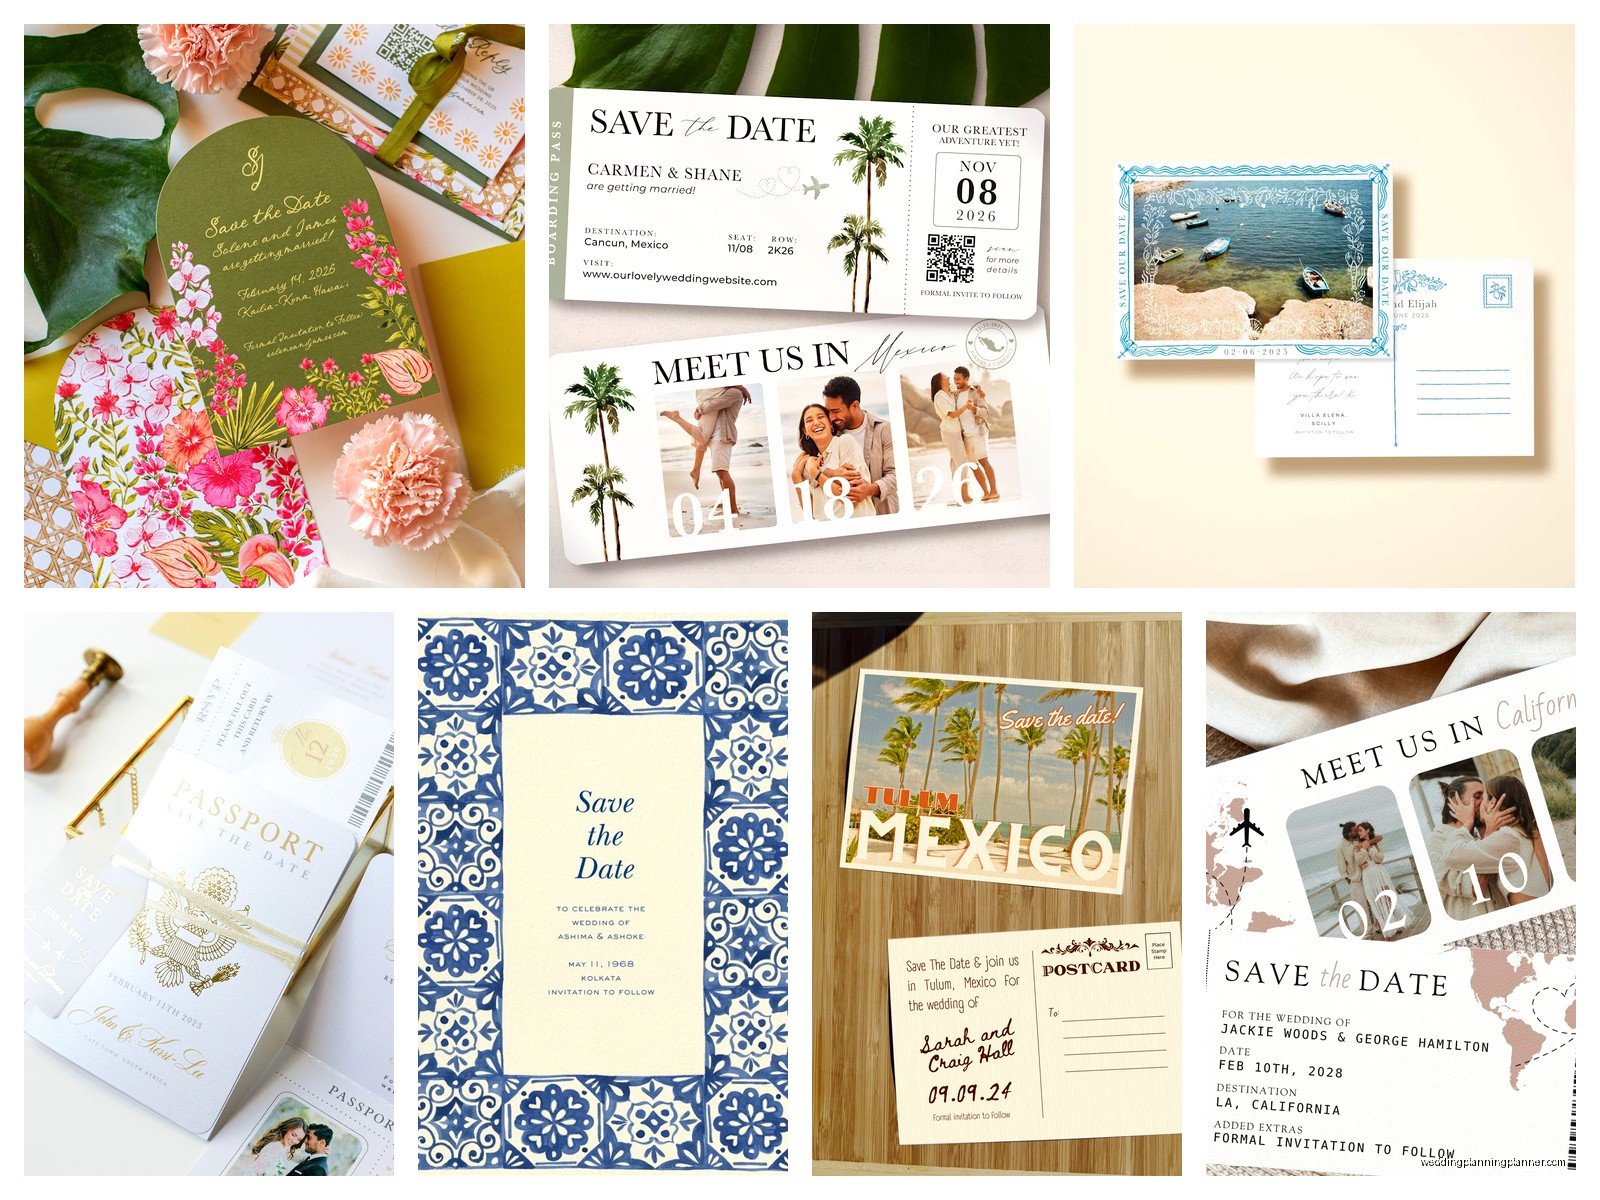
Okay so for the travel theme aesthetic, you’ve got options. The vintage travel poster look is still really popular and honestly it works well if you do it right. Think mid-century modern illustration style, bold colors, clean typography. You can get custom illustrations done of your actual destination – I’ve worked with illustrators on Etsy who’ll create a poster-style drawing of your venue or the beach where you’re getting married for like $200-400.
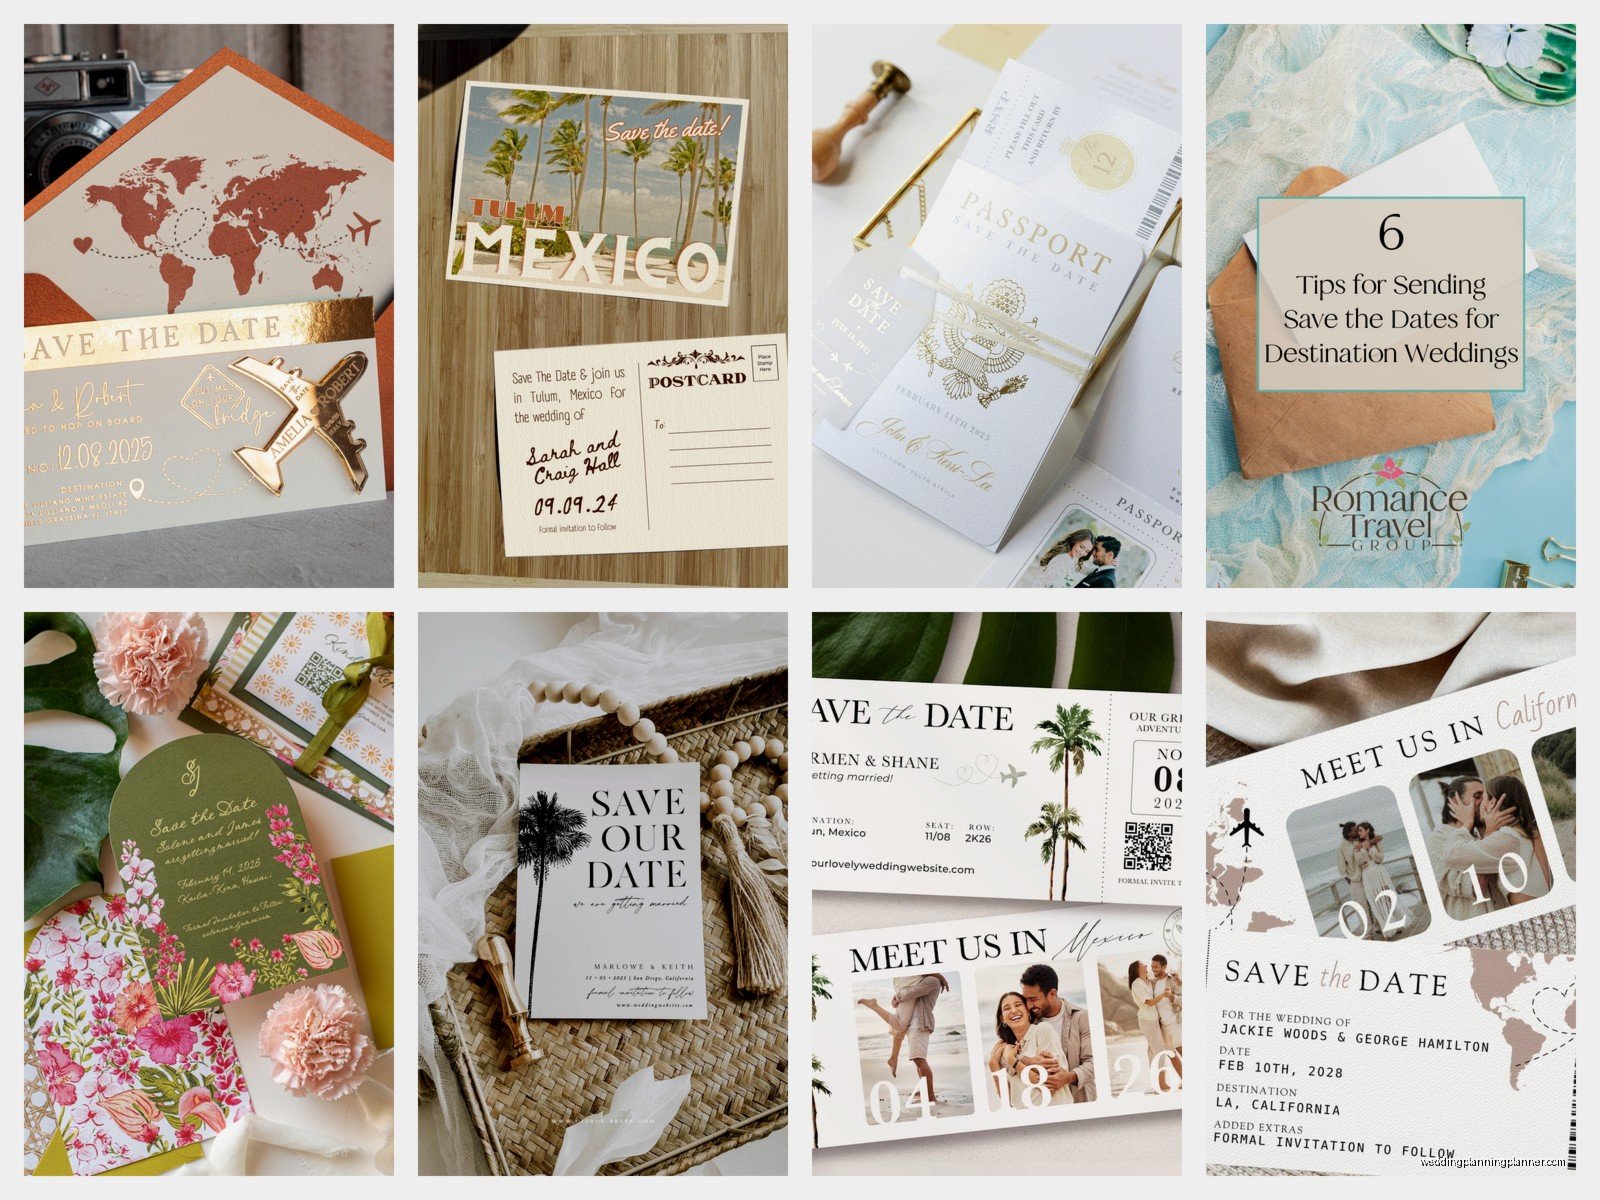
Passport-style save the dates are another route. These can be really cute if you include a photo of you two at the destination (if you’ve done a site visit) or just a nice couple photo. The passport format lets you include more information inside which is helpful for destination weddings. You can do the cover with your names and “Destination: Wherever” and then inside have all the dates, website, travel tips, whatever.
Boarding pass designs are… okay here’s where I’m gonna be honest, they’re kinda overdone at this point? But if you really love the look, go for it. Just make sure the information is actually readable because I’ve seen some where the designer got so caught up in making it look exactly like a real boarding pass that you can barely find the actual wedding date. Function over form, people.
Map-based designs work really well especially if your destination isn’t super well-known. Like if you’re getting married in a small coastal town in Portugal, showing where it actually is on a map helps guests visualize the trip. You can do a illustrated map style or a more modern clean map with a pin dropping on your location.
Printing and Materials
For destination weddings I usually suggest a thicker cardstock or even a postcard style because it feels more substantial and travel-y. Postcards are great because they’re literally associated with travel already, plus they’re cheaper to mail than standard envelopes. You can print the save the date info on one side and use the other side for the mailing address.
If you’re doing folded cards or passport styles, you’re gonna need envelopes. I like colored envelopes for destination weddings – like a turquoise blue for beach weddings or a warm terracotta for Tuscany. It makes it stand out in the mail pile and signals “this is something different than a regular wedding.”
Magnet save the dates are practical for destination weddings because people can stick them on the fridge for the whole year leading up to it. Constant reminder that they need to save money, request time off work, all that. The downside is they’re more expensive to produce and to mail since they’re heavier.
Timing and Mailing Strategy
So like I mentioned earlier, timing is critical. For a domestic destination wedding (like you live in New York but you’re getting married in Hawaii), send save the dates 6-8 months out. For international destinations, 8-12 months minimum. I had a couple doing Iceland in summer 2021 and we sent their save the dates 14 months in advance because summer in Iceland books up insanely fast and flights are limited.
One thing to consider is whether you want to do digital save the dates first and then follow up with printed ones. Some couples will send a quick email or create a private social media group like 12 months out with basic info, then send the pretty printed save the dates 8-9 months out. This double-touch approach works well for destination weddings because it gives people maximum time to plan.
Also think about your guest list and whether everyone needs the same information. If you’ve got some guests who are local to the destination (like you’re getting married in Mexico and you have family who lives there), they might not need all the travel details. You could do two versions or… actually nah, just send everyone the same thing, it’s easier and less confusing.
What to Put on Your Wedding Website
Your save the date is gonna direct people to your website, so you need to actually build that website before you mail these out. I learned this the hard way when – okay my cat just jumped on my desk and walked across the keyboard but anyway – when couples send save the dates with a URL that doesn’t work yet and then guests get frustrated.
Your website needs: detailed venue information with address, hotel recommendations with booking links and any group codes, flight information (nearest airport, typical flight times from your guests’ cities), transportation options from airport to venue, a rough itinerary of events (welcome dinner, ceremony, reception, farewell brunch), dress code, things to do in the area, travel tips, and a FAQ section.
The FAQ should cover stuff like “Do I need a passport?” “What’s the weather like that time of year?” “Is the wedding kid-friendly?” “Are you planning group activities?” All the questions you know people are gonna ask.
Wording That Works
The wording on travel-themed save the dates can be playful but needs to be clear. Here are some options I’ve used:
Simple and direct: “Save the Date for our destination wedding in Playa del Carmen, Mexico | June 15, 2025 | Formal invitation to follow”
More playful: “Pack your bags! We’re getting married in Costa Rica | March 22, 2025 | Details and travel information at [website]”
Adventure focused: “Join us for a wedding adventure in the mountains of Colorado | September 8, 2025”
Whatever wording you choose, make sure the essential information – names, location, date, website – is easy to find and read. Don’t bury it in cute phrases or make the font so small people need reading glasses.
Budget Real Talk
Save the dates for destination weddings can add up because you’re often ordering more elaborate designs and paying more for postage if they’re heavier. Budget-wise I usually tell couples to expect $2-5 per save the date including postage. So for 100 guests that’s $200-500.
You can save money by doing digital only, printing through an online service instead of a custom printer, choosing postcards instead of folded cards, or DIYing them if you’re crafty. Etsy has tons of templates you can customize yourself for like $15-30 and then print at home or through a print shop.
One thing people don’t think about is international postage – if you have guests in multiple countries, you’ll pay different postage rates. Sometimes it’s actually cheaper to order two separate print batches and have them mailed from within each country rather than mailing everything internationally from where you live.
Extra Touches That Make Sense
For destination weddings, you can include extra inserts with your save the dates that are actually useful. A luggage tag with your wedding hashtag or logo is cute and functional. A small information card about the destination. A list of recommended hotels at different price points.
Some couples include passport holders as a gift with the save the date, which is adorable but definitely increases your budget. I’ve also seen people include those travel-size bottles of sunscreen with a tag that says “See you in the sun!” which is cheesy but people actually use them so…
What I don’t recommend is including too many separate pieces because then you need a bigger envelope and people get overwhelmed with information. Keep it streamlined – the save the date itself and maybe one additional info card max.
Addressing and Tracking RSVPs
For the actual save the date, you typically don’t collect RSVPs yet – that comes with the formal invitation. But you DO want to track that people received them and saw the information. On your website, you can have a form where people confirm they got the save the date and indicate if they’re likely to attend. This gives you a rough headcount for planning purposes.
When addressing your save the dates, use full names and be clear about who’s invited. If someone’s getting a plus-one, address it to “Sarah Johnson and Guest” – don’t make them guess if they can bring someone to a destination wedding where they need to book flights.
Keep a spreadsheet tracking when you mailed them, who you sent them to, and any responses or questions you get. This’ll make your life so much easier when you’re actually sending invitations later and trying to remember who said what about their travel plans.
Following Up
After you send save the dates, be prepared for a flood of questions. People are gonna ask about costs, what else is happening that weekend, whether kids are invited, if they can extend their trip, literally everything. This is normal and expected for destination weddings. Try to get the most common questions answered on your website ASAP so you’re not responding to the same email fifty times.
About 2-3 weeks after mailing, follow up with anyone you haven’t heard from to make sure they received it. Especially for international mail, things can get lost or delayed. A quick text or email checking in is fine – you don’t need to send another printed version unless they genuinely didn’t get it.