
Planning Guides, Style Guide
Vellum Overlay Wedding Invitations: Translucent Layer Designs
May
What Vellum Overlays Actually Are
Okay so vellum overlays are basically those translucent sheets that go on top of your main invitation card and they’re having this huge moment right now. They’re usually made from either real vellum (which is animal-based, kinda like parchment) or more commonly these days, translucent paper that just looks like vellum. The paper weight matters a ton—you’re typically looking at 17-30lb vellum, with 29lb being what I recommend to most couples because it’s sturdy enough to not wrinkle when people handle it but still has that nice see-through quality.
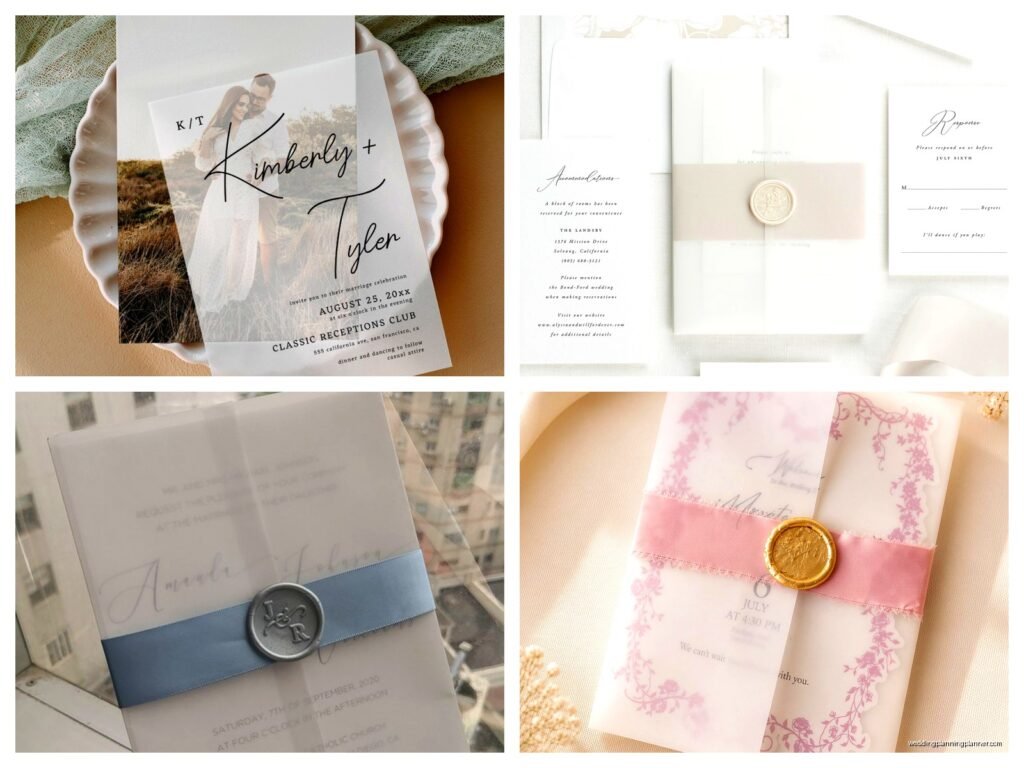
The whole point is creating this layered effect where your guests can see the invitation text through the overlay, and usually you’ve got something printed or designed on the vellum itself. Could be your names, a monogram, some botanical illustrations, whatever. I had this bride in spring 2023 who wanted her vellum overlay to have this insanely detailed lace pattern printed on it, and honestly it turned out gorgeous but the printer charged her an arm and a leg because of the detail work.
Why People Actually Choose Them
The main appeal is they look expensive and formal without being stuffy. You get this romantic, soft aesthetic that photographs really well. Like when your guests post photos of their invitation on Instagram (and they will), the vellum catches light in this really pretty way that makes everything look more elegant.
They also serve a practical purpose sometimes—if you’ve got a busy patterned card underneath, the vellum overlay can tone it down a bit while still letting the design show through. Or if you’re doing a dark-colored invitation, white or cream vellum can make the text more readable while adding visual interest.
Different Ways to Attach Them
This is where it gets tricky and where I see couples mess up constantly. You’ve got several options:
- Wax seals (super popular right now but can be problematic with postal machines)
- Belly bands (paper or ribbon strips that wrap around everything)
- Vellum bands (a strip of the same vellum material)
- Small adhesive dots at the top corners
- Tied with ribbon or twine
- Single hole punch with ribbon through it
- Double-sided tape along one edge
Here’s what annoys me though—when people use too much adhesive and you can see it through the vellum. It looks cloudy and cheap and there’s really no fixing it once it’s done. I always tell clients to use the tiniest dots possible or go with a decorative attachment method instead.
Printing on Vellum (This Gets Technical)
So you can’t just throw vellum through any printer. Digital printing on vellum is tricky because the ink doesn’t absorb the same way it does on regular paper—it kinda sits on top and can smudge. Laser printers work better than inkjet for vellum, but even then you gotta be careful about the heat settings or the vellum can melt or warp.
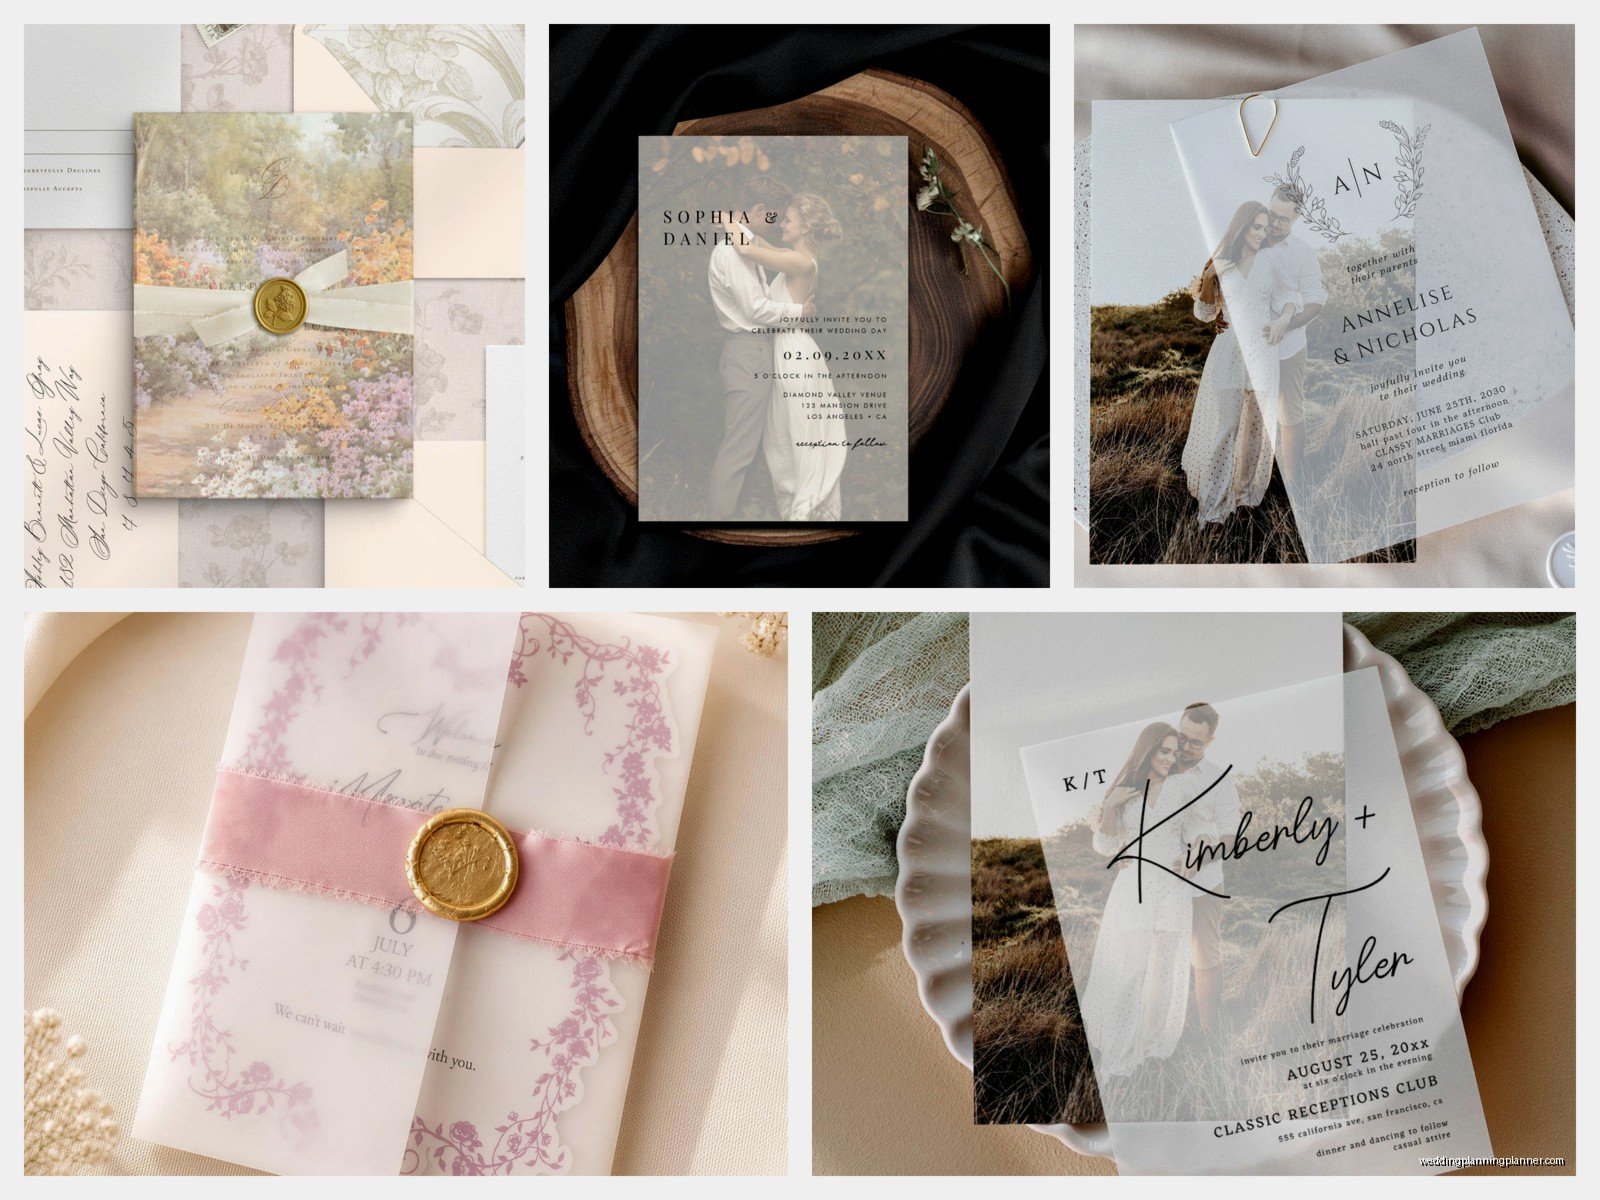
Most professional printers will do letterpress, foil stamping, or thermography on vellum. Foil looks absolutely stunning on vellum because you get this metallic shine against the translucent background. Gold and copper foils are gorgeous. Letterpress gives you that subtle debossed texture but it’s more understated on vellum than on thick cardstock.
If you’re DIYing this (which I don’t usually recommend but I get it, budgets are real), you’ll want to do test prints. Buy extra vellum sheets because you’re gonna mess up at least a few. Let the ink dry completely—like wait 24 hours if you can—before handling them or the oils from your fingers will smudge everything.
Design Considerations That Actually Matter
When you’re designing the overlay, remember that whatever’s underneath will show through. This seems obvious but I’ve had clients create these elaborate designs on both the vellum AND the card underneath and then everything looks muddy and cluttered when you stack them.
The general rule I follow: if your vellum has a lot going on (detailed pattern, lots of text, heavy design), keep the underneath card simple. Or flip it—minimal vellum design with a decorative card underneath. The vellum should enhance what’s below it, not compete with it.
Text on vellum should be bold enough to read easily. Light gray text might look elegant in your design software but it’s gonna be nearly invisible on actual translucent vellum. Go with darker colors—black, navy, deep burgundy, forest green. Metallic foils in gold, rose gold, or silver also show up really well.
The Practical Stuff About Assembly
Assembly takes way longer than you think. Like if you’re doing 150 invitations with vellum overlays, plan for several hours of work. This is not a one-episode-of-a-show task, this is a full-season-binge situation. My cat literally knocked over an entire stack of assembled invitations once and I wanted to cry because I had to redo like 40 of them.
Get your workspace organized before you start. You need: your invitation cards, your vellum overlays, whatever you’re using to attach them, and a clean flat surface. I use a large cutting mat because it’s smooth and easy to wipe down.
If you’re using adhesive, place it in the same spot on every invitation. Consistency matters here. I use a light pencil mark on the back of the vellum (super light, barely visible) to show me where the adhesive dot goes. Then I erase the mark after.
Wax Seals Need Their Own Section
Wax seals look amazing but they’re honestly kind of a pain. They add thickness to your invitation which means extra postage. The post office sorting machines can sometimes crack or damage them. And if you’re mailing invitations in summer, the wax can soften in hot mailboxes or delivery trucks.
If you’re set on wax seals, here’s what works: use flexible wax (not the traditional hard wax), place the seal on the back of the invitation suite rather than the front where it’s more protected, and hand-cancel your invitations at the post office. Hand-canceling means the postal worker manually stamps them instead of running them through the machine. Not all post offices will do this and it takes extra time, but it’s worth it to protect your beautiful invitations.
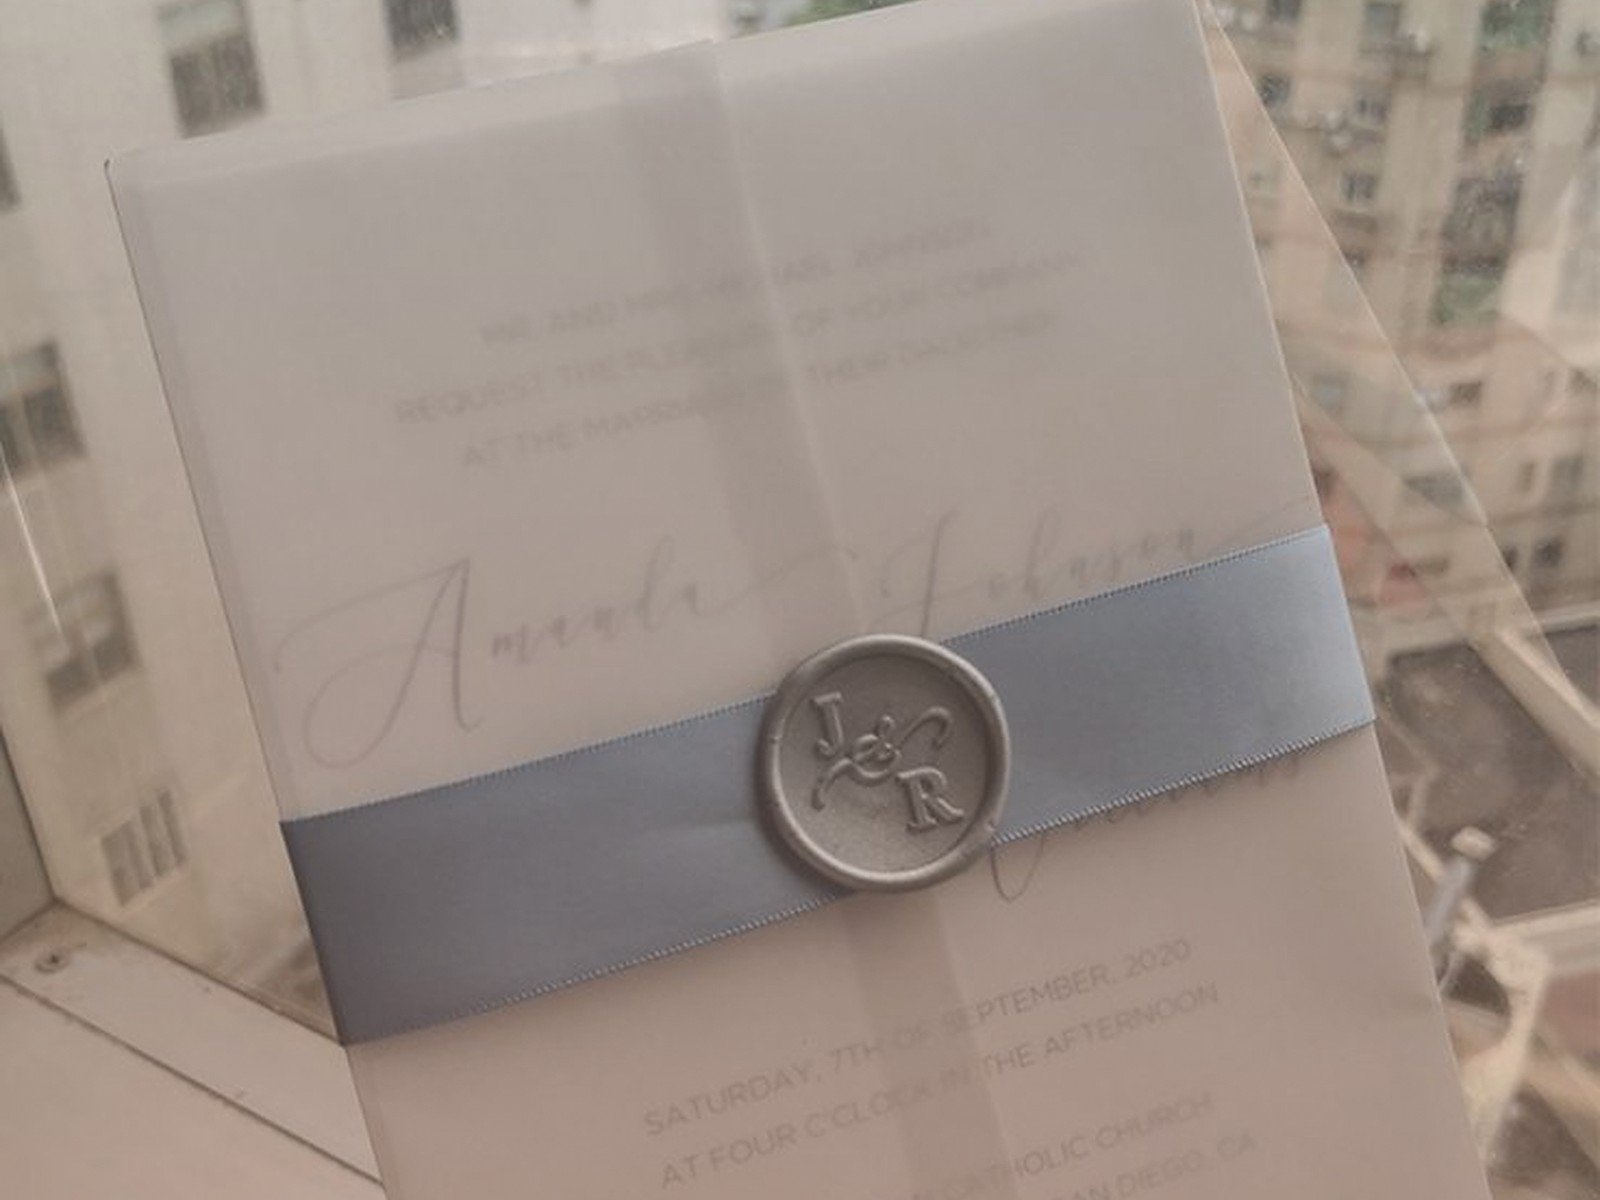
You can also do faux wax seals which are basically stickers that look like wax. They’re flatter and way more durable for mailing, and honestly most guests can’t tell the difference.
Cost Breakdown Because That Matters
Vellum overlays add to your invitation budget in a few ways. The vellum paper itself isn’t super expensive—you can get pre-cut sheets for around $0.50-$2.00 each depending on size and quality. But printing on vellum costs more than printing on regular cardstock because it requires special handling.
If you’re hiring a professional, expect to pay an additional $1-3 per invitation for the vellum overlay, plus printing costs. Foil stamping or letterpress on vellum can run $3-5+ per piece. Assembly charges add another $0.50-$1.50 per invitation if you’re not doing it yourself.
For DIY, you’re looking at the cost of vellum sheets, your attachment method (ribbon, wax seal supplies, adhesive), and your time. And probably some mistakes—budget for about 10-15% extra materials because you will mess some up.
Common Mistakes I See All the Time
Using vellum that’s too thin—it wrinkles easily and looks flimsy. Go with at least 25lb weight, preferably 29lb.
Not considering the envelope size. Your invitation suite gets thicker with a vellum overlay, so make sure your envelopes can actually close comfortably. I had this whole situation in summer 2021 where a client ordered envelopes before finalizing their overlay design and then nothing fit properly and we had to rush-order new envelopes which was a nightmare.
Forgetting about postage. Thicker invitations cost more to mail. Take a fully assembled invitation to the post office and have them weigh it before you buy stamps for all 150 invitations. Could save you from having them all returned for insufficient postage.
Not testing how things look together. Always order samples or create mockups before committing to printing 100+ invitations. What looks good on a computer screen might not translate well to physical materials, especially with translucent layers where you’re dealing with… I mean you really need to see how the colors and designs interact in person.
Design Styles That Work Really Well
Botanical designs are huge right now. Delicate leaf patterns or floral illustrations printed on the vellum with a simple card underneath. The translucent quality makes the botanicals look like they’re floating.
Geometric patterns—think modern lines, art deco designs, or minimalist shapes. These work especially well with foil printing on vellum.
Just your names or monogram on the vellum with all the invitation details on the card underneath. This is clean, elegant, and lets the information be easily readable while still having that layered effect.
Scriptural or literary quotes printed lightly on the vellum as a background texture. Works great for couples who have a meaningful quote they want to incorporate.
Coordinating Your Suite
If you’re doing vellum overlays on your invitation, you’ll probably want to carry that element through to other pieces. RSVP cards can have smaller vellum overlays. Details cards, reception cards, whatever other inserts you’re including.
But here’s the thing—you don’t have to do vellum on everything. Sometimes it’s actually more effective to just use it on the main invitation and keep the other pieces simpler. Saves money and keeps the main invitation as the focal point.
Your envelope addressing should complement the vellum style. If you’re doing formal calligraphy on the vellum, carry that through to the envelopes. If your vellum design is modern and minimal, keep the addressing style consistent.
Working With Printers
Not all invitation printers are comfortable working with vellum, so ask upfront. Request samples of their vellum work before committing. You wanna see how clean their printing is, whether there’s any smudging, how the colors look.
Give yourself extra time for vellum projects. They take longer to produce because of the special handling required. If a printer says they need 6 weeks for regular invitations, assume 8 weeks for vellum overlays.
Get everything in writing—the paper weight, the printing method, the colors, the timeline. I’ve seen too many miscommunications where couples thought they were getting one thing and received something totally different.
DIY Tips If You’re Going That Route
Buy a paper cutter. Don’t try to cut vellum with scissors—you won’t get clean edges. A proper paper trimmer with a sharp blade makes all the difference.
Work in a clean space. Vellum shows fingerprints and smudges like crazy. I keep hand wipes nearby and wipe my hands before touching each sheet.
Practice your assembly process with cheap materials first. Figure out your system before you start working with the expensive printed pieces.
If you’re printing at home, adjust your printer settings. Look for a “transparency” or “vellum” setting if your printer has one. If not, try the “cardstock” setting with lower heat. And again, test print multiple times.
Store your finished invitations flat in a cool, dry place. Don’t stack too many on top of each other or the weight can cause issues. I use tissue paper between every 10-15 invitations to keep them from sticking together.
Seasonal Considerations
Vellum works year-round but some attachment methods are better for certain seasons. Wax seals in summer are risky like I mentioned. Ribbon can fray more in humid climates. Adhesive can fail in extreme temperatures.
For summer weddings, I lean toward belly bands or vellum bands rather than wax seals. For winter weddings, pretty much everything works fine. Spring and fall are usually safe for any attachment method but you still gotta consider where your invitations are being mailed and stored.
The vellum itself is pretty stable across seasons, but if you’re storing printed vellum for a while before assembly (like if you’re doing a long engagement), keep it away from humidity and direct sunlight. The ink or foil can fade or the paper can warp.
Alternatives If Vellum Isn’t Working
Sometimes you get into planning and realize vellum isn’t gonna work for your situation. Maybe it’s the budget, maybe it’s the timeline, maybe you just decide you don’t like it as much as you thought.
Translucent envelopes can give you a similar effect—you can see the invitation through the envelope which is pretty cool. Glassine envelopes are another option, they’re smooth and translucent and less expensive than printed vellum overlays.
Layered cardstock in different colors can create depth without the translucent element. Or acetate sheets which are fully clear rather than translucent—different look but still gives you that layered effect.
You could also do a vellum envelope liner instead of an overlay. Easier to assemble, still incorporates the material, and it’s a nice surprise when guests open the envelope.
