Planning Guides, Style Guide
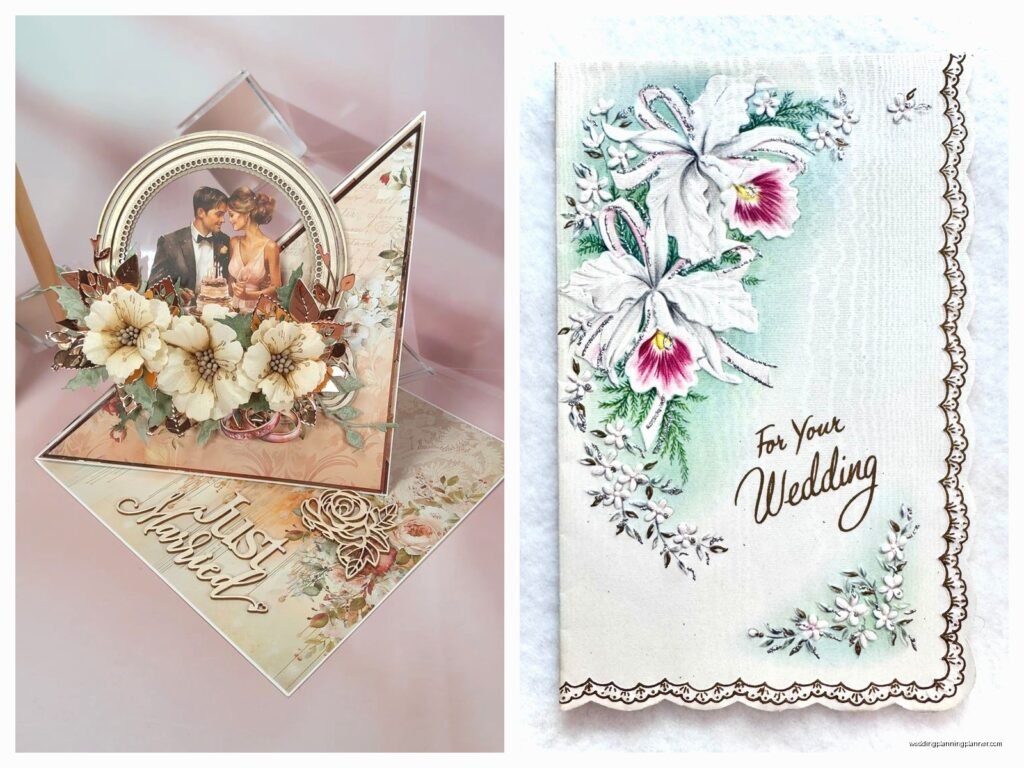
Fancy Wedding Cards: Design & Ordering Guide
Jun
Okay So First Things First: Know What “Fancy” Actually Means for Your Wedding
Look, I’ve been doing this for 20 years and honestly the word “fancy” means something completely different to every single couple. Last spring 2023 I had this bride who thought fancy meant gold foil everything and her fiancé was picturing like… minimalist letterpress with a single embossed monogram. They almost had a meltdown in my office.
Before you start ordering anything, sit down together and scroll through Pinterest or Instagram for like 30 minutes. Save everything you both like. Then compare. You’ll probably find some overlap, and that’s your starting point. Are we talking classic elegant fancy? Modern luxe fancy? Vintage ornate fancy? Boho-chic fancy? These all require totally different approaches.
Budget Reality Check (Sorry But We Gotta Talk About It)
Fancy wedding invitations can run anywhere from $8 per suite to literally $50+ per suite. I’m not even kidding. A “suite” usually includes the invitation itself, RSVP card, details card, and envelopes. Some couples add reception cards, accommodation cards, weekend itinerary cards… it adds up FAST.
Here’s what drives the price up:
- Letterpress printing (creates that gorgeous debossed impression)
- Foil stamping (gold, silver, rose gold, copper)
- Engraving (the most traditional and expensive method)
- Custom illustrations or calligraphy
- Fancy paper stocks (cotton, handmade, textured)
- Layers and belly bands
- Wax seals
- Lined envelopes
- Hand-tied ribbons or silk ties
You don’t need ALL of these things. Pick 2-3 fancy elements and you’ll still have a gorgeous invitation without needing a second mortgage. I usually tell couples to allocate about 3-5% of their total wedding budget to stationery if they want something really nice.
Design Elements That Actually Matter
The typography is gonna make or break your invitation, honestly. I see so many couples choose like 4 different fonts and it just looks chaotic. Stick to 2-3 max. Usually one script or decorative font for names or headers, and a clean serif or sans-serif for the body text.
Paper weight is something nobody thinks about until they’re holding samples. You want at least 110lb cardstock for the main invitation. Anything lighter feels cheap in your hand, even if the design is beautiful. For layered invitations, the base layer should be even heavier – like 130lb.
Color choices are tricky because what you see on a screen is NOT what you’ll get printed. Always, always, always order a physical sample before you commit to 150 invitations. I learned this the hard way back in like summer 2021 when a bride approved “dusty blue” online and it arrived looking straight-up gray. She cried. It was a whole thing.
Printing Methods Explained (Because Everyone Asks)
Digital Printing: Most affordable option. Works for basically any design. The quality has gotten really good in recent years, but it still sits on top of the paper rather than being pressed into it. Great for full-color designs or photos.
Letterpress: This is what people picture when they think fancy invitations. The text is pressed into thick cotton paper creating a tactile impression. Looks incredible but you’re limited to 1-2 colors usually, and it’s pricey. Worth it though if it’s in your budget.
Foil Stamping: Metallic foil is heat-pressed onto the paper. Comes in tons of colors beyond just gold and silver – I’ve seen gorgeous copper, rose gold, even holographic. Can be combined with other printing methods.
Engraving: The most traditional method, creates raised text on the front and an impression on the back. Super elegant and formal. Also super expensive. Usually reserved for the fanciest of fancy weddings or when tradition is really important.
Thermography: Kinda looks like engraving but way more affordable. Creates raised text through a heat process. Used to be the budget alternative but honestly digital printing has gotten so good that thermography feels a bit dated now.
Where to Actually Order These Things
You’ve got options and they’re all… well, they all have pros and cons.
Local Stationery Boutiques: You get personalized service, can touch samples, and usually work with someone who knows what they’re doing. More expensive but less stressful. This is my cat’s favorite option because I’m less stressed when I work with local vendors – wait that doesn’t make sense but you know what I mean.
Online Custom Designers: Places like Minted, Paperless Post (for digital), Artifact Uprising, Bella Figura. Good middle ground. Professional designs, customization options, better prices than full custom. You can order samples before committing.
Etsy Designers: Can find amazing unique designs and support small businesses. Quality varies WILDLY though. Read reviews carefully. Make sure they have experience with wedding invitations specifically. Ask about their revision policy.
Full Custom Stationery Designers: If you want something completely unique and have the budget, this is the way. You’ll work with a designer who creates everything from scratch based on your vision. Expect to pay premium prices and plan for a longer timeline.
Template Sites: Honestly nah, if you want fancy invitations, those Canva templates or Vista Print options aren’t gonna cut it. They’re fine for other stuff but not for this.
Timeline (Please Don’t Wait Until the Last Minute)
Order samples like 8-9 months before your wedding. You need time to see them in person, make decisions, and then actually order.
Place your final order 4-5 months before the wedding date. Fancy printing methods take TIME. Letterpress especially can take 4-6 weeks for production, and that’s before you even start addressing them.
Mail invitations 8-10 weeks before the wedding. For destination weddings, make it 12 weeks. I know everyone says 6-8 weeks but trust me, people need more time than they think, and you need time for the inevitable “I never got mine” messages.
The Stuff Nobody Tells You About But You Need to Know
Envelope addressing is its own entire thing. You can print directly on envelopes, hire a calligrapher, use digital calligraphy (printed to look hand-done), or hand-write them yourself if you have nice handwriting and infinite patience. Real calligraphy runs about $3-5 per envelope. Digital calligraphy is maybe $1-2 per envelope. Your hand cramping and questioning your life choices? Free.
Postage for fancy invitations is usually MORE than a regular stamp. If your invitation suite is thick, has a wax seal, is oversized, or square-shaped, you’re looking at extra postage. Take a full assembled invitation to the post office and have them weigh it. Also those pretty vintage stamps? You can use them but you’ll probably need like 3-4 of them to meet the postage requirement.
What really annoys me is when couples don’t account for extras. You WILL need extra invitations. People will give you the wrong address. Things will get lost in the mail. You’ll forget someone. Order at least 10-15 extra. Maybe 20 if you have a big guest list.
Assembly Tips Because This Takes Forever
Set up an assembly line if you’re doing this yourself. Lay out all your components in order. Put on a good podcast or TV show – I got through like two seasons of something while assembling invitations last year, can’t even remember what show but it helped.
If you’re doing belly bands, ribbons, or wax seals, practice on a few first. Wax seals especially… they’re gorgeous but they take practice and if you mess up you’re wasting expensive materials.
For wax seals: use a glue gun with wax sticks (easier than traditional wax), let it cool completely before touching, and remember they add weight which means extra postage.
Working With Designers (What to Actually Communicate)
When you reach out to a designer, have this info ready: wedding date, venue name/style, your color palette, rough guest count, and your budget. Also share 3-5 invitation designs you love – doesn’t matter if they’re not in your budget, it helps designers understand your aesthetic.
Ask about their revision policy upfront. Most designers include 2-3 rounds of revisions. After that, you might pay extra. Make sure you’re both clear on this.
Request a timeline in writing. When will you see the first proof? How long between revisions? When’s the final approval deadline? When will printing be complete?
Proofread everything like your life depends on it. Then have someone else proofread. Then proofread again. I cannot tell you how many times I’ve caught errors that couples missed because they’d looked at it too many times. Check dates, times, addresses, names (especially names!), dress code, website URLs.
Matching Stationery Suite Items
If you want the fancy vibe to continue, think about these additional pieces:
- Save the dates (send these 6-8 months before)
- Wedding programs
- Menu cards
- Place cards and escort cards
- Table numbers
- Welcome signs
- Thank you cards
You don’t need to order everything from the same designer, but keeping consistent fonts and colors makes everything feel cohesive. Sometimes I tell couples to splurge on invitations and then DIY some of the day-of stationery using the same design elements.
Eco-Friendly Fancy Options
Okay so if sustainability matters to you, you can still have gorgeous invitations. Look for designers who use recycled paper, tree-free paper (made from cotton or bamboo), or plantable seed paper. Some letterpress printers use vegetable-based inks.
Digital invitations have come a long way too. Paperless Post has some really elegant designs that don’t look cheap or lazy. You can still do a fancy paper save-the-date and then digital invitations, or vice versa.
Common Mistakes I See All the Time
Forgetting about RSVP card postage. Include a stamped return envelope. Yes it costs extra but your response rate will be SO much better.
Making the RSVP deadline too close to the wedding. Give yourself at least 3-4 weeks after the RSVP deadline before you need final counts. People are terrible at responding on time.
Not considering readability. That beautiful script font might be hard for older guests to read. Make sure the important info (date, time, location) is in a clear, readable font.
Ordering exactly the number you need. Like I said before, order extras or you’ll regret it.
Forgetting to include important details. Your wedding website URL should be on there. Hotel information. Dress code if it’s not obvious from the invitation style. Whether kids are invited (or not).
The Details Card Is Your Friend
Don’t try to cram everything onto the main invitation. That’s what details cards are for. Put your website, accommodation info, dress code, and any other logistics there. Keeps your invitation clean and elegant while still giving guests the info they need.
Some couples do a weekend events card if they have multiple events. Others include a small map or directions card, though honestly most people just use their phones now so this feels kinda optional.
Digital vs. Print (Because Someone Always Asks)
Digital can be fancy too, but it hits different. Great for destination weddings where postage would be insane, or if you have a lot of international guests. Also good for the environmentally conscious. But there’s something about receiving a beautiful physical invitation that an email just… doesn’t match, you know?
Some couples do a hybrid approach – digital save the dates, paper invitations. Or paper invitations with digital RSVPs through their website. Mix and match based on what matters to you and where you want to spend your money.