Planning Guides, Style Guide
Doodle Wedding Invitation: Design & Ordering Guide

Jun
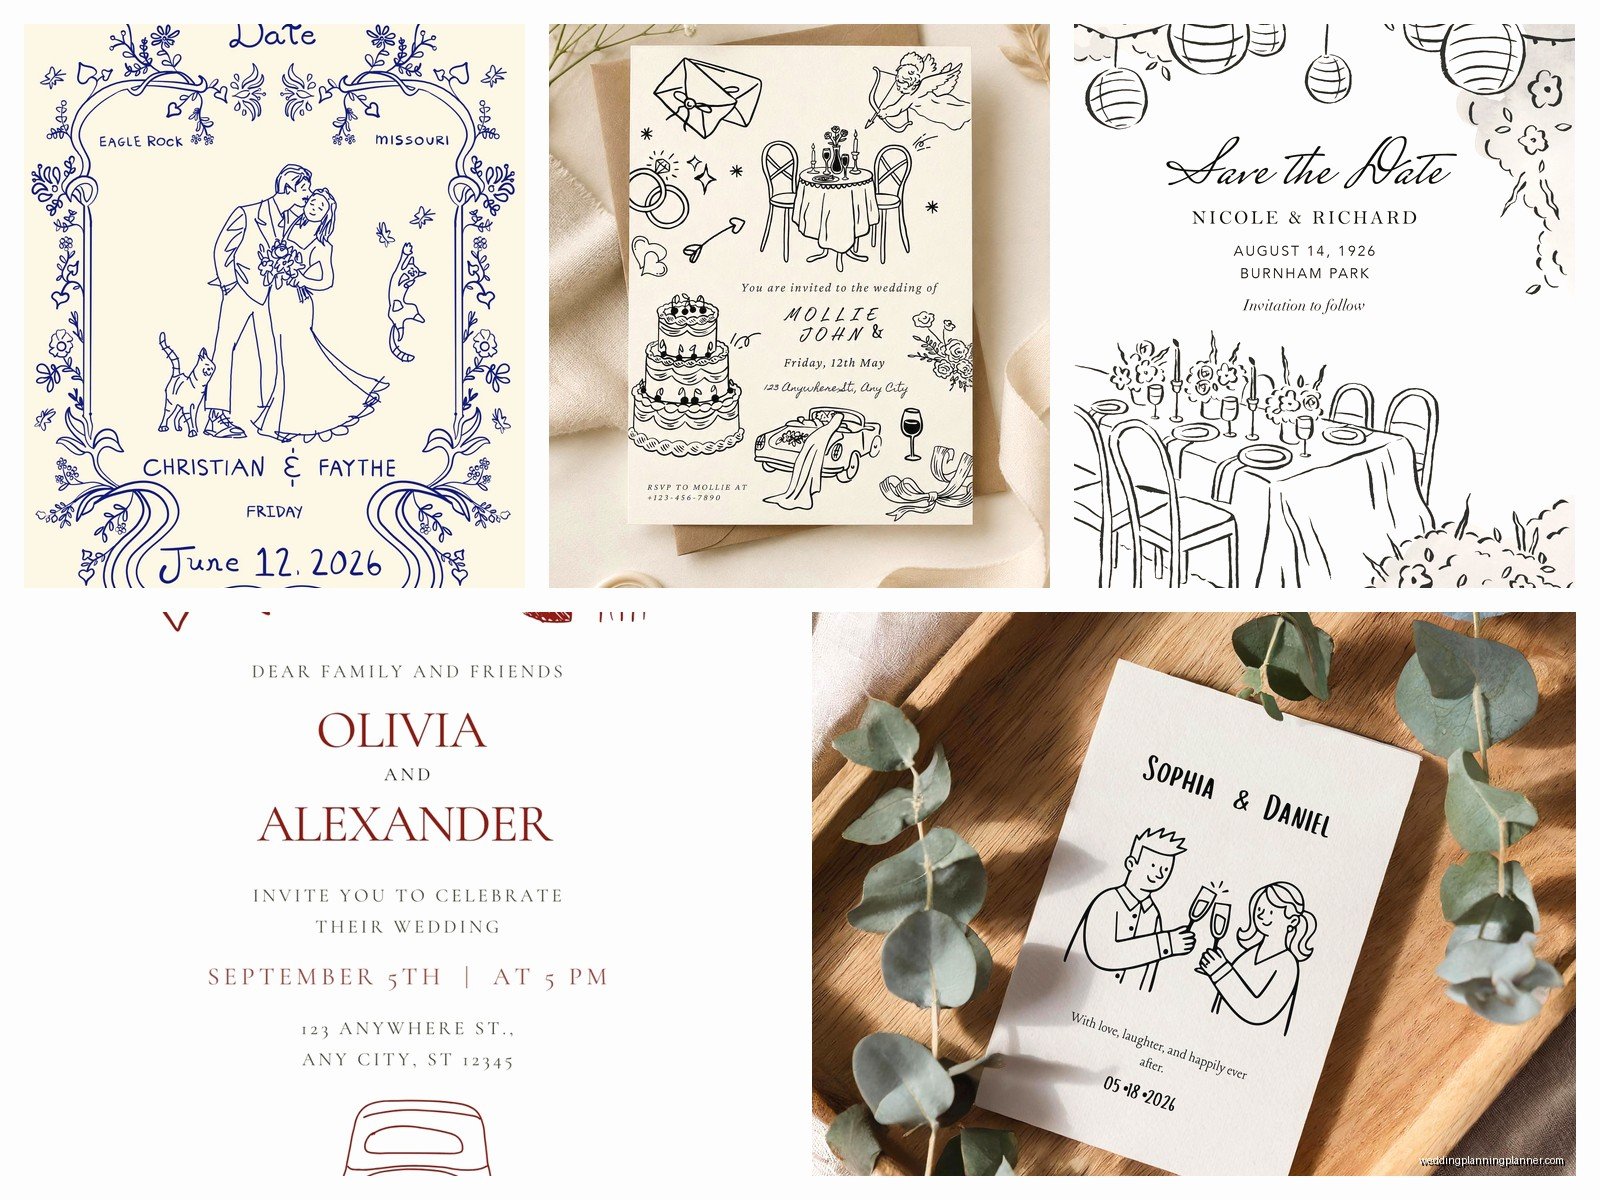
What Doodle Wedding Invitations Actually Are
So doodle wedding invitations are basically invites that have this hand-drawn, sketch-like vibe going on. Think little illustrated flowers, quirky line drawings of the venue, maybe cute stick figures of you and your partner, or these whimsical borders that look like someone sat down with a pen and just… drew. They’re not formal calligraphy or traditional printing—they’re playful and personal and honestly kinda perfect if you’re not into the whole “ivory cardstock with gold foil” thing that every other wedding seems to have.
I had this bride in spring 2023 who was absolutely set on doodle invitations because she’d seen them on Pinterest, but she had NO idea where to start. She kept sending me screenshots of like fifteen different styles asking “can we do all of these?” and I had to walk her through the whole thing step by step because she was getting overwhelmed by options.
Figuring Out Your Doodle Style First
Before you do anything else, you gotta nail down what KIND of doodle aesthetic you want. There’s actually a bunch of different directions this can go:
- Minimalist line art (simple, clean, modern)
- Whimsical botanical doodles (flowers, leaves, vines everywhere)
- Illustrated portraits or couple sketches
- Hand-lettered text with doodle accents
- Full-scene illustrations (like a drawing of your venue or city skyline)
- Abstract patterns and shapes
You need to figure this out because it completely changes who you’ll work with and what the pricing looks like. A simple doodle border is gonna cost way less than having an artist draw a custom portrait of you two plus your dog plus the venue, you know?
I usually tell people to make a Pinterest board or save Instagram posts for like a week, then look at what you saved and see if there’s a pattern. Are you drawn to colorful stuff or black and white? Detailed or simple? Funny or romantic?
The DIY Route vs Hiring Someone
Alright so here’s where it gets real. You can either design these yourself using templates and apps, OR you can hire an actual illustrator. Both are valid but they’re completely different experiences.
Going the DIY Template Route
If you’re even slightly comfortable with Canva or similar design tools, there are TONS of doodle invitation templates out there. Etsy is honestly your best friend here. You can buy a template for like $15-40, customize the text yourself, and then either print at home or send the file to a print shop.
The pros: it’s cheap, it’s fast, you have total control over tweaking things. The cons: it won’t be totally unique since other people are using that same template, and if you’re not design-savvy you might accidentally make it look… not great. I’ve seen some DIY attempts where the text is like three different fonts and nothing lines up and it just hurts my planner heart.
What really annoyed me once was when a couple bought a template, customized it terribly (we’re talking hot pink text on a light yellow background), sent it to print, and then blamed the designer when the invites looked bad. Like no honey, that’s not the template’s fault, that’s a you problem.
Hiring an Illustrator
This is obviously more expensive but you get something completely custom. You can find illustrators on:
- Etsy (many offer custom commission services)
- Instagram (search hashtags like #weddingillustrator or #customweddinginvitations)
- Upwork or Fiverr (budget-friendly options but quality varies a LOT)
- Local art schools or design programs
Expect to pay anywhere from $200 to $2000+ depending on the artist’s experience and how complex your vision is. A simple doodle border? Cheaper. A full illustrated scene with custom portraits and hand-lettering? Yeah, that’s gonna be on the higher end.
When you’re reaching out to illustrators, be specific about what you want but also… don’t micromanage their artistic process or they’ll hate working with you. I learned this the hard way when I was helping a bride communicate with an artist and she kept sending these super detailed critiques about like the exact curve of a flower petal and the artist eventually refunded her deposit and bailed on the project.
The Design Process Timeline
Whether you’re DIYing or hiring someone, here’s roughly how long everything takes:
DIY with templates: You can honestly knock this out in a weekend if you’re focused. Pick template, customize, send to printer, done. Maybe add another week if you’re printing at home and need to order cardstock or whatever.
Custom illustration: This takes WAY longer. Like, start this process 4-6 months before you need to mail invitations. Here’s the breakdown:
- Finding and vetting artists: 2-3 weeks
- Initial consultation and quote: 1 week
- First draft from artist: 2-4 weeks
- Revisions (usually 2-3 rounds): 2-3 weeks
- Finalizing and getting print-ready files: 1 week
- Printing and assembly: 2-3 weeks
So yeah, it adds up fast. I always tell couples to start earlier than they think they need to because something ALWAYS takes longer than expected.
Getting the Design Details Right
Okay so once you’re actually working on the design, here’s what you need to think about:
Colors and Printing Method
Doodle invitations can be printed in so many ways. Digital printing is the cheapest and easiest—basically any print shop can do this, even your local FedEx Office. You send them a PDF and they print it. Simple.
But you could also do letterpress, which gives this really cool tactile impression, or foil stamping on top of the doodles for some shine. I had a couple do black line doodles with rose gold foil accents and it was absolutely gorgeous, but it also cost them like three times what regular printing would’ve been.
Think about whether you want color or black and white. Color is obviously more expensive to print (usually) but it can make the doodles really pop. Black and white or single-color printing is more budget-friendly and honestly sometimes looks more sophisticated.
Paper Stock Matters More Than You Think
I cannot stress this enough—the paper you choose makes a HUGE difference in how these look. A doodle design printed on flimsy copy paper looks cheap and sad. Same design on nice thick cardstock feels substantial and special.
For doodle invitations, I usually recommend:
- Matte cardstock (100-130 lb weight) for a modern, smooth look
- Textured or cotton paper for something that feels more handmade
- Kraft paper if you’re going for rustic or bohemian vibes
You can order paper samples from most online print shops before committing to a full order. Do this. Seriously. The color on your screen is not gonna match the printed version perfectly, and seeing the actual paper texture helps you decide.
What Information to Include
This is where I see people get weirdly stuck. Your doodle invitation needs the same basic info as any invitation, the doodles are just decoration. You need:
- Your names (obviously)
- Date and time
- Venue name and address
- RSVP details and deadline
- Dress code if you have one
- Wedding website URL
Some people also include a little illustrated map or directions, which is super cute with doodle invitations. Just make sure it’s actually readable—I’ve seen illustrated maps that were so stylized you literally couldn’t tell which road was which.
Oh and if you’re doing multiple events (welcome party, ceremony, reception, brunch), you might need insert cards. The doodle design should carry through all the pieces so everything feels cohesive. My cat just jumped on my desk and I lost my train of thought but umm… yeah, cohesive design across all your invitation suite pieces.
Where to Actually Print These Things
Once you have your design finalized, you need to get them printed. Options include:
Online Print Shops
Places like Minted, Zazzle, Vistaprint, Catprint, or even Costco Photo Center can handle invitation printing. Upload your design file, choose your specs, order. Easy.
Minted is great quality but pricier. Vistaprint is budget-friendly but the quality is just… okay. Catprint is kinda the middle ground I recommend most often for custom designs. They have good customer service and reasonable prices.
Local Print Shops
If you have a local printer, they can often give you more personalized service and you can see paper samples in person. This is especially helpful if you’re doing something more complex like letterpress or foil stamping. Plus you’re supporting a local business which is nice I guess.
At-Home Printing
Nah, I’m gonna be honest—unless you have a really good printer and you’re only doing like 20 invitations max, don’t do this. It’s more hassle than it’s worth. Your printer will jam, the colors will be inconsistent, you’ll run out of ink halfway through, someone will spill coffee on a stack… just trust me and send them to a print shop.
Ordering the Right Quantity
Here’s the math: you need one invitation per household, not per guest. So if you’re inviting a couple, that’s one invitation. A family of four? One invitation.
BUT always order extras. I tell people to order at least 15-20 more than they think they need because:
- You’ll forget someone (it happens to literally everyone)
- Some will get lost in the mail
- You’ll want to keep one for yourself as a keepsake
- Your mom will want extras to show her friends
- Someone will spill something on theirs while addressing them
It’s way cheaper to order a few extra upfront than to do a second print run later when you realize you’re short.
Assembly and Mailing Logistics
Okay so you got your printed invitations, now what? If you have multiple pieces (invitation, RSVP card, details card, envelope liner, whatever), you need to assemble everything. This is tedious but kinda meditative if you put on a good show or podcast.
Stack everything in the right order—usually invitation on bottom, then details card, then RSVP card with its envelope tucked under the flap. Some people use belly bands or vellum wraps to keep everything together, which looks nice but adds cost and assembly time.
Addressing envelopes is its own whole thing. You can hand-write them (time-consuming but personal), print labels (practical but some people think it looks cheap), or hire a calligrapher (expensive but gorgeous). For doodle invitations, I think printed addresses in a nice font actually work fine since the whole vibe is already casual and artistic.
Before you mail everything, take ONE COMPLETE invitation to the post office and have them weigh it. Square envelopes, thick invitations, or anything with ribbons or embellishments will cost more than standard postage. You don’t wanna slap regular stamps on everything and then have them all returned for insufficient postage. Been there, seen that disaster, it’s not fun.
Common Mistakes to Avoid
Since I’ve been doing this for years, I’ve seen people mess up doodle invitations in some pretty consistent ways:
Making the doodles too busy: If there are illustrations everywhere and the text is hard to read, guests won’t actually know when or where your wedding is. The doodles should enhance the information, not compete with it or… wait, I was gonna say something else but I forgot. Oh right—white space is your friend. Don’t fill every single centimeter with drawings.
Choosing fonts that don’t match: Your text font should complement the doodle style. Whimsical doodles with a super formal serif font looks weird. Modern minimalist doodles with a cutesy script font also looks off. They should feel like they belong together.
Not getting a proof: Always, always, ALWAYS request a printed proof before doing your full print run if you’re working with a print shop. Colors look different on screen versus paper, and you might catch a typo or spacing issue you didn’t notice digitally.
Forgetting about bleed and margins: This is technical but important. If your doodles go to the edge of the card, you need to set up your file with bleed (extra image area beyond the trim line) so you don’t get weird white borders when they’re cut. Most print shops have templates that show you exactly how to set this up.
Budget Breakdown Reality Check
Let me just give you some real numbers so you know what you’re looking at:
Super budget DIY: $50-150 total (template + at-home printing or cheap online printing)
Mid-range custom: $400-800 (custom illustration + quality printing for 100 invitations)
High-end custom: $1200-3000+ (renowned illustrator + letterpress or specialty printing)
These are rough estimates and can vary a ton based on your guest count, how many pieces you’re including, and what special finishes you want. Just be realistic about what you can actually afford and don’t let Instagram make you feel like you need to spend $2000 on invitations when you could use that money for literally anything else at your wedding.
Working With Your Illustrator Successfully
If you hire someone, communication is everything. Give them a clear creative brief upfront with:
- Your wedding date, venue, and overall theme/vibe
- Color preferences or your wedding colors
- Examples of doodle styles you like (and don’t like)
- Specific elements to include (your dog, a landmark, certain flowers, etc.)
- How many revision rounds are included in their price
- File format you need for printing (usually high-res PDF)
Then trust them to do their thing. You hired them for their artistic vision, so don’t nitpick every little detail. Give feedback that’s specific and constructive, not just “I don’t like it” without explaining why. Artists aren’t mind readers and they’re gonna do their best work when you give them clear direction but also creative freedom.