Planning Guides, Style Guide
Arch Wedding Invitations: Curved Shaped Design Style
Nov
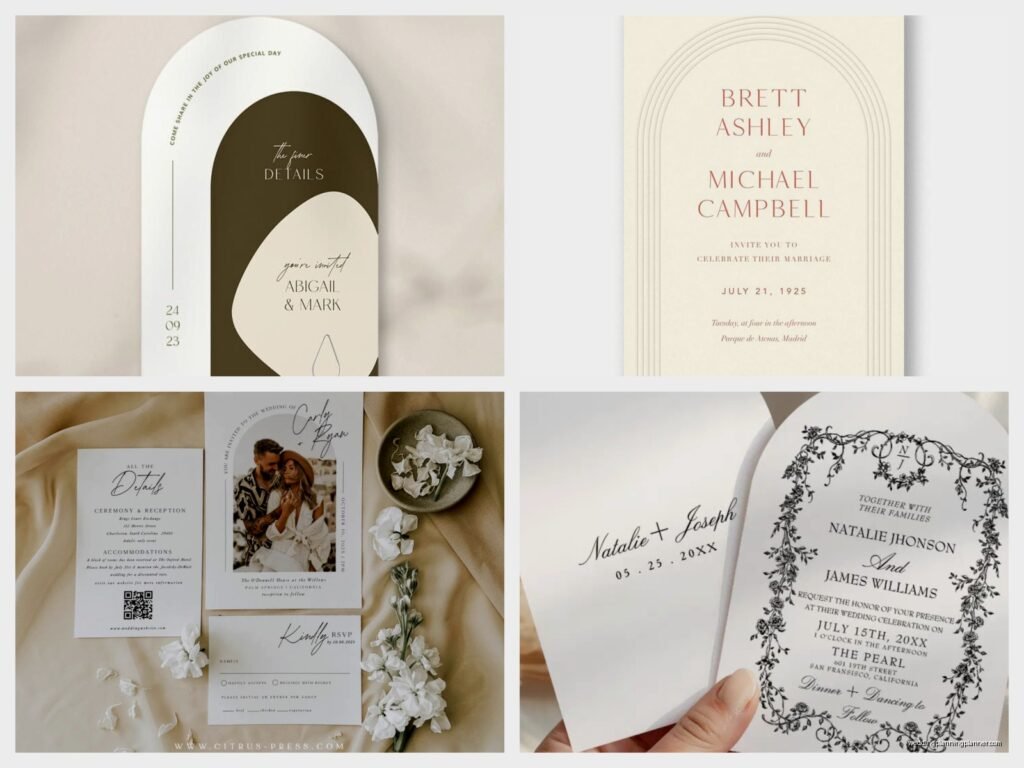
What Even Are Arch Wedding Invitations
Okay so arch invitations are basically what they sound like—the top edge is curved instead of straight. Think of it like a doorway or a window shape instead of a regular rectangle. I had this bride back in spring 2023 who was absolutely OBSESSED with arches because her venue had these gorgeous stone archways and she wanted everything to match, and honestly that’s when I really started paying attention to how much this design choice can do for your whole aesthetic.
The curve can be subtle or really dramatic. Some couples go for just a gentle rounded top, others want that full semicircle situation. You’re gonna see them called different things too—arched invitations, curved invitations, dome-top invitations. Same thing basically.
Why People Choose This Shape
The arch shape immediately makes your invitation feel more elegant and architectural. It’s got this romantic, timeless vibe that works really well for:
- Garden weddings
- Vineyard ceremonies
- Historic venues with actual arches
- Mediterranean or European-inspired themes
- Anything botanical or organic-feeling
- Modern minimalist weddings where you want one special detail
I’ve noticed they photograph REALLY well for save-the-dates and invitation flat lays. The curved edge creates visual interest without being too… I dunno, gimmicky? Like you’re not doing a die-cut shape of two swans or whatever, it’s still sophisticated but different.
The Practical Stuff You Gotta Know First
Here’s what annoyed me when I first started working with arch invitations—nobody tells you upfront that they’re more expensive and complicated than regular rectangular ones. The die-cutting process costs more. You can’t just trim these with a regular paper cutter. Most print shops charge extra because it’s a custom shape.
Expect to pay maybe 20-40% more than standard invitations depending on your printer. Some online template places have standardized arch sizes now which helps with cost, but truly custom curves? Yeah, that’s gonna add up.
Envelope Situation
This is where it gets interesting. You have a few options:
Option 1: Standard rectangular envelopes. Your arched invitation just sits inside a normal rectangle envelope. Totally fine, most people do this. The recipient doesn’t see the arch until they open it, which is kinda like a little surprise.
Option 2: Custom arched envelopes. These exist but wow are they pricey. You’re looking at custom envelope creation which is… it’s a lot. I’ve only had maybe three clients ever do this because the cost is pretty intense. But it DOES look incredible if you have the budget.
Option 3: Belly bands or vellum wraps. You can hint at the arch shape by wrapping your invitation suite in a way that shows the curved edge peeking out. This is my cat’s favorite option to knock off my desk apparently, but it works well aesthetically.
Size Considerations
Standard rectangular invitations are usually 5×7 or 5.5×8.5 inches. With arches, you need to think about the overall height including the curve. Common arch invitation sizes:
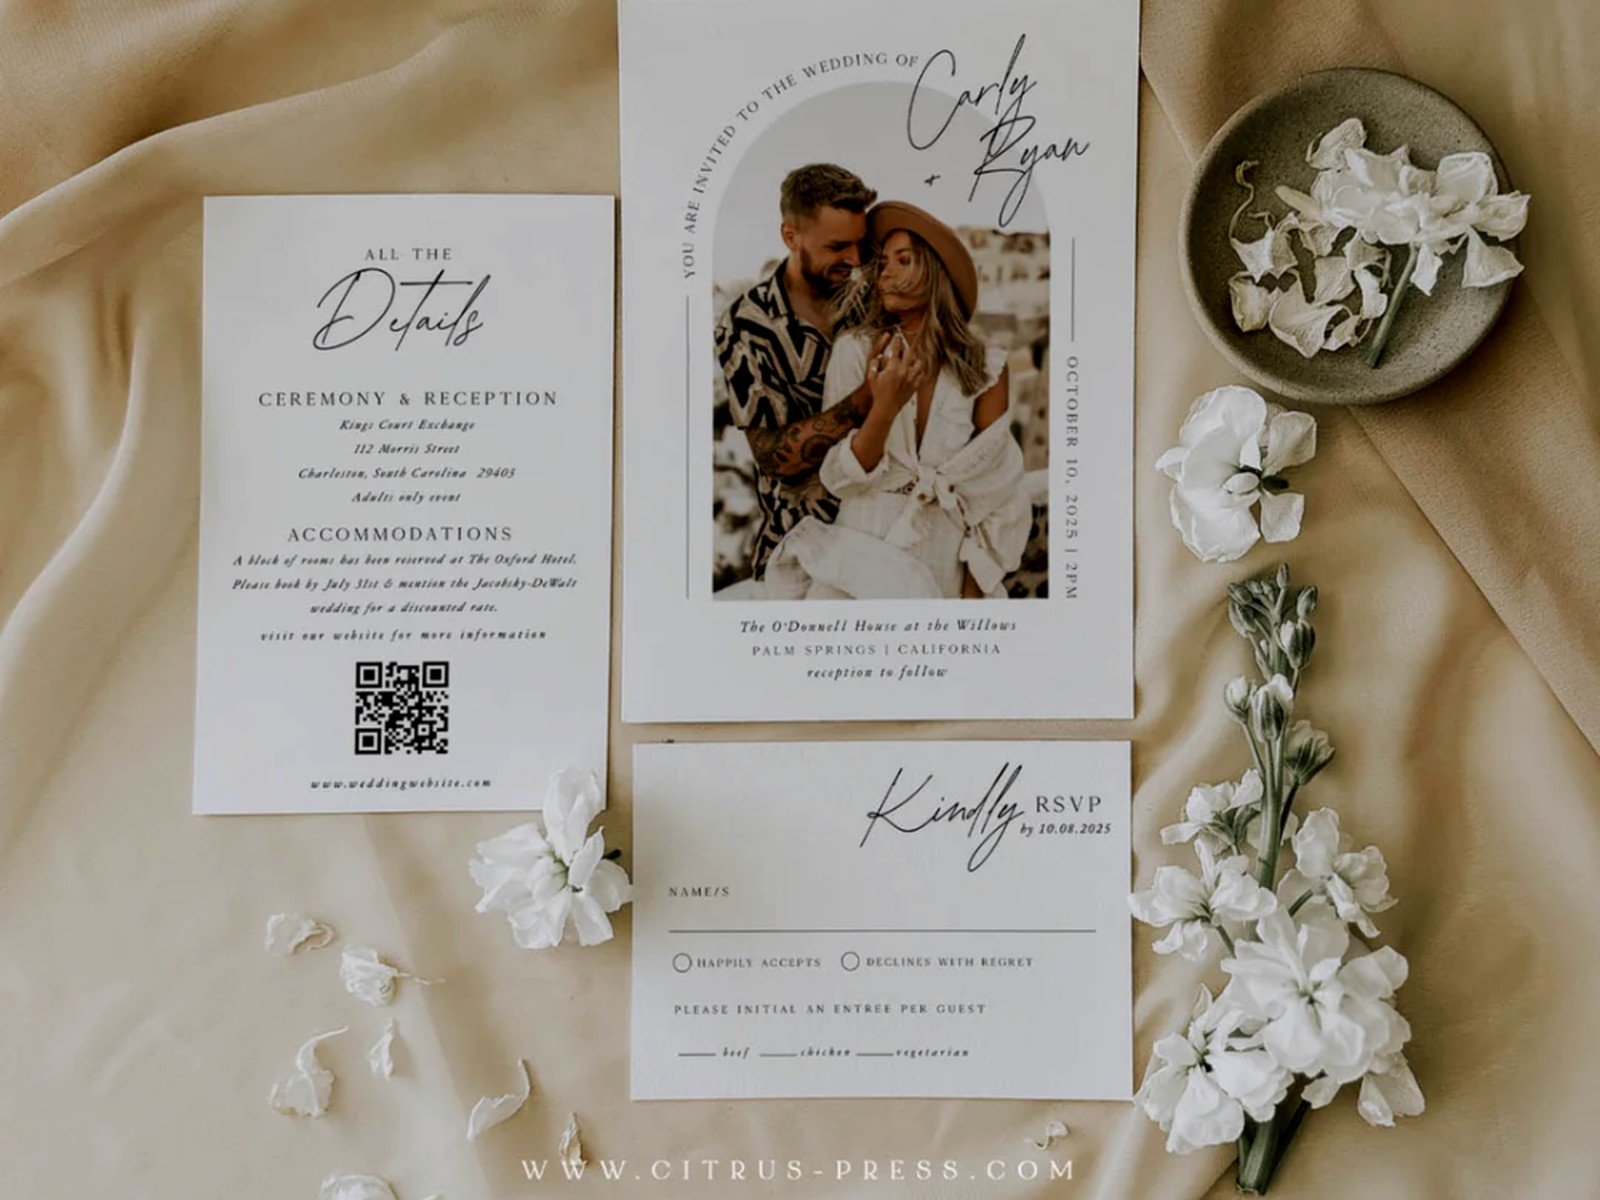
- 5×7 with a 1-inch arch curve
- 5.5×8 with varying arch heights
- Custom sizes (usually 4.5×7.5 or 5×8.5)
The arch adds height, so make sure your envelopes can accommodate. A standard A7 envelope (for 5×7 invites) should work for most gentle arch curves, but if you’re going dramatic with the curve, you might need to size up to an A8 or get custom envelopes made.
Design Tips That Actually Matter
The arch shape itself is a design element, so you don’t wanna go too crazy with other stuff or it gets cluttered fast.
Text Placement
You’ve got two main approaches. Either center everything and let the arch frame your text naturally, or—and this is what I usually recommend—follow the curve with your design elements. Like, put a delicate botanical illustration that echoes the arch shape, or have your text layout acknowledge that curve exists.
Don’t just slap centered text on there and call it done. The whole point is that curved edge, so work WITH it. I had this client who wanted to ignore the arch completely in her layout and I was like… then why are we doing an arch? But anyway, she’s the bride, so we did what she wanted.
Border or No Border
This is personal preference but I think borders work really well with arch invitations. A thin border that follows the curve emphasizes the shape. You can do:
- Simple line borders in gold foil or letterpress
- Botanical borders with leaves and vines following the arch
- Geometric borders for modern vibes
- Watercolor washes that fade toward the edges
Or skip the border entirely and do a clean minimal design. Both work, just depends on your overall aesthetic.
Printing Methods
Digital printing is the most affordable option and works perfectly fine for arch invitations. The quality these days is honestly really good.
Letterpress looks STUNNING on arch invitations because you get that tactile impression and the curved edge plus the debossed text is just *chef’s kiss*. But it’s expensive. Like, significantly expensive. Worth it if you have the budget though.
Foil stamping is another gorgeous option. Metallic foil along that curved edge or on key text elements adds serious elegance. You can combine foil with digital printing to save some money—digital for most of the text, foil for names or key details.
Thermography is kinda the middle ground. Raised printing that mimics letterpress but costs less. It works on arch shapes no problem.
DIY vs. Professional Printing
Look, I’m gonna be honest—DIY arch invitations are tough. You need a die-cutting machine that can handle the curve (like a Cricut or Silhouette), and even then, cutting 100+ invitations perfectly is… it’s a project. I watched a bride attempt this in summer 2021 and she ended up with like 30 usable invitations out of 150 attempts because the curves weren’t consistent.
If you’re set on DIY, buy extra paper. Like, a LOT of extra paper. And practice on cheap cardstock first.
For most people, I recommend finding a printer who specializes in custom shapes. Minted, Zola, and Artifact Uprising all have arch templates now. Smaller specialty printers on Etsy often do beautiful custom work too.
Color and Paper Choices
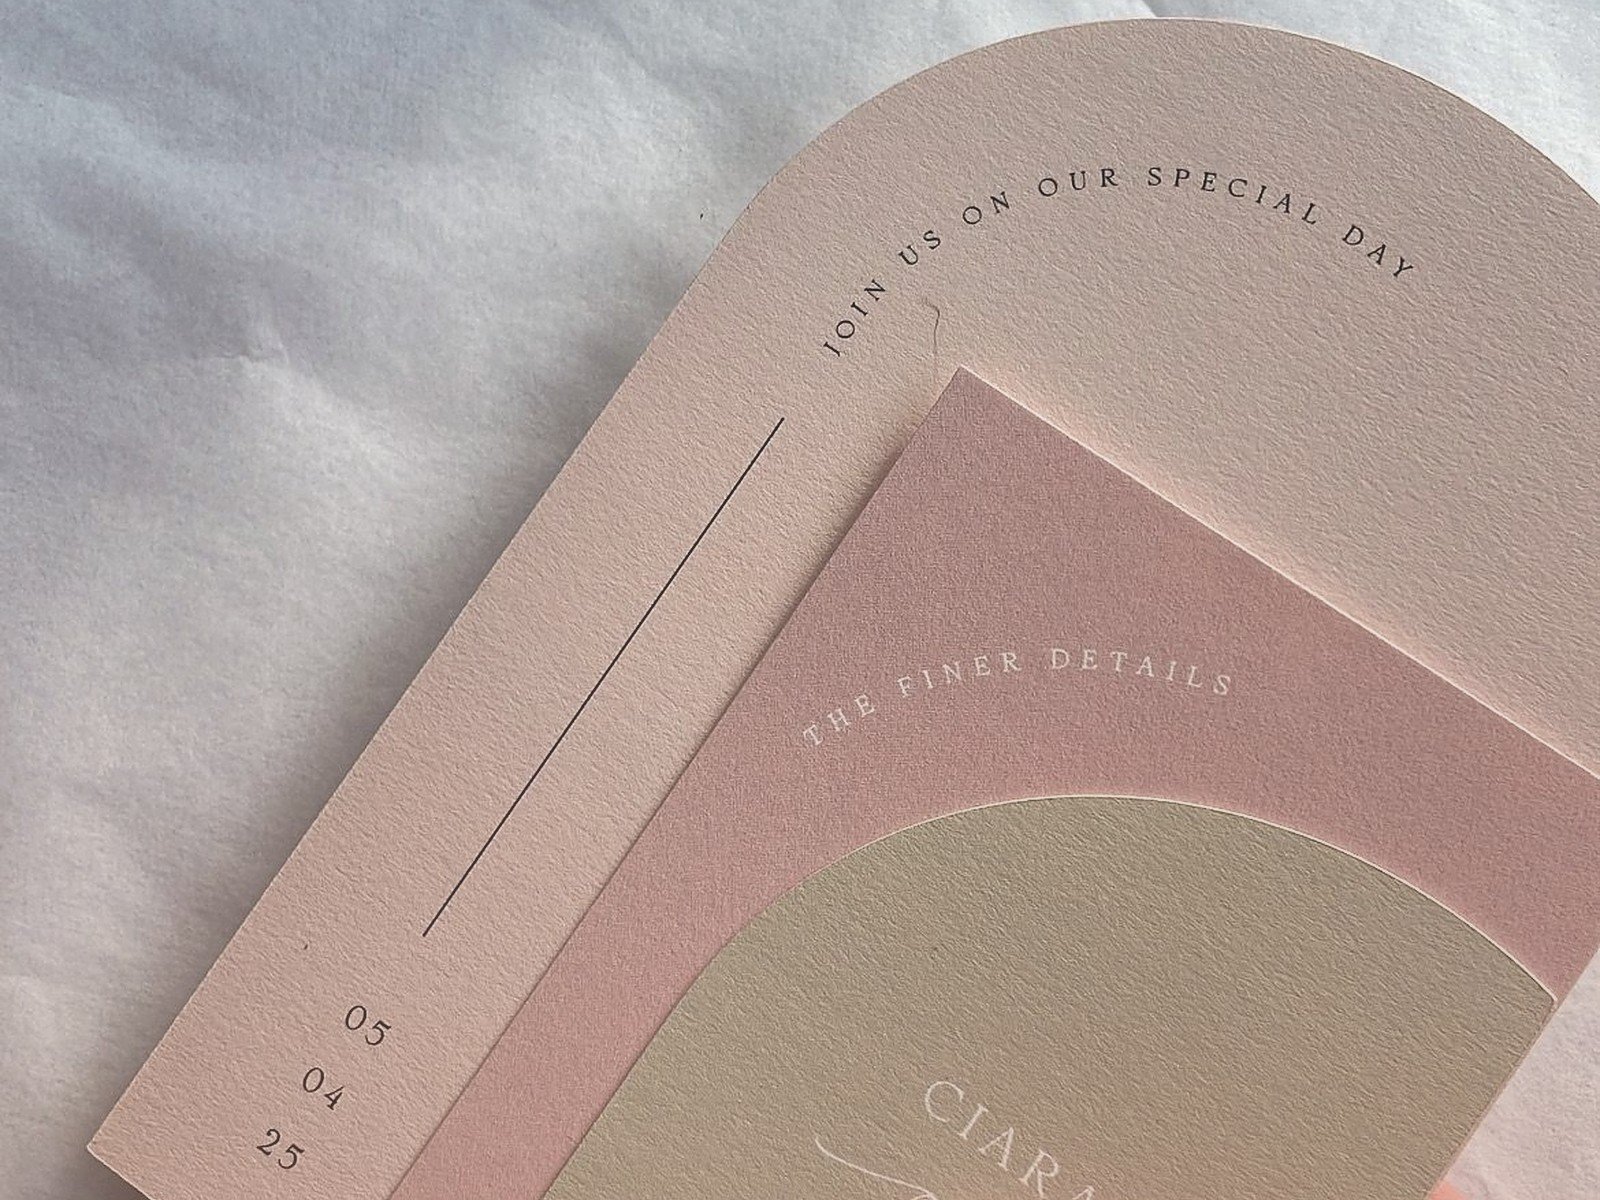
The arch shape works with basically any color palette, but I’ve noticed it looks especially good with:
- Soft neutrals (cream, ivory, blush, sage)
- Terracotta and rust tones
- Deep jewel tones if you want drama
- Classic white with black text for modern elegance
Paper weight matters more than you’d think. Thinner paper (like 80lb) can look kinda flimsy with the curve. I usually recommend at least 110lb cardstock, preferably 130lb. The curve needs some substance to hold its shape and feel substantial.
Textured papers work beautifully—cotton paper, linen finish, even handmade paper if you’re going for that organic artisan vibe. Just make sure your printer can handle whatever paper you choose with their die-cutting equipment.
Suite Coordination
So you’ve decided on arch invitations. Now what about the rest of your suite? You don’t have to make EVERYTHING arched (honestly that might be overkill), but you should tie things together somehow.
Options for the rest of your suite:
The main invitation is arched, everything else is rectangular. Totally fine. Just use the same colors, fonts, and design elements so it feels cohesive. Your RSVP card, details card, etc. can all be standard rectangles.
Main invite and RSVP both arched. This looks really polished. The other insert cards stay rectangular.
Everything arched. Expensive but stunning if you can swing it. I’ve only seen this a handful of times but wow, the effect when you open that envelope and everything has that curved edge…
You can also echo the arch in other ways—like using arch-shaped graphics or illustrations on your rectangular insert cards, or having an arch motif in your monogram.
Assembly and Mailing
Assembly is pretty much the same as regular invitations. Stack your cards in order (usually invitation on bottom, then details card, RSVP card and envelope on top), add any belly bands or vellum wraps, tuck into the envelope.
One thing to watch—that curved edge can catch on the envelope if you’re not careful. Insert the invitation with the arch at the top, and make sure it’s not too tight a fit. You want smooth insertion, not forcing it in there and potentially bending the curve.
Postage
Here’s something nobody thinks about until the last minute—weigh your assembled invitation before you buy stamps. The arch shape itself doesn’t affect postage, but these invitations are often heavier because of the thicker cardstock, plus all your insert cards, plus any embellishments.
Most wedding invitations need extra postage beyond a regular stamp. Take a fully assembled invitation to the post office and have them weigh it. And please, PLEASE hand-cancel your invitations or request gentle handling. That curved edge can get dinged up in the sorting machines.
Digital Versions
Oh and if you’re doing digital save-the-dates or email invitations (which honestly more couples are doing now), you can still use the arch shape. It translates really well to digital—just make sure your graphic designer exports it with the transparent background so the arch shows properly on different email clients.
I’ve seen some couples do physical arch invitations for their main guest list and digital arch designs for their extended B-list or international guests where shipping gets crazy expensive. Works perfectly fine, nobody needs to know they’re different formats.
Timing and Ordering
Custom die-cut invitations take longer to produce than standard rectangles. Plan for at least 3-4 weeks for production, sometimes longer during peak wedding season (spring and early summer). Rush orders are usually possible but you’ll pay extra.
Order samples before you commit to 150 invitations. Like, always do this anyway, but especially with a custom shape. You need to see how the curve looks in person, feel the paper weight, make sure the size works with your envelopes. Most printers offer sample packs or will send you a proof for a small fee.
And order extras. I always tell clients to order 10-15% more than their guest count. You’ll mess up addressing some envelopes, you’ll want to keep some for your own keepsakes, random plus-ones will appear… just order extra.
Matching Day-Of Stationery
If you’re really into the arch theme, you can carry it through to your wedding day paper goods:
- Ceremony programs with arched tops
- Menu cards with the curve
- Table numbers in arch shapes
- Place cards with subtle arches
- Thank you cards (though honestly rectangular is fine here, people are kinda over themed thank yous)
I had a bride who did arch-topped menus and it looked SO good on the reception tables. The shape just photographs beautifully and adds this elegant consistency to everything.
Common Mistakes to Avoid
Don’t make the arch too dramatic unless you’re ready for the logistical challenges. A super high curve means taller envelopes, potentially awkward proportions, and more expensive everything.
Don’t forget about the back of the invitation if you’re doing anything double-sided. The arch needs to line up perfectly front to back, which is why professional printing matters here.
Don’t assume every printer can do arch shapes. Ask specifically, request samples of their curved die-cuts, check reviews. Some printers are better at this than others.
And please don’t try to trim arched invitations by hand with scissors. Just… no. I mean unless you have incredibly steady hands and infinite patience, but even then, the curves won’t be consistent and it’ll look homemade in a not-cute way.
Budget Breakdown
Real talk about costs for 100 invitations (just main invite, not full suite):
- Budget option (digital printing, standard arch): $200-400
- Mid-range (digital with foil accents, quality paper): $500-800
- Luxury (letterpress, custom curve, premium paper): $1200-2000+
Add in RSVP cards, details cards, envelopes, postage, and you’re looking at anywhere from $400 to $3000+ for a complete suite depending on how fancy you go. The arch shape itself probably adds $50-150 to whatever the rectangular version would cost.
Templates and Resources
If you’re working with a designer, show them examples of arch invitations you like. Pinterest is actually super helpful here despite being overwhelming for wedding planning in general. Search “arch wedding invitations” and save anything that catches your eye.
Etsy has tons of arch invitation templates if you’re doing semi-DIY (you customize the template, they print and cut it). This is a good middle ground between fully custom and completely DIY.
Minted’s arch collection is really nice and they have good paper options. Artifact Uprising does a minimalist arch style that’s gorgeous if that’s your vibe. Zola has some too though their selection is smaller.
For true custom work, find a stationery designer who lists die-cut or custom shapes in their services. Expect to pay design fees plus printing costs, but you’ll get exactly what you want and it’ll be completely unique to you.

Canva
Wedding Memories Hardcover Template Canva Editable For Notebook, Journal, Novel, Hard Covers, Canva template For KDP Cover 6×9″ 120 pages
Canva
The Ultimate Wedding Planning Bundle, Canva Editable.
Canva
Customizable Wedding Video Invitations templates, Canva Editable Digital Wedding invitation Minimalist, Animated Custom Invitation
Digital Planning Templates
Wine Wedding Planner Bundle – 200-Page Printable PDF + 10 Editable Wedding Invitations | Instant Digital Download
Canva
Orange Wedding Planner Bundle – 200-Page Editable Canva Templates + 10 Editable Wedding Invitations | Instant Digital Download
Digital Planning Templates
Champagne Wedding Planner Bundle – 200-Page Printable PDF + 10 Editable Wedding Invitations | Instant Digital Download
Canva
Wedding Memories Hardcover Template Canva Editable For Notebook, Journal, Novel, Hard Covers, Canva template For KDP Cover 6×9″ 120 pages
Digital Planning Templates
Yellow Wedding Planner Bundle – 200-Page Printable PDF + 10 Editable Wedding Invitations | Instant Digital Download
Canva
Dusty Blue Wedding Planner Bundle – 200-Page Editable Canva Templates + 10 Editable Wedding Invitations | Instant Digital Download