Planning Guides, Style Guide
Wedding Invitation Envelope Design: Design & Ordering Guide
Apr
Okay so envelope design is actually where most couples mess up their invitations
The envelope is literally the first thing your guests see and I cannot tell you how many times I’ve watched someone open a gorgeous invitation suite only to have it arrive in the most boring white rectangle that screams “office supply store.” Like you spent all this money on letterpress printing and custom wax seals but then the envelope looks like it’s carrying a dental appointment reminder? Nah.
So here’s the thing about wedding invitation envelopes – you’ve actually got way more options than you think. Most couples don’t realize you’re working with two envelopes typically: the outer envelope (the one that gets addressed and goes through the mail) and the inner envelope (the one that holds the actual invitation and tells people who specifically is invited). Some people skip the inner envelope to save money and honestly that’s fine for casual weddings but if you’re doing a formal affair you’re gonna want both.
Picking Your Envelope Style and Material
First decision is the actual envelope type. Standard commercial envelopes are boring but cheap. A5 envelopes (5.75 x 8.75 inches) fit most invitation sizes and you can get them anywhere. But then you’ve got baronial envelopes which have that pointed flap and look way fancier – I always push couples toward baronial because it immediately signals “this is special” before anyone even opens it.
There’s also square envelopes which I kinda love visually but ugh they cost more to mail because the post office charges extra for non-standard sizes. Found that out the hard way with a client back in spring 2023 when we did these gorgeous 7×7 square envelopes in sage green and then she nearly had a heart attack when I told her it was gonna be an extra 20 cents per invite for postage. On 200 invitations that’s an extra $40 which doesn’t sound like much but it adds up when you’re already over budget.
Color and Texture Choices That Actually Matter
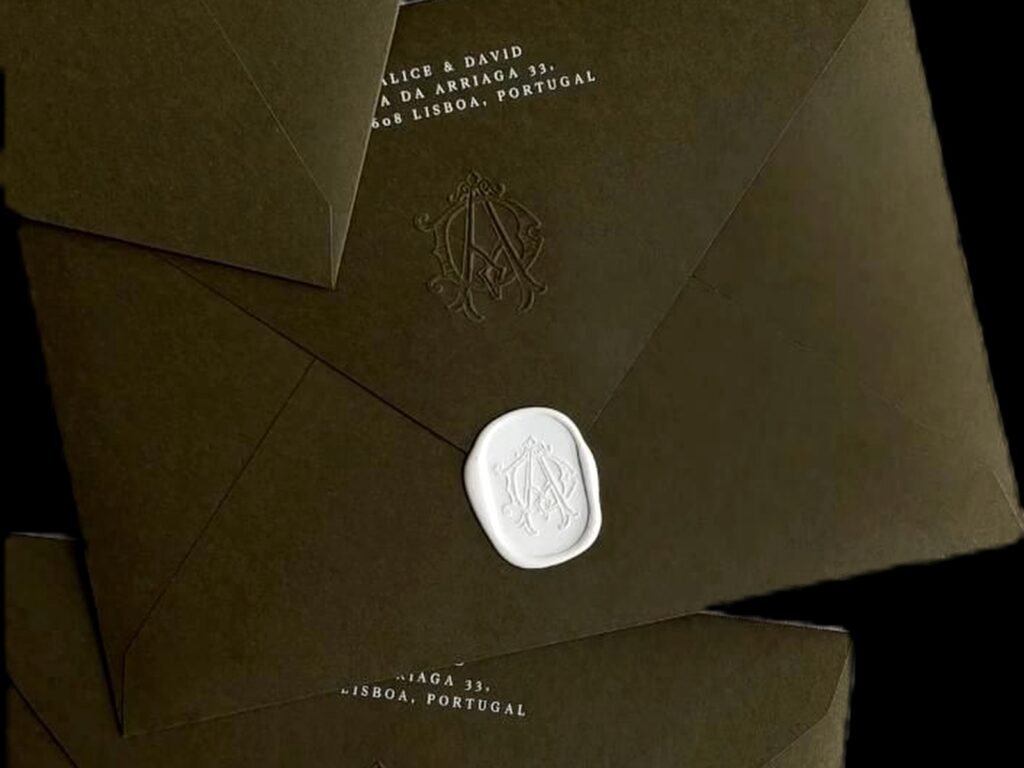
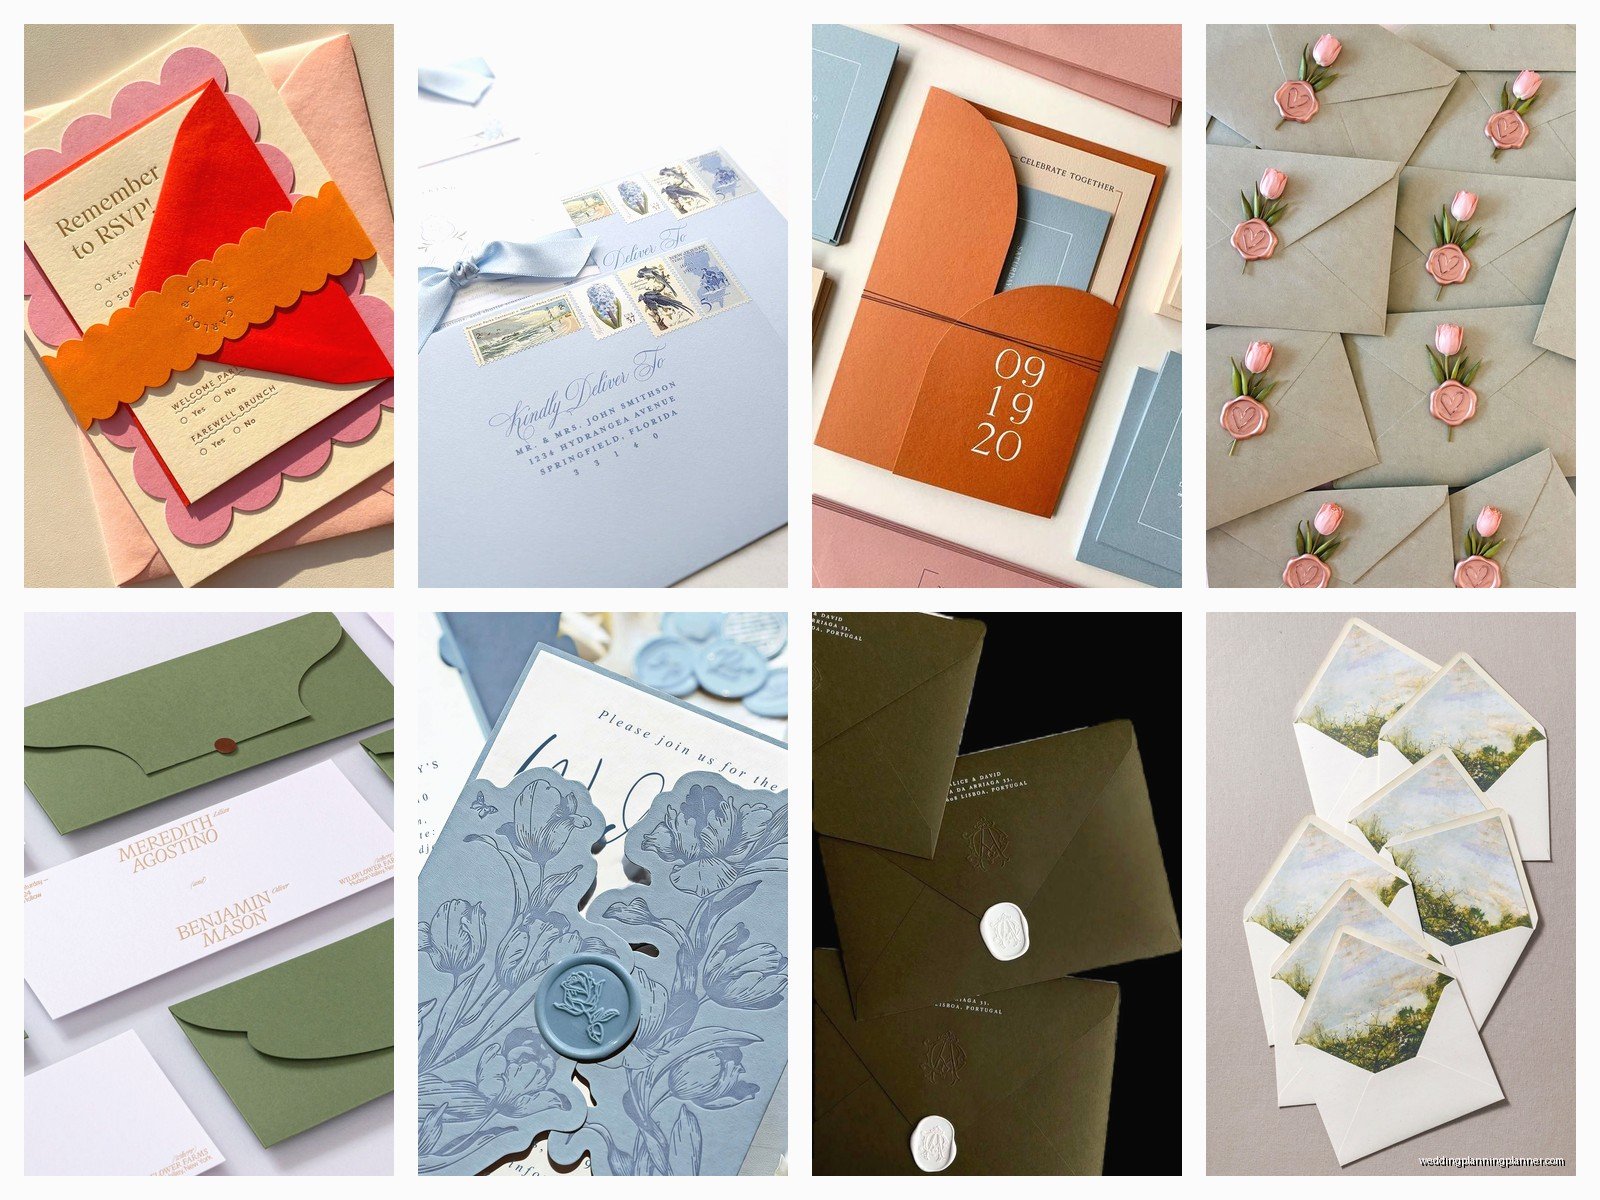
White envelopes are fine but they’re everywhere. Ivory or ecru gives you that classic wedding feel without being too stark. But colored envelopes? That’s where you can really make a statement. I’ve done deep navy envelopes with gold calligraphy, blush pink envelopes with burgundy wax seals, even black envelopes with white ink (though those are tricky because some printers won’t print on dark colors).

Texture is huge too. You’ve got your basic smooth finish, then linen texture which has that subtle crosshatch pattern, laid finish which shows the paper fibers, and vellum which is translucent and delicate. My personal favorite is cotton paper – it’s got this substantial weight to it that feels expensive when you hold it. There’s also parchment paper that has an aged vintage look if that’s your vibe.
One thing that really annoyed me recently was when a stationery company didn’t tell a couple that the envelope color they picked wouldn’t work with the printer they wanted to use. The couple ordered 150 envelopes in this gorgeous dusty blue and then found out their calligrapher’s printer couldn’t feed that particular paper weight. Had to reorder everything. Always check compatibility before you buy in bulk I’m telling you.
Addressing Options Because This Gets Complicated
So you’ve got your envelopes picked out now you gotta figure out how to address them. You can go digital printing which is the cheapest – basically just printing addresses directly onto envelopes using your home printer or a professional service. It’s clean and easy but not super formal looking.
Then there’s calligraphy which is what most formal weddings use. You can hire a professional calligrapher (expensive but gorgeous), use a calligraphy printing service that mimics hand lettering (more affordable), or if you’re really ambitious do it yourself. I tried hand-addressing my own wedding invites back in summer 2021 and my hand cramped up after like 15 envelopes so… maybe don’t do that unless you’ve got serious patience or a small guest list.
Digital calligraphy is a good middle ground – someone designs the addresses digitally in a calligraphy style then prints them. Looks hand-done but costs way less than actual calligraphy. For outer envelopes you’ll want formal addressing (Mr. and Mrs. Jonathan Smith) but for inner envelopes you can be more casual (Jonathan and Sarah).
Oh and return addresses! Don’t forget those. You can print them on the envelope flap, use a return address stamp (cute and reusable), or get printed labels. I personally think printed directly on the flap looks most polished.
Envelope Liners Are Optional But Wow Do They Elevate Things
Okay so envelope liners are these decorative paper inserts that go inside the envelope flap and honestly they’re one of my favorite details. When someone opens your invitation and sees a pop of pattern or metallic or color? It’s like a little surprise that makes the whole thing feel more luxurious.
You can get liners that match your wedding colors, patterns that coordinate with your invitation design, or even custom printed liners with monograms or florals. They come in different sizes to fit different envelope styles – euro flap liners, square flap liners, pointed flap liners. You can buy pre-cut liners or get sheets and cut them yourself if you’re crafty (or have too much time on your hands).
Installing them is sorta tedious though not gonna lie. You’ve gotta use a glue stick or double-sided tape and line them up perfectly so they sit right inside the envelope. I usually recommend couples do a few practice runs before committing to all 150 envelopes because there’s definitely a learning curve. My cat knocked over my glue stick while I was working on a client’s liners once and I had to redo like 30 of them which was… not fun.
Ordering Process and What You Actually Need to Know
When you’re ready to order here’s what you need to figure out first: your invitation dimensions so you know what envelope size to get, your quantity (always order at least 10-15 extra for mistakes or last-minute additions), and your timeline because custom envelopes can take 2-4 weeks to arrive.
Places to order from – there’s the big online retailers like Cards & Pockets, LCI Paper, Envelopes.com. They’ve got tons of options and you can order samples before committing. Etsy has smaller sellers who do custom envelope designs. Paper Source has nice options if you want to see them in person. And your stationer might offer envelope sourcing as part of their package.
Sample everything before ordering in bulk seriously. Colors look different on screen versus in person and paper weight matters more than you think. I always tell clients to order at least 5 different samples so they can compare textures and shades side by side. It’s like a $20 investment that saves you from ordering 200 wrong envelopes.
Embellishments and Sealing Options
So you’ve got your envelopes and they’re addressed now you gotta seal them and maybe add some extra touches. Basic moisture-activated gum on the flap works fine – just lick it or use a damp sponge. But there’s also peel-and-stick envelopes which are way easier for large quantities.
Wax seals though? Game changer. They look incredibly elegant and they’re not as hard as you’d think. You can buy wax seal kits online with your monogram or design, melt the wax with a spoon or glue gun, and stamp it onto the envelope flap. Pro tip: do wax seals on the inner envelope or on the invitation belly band, not the outer envelope, because sometimes they break in the mail and then you’re sad.
Vellum wraps or belly bands are another nice touch – they’re translucent or paper bands that wrap around your invitation suite and you can seal them with a wax seal or sticker. Ribbon ties are pretty but they add bulk which means more postage costs. Stickers or custom labels with your monogram or wedding logo can seal envelopes too and they’re way easier than wax.
Assembly Tips So You Don’t Lose Your Mind
Once everything arrives you’ve gotta assemble it all and this is where couples usually panic because it’s more time-consuming than expected. Set up an assembly line situation – lay out all your components (invitation, RSVP card, details card, envelope, liner if you’re using one) and work in batches.
Stuff the invitation suite in a specific order: invitation on bottom, then details card, then RSVP card and envelope on top. If you’re using tissue paper to protect letterpress printing put that between the layers. The whole stack goes into the inner envelope (if you’re using one) with the printed side facing the flap so when someone opens it they see the invitation first. Then that inner envelope goes into the outer envelope.
For just outer envelopes with no inner, you’re gonna want the invitation facing the flap for the same reason. Don’t seal anything until you’ve double-checked the contents because I’ve seen people seal 50 envelopes before realizing they forgot to include the RSVP envelopes and then they had to rip everything open and start over.
Postage and Mailing Because This Is Its Own Nightmare
Take a fully assembled invitation to the post office and have them weigh it before you buy stamps. Seriously. Most wedding invitations are over one ounce which means you need extra postage. Square envelopes, thick envelopes, or anything with wax seals might need even more. I’ve had couples spend hundreds on gorgeous vintage stamps only to find out they needed like three stamps per envelope to cover the actual postage cost.
You can get custom stamps with your engagement photos or wedding logo which is a cute detail. But honestly sometimes regular pretty stamps from the post office work just fine and they’re way cheaper. Just make sure they coordinate with your color scheme – don’t put tropical bird stamps on a winter wedding invitation or whatever.
Hand-canceling is when the post office manually processes your invitations instead of running them through the machine. It costs a little extra but it prevents your envelopes from getting chewed up or your wax seals from breaking. You have to specifically request it and some post offices are annoying about it but it’s worth it for fancy invitations.
Common Mistakes I See All The Time
Not ordering enough envelopes is the biggest one. You will mess up addresses, you will tear flaps, you will spill coffee on at least three of them. Order extras.
Choosing envelope colors that don’t photograph well – like if you’re gonna do a flat lay of your invitation suite for social media or your photographer, make sure the envelope color doesn’t clash with everything else.
Forgetting about the RSVP envelope entirely which sounds dumb but it happens. Your RSVP envelope should be pre-addressed to whoever’s collecting responses and it should have postage on it already so your guests don’t have to deal with that.
Using envelope sizes that don’t match invitation sizes – I’ve seen couples order 5×7 invitations and then buy A6 envelopes when they needed A7 and nothing fits right and it’s just a mess.
Timeline For Ordering and Assembly
You want to order envelopes about 3-4 months before your wedding ideally. That gives you time for samples, ordering, receiving, addressing, assembling, and mailing. Invitations should go out 6-8 weeks before the wedding so work backward from there.
If you’re doing calligraphy add extra time because that takes forever. If you’re assembling 200 invitations yourself block out like an entire weekend because it’s gonna take longer than you think and you’ll need breaks or you’ll lose your mind.
Rush options exist but they’re expensive and stressful so try not to wait until the last minute even though I know everyone does anyway because wedding planning is chaos and timelines are more like suggestions apparently…
The quality of your envelopes really does set the tone for your whole wedding so don’t treat them like an afterthought even though they’re technically just the packaging. People notice when you put effort into details and a beautiful envelope makes your guests excited to open the invitation instead of just tossing it on the counter with the bills