Planning Guides, Style Guide
Vellum Jackets 5×7: Invitation Sleeve Size Specific
Jun
So You Need Vellum Jackets for 5×7 Invitations
Okay so vellum jackets for 5×7 invitations are one of those things that seem super straightforward until you’re actually standing there with your materials and nothing fits right. I learned this the hard way during a spring 2023 wedding where the bride wanted this gorgeous botanical suite with vellum overlays and I ordered the wrong size jackets because I didn’t account for the actual folding dimensions. That was a fun week of panic ordering and overnight shipping.
What Even Is a Vellum Jacket Anyway
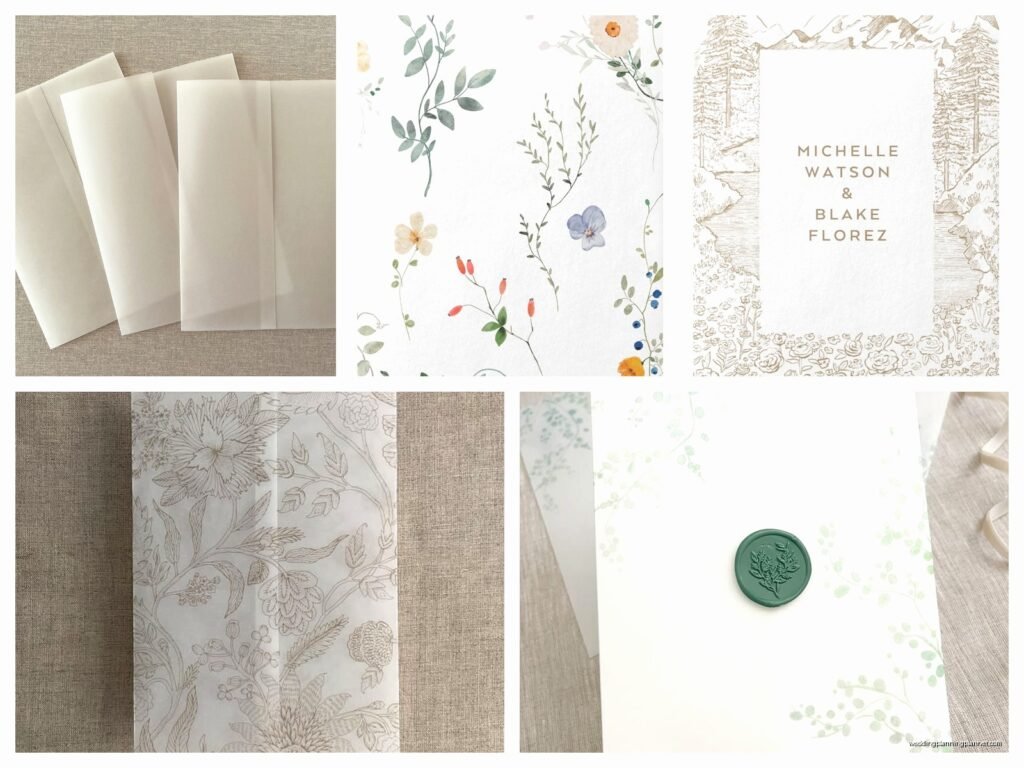
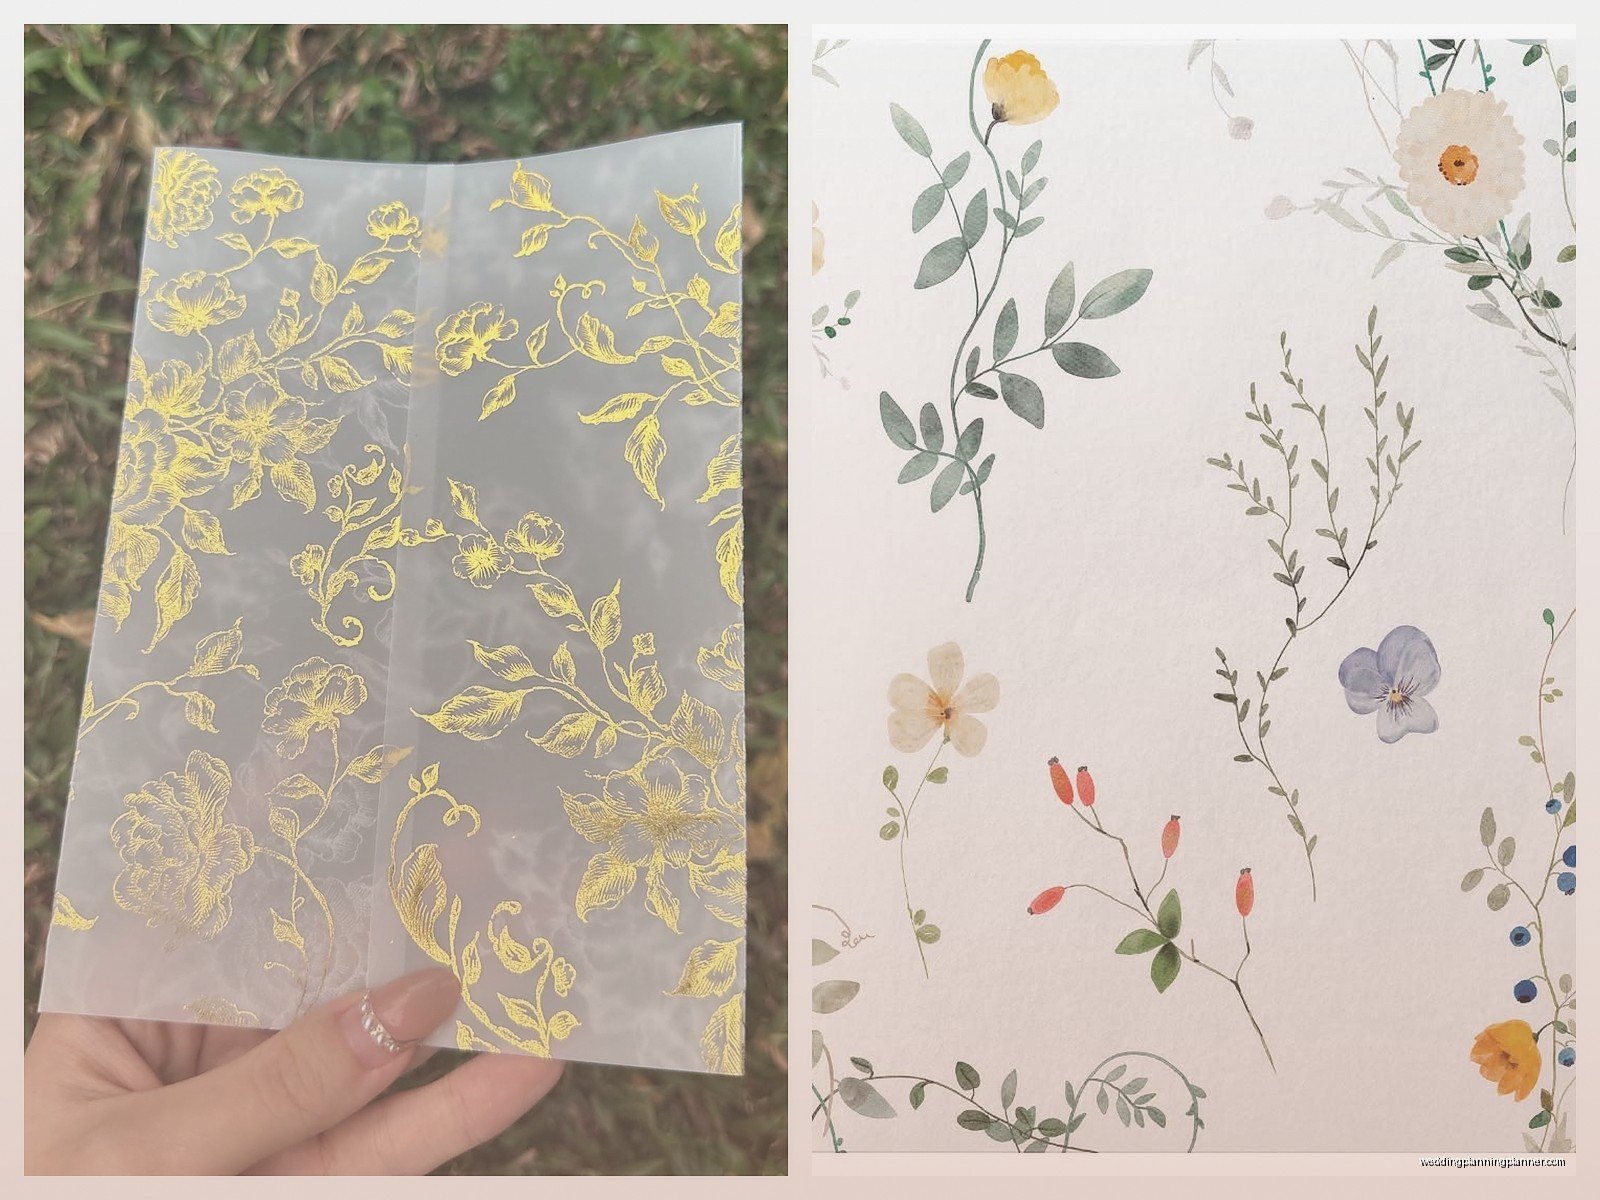
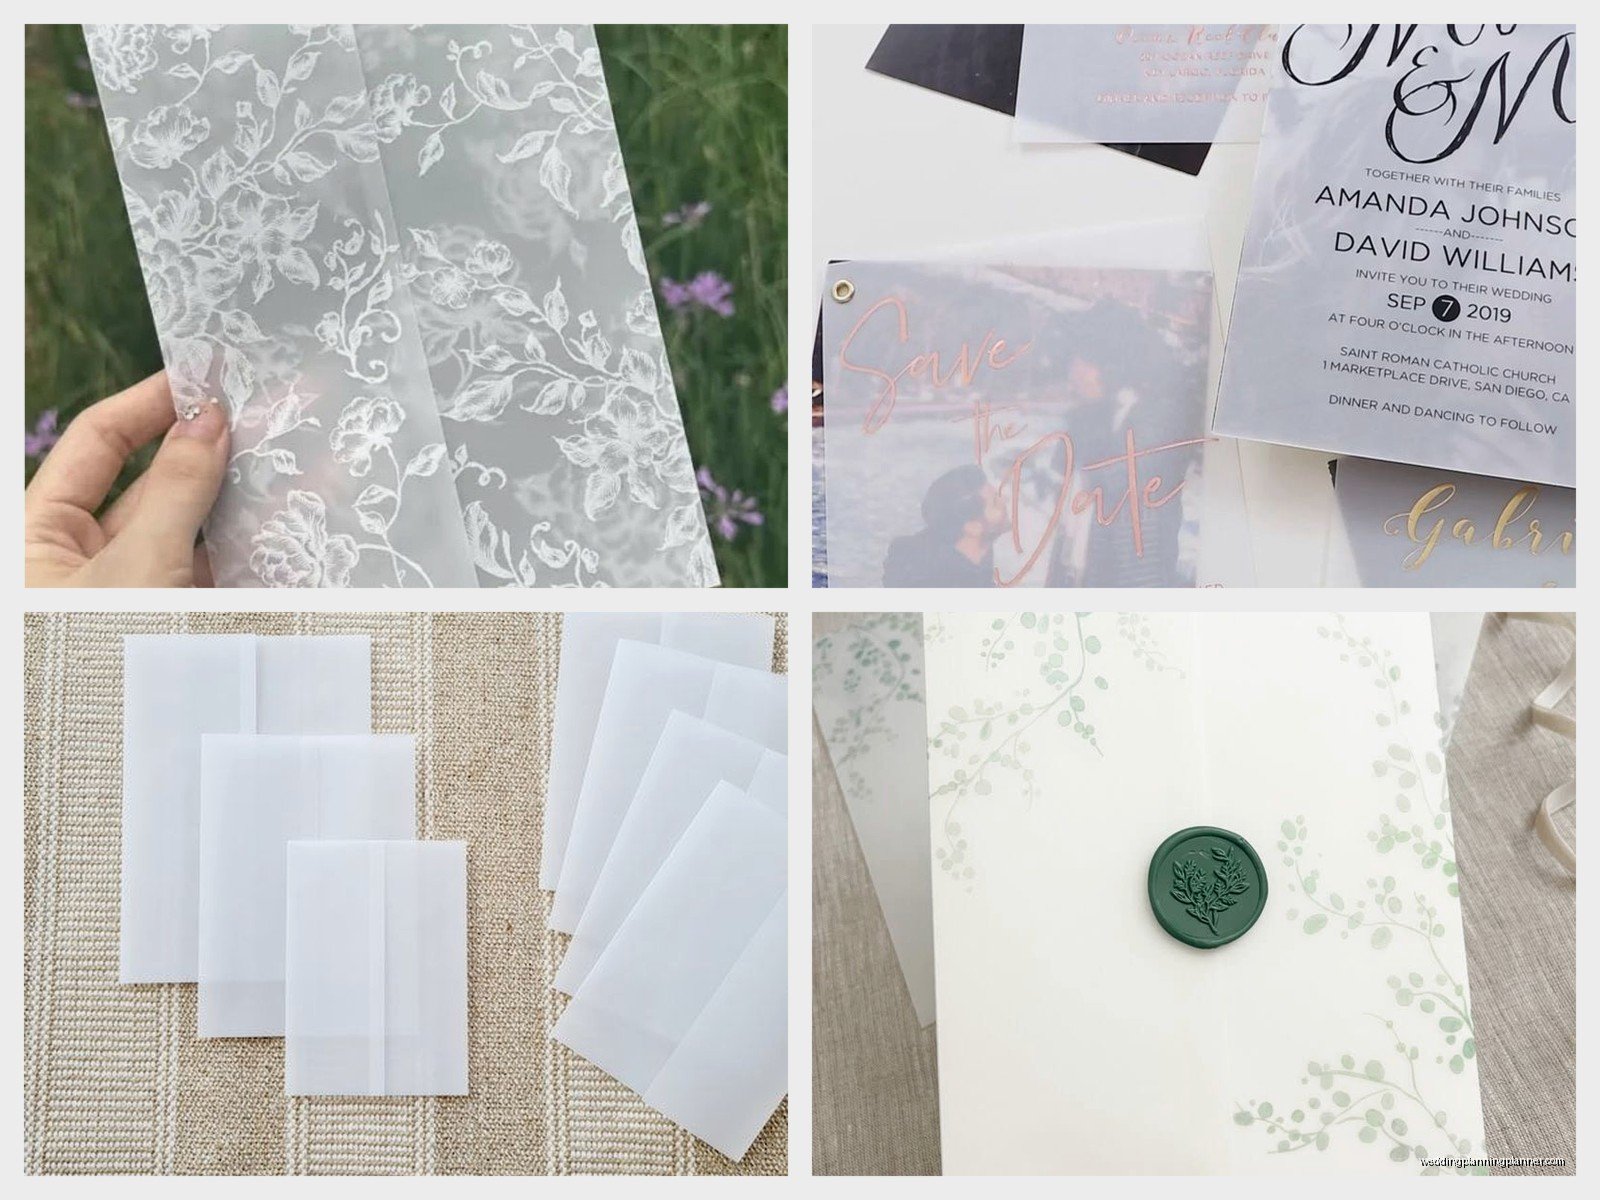
A vellum jacket is basically a translucent sleeve that wraps around your invitation. It’s not an envelope—it’s more like a fancy wrapper that shows off your invitation design while adding that frosted, elegant look. You slide the invitation into it, and it can be secured with a belly band, wax seal, ribbon, or just left open at the back. The vellum itself is that semi-transparent paper that kinda looks like tracing paper but fancier.
For a 5×7 invitation, you need to think about the actual dimensions of the vellum sheet BEFORE it’s folded into a jacket. This is where everyone messes up including me that first time.
The Math That’ll Save Your Life
Your invitation is 5 inches wide by 7 inches tall. Simple enough. But the vellum jacket needs to wrap around it with some overlap in the back. Here’s what you’re looking at:
Most vellum jackets for 5×7 invitations are cut from sheets that are either 10.5 x 7 inches or 11 x 7 inches flat. When you fold them, they create a pocket that fits your invitation with about a quarter inch overlap in the back where the two ends meet.
The 10.5 inch width works like this: you’ve got 5 inches for the front panel, 5 inches for the back panel, and that extra half inch is your overlap. The 11 inch version gives you a bit more overlap which honestly I prefer because it looks more finished and you don’t have weird gaps.
The height stays at 7 inches because your invitation is 7 inches tall and you want it to sit flush with the top and bottom of the jacket. Some people go for 7.25 inches in height if they want a little wiggle room but I think that looks sloppy unless you’re doing something specific with the design.
Ordering the Right Size From Suppliers
When you’re ordering from places like Cards & Pockets, LCI Paper, or Envelopes.com, they’ll list vellum jackets by their flat dimensions. So you’ll see something like “5×7 Vellum Jacket – 10.5 x 7” or “5×7 Invitation Sleeve.” Make sure you’re reading the FLAT size, not the finished size after folding.
What really annoyed me was when I first started and suppliers would list these as “fits 5×7” without specifying whether that meant the invitation size or the actual vellum dimensions. Like, be specific people! I’ve now gotten into the habit of always checking the flat measurements before I add to cart.
Pre-Scored vs Flat Sheets
You can buy vellum jackets that come pre-scored and ready to fold, or you can buy flat vellum sheets and score them yourself. The pre-scored ones are gonna cost you more per piece but they save SO much time. I usually go pre-scored for client orders over 75 invitations because my time is worth something and sitting there scoring 100+ sheets while my cat Miso knocks my ruler off the table repeatedly is not how I wanna spend my Thursday.
If you’re doing a smaller order or you’re on a tight budget, flat sheets work fine. You’ll need a scoring board (I use the Martha Stewart one, it’s like $25 and does the job) and you’ll score at 5 inches if you’re working with 10.5 inch wide vellum, or at 5.5 inches if you want more overlap.
Actually Assembling These Things
The assembly is pretty straightforward but there’s a technique to it. You lay your vellum flat on your work surface with the pretty side down if it has a printed design. Place your invitation face-up in the center of what will be the back panel. Then fold one side over the invitation, then fold the other side over to create the overlap.
Here’s where people mess up—they try to fold it too tightly and the invitation buckles or you get weird creases. You want the vellum to lay smoothly but not be stretched tight. There should be just enough room for the invitation to slide in and out if needed but not so much that it’s swimming around in there.
Securing Methods
You’ve got options for keeping the jacket closed:
- Belly bands (paper strips that wrap around the whole thing)
- Vellum bands (same idea but in vellum)
- Wax seals on the back overlap
- Small clear stickers or glue dots
- Ribbon tied around
- Nothing—just let it be open in back
I’m personally not a fan of leaving them completely open because they tend to slide out during mailing and it just looks unfinished to me. But some designers love that look so whatever works for your aesthetic I guess.
Wax seals are gorgeous but they add bulk which means you might need to hand-cancel at the post office. Belly bands are my go-to because they’re clean, they work with any postage situation, and they give you another design element to play with.
Vellum Weight Matters More Than You Think
Vellum comes in different weights—usually 29lb, 48lb, or 60lb. For 5×7 jackets, I almost always use 48lb. The 29lb is too flimsy and doesn’t hold its shape well, it kinda just flops around. The 60lb is really substantial but it doesn’t fold as crisply and it’s harder to work with for jackets specifically.
48lb vellum has enough body to create a nice structured jacket but it’s still translucent enough to show off your invitation design underneath. It folds cleanly and stays folded without springing open.
Printing on Vellum Jackets
If you want to print on your vellum jackets—like adding names, dates, or designs—you need to know what you’re getting into. Vellum is NOT easy to print on. It doesn’t absorb ink like regular paper so you’ll get smearing with inkjet printers unless you use special vellum that’s treated for inkjet printing.
Laser printers work better but the heat can sometimes warp the vellum. I usually do test prints on scraps first before committing to the full batch. And honestly, for client work, I send vellum printing out to a professional printer because the risk of ruining expensive vellum stock is too high.
If you’re doing it at home, use a laser printer, adjust your settings to “thick paper” or “cardstock,” and feed sheets one at a time. Let them cool completely before handling because hot vellum smudges like crazy.
The Postage Situation Nobody Warns You About
Vellum jackets add bulk and texture to your invitation which means standard postage often isn’t enough. A 5×7 invitation in a vellum jacket typically needs extra postage—usually around $1.00 to $1.20 per piece depending on weight and thickness.
You need to take a fully assembled invitation to the post office and have them weigh it and check if it’s machinable. If there’s any dimension that’s too thick or if the vellum texture prevents it from going through sorting machines smoothly, you’ll need to hand-cancel. This adds cost and time but it prevents your beautiful invitations from getting chewed up by postal equipment.
Pro tip: make friends with your local post office counter person. I bring mine cookies during the holidays and she’s saved me multiple times by catching postage issues before I mailed 150 invitations with insufficient stamps.
Common Problems and Quick Fixes
The jacket is too loose and the invitation slides around—your vellum is cut too large. You can either add a thicker belly band to take up space or you can trim your vellum down by a quarter inch on the width. Or just… order the right size next time, I mean, we’ve all been there.
The jacket won’t stay closed—you need a securing method or your overlap isn’t enough. Add a glue dot on the inside of the overlap to keep it in place. Just one small dot, not a line of glue, or it’ll show through the vellum.
The vellum is buckling or wrinkling when you fold it—you’re probably folding it too sharply or your scoring is too deep. Vellum should be scored lightly, just enough to create a guide for folding. If you press too hard with your scoring tool, you’ll damage the paper.
The invitation shows through too much and looks messy—this is usually a design issue not a sizing issue. But you can use a slightly heavier vellum weight or add a backing card to your invitation to create more opacity.
Working With Different Invitation Thicknesses
If your 5×7 invitation is just a single flat card, the standard jacket dimensions work perfectly. But if you’ve got a layered invitation with backing cards, belly bands, ribbons, or other embellishments, you might need to adjust.
For invitations that are thicker than about 3/16 of an inch, I go up to an 11.5 x 7 inch flat vellum size. This gives you extra room in the overlap to accommodate the bulk. You don’t want the jacket stretched tight over a thick invitation because it looks awkward and the vellum might tear at the score lines.
I had this issue during that spring 2023 disaster I mentioned earlier—the invitation had a laser-cut overlay, a backing card, and the main invitation, so it was pretty thick. The standard jackets I’d ordered were too tight and the vellum was pulling at the folds. Had to reorder with larger dimensions and expedite shipping which ate into my profit margin. Lesson learned.
Buying in Bulk vs Small Quantities
Vellum jackets get significantly cheaper when you buy in bulk. Like, we’re talking $0.50 each for small quantities vs $0.15 each when you order 500 or more. If you’re a wedding planner or stationer who uses these regularly, it’s worth keeping a stock of common sizes on hand.
I keep about 200 of the 5×7 size in clear vellum because it’s the most popular invitation size and clear goes with everything. Then I order specialty colors or printed vellum as needed for specific projects.
Storage tip: keep vellum flat in a drawer or large envelope. Don’t stack heavy stuff on top of it because it’ll crease. Vellum creases are basically permanent and there’s no real way to get them out, which is super annoying when you’re trying to work with a sheet that got folded wrong in shipping.
DIY Scoring If You’re Going That Route
If you bought flat vellum sheets and need to score them yourself, here’s the process. You’ll need a scoring board, a bone folder or scoring tool, and a light touch.
Place your 10.5 x 7 inch vellum sheet on the scoring board with the 10.5 inch side horizontal. Score vertically at the 5 inch mark—this is your center fold… well, not center exactly, but you know what I mean. Some people score at both 5 inches and 5.5 inches to create the overlap panel but I find that overcomplicates things.
Use your bone folder to gently crease along the score line. Don’t press super hard, just guide the fold. Vellum is delicate and too much pressure will create a white stress line along the fold which looks bad.
The whole process takes about 30 seconds per sheet once you get into a rhythm. Put on a show in the background (I was rewatching The Great British Bake Off during my last big scoring session) and you can knock out a bunch pretty quickly.
When Vellum Jackets Aren’t the Right Choice
Look, vellum jackets aren’t for every invitation. If you’re doing a super casual backyard wedding, they might be too formal. If your budget is really tight, they add cost that might be better spent elsewhere. And if your invitation design is really busy or has a white background, the vellum overlay might not add anything visually.
I usually suggest vellum jackets when the invitation design underneath is worth showing off—like letterpress, foil stamping, or beautiful illustrations. The vellum adds that layer of sophistication without hiding the design work. But for simple text-based invitations, you might be better off with a nice envelope liner or colored envelope instead.
Envelope Sizing for Vellum-Jacketed Invitations
Your vellum-jacketed 5×7 invitation will fit in an A7 envelope, which is the standard envelope for 5×7 cards. The envelope dimensions are 5.25 x 7.25 inches, so there’s a quarter inch of space on all sides.
However, if your invitation is thick because of the jacket plus a belly band plus maybe a details card, you might need to go up to a 5.5 x 7.5 inch envelope or even a 5.75 x 8.75 inch envelope. Always assemble one complete invitation and test-fit it in the envelope before ordering envelopes in bulk. Trust me on this.
The extra bulk from the vellum also means your envelope might not seal flat. You’ll probably need a wax seal or an envelope moistener that really saturates the glue strip to get a good seal. Those little sponge-tip envelope moisteners don’t always cut it for bulky invitations, you kinda need to really wet the glue.