Planning Guides, Style Guide
Sliding Wedding Invitation: Design & Ordering Guide
Jun
So You Want Sliding Wedding Invitations
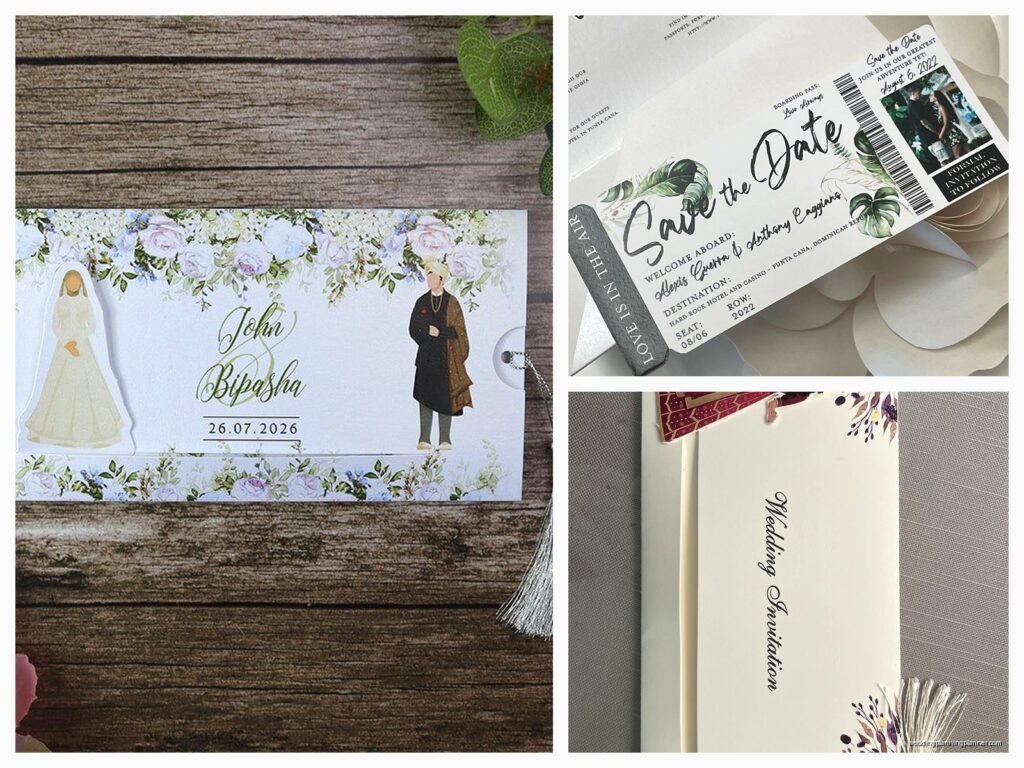
Okay so sliding invitations are basically when you have multiple cards or panels that slide out from a sleeve or holder. They’re super elegant and people lose their minds over them because they feel fancy when you open one. I had this bride in spring 2023 who was absolutely SET on having sliding invitations with like four different inserts and she didn’t understand why the price kept going up and honestly that whole situation taught me I needed to explain this stuff better upfront.
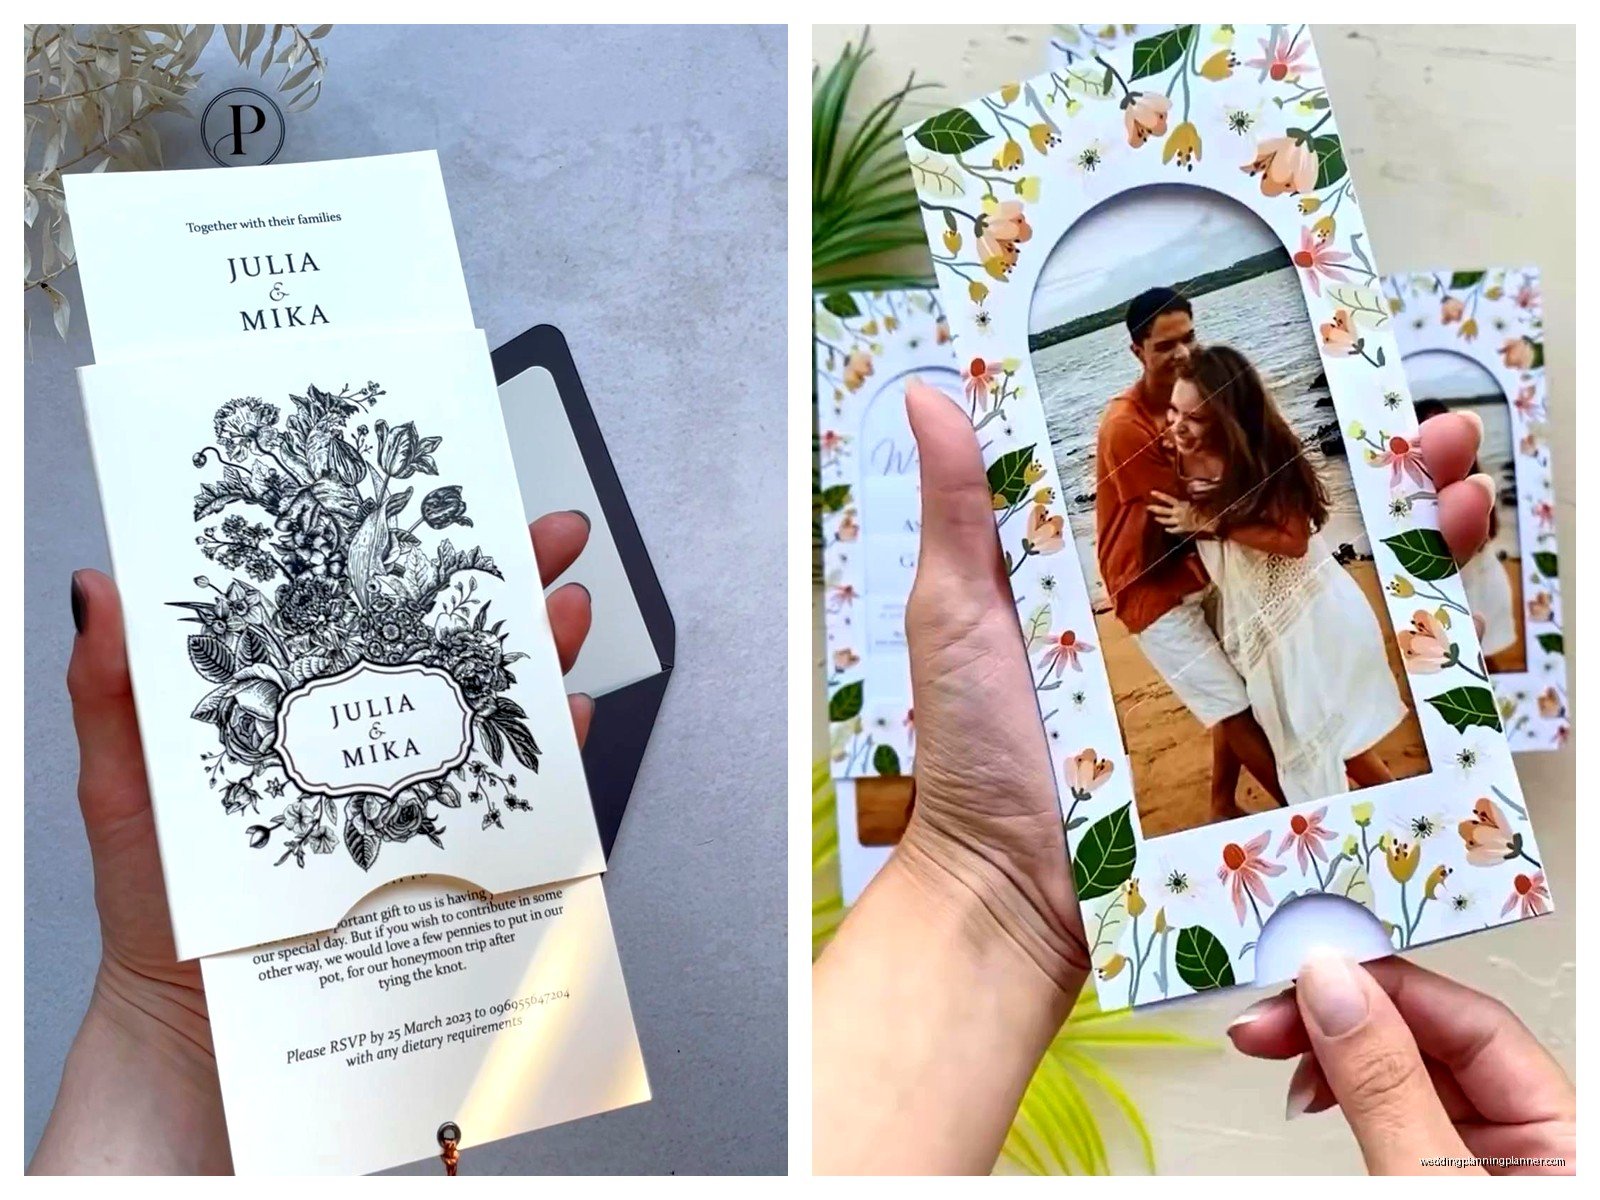
The main appeal is that unboxing moment. You slide the card out and it reveals all these layers of information in this really satisfying way. It’s tactile, it’s interesting, and it photographs really well for those flat lay shots everyone posts on Instagram.
Types of Sliding Invitation Designs
There’s a few different configurations you gotta know about before you start designing or ordering anything.
Belly Band Style
This is where you have a paper band that wraps around your invitation suite and everything slides out together. The band can have your names, a wax seal, whatever. It’s the most budget-friendly sliding option because you’re basically just adding one decorative piece that holds everything together. I use this for clients who want that sliding effect but don’t wanna spend like $15 per invitation.
Sleeve or Pocket Style
This is what most people picture when they think sliding invitations. You’ve got a sleeve (basically a pocket made from one piece of cardstock that’s scored and folded) and your invitation slides in and out of it. The sleeve can be the same size as your invitation or slightly larger. You can print on the sleeve or leave it blank with just a closure element.
Box or Folder Style
These are more structured. Think of it like a matchbox where you have an outer shell and an inner tray that slides out. Way more expensive but SO dramatic when someone opens it. The invitation and all inserts sit in the tray and slide out as one unit.
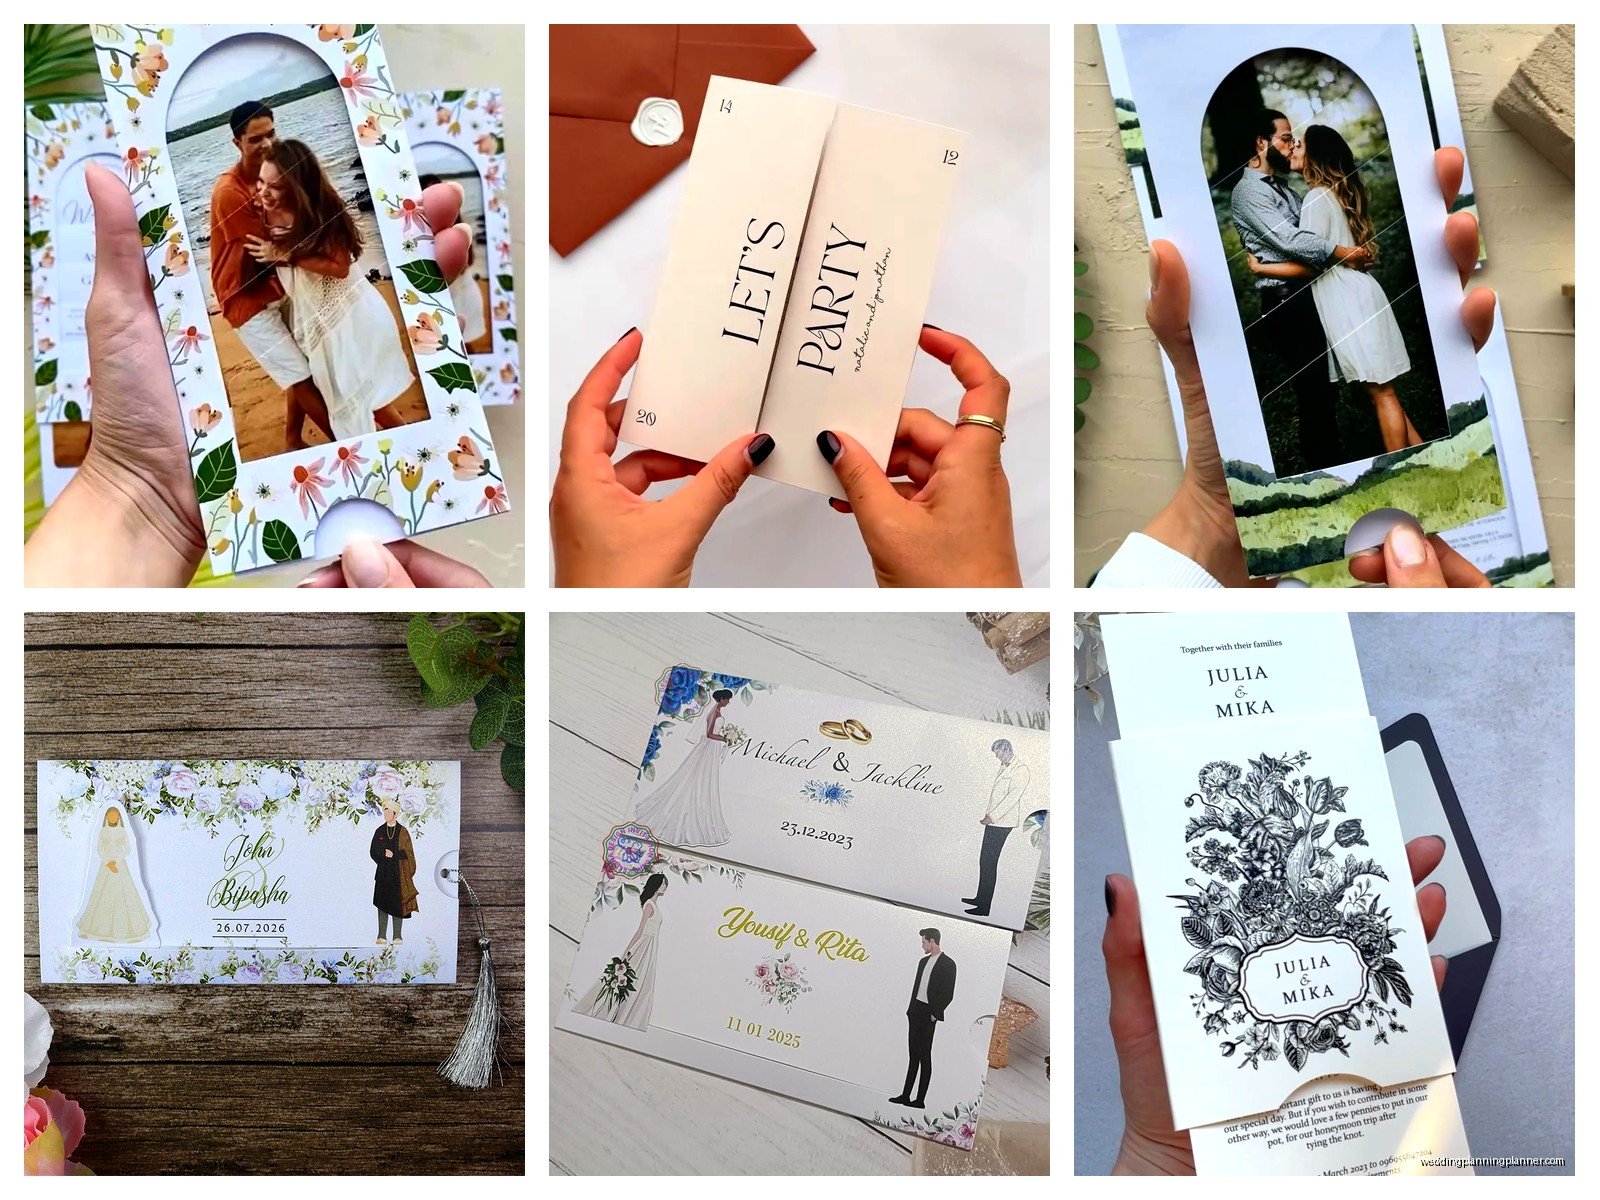
Layered Panel Style
This is where multiple panels are attached at one end and fan out or slide across each other. Kinda like… you know those paint sample cards at hardware stores? Similar concept but obviously way prettier. Each panel has different information.
Design Considerations That Actually Matter
Alright so before you fall in love with a design on Pinterest you need to think through some practical stuff.
Size and Postage
This is the thing that annoyed me SO MUCH when I first started doing this – nobody tells you that sliding invitations usually end up being non-machinable at the post office which means extra postage. If your invitation is thick, rigid, or has uneven weight distribution, you’re looking at additional fees. Sometimes like $1-2 extra per invitation just for postage. Always make a dummy version and take it to the post office to get it weighed and checked before you order 150 of them.
Standard invitation size is 5×7 but sliding invitations often work better at 5×7 or 4×6 for the actual card with a slightly larger sleeve. You can go bigger but then you’re definitely in hand-cancel territory for mailing.
Paper Weight and Material
For the sleeve or outer element you want something sturdy. I typically use 100lb+ cardstock or even 120lb cover stock. If it’s too flimsy the whole thing feels cheap and the card doesn’t slide smoothly – it just kinda flops around.
For the actual invitation card that slides you can go with standard 100lb cardstock. You don’t want it too thick or it won’t slide easily. There’s this weird balance between substantial and functional.
Texture matters too. Really textured paper (like linen or felt) can catch when sliding and that’s annoying for your guests. Smooth or slightly textured works better.
How Many Inserts Can You Actually Include
That bride I mentioned earlier wanted the main invitation, an RSVP card, details card, accommodations card, AND a weekend itinerary card all sliding out together. It was like half an inch thick and cost a fortune to mail. Generally I recommend keeping it to 2-3 pieces max including the main invitation. Anything more and it becomes bulky and expensive and honestly people don’t read all of it anyway.
You can put multiple pieces of info on one card if you design it well. Like accommodations and weekend events can share a details card if you format it right.
The Sliding Mechanism
This sounds obvious but the card needs to actually slide smoothly. I’ve seen designs where the tolerances were too tight and you had to yank the invitation out which is not the vibe you’re going for. Leave about 1/8 inch of space on each side. Test it obsessively before you place your full order.
Some sleeves have a thumb notch cut out at the bottom so you can easily grab the invitation to slide it out. This is a nice touch and not that expensive to add.
Design Elements and Customization
Okay so now the fun part where you actually make it look good.
What Goes on the Sleeve
You can keep the sleeve totally blank and let the invitation peek out, or you can print on it. Popular options are just names and wedding date on the front, or a monogram, or a decorative pattern. I’ve also seen people do a belly band with a wax seal which looks expensive but is actually pretty affordable if you order wax seal stickers instead of doing real wax.
If you’re printing on the sleeve make sure whatever design you choose doesn’t look weird when the invitation is halfway pulled out. You’d be surprised how many designs look great closed but awkward during the actual sliding.
Closure Options
You need something to keep the invitation from sliding out during mailing. Options include:
- Wax seals (real or sticker)
- Belly bands or ribbon
- Sticker seals
- Vellum wrap with printing
- Nothing if the fit is tight enough but that’s risky
I personally love a simple sticker seal because it’s clean and people can remove it easily without destroying anything. Wax seals photograph beautifully but can break in transit even if you hand cancel.
Color Schemes and Printing
Sliding invitations look best with some contrast between the sleeve and the invitation. Like a dark sleeve with light invitation or vice versa. All one color can look flat and you lose that dramatic reveal effect.
For printing you’ve got options: digital, letterpress, foil stamping, or thermography. Digital is most affordable and totally fine for most weddings. Letterpress is gorgeous but expensive and you need to order larger quantities usually. Foil stamping on the sleeve looks really luxe and isn’t as expensive as you’d think if you’re just doing names or a simple design.
Where to Order and What to Expect Price-Wise
So you can go a few different routes here depending on your budget and how custom you wanna get.
Online Print Services
Places like Minted, Zazzle, or Shutterfly have sliding invitation options that are templates you can customize. These are gonna be your most affordable option, usually $3-6 per invitation depending on paper quality and printing method. The downside is you’re working within their templates and paper choices. But honestly for a lot of weddings this is perfectly fine.
Etsy Sellers
Etsy is great for semi-custom work. You can find designers who have sliding invitation templates and they’ll customize colors, wording, fonts for you. Prices range wildly from like $4-12 per invitation. Read reviews carefully because quality varies a lot. Some sellers are actual stationery designers and some are just reselling templates.
Make sure you understand what you’re buying – is it a PDF template you print yourself, or are they printing and shipping to you? I’ve had clients get confused about this and end up with a digital file when they thought they were getting printed invitations.
Custom Stationery Designers
This is where you go for fully custom work designed specifically for you. You’re looking at $8-20+ per invitation depending on complexity, printing methods, and materials. The advantage is you get exactly what you want and someone managing the whole process for you. I work with a few designers I trust and the process is so much smoother than trying to DIY complex sliding invitations.
DIY Options
You can absolutely DIY sliding invitations if you’re crafty and have time. Order blank sleeves from paper suppliers (like Paper Source or Cards & Pockets), design and print your invitations at home or through a print shop, and assemble everything yourself. This works great for smaller weddings under like 75 guests. For 150+ invitations the assembly time is gonna make you lose your mind trust me.
I tried to DIY my own save the dates back in like summer 2021 and I was still assembling them the night before they needed to mail while my cat kept sitting on the paper stacks and I was like never again.
Ordering Timeline and Quantities
Order your invitations about 4-5 months before your wedding date so you can mail them 6-8 weeks out. This gives you time for:
- Design revisions and proofs
- Printing (2-4 weeks usually)
- Shipping to you
- Assembly if needed
- Addressing envelopes
- Post office trip for postage
- Buffer time for problems because there’s always problems
For quantity, order about 10-15% more than you think you need. You’ll mess some up during assembly, you’ll forget people, addresses will be wrong and you’ll need to resend. It’s way cheaper to order extra upfront than to do a tiny reorder later.
Samples Are Non-Negotiable
Always always always order a printed sample before you order your full quantity. Colors look different on screen versus printed. Paper weight feels different in person. The sliding mechanism might not work like you imagined. Spend the $20-40 on a sample and save yourself from ordering 150 invitations that aren’t what you wanted.
Assembly Tips If You’re Doing It Yourself
Set up an assembly line situation. Clear a big table, lay out all your components in order, and work in batches. Do all the sliding first, then all the belly bands, then all the seals. Don’t try to complete one invitation at a time or you’ll go slower.
Wear cotton gloves if you’re handling dark paper or foil stamping because fingerprints show up like crazy. I learned this the hard way and had to reorder like 20 sleeves because they were covered in smudges.
Quality check as you go. Every 10-15 invitations pull one out of the pile and inspect it like you’re receiving it fresh. You’d be amazed at how you stop noticing mistakes when you’re in assembly mode.
Addressing and Mailing
For envelopes you’ll probably want A7 size (5.25 x 7.25) for standard 5×7 sliding invitations. Go bigger if your sleeve adds bulk. Inner envelopes are nice for sliding invitations because they add another layer of protection during mailing.
You can hand address, print labels, use a service like Minted’s addressing, or hire a calligrapher. Whatever you choose, do a test run with addressing to make sure your envelope size works with your addressing method.
Take your fully assembled invitation in its envelope to the post office before you buy postage for everything. They need to weigh it, check thickness, and determine if it needs hand canceling. Get the exact postage amount and buy it there or online. Don’t guess because if you under-pay your invitations get returned or your guests have to pay the difference which is embarrassing.
Common Problems and How to Avoid Them
The invitation gets stuck in the sleeve – this usually means tolerances are too tight or you used textured paper that catches. Fix it by trimming the invitation slightly or switching to smoother paper.
Everything shifts during mailing – add a seal or closure element, and consider using an inner envelope for stability.
The sleeve bends or crumples – you need heavier cardstock or a different fold style, or you need to add “do not bend” to your envelopes which doesn’t always work but sometimes helps.
Colors don’t match between the sleeve and invitation – this happens when you order them from different places or at different times. Order everything in one batch from one printer if color matching is critical to your design.
Assembly takes forever – yeah it does, that’s just how it is with sliding invitations, they’re more labor intensive than flat cards, plan accordingly or hire help or just… accept that you’re gonna spend several hours on this while watching TV or something.
Worth It or Not
Look sliding invitations are gorgeous and impressive but they’re definitely more expensive and time-consuming than standard flat invitations. If you love that tactile unboxing experience and it fits your wedding style and budget then absolutely go for it. But if you’re on the fence or feeling pressured because you saw them on social media, nah you don’t need them. A beautifully designed flat invitation is just as elegant and your guests will be just as excited about your wedding either way.
The couples who are happiest with sliding invitations are the ones who genuinely love the design style and factor in the realistic costs from the beginning. The ones who regret it are usually the ones who didn’t realize how much extra they’d spend on postage and assembly time or who chose them because they felt like they should have fancy invitations.
Just be honest with yourself about what matters to you and what you’re willing to spend time and money on. There’s no wrong choice here it’s just about what works for your specific situation and wedding priorities.