
Planning Guides, Style Guide
Photo Booth Save the Date: Fun Interactive Announcement
May
Photo Booth Save the Dates Are Actually Genius
Okay so photo booth save the dates are honestly one of my favorite trends right now and I need to tell you why they work so well. Instead of hiring a photographer for a formal engagement shoot, you basically rent or DIY a photo booth setup, take a bunch of fun pics, and turn those into your save the dates. It’s interactive, it’s playful, and guests actually remember receiving them because they’re not just another pretty sunset photo.
I had this couple back in spring 2023 who were SO stressed about their engagement photos. Like the bride kept saying she hated being photographed, felt awkward posing, the whole thing. I suggested the photo booth route and her face literally lit up. They set up a booth at their favorite brewery, invited like 10 close friends to join them for “quality control” (aka drinking beer while they took silly photos), and ended up with the most genuine, happy images I’ve seen in years.
Why This Works Better Than You’d Think
The whole point of a save the date is to get people to mark their calendars and get excited about your wedding. A photo booth setup does this because it shows your personality immediately. You’re not trying to look like a magazine spread – you’re showing guests that your wedding is gonna be fun and maybe a little unconventional.
Plus you get like 20-30 different photo options in one session instead of hoping your photographer captures “the one” during golden hour. You can be goofy in some, sweet in others, and actually use different photos for different purposes. I’ve had couples use one photo for the physical save the dates and a completely different strip for their wedding website.
Setting Up Your Photo Booth Session
First decision: are you renting an actual booth or creating a DIY setup? Rental booths run anywhere from $400-$800 for a few hours depending on your area. They come with the camera, lighting, backdrop, props, and usually instant prints or digital downloads. Super easy, very professional looking.
DIY setups are cheaper but require more effort. You’ll need a good camera (your phone honestly works fine if it’s newer), a tripod, a remote shutter or timer, lighting (even just a ring light helps), and a backdrop. I kinda love the DIY route because you have total creative control and can do it at home or anywhere meaningful to you.
Location Matters More Than You Think
Don’t just default to your living room. Think about where you actually spend time together. Coffee shop where you met? Your favorite park? That weird vintage arcade you love? I had a couple do theirs at a laundromat because that’s where they had their first real conversation and it was SO memorable. The industrial vibe with the bright machines in the background was perfect.
If you’re doing it at home, pick a room with good natural light or set up near a window. You can hang a sheet, use a colored wall, or order a backdrop from Amazon for like $25. Those sequin backdrops photograph really well in booth-style setups.
Props and Styling (Don’t Overthink This)
Here’s what annoyed me for a while – couples would spend HOURS finding the perfect props and then barely use them because they felt silly. Like you don’t need 47 different signs and hats and mustaches. Pick 5-8 items that actually mean something to you or match your wedding vibe.
Good prop ideas that actually get used:
- A small chalkboard or acrylic sign with your wedding date
- Confetti or balloons in your wedding colors
- Something related to a shared hobby (tennis rackets, books, whatever)
- Champagne glasses or coffee mugs
- Your dog if they’ll cooperate (mine absolutely would not, she hates cameras)
- Vintage frames you can hold up
- Seasonal items if your timing works out
The sign with your date is honestly the only essential item. Everything else is extra. I’ve seen gorgeous photo booth save the dates that were just the couple making faces at each other with a simple “Save the Date: June 14, 2025” sign in the corner.
What to Wear
This is where people spiral but honestly just wear something you feel good in that fits your wedding vibe. If you’re having a black tie wedding, maybe dress up a bit. Casual backyard wedding? Jeans and a nice top work perfectly.
One thing – avoid really busy patterns or logos. They photograph weird in booth-style lighting and distract from your faces. Solid colors or subtle patterns work better. And coordinate but don’t match exactly. You’re not going for the matchy-matchy holiday card look unless that’s your thing.
Actually Taking the Photos
Set your camera or phone on a tripod at about chest height, roughly 4-6 feet away. If you’re using a phone, put it in portrait mode if it has that feature. The slight blur effect mimics what actual photo booth cameras do.
Use the timer function or a remote shutter. Take like 50 photos minimum. I know that sounds excessive but you’ll delete half immediately and then need options. Do a mix of:
- Classic smiling photos
- Silly faces or laughing candids
- Kissing/romantic shots
- Action shots (jumping, dancing, whatever)
- Close-ups and full body shots
The beauty of the photo booth concept is that imperfection is kinda the point. Slightly blurry because you’re laughing? Perfect. Someone’s eyes closed? Might be the most genuine shot. You’re not aiming for portfolio-worthy images here.
Turning Photos Into Actual Save the Dates
Okay so you’ve got your photos, now what. You have a few options and honestly they all work fine, just depends on your budget and how much effort you wanna put in.
Photo Strip Layout
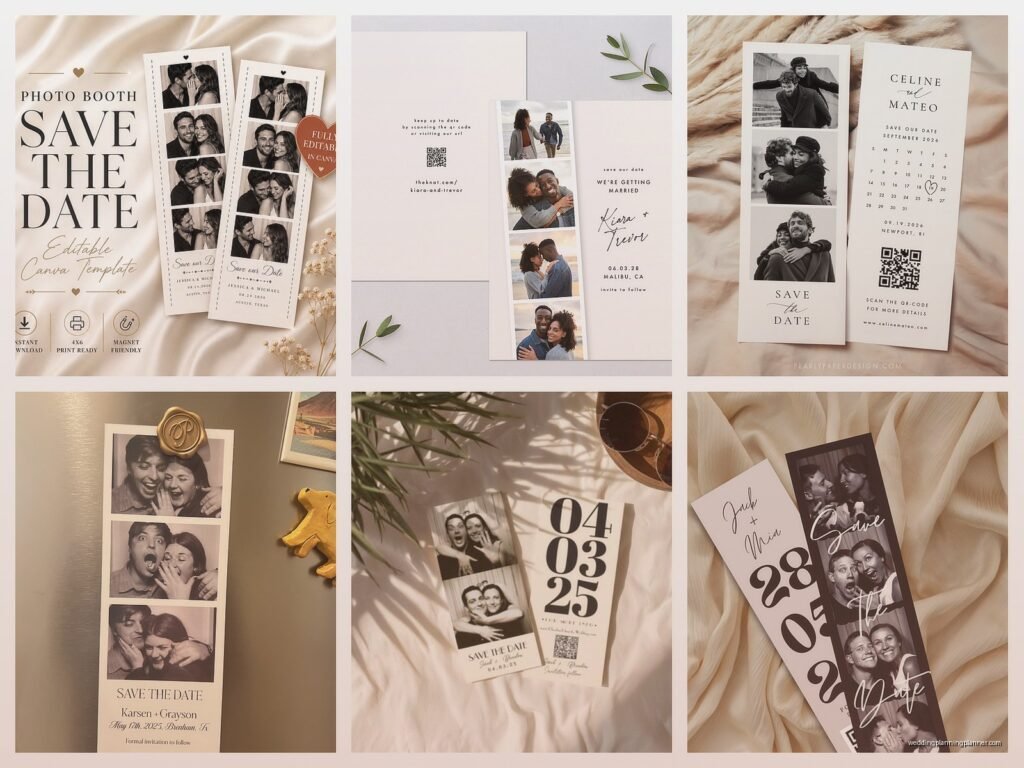
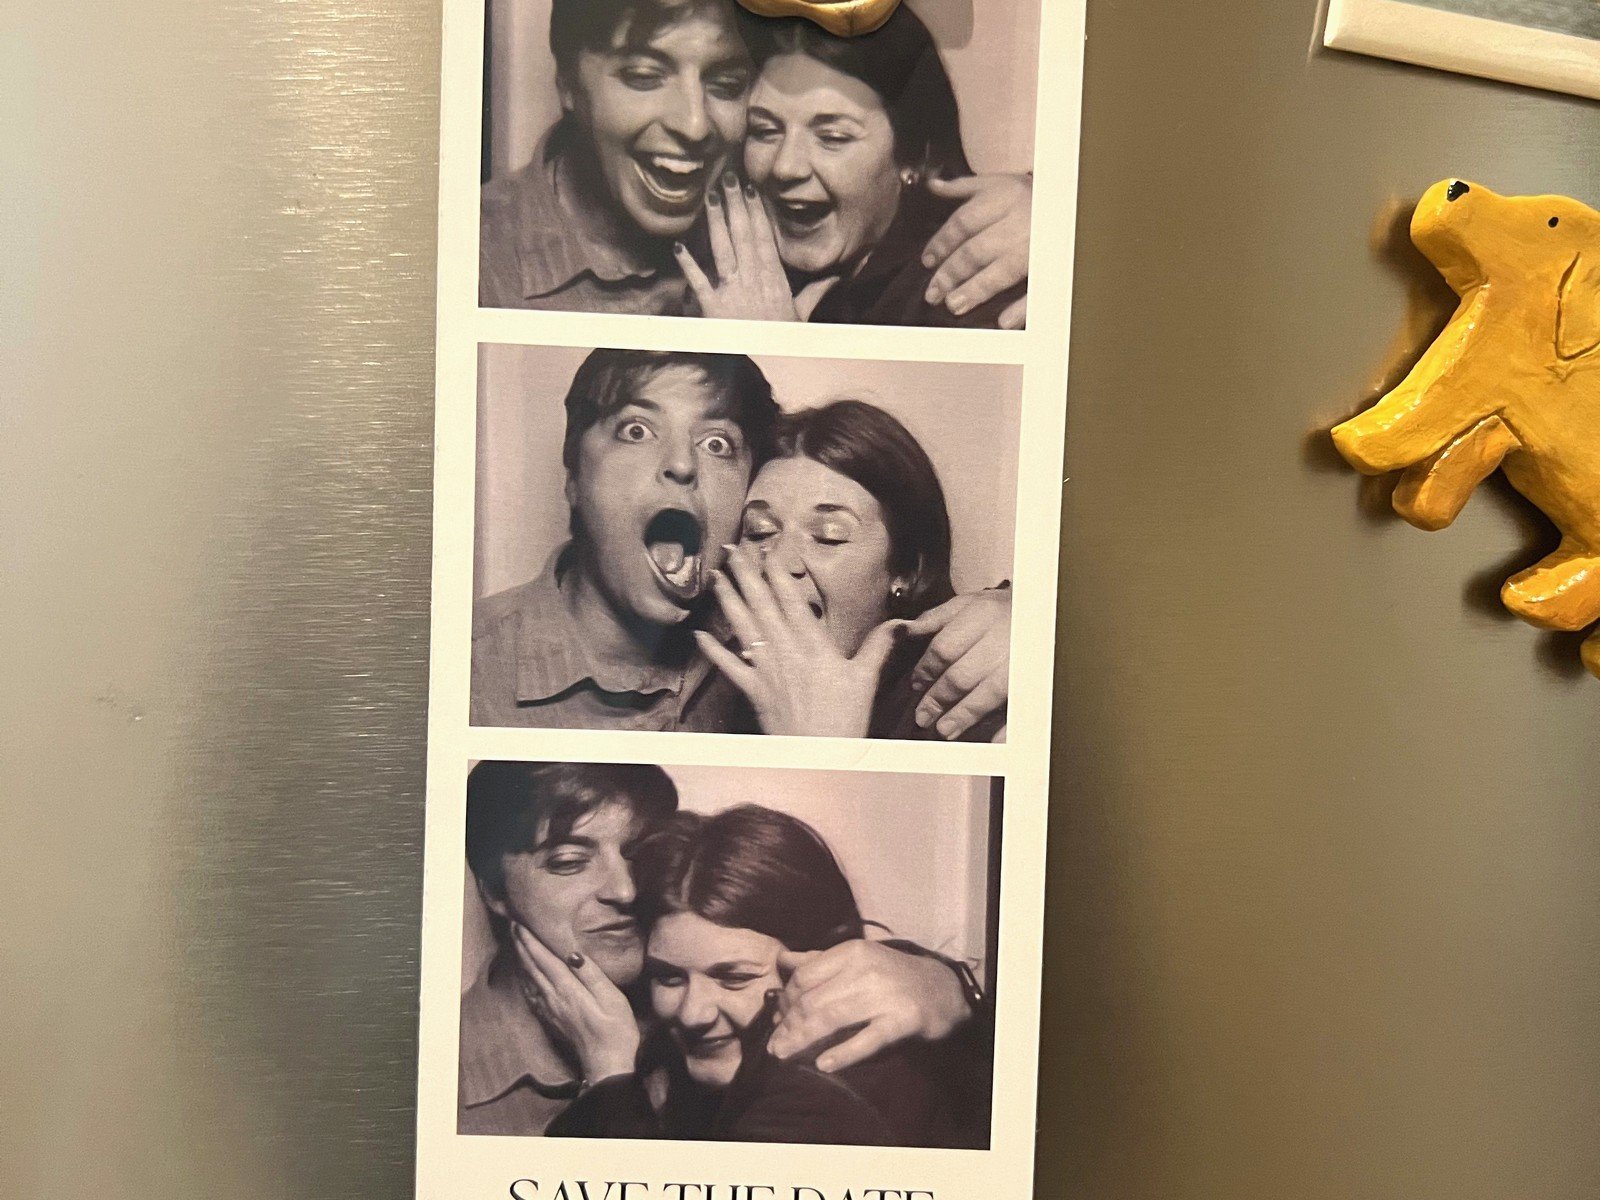
This is the most “photo booth” option. Use Canva or Photoshop to create a vertical strip with 3-4 photos stacked. Add your names, wedding date, and location. Make it look like an actual photo booth printout – white borders, maybe a slight tilt to the photos, keep it simple. You can print these as postcards (4×6 is cheapest) or go bigger like 5×7.
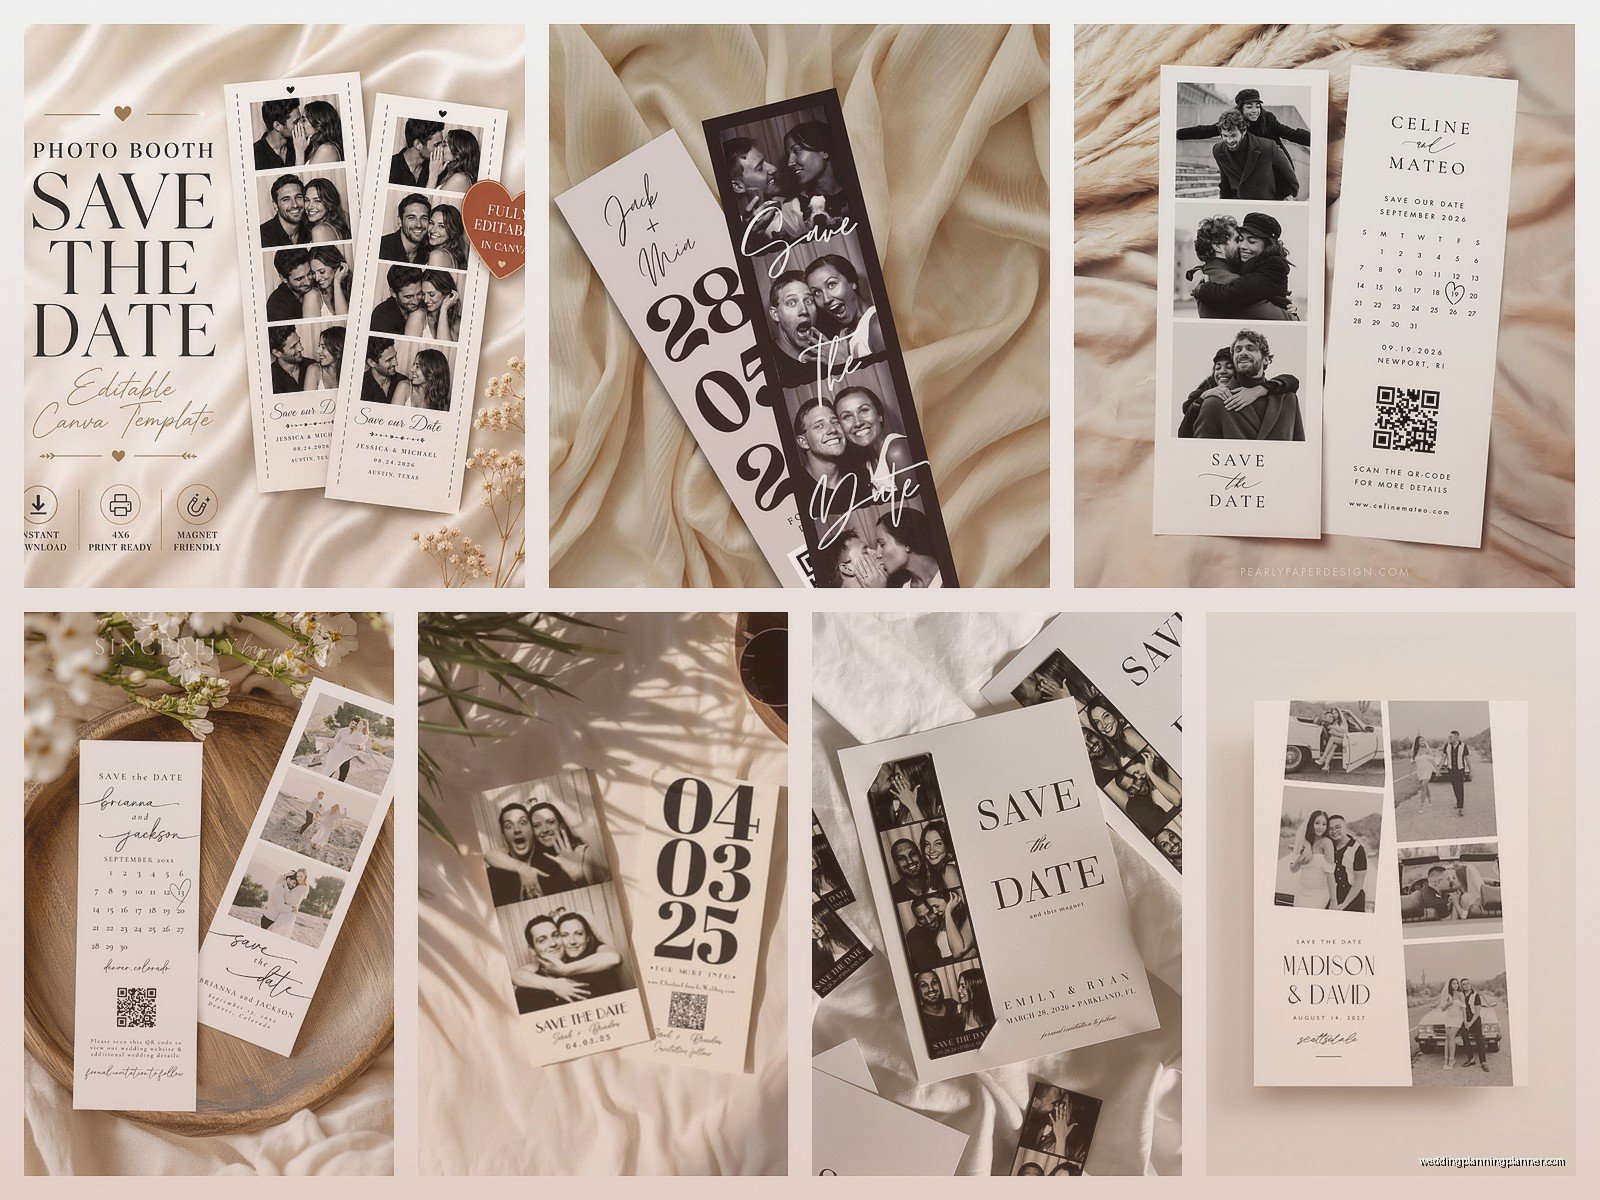
I love this layout because it immediately reads as “fun” when people pull it from their mailbox. It’s different from the standard save the date card.
Single Photo with Text Overlay
Pick your absolute favorite photo and add text directly on the image. This works better if you have some negative space in the photo (blank wall area, sky, whatever) where text won’t cover your faces. Simple and clean, gets the job done.
Collage Style
Use 4-6 different photos in a grid layout. This shows more personality because guests see multiple sides of you – goofy, romantic, candid. Templates for this are everywhere on Canva, Minted, Shutterfly, all those sites.
One couple I worked with did a collage where each photo had them holding a letter that spelled out MARRIED and I thought that was… actually it was kinda cheesy but they loved it and that’s what matters.
Printing and Sending
For printing, you’ve got options at every price point. Vistaprint and Shutterfly run sales constantly – wait for a 40% off deal, you’ll save like $100 easy. Minted is pricier but the quality is noticeably better if that matters to you. For a more budget option, print at Costco or your local print shop and buy envelopes separately.
Postcard style (no envelope needed) is the cheapest to mail and honestly people don’t care. You save on envelopes AND postage. But if your photos are more intimate or you want a fancier presentation, go with the envelope.
Magnets are another option I’m seeing more of. Slightly more expensive to produce but people actually keep them on their fridge, so your wedding date stays visible for months. That’s pretty smart actually.
Digital Save the Dates
Nah don’t skip physical ones entirely but DO send digital versions too. Email them 2-3 weeks before you mail the physical ones, especially to your out-of-town guests who need more planning time. You can also do a fun Instagram announcement with a carousel of your booth photos.
For digital versions, you can literally just export your design as a JPEG or PDF. Or get fancy and make a GIF that cycles through 3-4 photos. There are free online tools for this that are super easy to use even if you’re not tech-savvy.
Timing This Whole Thing
Photo booth sessions are quick. Like you can knock this out in 45 minutes if you’re prepared. Do it 8-12 months before your wedding so you have time to get save the dates designed, printed, and mailed 6-8 months out.
Don’t try to do this the same day you get engaged or during a stressful work week or… okay I had this couple try to do their booth session the week they were moving into a new house and it was a disaster. They were exhausted, surrounded by boxes, couldn’t find the props they’d bought, and the photos looked like hostage photos. We had to reschedule. Pick a day when you’re both relaxed and have energy.
Making It Interactive for Guests
Here’s where it gets fun – you can actually make the save the date itself interactive, not just the photo-taking process. Some ideas:
- Include a QR code that links to a video of your full photo booth session
- Add a “hashtag our photos” note encouraging guests to share their own booth pics from events
- Include a scratch-off element revealing the wedding location (you can buy scratch-off stickers online)
- Make it a mini photo strip they can actually put in their wallet
- Add a perforated tear-off RSVP section right on the save the date
That last one is technically not how save the dates work – you’re not supposed to RSVP yet – but I’ve seen couples do it for very small weddings and it streamlined everything.
Common Mistakes I See
Too many props in every single photo. It gets cluttered and you can’t see your faces. Pick one or two props max per photo.
Forgetting to include actual important information. I’ve gotten save the dates that were so focused on being cute that they didn’t mention the city or even the full date. Don’t do that.
Using photos that are too dark. Photo booths typically have harsh, bright lighting for a reason – it photographs well. If your DIY setup has moody lighting it might look cool in person but won’t translate to print.
Not leaving enough time. Printing takes 1-2 weeks, addressing takes longer than you think (unless you’re printing addresses directly on them or using calligraphy services), and mailing… just build in buffer time.
Oh and trying to make everyone match or pose perfectly. The couple I mentioned from spring 2023? Their friends jumped in some photos unexpectedly and those ended up being their favorites. Sometimes the best moments are unplanned and that’s very on-brand for photo booth vibes anyway.
Budget Breakdown
Since I’m a planner I gotta give you numbers. Here’s what you’re looking at:
DIY Route:
- Backdrop: $20-50
- Props: $30-60 if buying new
- Lighting (if needed): $25-40 for a ring light
- Printing 100 save the dates: $80-150 depending on style
- Postage: $46 for postcards, $68 for envelopes
- Total: $200-350
Rental Booth Route:
- Booth rental (2-3 hours): $400-800
- Printing: Same as above
- Postage: Same as above
- Total: $525-1000
For context, traditional engagement photo sessions with a photographer run $300-600 and then you still have to pay for printing and postage. So the photo booth route isn’t necessarily cheaper but you get a different vibe and usually more photo options.
Real Talk About Whether This Fits Your Wedding
Photo booth save the dates work best for couples who want their wedding to feel fun and relaxed. If you’re planning a very formal, traditional wedding at a country club, this might feel off-brand. But honestly I’ve seen it work for all types of weddings because the save the date doesn’t have to match your wedding style exactly – it just has to match YOUR style as a couple.
The interactive element also works well if your guest list includes a lot of younger people or if you’re having a destination wedding where you want people excited and engaged early on. It sets a tone that this wedding will be participatory and fun, not just sit-and-watch-formal.
My cat just knocked over my coffee which is honestly perfect timing because I think I’ve covered everything important here. The main thing is don’t overthink it – the whole appeal of photo booth save the dates is that they’re casual and genuine. Set up your space, take a bunch of photos, pick your favorites, add the important info, and send them out. Your guests will love them because they actually show who you are instead of some overly produced image that doesn’t feel real.
