
Planning Guides, Style Guide
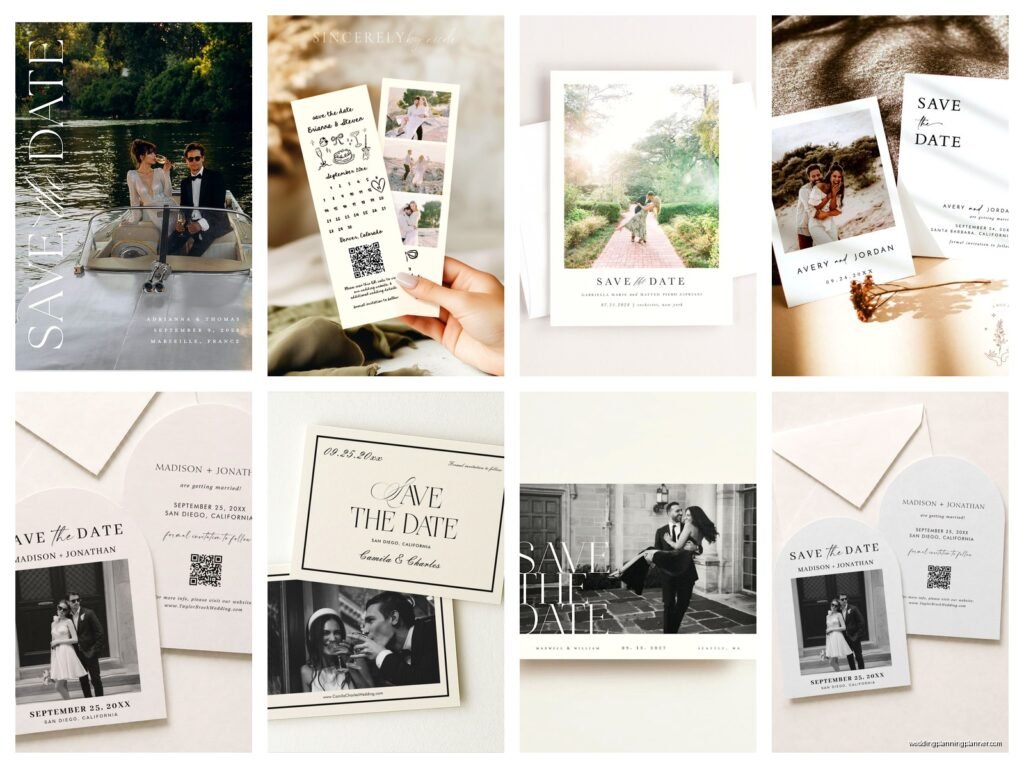
Save the Date Photo Cards: Custom Picture Announcements
May
Getting Your Save the Date Photo Cards Actually Done
So you want to do photo save the dates instead of the basic text ones. Smart move honestly because people are way more likely to stick a photo card on their fridge than some generic card with just text. I learned this back in spring 2023 when I had a bride who insisted on plain save the dates and then got SO upset when only like 60% of guests actually remembered the date six months later. Meanwhile my couples who send photo cards? Way better response rates.
First thing you gotta figure out is whether you want engagement photos specifically FOR the save the dates or if you’re gonna use existing photos. This is actually a bigger decision than it sounds because it affects your whole timeline. If you need new photos, you’re looking at booking a photographer, scheduling the shoot, waiting for edits, then ordering cards. That’s easily 6-8 weeks if everything goes smoothly. Which it never does.
Timing Your Photo Shoot
If you’re doing a dedicated engagement shoot, book it at least 4 months before you need to mail the save the dates. I know that sounds like forever but trust me. Your photographer might be booked for the next month, then you need good weather (or at least weather that matches your vision), then they need 2-3 weeks for editing, and you need time to actually pick the photo you want without feeling rushed.
One thing that drives me absolutely CRAZY is when couples book their engagement shoot for like… November in Chicago or something and then act shocked when every photo is grey and depressing. Unless that’s your vibe! But usually it’s not. Think about what season actually represents you as a couple or what looks good. My cat literally photobombed one couple’s backyard engagement shoot last summer and honestly it made the photo better, but that’s beside the point.
Choosing The Right Photo
You’ll probably get back 50-100 edited photos from your shoot and this is where couples freeze up. Here’s what actually works for save the date cards:
- Both of you clearly visible (sounds obvious but I’ve seen people try to use artistic shots where someone’s face is mostly hidden)
- Good contrast – the photo needs to look good when printed, not just on a screen
- Not too busy in the background because you’re adding text over this
- You’re both genuinely smiling or laughing, not doing that serious model face thing unless that’s really your personality
- Horizontal photos usually work better for standard card layouts but vertical can work too
The photo should kinda represent your relationship but don’t overthink it. I had a couple spend THREE HOURS debating whether their photo should show them hiking or at a coffee shop and honestly? Their guests did not care that much. Pick something you both look good in and move on.
Design Layout Options
Okay so you’ve got your photo. Now you need to decide on the actual card layout. There are basically a few standard options and then custom designs if you wanna get fancy.
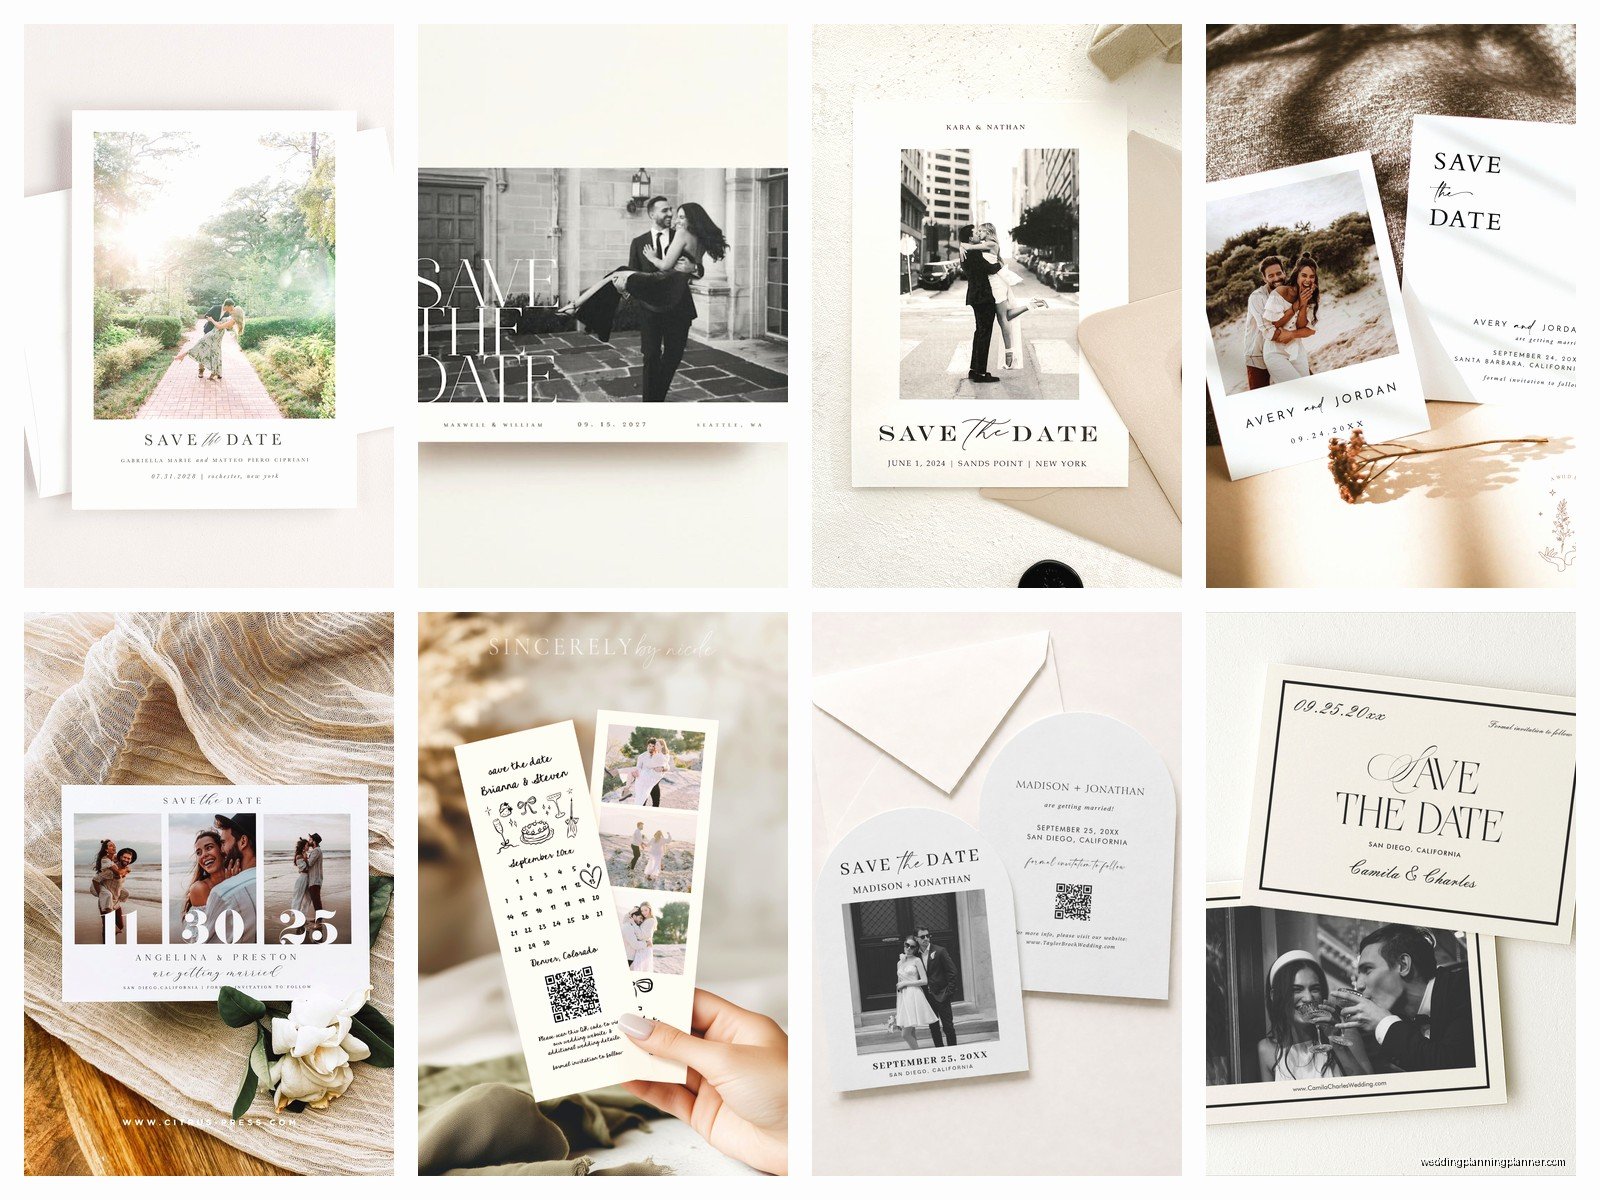
Full Photo Background: This is where your photo takes up the entire card and text goes on top. Looks really clean and modern. The trick here is making sure your text is readable – you might need to add a semi-transparent overlay behind the words or position text in a clear area of the photo. White text on a dark part of the image or dark text on a light part.
Photo With Border: Your photo is the main focus but there’s a border (usually white or colored) around it with text below or beside the image. This is probably the easiest to design because you don’t have to worry as much about text placement over the image.
Split Design: Photo on one half, text and details on the other half. Works great if your photo is vertical or if you have a lot of information to include.
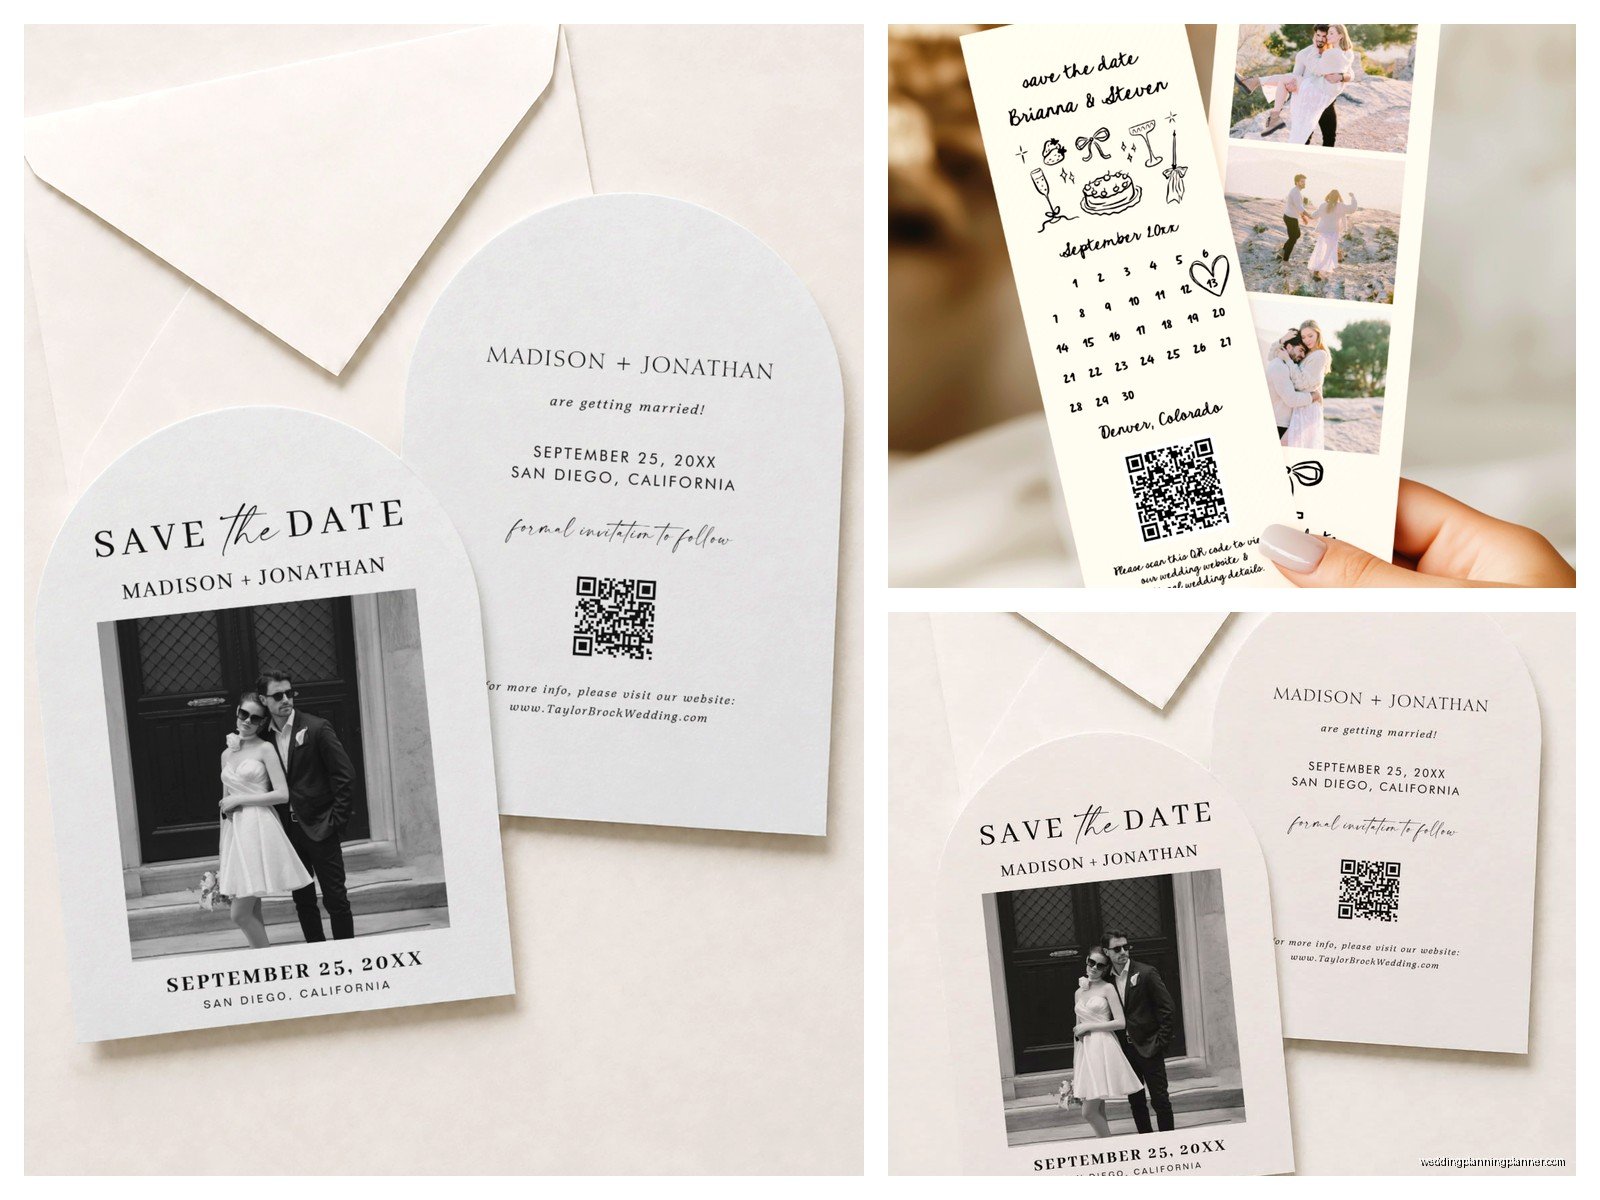
Back and Front: Photo on the front with minimal text (just “Save the Date” and your names maybe), then all the details on the back. I actually love this option because the front makes a better keepsake but you can still include everything guests need to know.
What Information Actually Needs To Be On There
This is where people either include way too much or way too little. Here’s what you actually need:
- Your names (first names are fine, you don’t need full legal names)
- Wedding date
- City and state (you don’t need the full venue address yet)
- Wedding website URL if you have one
- Formal invitation to follow
That’s it. You do NOT need your venue name, you don’t need the exact time, you don’t need hotel block information. Save that for the actual invitation. The save the date has one job: get people to mark their calendar and know generally where they’re traveling to.
What really annoys me is when couples try to cram their entire wedding itinerary onto a save the date card. I’ve literally seen save the dates with welcome dinner info, brunch info, dress code… like no. Stop. You’re gonna change half of that anyway and then you’ve given people wrong information.
Printing Companies and Options
You’ve got so many options here it’s kinda overwhelming. Minted, Shutterfly, Zazzle, Etsy designers, local print shops, online specialty wedding stationers. Here’s the real talk on each:
Minted: Really high quality paper and printing, gorgeous designs, but you’re gonna pay for it. Expect $2-4 per card depending on style. They do sales pretty often though so wait for a 20-30% off code. Their paper quality is noticeably better than budget options.
Shutterfly/Vistaprint: More affordable, usually $1-2 per card. Quality is fine, totally acceptable. Not as thick or luxe as Minted but most guests won’t care. They run sales constantly so never pay full price.
Etsy Designers: You can get custom designs here and then print them yourself at a local shop or through an online printer. This gives you more control but requires more work on your end. Prices vary wildly.
Local Print Shops: If you want to support local business or need help with design, this can be great. Usually more expensive but you get personalized service. Good option if you’re not comfortable with online design tools.
Paper Types and Finishes
Okay this is where it gets into the weeds but it actually matters. Most companies offer a few paper options:
Matte: No shine, looks sophisticated, easier to write on if you’re hand-addressing. This is what I usually recommend because it photographs well and doesn’t show fingerprints.
Glossy: Shiny finish, makes colors pop, but shows fingerprints like crazy and can look kinda… cheap? Unless it’s really high quality glossy. Also harder to write on.
Pearl or Shimmer: Subtle shine, really pretty, more formal feeling. Costs a bit more usually.
Textured: Linen or felt finishes. These feel expensive and look elegant but your photo won’t be quite as crisp. Better for designs with less photo focus.
I usually tell people to order a sample pack if the company offers it. Seeing and touching the actual paper makes a huge difference compared to looking at photos online.
Sizing Considerations
Standard postcard size is 4×6 which is the cheapest to mail (just a regular stamp). But it’s kinda small for a photo card. Most save the dates are 5×7 which needs a bigger stamp but looks way better. Some people go 5.5×8 or even bigger but then you’re paying more for postage and it feels a bit extra for a save the date.
Think about what people will do with the card. 5×7 fits in most frames if someone wants to keep it on display. 4×6 fits on a fridge easily. Weird custom sizes are harder for people to… I don’t know, just stick with standard sizes unless you have a specific reason not to.
Magnet Save the Dates
Some companies offer magnet versions instead of paper cards. People LOVE these because they go straight on the fridge and stay there. They’re more expensive (usually $3-5 each) but the reminder factor is unbeatable. During that stressful spring 2023 season I mentioned earlier, the couples who did magnets had way fewer “wait when is your wedding again” texts.
Downside is they’re heavier so postage costs more and they can’t go through the mail sorter things as easily. Sometimes they arrive damaged. You’re basically gambling a bit.
Coordinating With Your Wedding Theme
Your save the dates don’t have to match your wedding colors exactly but they should feel cohesive with your overall vibe. If you’re doing a formal black tie wedding, a casual beach photo might send mixed messages. If you’re doing a backyard BBQ wedding, a super formal portrait in evening wear is gonna confuse people.
That said don’t stress about this too much. I’ve seen couples try to force their engagement photos to include their wedding colors and it just looks weird. Like they’re holding coral flowers in November because coral is their wedding color. Just… be yourselves in a setting that feels right and use design elements (fonts, borders, graphics) to tie in your theme if you want.
Text and Font Choices
Keep your fonts readable. I know that gorgeous script font looks amazing but if your grandma can’t read it without her glasses, pick something else. Usually a combination works well – script for names, clean sans-serif for details.
Don’t use more than two fonts. Three maximum if one is just for a small detail. More than that and it looks like a ransom note.
Make sure there’s enough contrast between text and background. Light text on light backgrounds doesn’t work even if it looks “elegant” to you. People need to actually read this thing.
Ordering Timeline and Quantities
Order at least 2-3 weeks before you need them, more during busy season (basically October through February). Production usually takes 1-2 weeks plus shipping.
For quantities, count your guest list by household not individuals. So a family of four gets one card. Order about 10-15 extras for last minute additions, mistakes, or keepsakes. They’re cheaper when you order more at once than if you have to do a second order later.
Addressing and Mailing
You can hand-address the envelopes which looks personal and nice, print labels which is faster, or pay for the company to print addresses directly on envelopes which looks cleanest but costs more.
Mail them 6-8 months before your wedding, or up to a year for destination weddings. Earlier is better for holiday weekends or popular travel times. I send mine out about 8 months before because it gives people plenty of time but isn’t so early that they forget.
Use real stamps instead of metered mail if possible. It looks better. And actually take them to the post office to hand to a clerk instead of dropping in a mailbox – they can make sure you have correct postage and that they’ll go through okay.
Before you mail all of them, send one to yourself first to make sure it arrives in good condition and that the address is positioned correctly. Sounds paranoid but I’ve seen cards arrive bent or torn because they were too thick for the envelope or whatever.
Digital Save the Dates
Okay so some people are doing digital versions to save money or be eco-friendly. You can definitely do this through email or sites like Paperless Post or Greenvelope. It’s way cheaper (often free or under $50 total) and faster.
The problem is they’re really easy to ignore or delete. People don’t put digital save the dates on their fridge. They get buried in email. I’ve had couples do digital only and then be really disappointed with their response rates. If you’re gonna do digital, follow up with a physical invitation later or be prepared to remind people a lot.
A compromise is doing digital for most people and physical cards for VIPs (immediate family, wedding party, elderly relatives who don’t check email). Or do physical cards but skip the envelope and send them as postcards to save money.
Common Mistakes To Avoid
Don’t send save the dates before you’ve actually booked your venue and confirmed your date. I know this sounds obvious but I’ve seen it happen and then the couple had to send correction cards which is awkward and expensive.
Don’t include people you’re on the fence about inviting. Save the dates mean you’re definitely inviting them. If you send someone a save the date you can’t uninvite them later unless something major happens.
Don’t forget to proofread everything multiple times. Check the date, check the spelling of names, check the website URL actually works. Have someone else look at it too because you’ll miss your own mistakes.
Don’t feel like you have to do photo cards just because everyone else is. If you hate being photographed or don’t want to pay for engagement photos, text-based save the dates are completely fine and often less expensive.
Working With Your Photographer
If you’re booking engagement photos specifically for save the dates, tell your photographer that upfront. They can make sure to get some shots that will work well for cards – clear faces, good composition with space for text, variety of orientations.
Ask for high-resolution files that are print-ready. Most photographers provide this anyway but confirm. You need at least 300 DPI for good print quality.
Some photographers include engagement sessions with wedding packages, others charge separately. Factor this into your budget because a good engagement shoot can easily be $300-800 depending on your location and the photographer’s experience.
The whole thing is honestly less complicated than it seems once you just start making decisions and moving forward. People get paralyzed by all the options but really you just need a photo you like, clear information, and cards that arrive on time. Everything else is just details that most guests won’t even notice or remember.
