Planning Guides, Style Guide
Trifold Wedding Invitations: Three-Panel Folded Designs
May
Understanding the Basic Trifold Structure
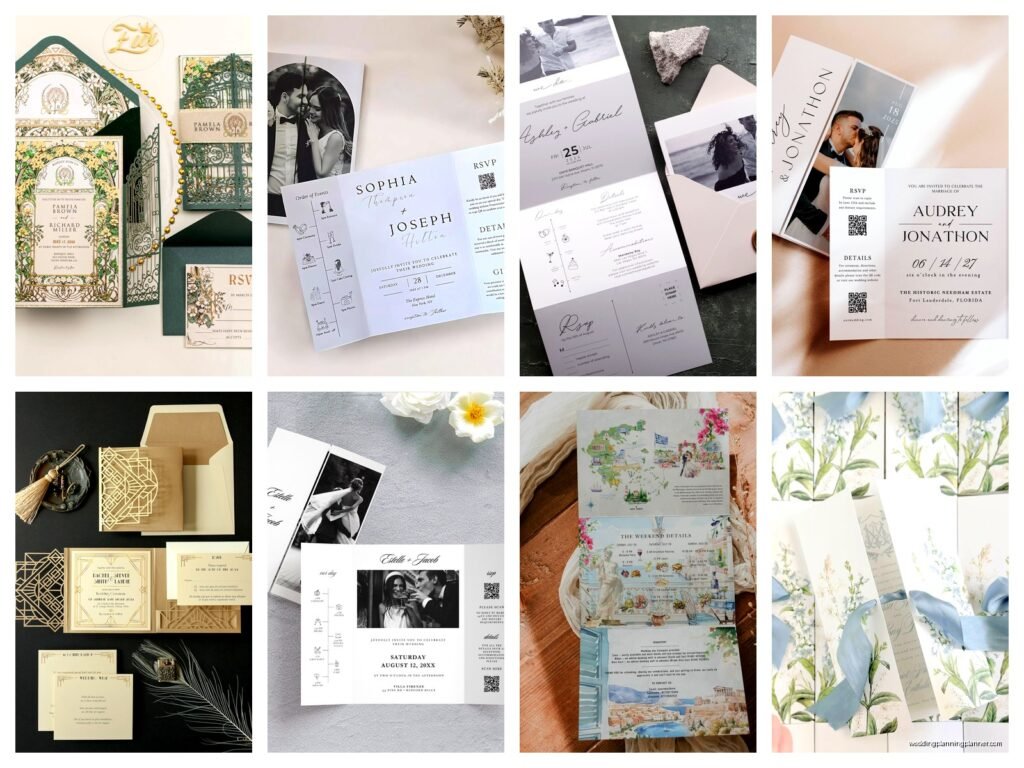
Okay so trifold invitations are basically three panels that fold into each other, and honestly they’re one of my favorite formats because you get SO much real estate to work with compared to a standard flat card. The most common setup is a letter-size sheet (8.5″ x 11″) that gets divided into three sections, each roughly 3.67″ wide when you do the math. You fold the right panel inward first, then the left panel over that, and boom—you’ve got this nice compact package.
The thing is, not all trifolds are created equal. Some couples go for a gatefold style where both outer panels open outward like little doors, which looks fancy but requires different measurements. For a standard trifold though, you’re working with that classic Z-fold or C-fold pattern. The C-fold is where one panel tucks inside slightly (so it’s actually a hair narrower, like 3.625″ instead of 3.67″), and that’s what most printers recommend because it prevents bulking at the edges.
I learned this the hard way in summer 2021 when a bride ordered 200 trifolds and I didn’t account for the paper thickness. They were printed on this gorgeous 110lb cardstock, and when we folded them, the right panel kept popping out because I’d made all three panels exactly the same width. We had to reprint the whole batch with the inside panel reduced by about 1/8″. Cost me like three hours of sleep and a chunk of my profit margin, but you better believe I never made that mistake again.
Panel Layout Strategy
Here’s where it gets fun—you gotta decide what goes where. The front panel (the one people see first when it’s folded) usually has minimal info. Think: names, maybe a small graphic or monogram, possibly “wedding invitation” in script font. Some couples put absolutely nothing on the front except their initials, which I kinda love for the mystery factor.
When someone opens your trifold, they see the inside three panels all at once spread out. This is your main canvas. Most people put the ceremony details on the center panel because that’s where your eye naturally goes first. Left panel might have reception information or the weekend schedule if it’s a destination wedding. Right panel could be accommodation details, dress code, or a sweet quote.
The back panel—the one facing out when it’s folded—is tricky. You can use it for your return address, a decorative element, or sometimes people put RSVP instructions there. Just remember that if you’re mailing these, the back panel needs to be designed with a mailing address in mind, or you’ll need to use an envelope (which, let’s be real, most people do anyway because trifolds are too thick for just a belly band).
What Annoys Me About Panel Distribution
Can I just say what drives me absolutely nuts? When couples try to cram EVERYTHING onto the center panel and leave the other panels basically empty except for some random flourishes. Like, you chose a trifold specifically because you have a lot of information to share—a weekend itinerary, multiple events, travel details, whatever. Use the space! I had this client in spring 2023 who insisted on putting all six events on the center panel in tiny 8pt font, and then wanted giant peonies illustrated on the side panels with nothing else. I tried to redistribute the content and she kept saying “but the center is the most important part” and I’m like… okay but your guests also need to be able to READ it without a magnifier.
Paper Weight Considerations
You’re gonna want to think about paper thickness because it matters more with trifolds than with flat invites. Too thin (like 80lb cover stock) and it feels flimsy and cheap when people hold it. Too thick (like 130lb+) and you can’t get a clean fold—it’ll crack along the fold lines or refuse to stay closed properly.
The sweet spot is usually between 100lb and 110lb cover stock. Some people use 80lb text weight, which is thinner but can work if you’re doing a letterpress or want that soft, romantic feel. I personally prefer something with a bit of heft because weddings are formal events and the invitation should feel substantial in your hand.
Also consider the finish. Matte stocks fold better than glossy ones—glossy can crack and show white stress marks along the folds. Textured papers like linen or felt finishes are gorgeous for trifolds because they add tactile interest and they hide any minor imperfections in the scoring.
Scoring and Folding Techniques
If you’re printing at home or through a print shop, you absolutely need proper scoring before folding. Scoring is that indented line that helps the paper fold cleanly. Without it, you’re just creasing thick paper and it looks messy—the fold won’t be sharp and it might crack.
Most professional printers include scoring in their trifold services, but if you’re DIYing this, you’ll need a scoring board or at minimum a bone folder and a ruler. The process is: measure your panels exactly (remember that inside panel needs to be slightly narrower), use a scoring tool to create an indented line, then fold along that score with a bone folder to press it flat.
I’ve seen people try to fold trifolds without scoring and it’s just… nah. Don’t do it. It looks amateurish and your beautiful design gets ruined by wonky folds. You can get a Martha Stewart scoring board for like $20 and it’ll last you forever, or if you’re ordering from an online print service, just make sure scoring is included in the price.
Digital Printing vs. Letterpress
Digital printing is definitely the most common and affordable option for trifolds. You can get full color, photos, gradients, whatever you want. The file setup is straightforward—just create your design in a three-panel layout with bleed and crop marks, export as a PDF, and send it off.
Letterpress trifolds are STUNNING but pricey. The debossed texture adds so much elegance, but you’re limited to simpler designs—usually one or two ink colors, no photos. Also, letterpress works best on softer papers which are thinner, so you might need to do a duplex (two sheets laminated together) to get the right thickness. I did a letterpress trifold for a client once and the whole project took six weeks and cost about $15 per invitation. Gorgeous, but definitely not for everyone’s budget or timeline.
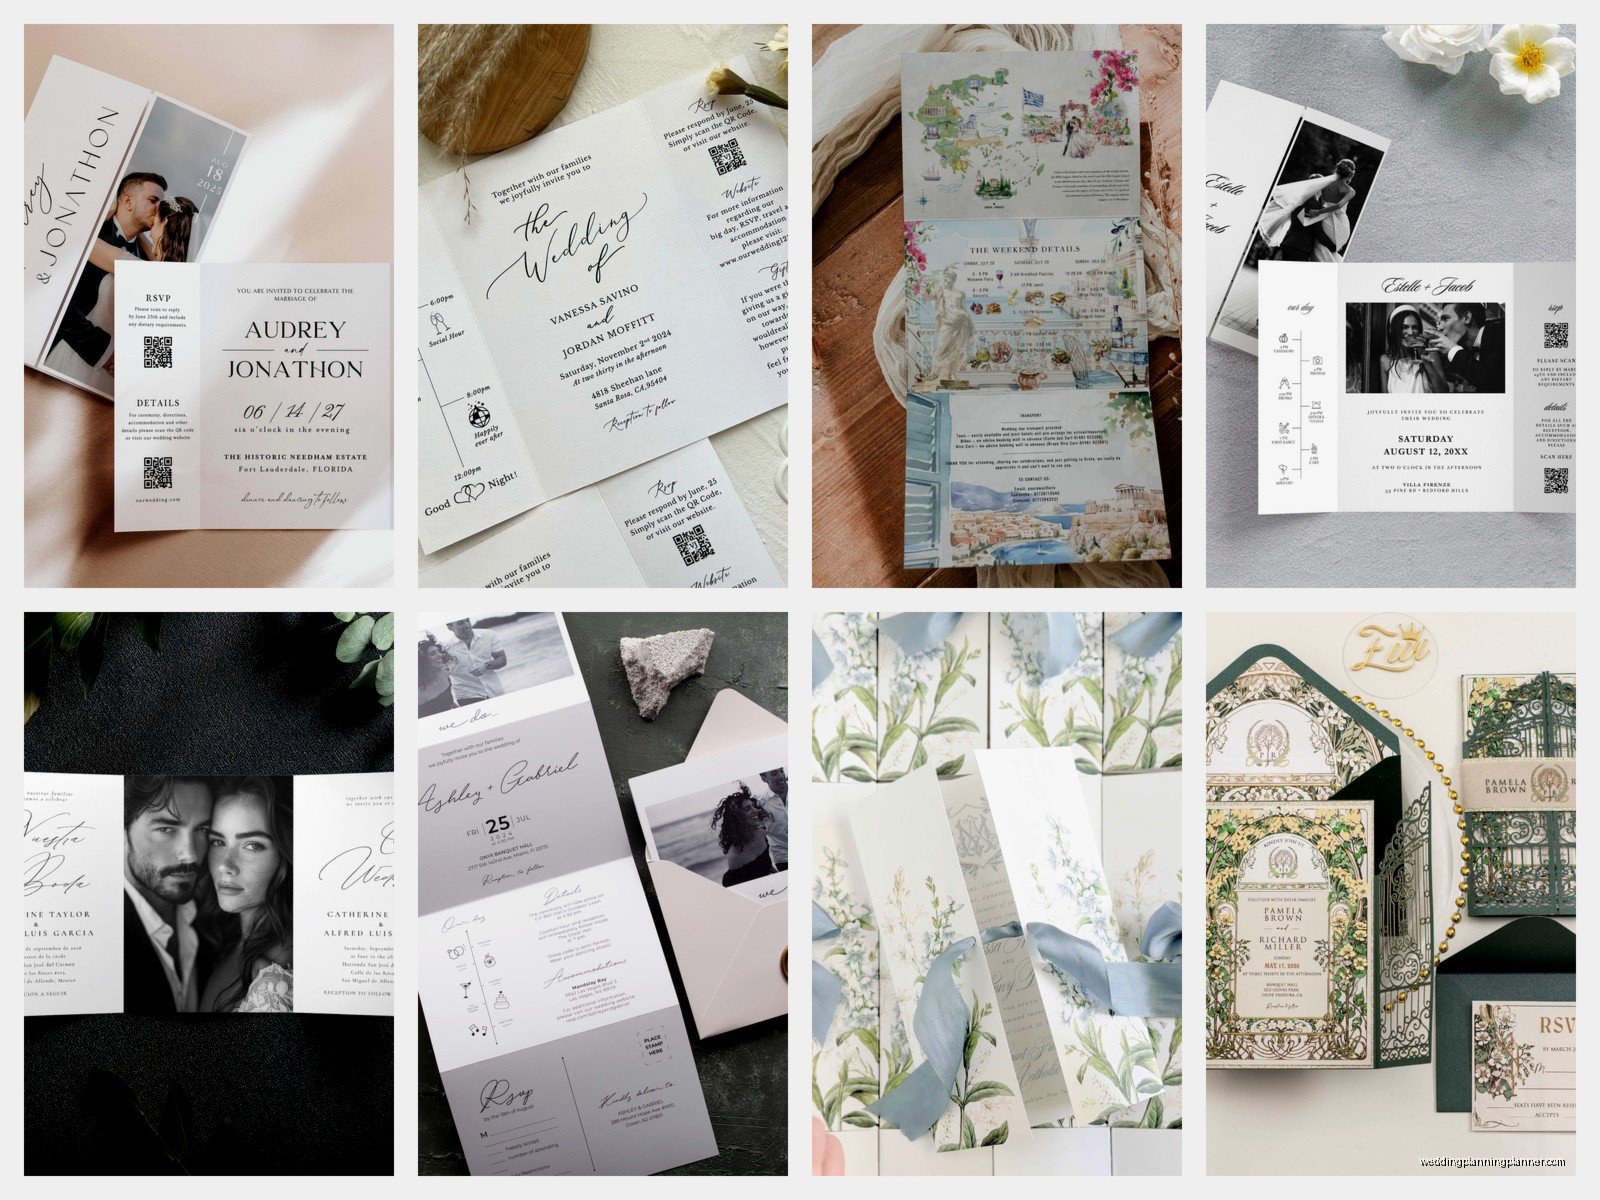
Design Elements That Work Best
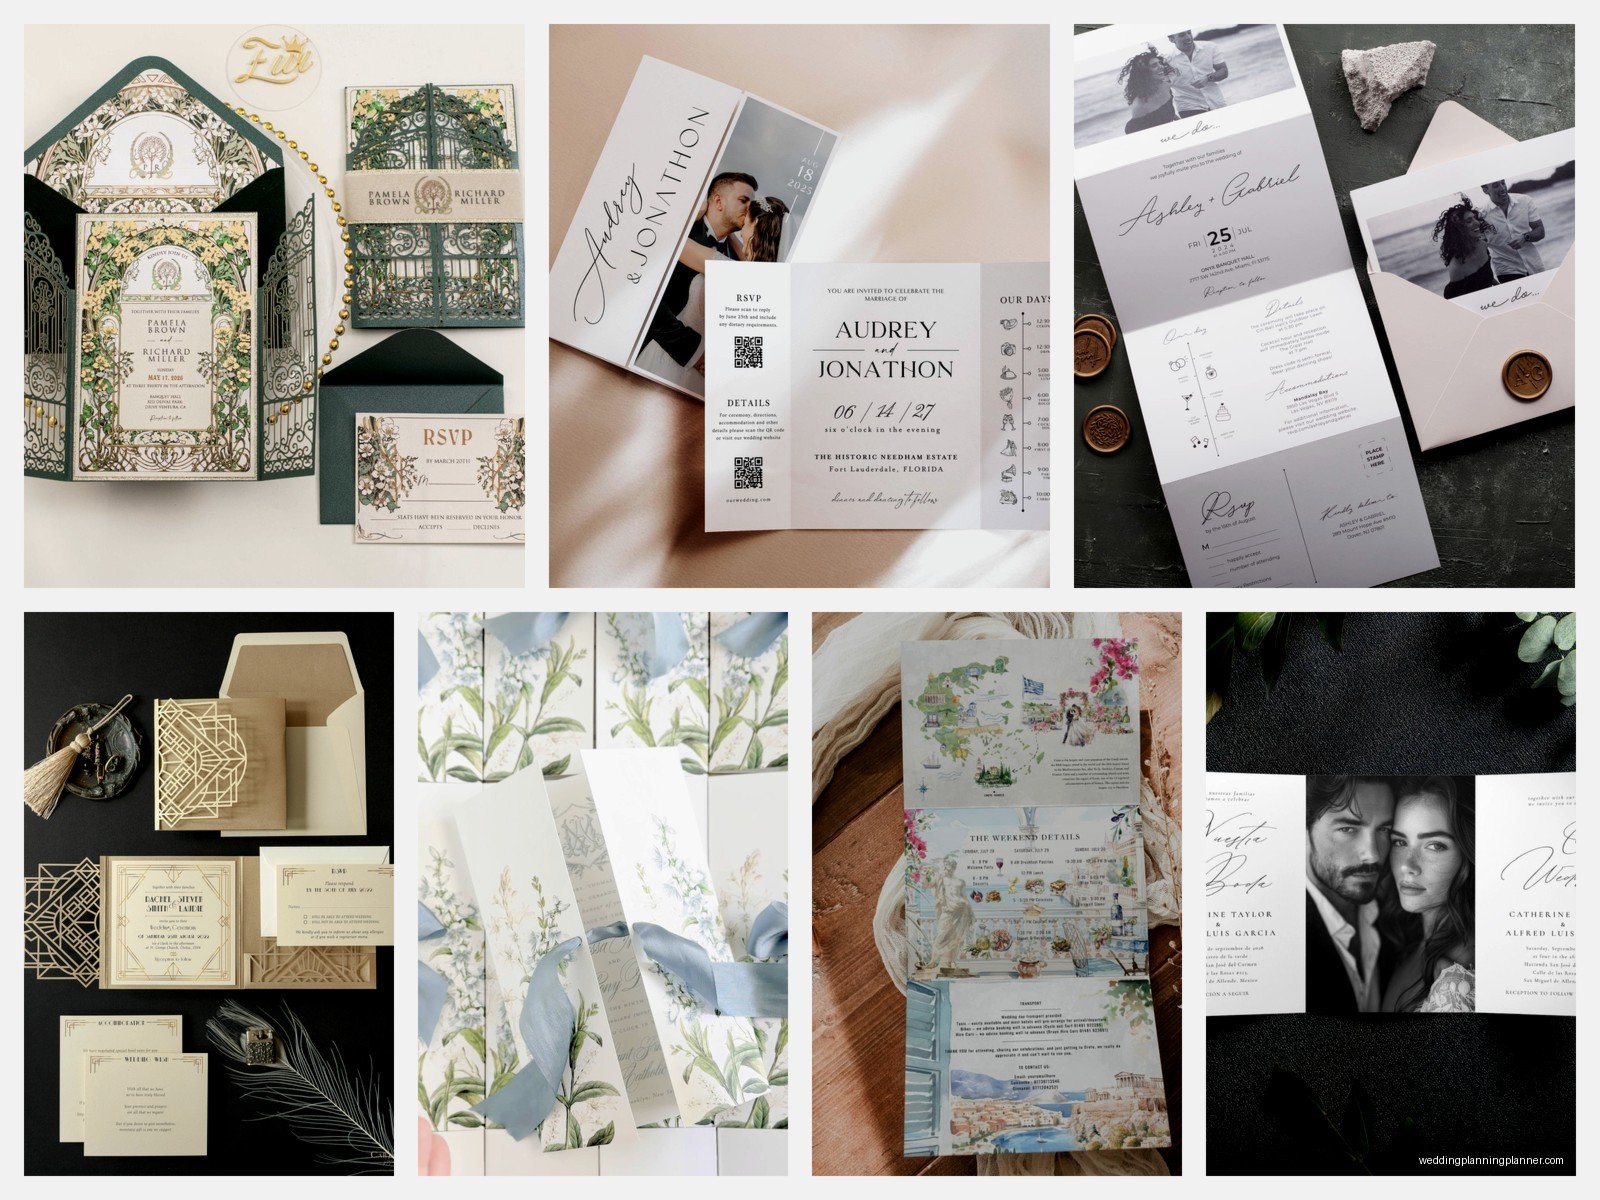
With three panels to work with, you can get creative with visual flow. I like using a consistent design element—like a botanical motif or geometric pattern—that carries across all panels to unify the piece. Maybe you have a vine that starts on the left panel and grows across to the right, or a watercolor wash that fades from one side to the other.
Typography hierarchy is crucial because you’re dealing with multiple sections of information. Your names should be the largest text, ceremony details slightly smaller, then everything else smaller still. Don’t make everything the same size or nothing will stand out. I usually work with three different font sizes maximum—any more than that and it looks chaotic.
Color blocking can work really well on trifolds too. Maybe the center panel has a colored background and the side panels are white, or vice versa. Just make sure there’s enough contrast for readability. I learned from my cat knocking over my coffee onto a proof once that dark text on dark backgrounds is a terrible idea even if it looks “moody and dramatic” in your head.
Information Hierarchy and Content Planning
Before you even start designing, map out what information goes where. Write it all down: names, date, ceremony time and location, reception time and location, dress code, accommodation blocks, transportation info, wedding website, registry details, RSVP instructions, and anything else you need to communicate.
Then prioritize. Ceremony details are non-negotiable and should be prominent. Reception info is next. Everything else is secondary and can be sized down or placed on less prominent panels. Some people also include a timeline for the day, which works great on trifolds because you have room to list it out clearly.
One thing couples always forget is RSVP details. Even if you’re doing online RSVPs through your website, you should still mention it on the invitation. I usually put something like “Please respond by [date] at [website]” on one of the side panels. If you’re including a separate RSVP card, then you don’t need to put it on the trifold itself, but then you’re adding another piece to your invitation suite which increases costs and weight for postage.
Mailing Trifolds
Okay so here’s the thing about mailing trifolds—they’re thick. Even folded, you’re looking at about 1/4″ thickness depending on your paper choice, which means you need a substantial envelope. An A7 envelope (5.25″ x 7.25″) works for most standard trifolds when folded. Some people go for 6″ x 9″ booklet envelopes if they want a roomier fit.
You’ll definitely need extra postage. A trifold invitation with enclosures (RSVP card, details card, maybe a map) usually weighs between 2-3 ounces, which requires two Forever stamps or one stamp plus additional postage. Take a fully assembled invitation to the post office and have them weigh it before you buy stamps in bulk. Also ask them to hand-cancel it instead of running it through machines—trifolds can get damaged in automated sorting equipment.
Some people use belly bands or vellum wraps to keep the trifold closed, which looks elegant but adds more weight. Wax seals are another option but they basically guarantee you need hand-canceling because machines will crush them. I had a bride once who insisted on wax seals and didn’t hand-cancel… half her invitations arrived with broken seals and envelope damage. Not cute.
DIY vs. Professional Printing
If you’re crafty and have time, DIYing trifolds is doable. You’ll need design software (Canva works, or Adobe InDesign if you’re comfortable with it), access to a good printer, proper cardstock, a paper cutter, and a scoring tool. The learning curve isn’t terrible, but there’s definitely room for error.
The advantage is cost—you can probably make trifolds for $2-3 each if you’re doing everything yourself. The disadvantage is time and the risk of mistakes. Printing 100+ invitations at home takes hours, and if your printer jams or the colors don’t match your screen, you’re stuck troubleshooting.
Professional printing through companies like Minted, Zazzle, or local print shops costs more—usually $4-8 per invitation—but they handle the technical stuff. They score, fold, and sometimes even assemble everything for you. The quality is usually more consistent, and you’re not spending your weekends hunched over a paper cutter. For most couples, I recommend professional printing unless you’re genuinely excited about the DIY process or you have a really tight budget.
Timing and Ordering
Order samples first. Always. Every print company’s paper stocks and colors look different in person than on screen. I can’t tell you how many times couples have been surprised by the actual shade of “blush” or “sage” when the samples arrive. Order at least 2-3 weeks before you need to place your full order so you have time to make changes.
For the full order, give yourself at least 6-8 weeks before your mail date. Professional printing usually takes 2-3 weeks, then you need time to assemble everything (stuff envelopes, address them, add stamps), and you should mail invitations 8 weeks before the wedding. So work backwards from there. If your wedding is in October, you should be finalizing your trifold design by early July at the latest.
Order extras. The standard recommendation is 10-15% over your guest count to account for mistakes, last-minute additions, and keepsakes. So if you’re inviting 150 guests, order at least 165-170 invitations.
Common Mistakes to Avoid
Don’t forget about bleed. If your design has color or images that go to the edge of the paper, you need to extend them about 1/8″ beyond the trim line. Otherwise you’ll have white edges where the paper was cut.
Don’t use fonts smaller than 9pt for body text. I know you want to fit everything, but if your elderly relatives need reading glasses to decipher your invitation, you’ve made it too small. Names can be larger (18-24pt), main details should be 11-14pt, and secondary info can be 9-10pt minimum.
Don’t ignore proofreading. Read your invitation out loud multiple times. Have three other people read it. Check dates, times, addresses, spelling of names and venues. I once had an invitation go to print with the ceremony time listed as 4:00 PM when it was actually 4:30 PM and the couple didn’t catch it until the invitations arrived. They had to order rush stickers to cover the mistake.
And honestly, don’t overthink it. Trifolds are meant to be functional and beautiful, but at the end of the day, people mostly care about the when and where. Your guests aren’t gonna analyze your font choices or whether your botanical illustrations are botanically accurate (yes, someone once asked me this). They’re gonna glance at it, put the date in their calendar, and maybe stick it on their fridge. Make something you’re happy with and move on to the other million wedding planning tasks.