Planning Guides, Style Guide
Pocket Wedding Invitations: Layered Pocket Fold Designs
May
Pocket Fold Invitations Are Actually Worth the Hype
Okay so pocket wedding invitations are basically these folded card designs with a literal pocket that holds all your other invitation pieces. Think of it like a tiny folder for your wedding stuff. The main invitation card sits in there, plus you’ve got room for RSVP cards, directions, accommodation info, whatever else you need to include without making guests juggle seventeen loose papers.
I had this bride back in summer 2021 who was absolutely convinced she needed pocket invitations but had no idea they required actual assembly, and when I told her we’d need to schedule time to put together 150 of these things she just stared at me like I’d suggested we hand-deliver each one on horseback. But honestly once you understand how they work they’re not that bad.
The Basic Structure You’re Working With
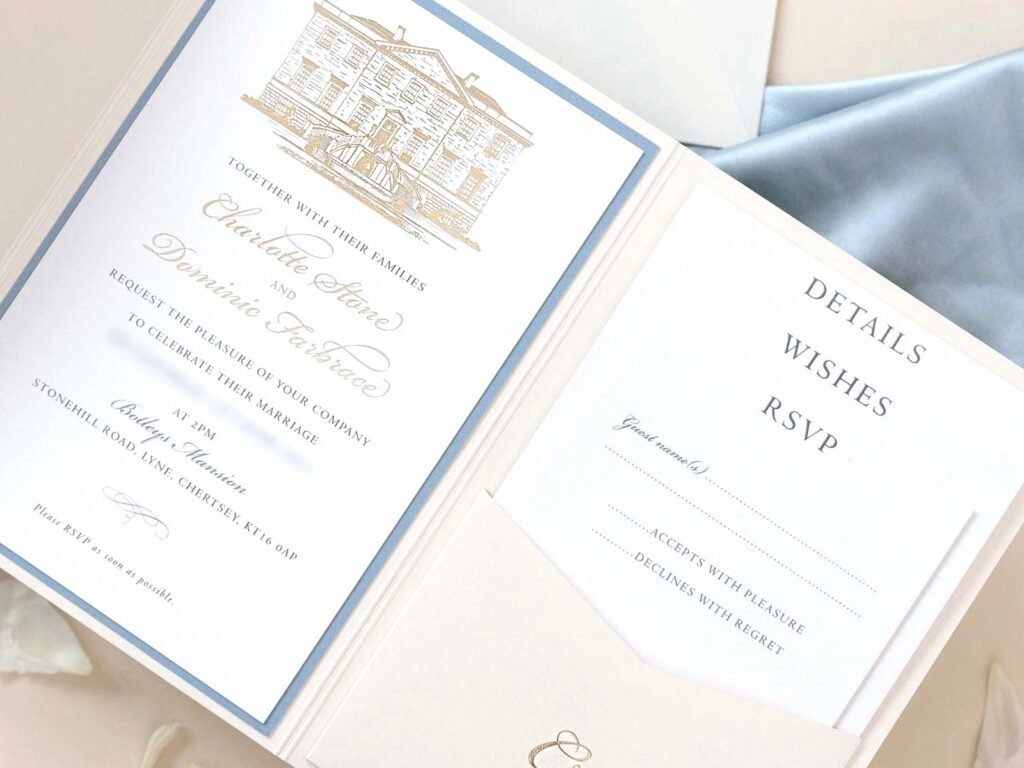
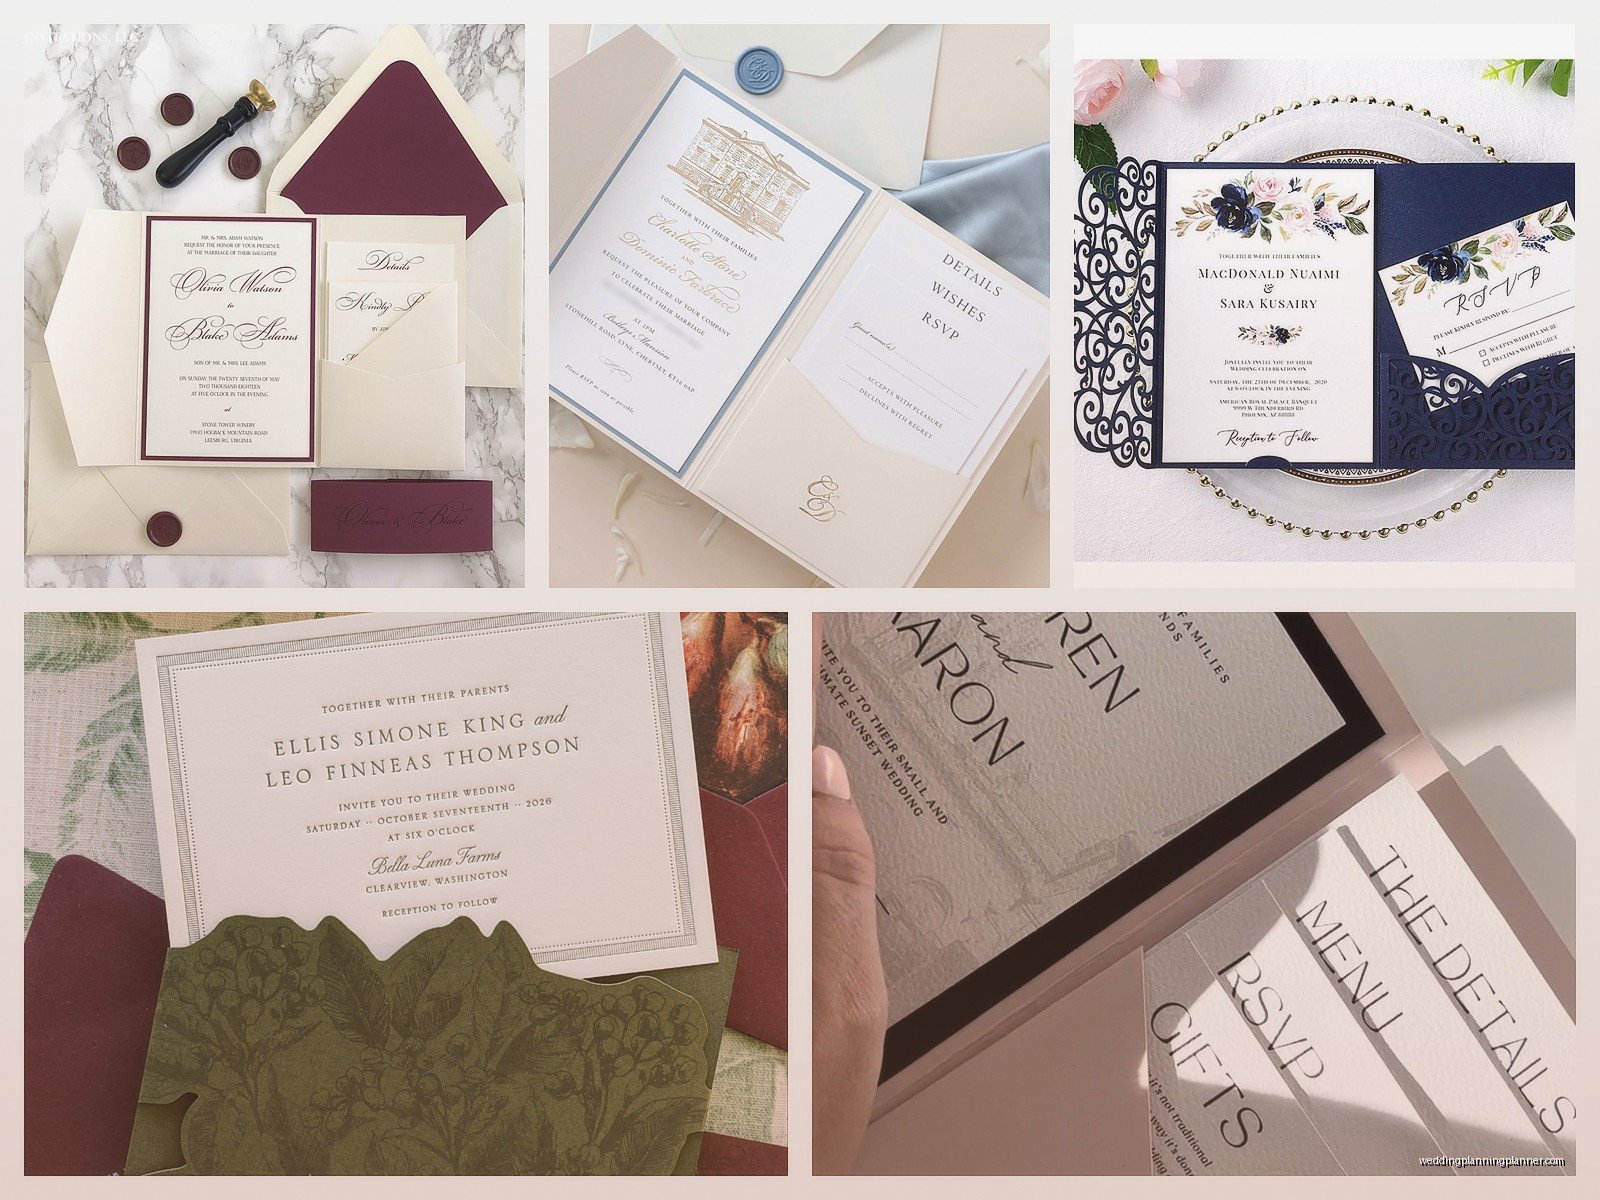
The pocket fold itself is usually a single piece of cardstock that’s scored and folded to create the pocket. Most common size is 6×9 inches when folded, but you’ll see 5×7 and square formats too. The pocket can be on the left side, right side, or sometimes there’s a double pocket situation which is kinda extra but looks amazing if you have a lot of inserts.
Inside the pocket you’re layering multiple cards – your main invitation (usually 5×7 or slightly smaller), then smaller cards for RSVP, details, accommodations, maybe a weekend events schedule. The layering part is where people get creative because you can stagger them so guests see a little bit of each card peeking out, or you can stack them neatly, or do this cascading thing where each card is slightly offset.
What really annoys me is when people don’t consider the thickness before they order envelopes because if you’re doing like five layers of cardstock plus ribbons and belly bands, that sucker is NOT fitting in a standard A9 envelope and then you’re scrambling to find box invitations or oversized envelopes and the whole postage situation becomes a nightmare.
Picking Your Pocket Style
You’ve got a few standard pocket configurations. The classic single pocket fold has one pocket on either the left or right panel. Then there’s the gatefold pocket which opens from the center and can have pockets on both sides – very dramatic entrance for your invitation info. There’s also the Z-fold pocket design where it folds in a zigzag pattern and honestly those always remind me of those old birthday cards my aunt used to send.
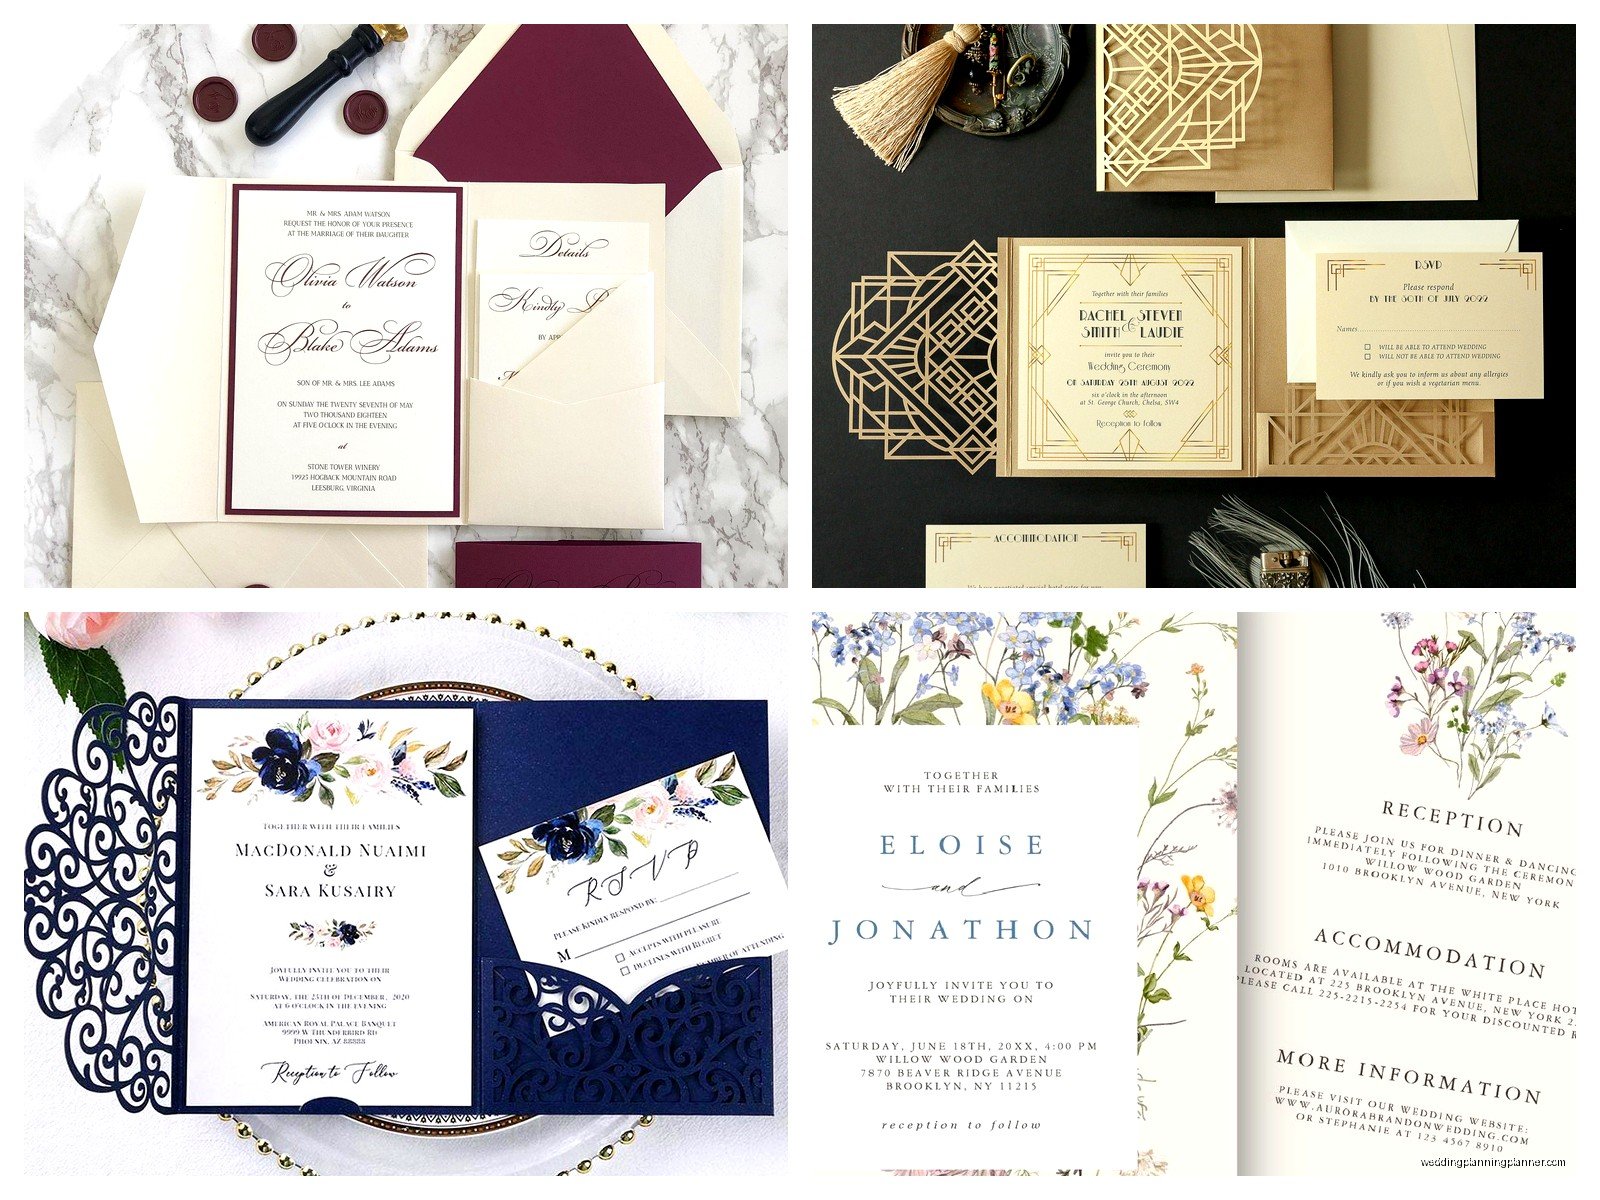
For the actual pocket itself you can do a straight edge pocket, scalloped edge, rounded corners, or even laser cut designs that show through to the layer behind. I worked with a couple last spring who wanted cherry blossom cutouts on their pockets and it looked gorgeous but cost them an extra $4 per invitation for the laser cutting.
Layering Your Inserts The Right Way
This is where you gotta think about what guests see first. Your main invitation should be the focal point, so that typically goes in front or on top of the stack. Then you’re arranging your other cards based on importance – RSVP card and envelope usually go right behind the main invite because that’s the action item guests need to handle.
I like doing this thing where the RSVP card is slightly shorter than the main invite so you can see both at once. Details cards about the venue, directions, hotel blocks – those go behind. If you’re including one of those “Saturday morning brunch” or “Sunday goodbye breakfast” cards, stick that at the back because it’s nice-to-know info but not critical.
Some designers will do a vertical stack, others prefer horizontal layering where cards sit side by side in the pocket. Vertical stacking is easier for assembly but horizontal looks more sophisticated if you have the pocket space for it.
The Belly Band Situation
Belly bands are those paper or ribbon strips that wrap around your invitation stack to keep everything together. You don’t technically need them but they make the whole package feel more intentional and also prevent cards from sliding around inside the pocket during mailing which… trust me that happens more than you’d think.
Paper belly bands can be printed with your names, wedding date, a monogram, whatever. They’re usually 1.5 to 2 inches wide and wrap around the middle of your invitation stack. You secure them with a sticker seal on the back or sometimes people use actual wax seals which look incredible but add time and cost.
Ribbon belly bands are softer and come in silk, satin, organza, velvet – I’m partial to silk because it photographs well and doesn’t look cheap. You tie these in a bow or knot, or you can thread them through a custom tag or charm. My cat actually knocked over an entire box of ribbon belly bands once while I was working from home and I found pieces of ivory silk ribbon all over my apartment for weeks.
Assembly Process That Won’t Make You Lose Your Mind
Alright so assembly is the part everyone underestimates. For 100 invitations with five inserts each, you’re looking at handling 500 individual pieces of paper plus envelopes plus whatever embellishments you’ve added. Set up a workspace – dining table works, just clear it completely.
Create an assembly line. Lay out all your components in separate stacks. Start with the pocket fold as your base, then layer in your inserts in order. If you’re using a belly band, wrap it around the assembled stack before putting everything in the pocket, or after, depending on your design. I usually do it after because it’s easier to adjust the cards if they shift.
Get friends to help or hire a calligrapher who also does assembly – many of us offer this service because we’re already handling the envelopes anyway. I’ve spent countless evenings with couples and their wedding parties doing invitation assembly parties with wine and snacks, which sounds fun but by hour three everyone’s kinda over it and someone always accidentally puts an RSVP card in upside down.
Securing Everything So It Doesn’t Fall Apart
You can use small glue dots to secure the invitation stack to the pocket itself – like one dot on the back of the main invitation card that sticks it to the pocket floor. This keeps everything from sliding out when guests open the envelope. Don’t go crazy with adhesive though because you want guests to be able to remove the cards easily.
If you’re doing ribbon closures on the actual pocket fold (not just belly bands), thread the ribbon through before you assemble the inserts because trying to do it after is gonna make you want to throw the whole thing across the room. Some pocket folds come with pre-punched holes for ribbon, others you’ll need to use a hole punch or have your printer do it.
Paper Weight and Quality Stuff You Should Know
The pocket fold itself should be sturdy – I recommend 80lb to 100lb cardstock minimum. If you go lighter it’ll be floppy and feel cheap. Your inserts can be lighter weight, like 65lb to 80lb cardstock, because they don’t need to support anything structurally.
Mixing paper textures adds visual interest. Maybe your pocket is smooth cardstock but your main invitation is on textured linen paper. Or you could do metallic paper for accent pieces like the RSVP card. Just make sure your printer can handle whatever paper you choose – some metallic papers don’t play nice with certain printing methods.
I had this situation in spring 2023 where a couple ordered this gorgeous shimmer paper for their pockets but didn’t tell their printer and the ink just would NOT adhere properly, it was smearing everywhere and we had to reorder everything on matte paper and push back their mail date by two weeks which stressed everyone out.
Color Layering and Coordination
This is where pocket invitations really shine because you can play with multiple colors in one suite. Your pocket might be navy, main invitation on cream paper, RSVP card with a dusty blue backer, details card on white. Each layer adds a color pop when guests pull everything out.
Don’t go too matchy-matchy though – like if everything is the exact same shade of blush pink it’ll just look like one blob of color. I always suggest picking one main color for the pocket, one or two accent colors for inserts, and keeping at least some elements in neutral territory so there’s contrast.
Backers are those extra layers of cardstock behind your printed cards that add dimension and color. So you’d have your invitation printed on white, mounted on a slightly larger piece of colored cardstock. This creates a border effect and makes the whole thing feel more substantial. You can do double backers too if you’re feeling fancy – like a gold layer, then a navy layer, then your white invitation on top.
Printing Methods That Actually Work
Digital printing is your most affordable option and works fine for most designs. The quality has gotten really good in recent years. Letterpress is gorgeous but expensive – you’re looking at $15-30 per invitation suite easily, sometimes more if you want multiple ink colors or deep impression. It works best on soft cotton paper.
Foil stamping adds metallic elements without the full cost of letterpress. You can foil stamp just your names or a monogram or decorative elements. Rose gold foil is still super popular even though we’re kinda past peak rose gold trend… or are we? I honestly can’t keep track anymore.
Thermography creates raised printing that looks similar to letterpress but costs less. It has this shiny quality to it though that some people love and others think looks dated. I’m pretty neutral on it – depends on the overall design aesthetic.
Envelope Addressing and Postage Reality Check
Your envelopes need to be large enough to accommodate the thickness of your assembled pocket invitation. Weigh a fully assembled invitation at the post office before you order stamps because these almost always require extra postage. A standard suite might be 2-3 ounces which means you need additional stamps beyond the basic forever stamp.
Consider square envelopes carefully – they cost more to mail because they can’t go through standard sorting machines. Also the post office considers them “non-machinable” if they’re too thick or rigid, which adds another surcharge. I know it’s annoying but factor this into your budget from the start.
Hand addressing looks beautiful but takes forever. Printed labels are practical but less formal. Envelope printing directly on the envelope is a nice middle ground. Or hire a calligrapher which is what I obviously recommend because it’s literally part of my business but also because it genuinely makes your invitations feel special when guests see that hand-addressed envelope in their mailbox.
Design Elements That Elevate the Look
Wax seals on the belly band or envelope flap add old-world elegance. You can get custom stamps made with your monogram or wedding date. Just know that wax seals sometimes get damaged in mail sorting and they add thickness which affects postage. I use flexible wax now instead of traditional hard wax because it’s more durable.
Vellum overlays are those translucent sheets that go over your main invitation – you can print on them or leave them plain with just a wax seal or ribbon tying them to the card beneath. They add a soft romantic layer and also protect your printed invitation from smudging during assembly and mailing.
Envelope liners make the unboxing experience better. Your guests open the envelope and see this pop of pattern or color before they even pull out the pocket invitation. You can DIY these with liner templates or order them pre-made. Installing them is tedious though – you’re basically gluing triangle-shaped paper into each envelope flap and trying not to get adhesive everywhere.
Timeline for Ordering and Assembly
Order your invitation components at least 3-4 months before you need to mail them. That gives you time for design revisions, proofs, printing, shipping, and assembly. Rush fees are brutal in the stationery world so avoid them if you can.
Plan at least 2-3 weeks for assembly depending on your guest count and how elaborate your design is. More if you’re doing it yourself without help because you’ll get tired and need breaks and also you have jobs and lives and can’t spend every evening assembling invitations even though it feels like that’s all you’re doing.
Mail invitations 8-10 weeks before the wedding for local guests, 12 weeks for destination weddings. This gives people time to request time off work, book travel, and return RSVPs without feeling rushed. Yes you’ll still have people who RSVP the day before the deadline or not at all but that’s just… that’s just how weddings work I guess.
Budget Real Talk
Pocket invitations are more expensive than flat cards or simple folded invitations. You’re paying for more materials, more printing, more assembly time. A basic pocket suite might run $5-8 per invitation. Mid-range with some special printing or embellishments could be $10-15. High-end with letterpress, custom everything, fancy ribbons and seals – easily $20-30+ per invitation.
For 150 invitations at $12 each you’re looking at $1,800 just for invitations, plus postage which might be another $300-400. Some couples are fine with this, others would rather spend that money on flowers or an open bar. It’s your call but go in with realistic expectations about what pocket invitations actually cost because I’ve had too many couples fall in love with a design and then get sticker shock when they see the quote.
You can save money by doing your own assembly, printing some components digitally instead of letterpress, skipping the fancy embellishments, ordering pockets pre-made instead of custom designed. But at the end of the day pocket invitations are a premium product so they’re gonna cost more than basic invites no matter how you slice it.