Planning Guides, Style Guide
Wedding Invitation Sets: Complete Suite Packages
May
What Actually Goes in a Complete Wedding Invitation Suite
Okay so wedding invitation suites are basically the entire package of cards and inserts you send to your guests, not just the main invitation card. A lot of couples think it’s just one card but then they’re like “wait where do I put the RSVP info” and that’s when I have to explain the whole thing.
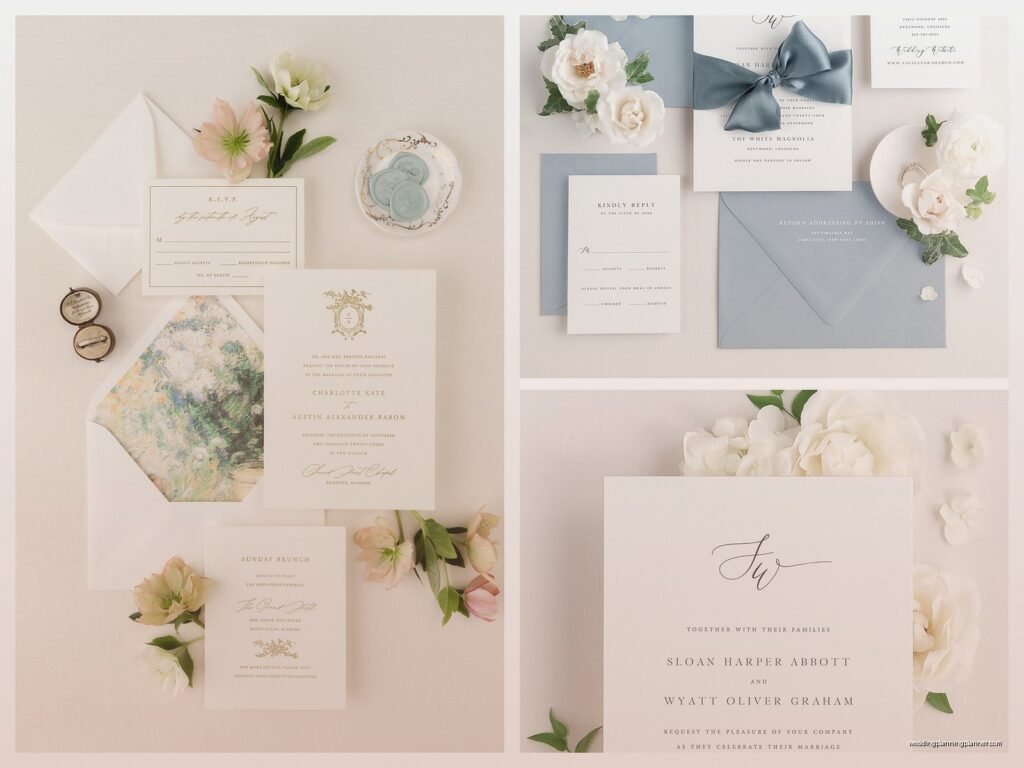
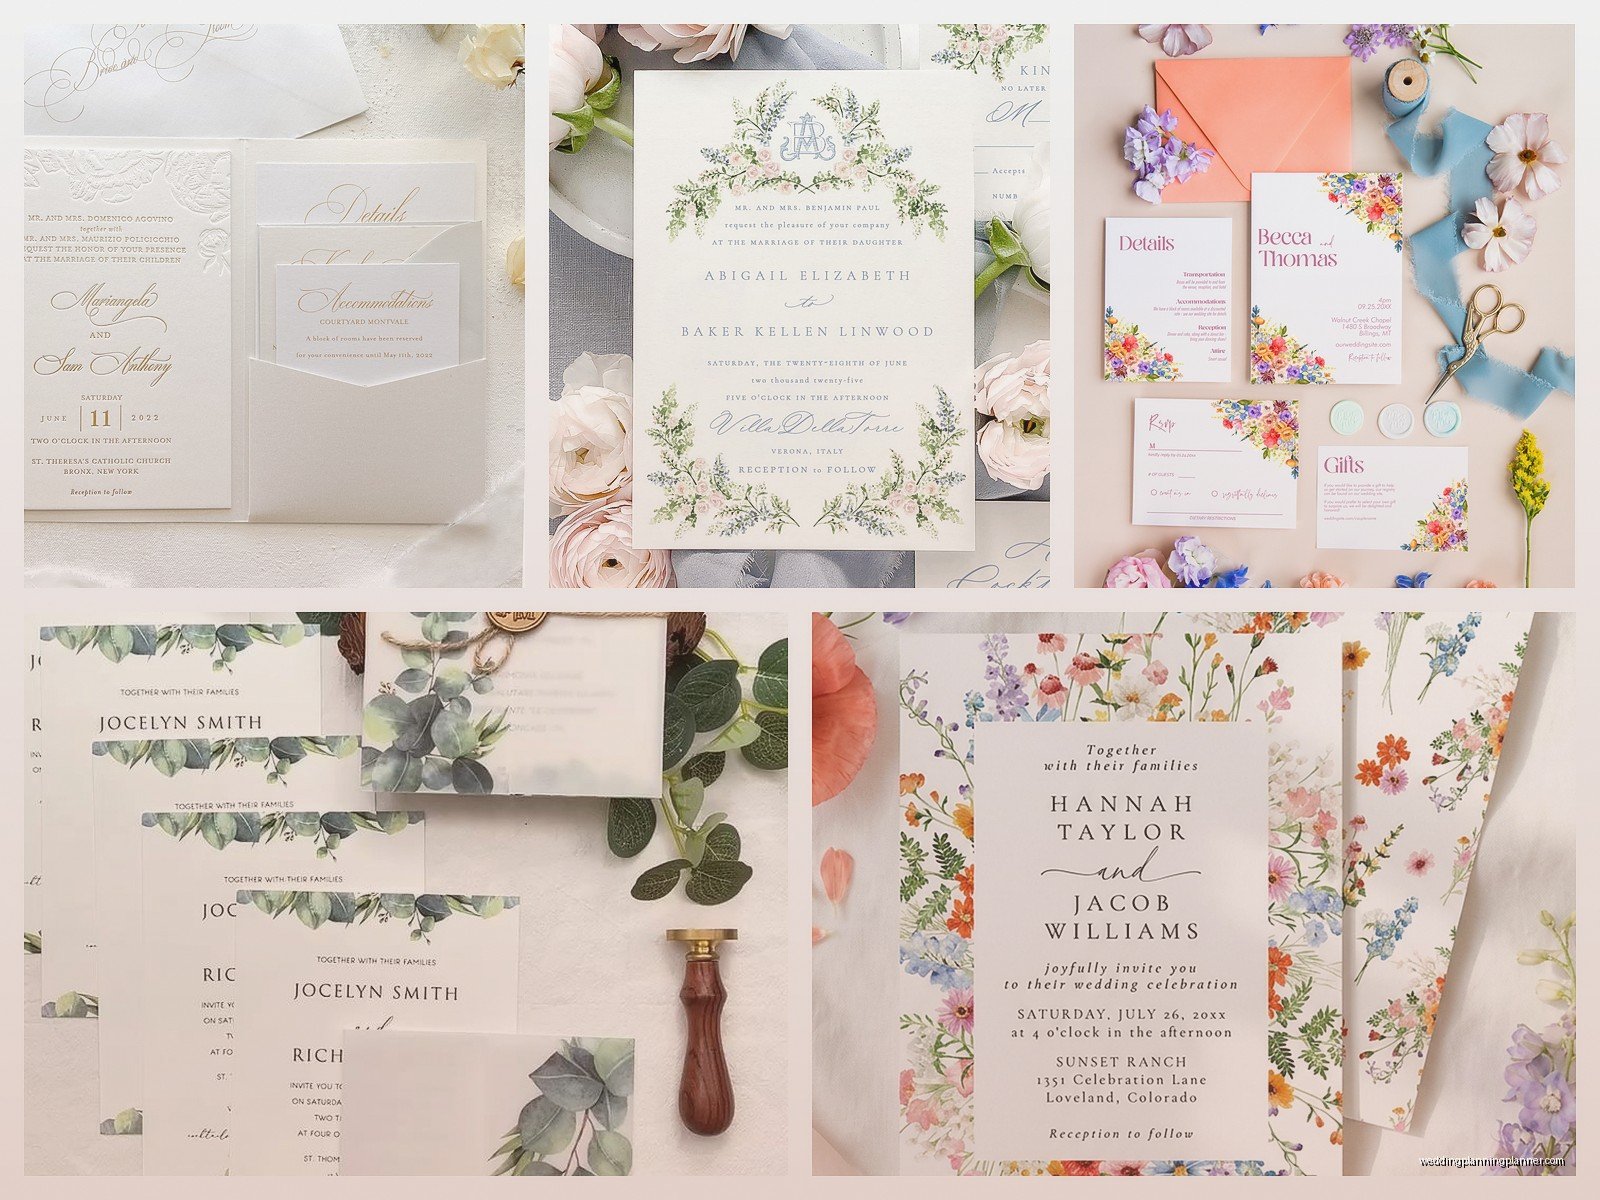
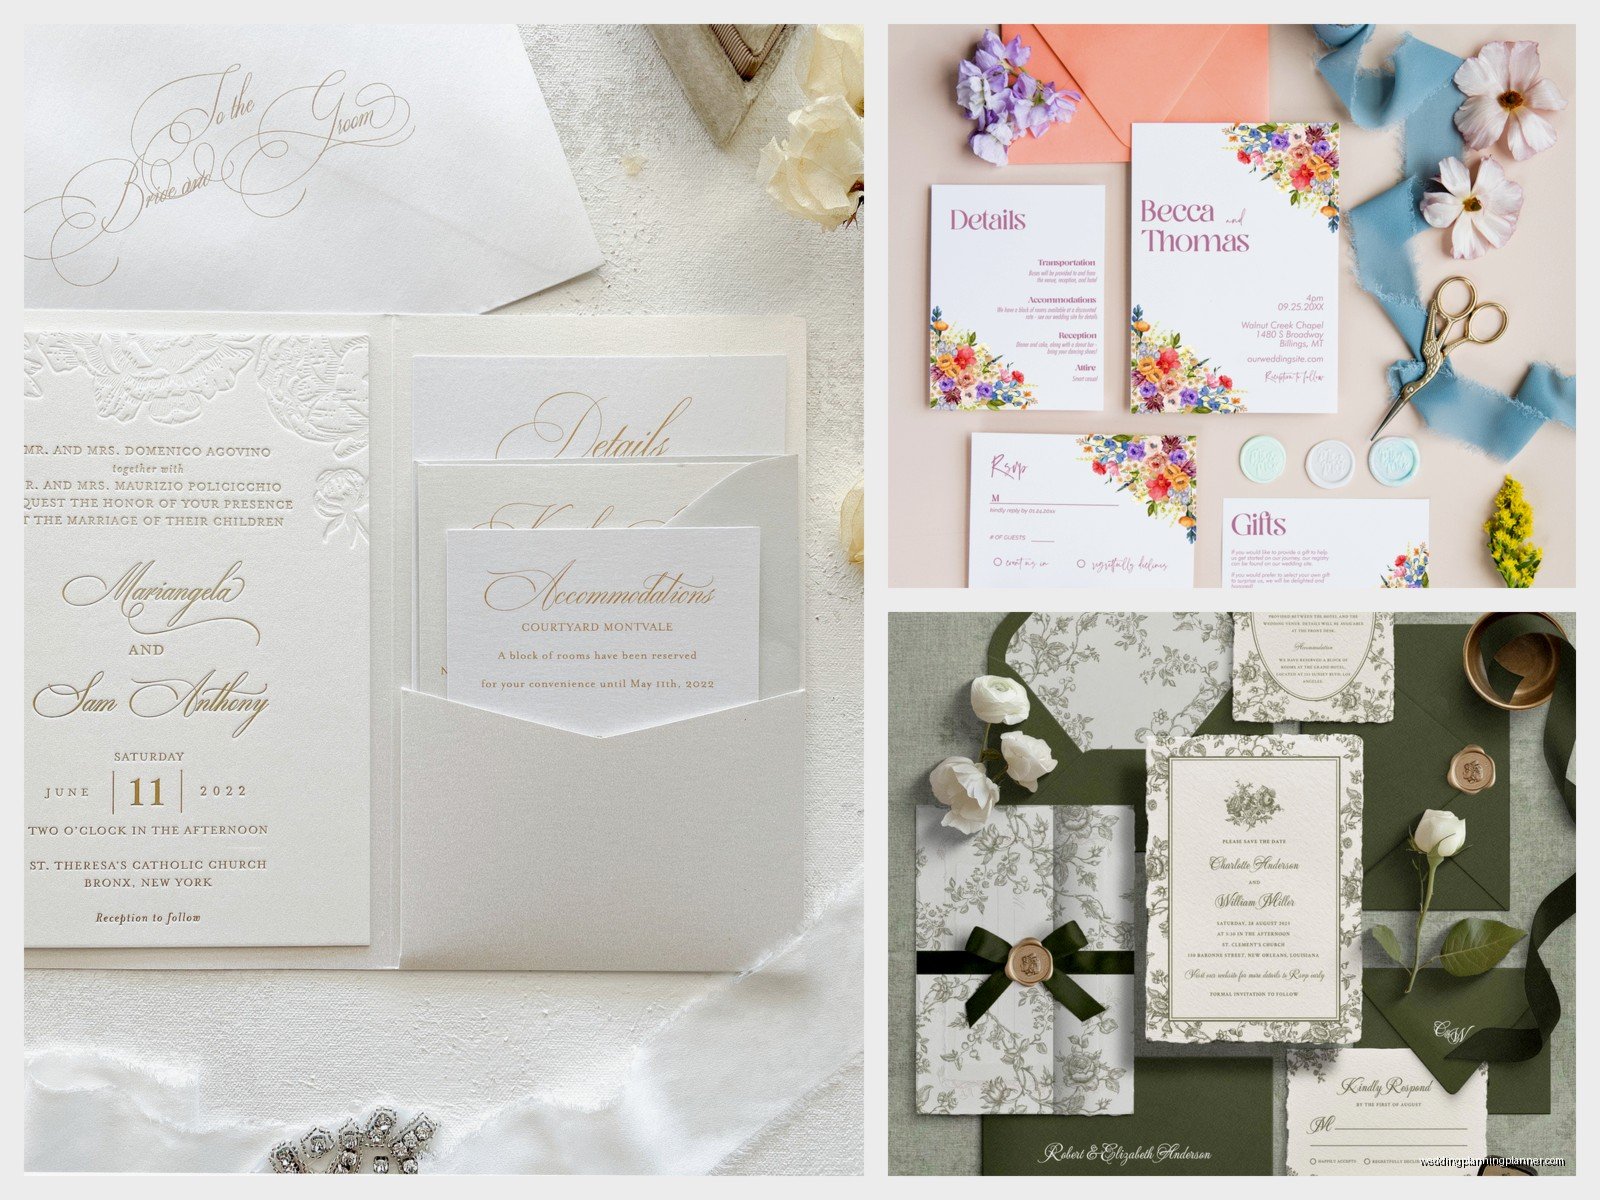
The basic complete suite usually has five main pieces: the invitation card itself, the RSVP card, the RSVP envelope, a details card, and sometimes a reception card if your ceremony and reception are at different places or times. Then there’s the outer envelope that holds everything, and some people add an inner envelope too which honestly annoys me because it’s 2025 and we’re wasting paper but whatever, some traditions die hard I guess.
The invitation card is the main event. This is where you put the couple’s names, the date, the ceremony location, and the time. It’s typically the largest card in the suite, usually 5×7 inches but I’ve seen everything from square 6×6 to big dramatic 7×9 cards. You want it to set the tone for your whole wedding basically.
RSVP Cards and How People Still Mess Them Up
The RSVP card is where guests tell you if they’re coming or not. You gotta include a pre-addressed, pre-stamped envelope with this or like half your guests won’t send them back. I learned this the hard way during a spring 2023 wedding when my client decided to skip stamps to save money and we got maybe 30% of RSVPs back on time. It was a nightmare chasing people down.
On the RSVP card you need: a deadline date (usually 3-4 weeks before the wedding), a line for names, checkboxes for “accepts with pleasure” or “declines with regret” or whatever wording you prefer, and meal choices if you’re doing a plated dinner. Some couples add a line for song requests which is kinda cute actually.
The RSVP envelope should be addressed back to whoever is collecting responses – usually the couple or sometimes the parents if they’re more involved. And seriously, put a stamp on it. Just do it.
Details Cards Are Your Best Friend
Details cards are where you put everything else guests need to know. This is where I tell couples to go wild with information because the main invitation should stay elegant and simple, but the details card can have your wedding website, hotel room block info, directions or parking details, what time cocktail hour starts, dress code – basically anything that doesn’t fit on the main invite.
I usually recommend a details card that’s about 4×6 inches or sometimes 5×7 if there’s a lot to say. You can list your wedding website here too which is honestly where most of the real info should live anyway but some older guests don’t check websites so you need some backup info on paper.
The Extras That Make It Feel Complete
So beyond the basic five pieces there are like a million add-ons you can include. Reception cards are separate if your reception is at a different location or much later than the ceremony. Weekend itinerary cards if you’re doing a whole weekend thing with welcome drinks and a farewell brunch. Accommodation cards with hotel details but honestly this info works fine on the details card too.
Map cards used to be huge but now with everyone using GPS they’re kinda unnecessary unless your venue is really hard to find or you want it for aesthetic reasons. I had a couple in summer 2021 who insisted on custom illustrated map cards and they were gorgeous but also like nobody used them, everyone just typed the address into their phones.
Then there’s belly bands, which are paper or ribbon wraps that hold all the cards together in a neat stack. Vellum wraps are similar but more delicate and fancy looking. Wax seals if you’re feeling extra Victorian or romantic. Envelope liners that add a pop of color or pattern when you open the outer envelope.
Figuring Out What You Actually Need
Here’s the thing – you don’t need every single component. I always tell couples to start with what information their guests absolutely need to know and work backwards from there. Having a simple wedding at one venue with all the info on your website? You might only need the invitation card, an RSVP card with envelope, and maybe a small details card with the website.
Doing a destination wedding or multi-day event? Then yeah you’re gonna need more pieces to keep everyone organized. It depends on your specific situation and also your budget because this stuff adds up fast.
The worst is when couples want everything but then complain about the cost and I’m like… well we can cut some things or… anyway that’s a whole different conversation.
Envelope Situations
Outer envelopes are standard – they’re what gets addressed and mailed. These are usually included in any suite package. Inner envelopes are optional and traditional but I think they’re mostly wasteful unless you’re doing a really formal wedding where tradition matters a lot to you.
The point of inner envelopes historically was to keep the outer envelope clean during mail delivery, and then the inner envelope would be pristine when presented to the guest. Now it’s more about formality and having a place to specify exactly who’s invited (like writing the kids’ names on the inner envelope if children are included, or leaving them off if it’s adults only).
You can do envelope addressing yourself, hire a calligrapher, use a service that prints directly on envelopes, or get printed labels. Each option has different price points and vibes. I personally think digital calligraphy printing looks gorgeous and saves money compared to hand calligraphy but some people really want that authentic hand-done look.
Assembling the Suite
There’s actually a proper order to stack everything when you’re putting suites together. The invitation goes on the bottom face up, then you stack the other cards on top in size order (largest to smallest usually). The RSVP card goes inside its envelope – some people put it face up so you can see it, others tuck it in face down.
If you’re using a belly band or vellum wrap, you slide that around the stacked cards. Then the whole thing goes into the inner envelope if you’re using one (with the printed side facing the back flap so guests see it when they open), and that goes into the outer envelope. If no inner envelope, the stack goes directly into the outer with the text facing the back flap.
The RSVP envelope gets tucked into the suite somewhere – either under the belly band or just in the stack. Make sure the flap is visible so guests know it’s there.
I spent an entire weekend once assembling 200 invitation suites for a bride who didn’t want to hire assembly help and honestly my cat knocked over one of the piles and I almost cried but we got through it.
Suite Package Options and Pricing
Most stationery designers and companies offer suite packages at different levels. A basic package might include just the invitation, RSVP card and envelope, and outer envelope. Mid-level adds details cards, envelope liners, and maybe a belly band. Premium packages include everything – inner envelopes, multiple insert cards, wax seals, custom illustrations, the works.
Prices vary wildly depending on printing method, paper quality, and customization level. Digital printing is most affordable, letterpress is expensive but gorgeous with that pressed-in texture, foil stamping adds metallic elements and costs more. You can expect basic suites to start around $3-4 per invitation for digital printing, while elaborate letterpress suites with multiple inserts can run $15-25+ per invitation.
When you’re getting quotes, make sure you understand what’s included. Some designers quote per suite (all pieces together), others quote per piece. Ask if assembly is included or extra. Ask about envelope addressing. Ask if they provide digital proofs before printing because trust me you want to catch typos before 150 invitations get printed – I’ve seen some disasters there.
Timing for Ordering and Sending
Order your invitation suites about 4-5 months before your wedding date. This gives time for design, proofs, revisions, printing, and shipping. Then you’ll mail them about 8 weeks before the wedding (or 12 weeks for destination weddings because people need more planning time).
Save the dates are different – those go out 6-8 months before, or even earlier for destination weddings. But we’re talking about the full invitation suite here which comes later in the timeline.
Don’t forget to order extras. I always recommend 15-20 extra invitations beyond your guest count for keepsakes, last-minute additions, mistakes during assembly, or if you want to frame one later.
Matching Everything vs. Mix and Match
Suite packages are designed to coordinate obviously – same paper, same fonts, same color scheme across all pieces. This creates a cohesive look that feels polished and intentional. Most couples go this route because it’s easier and looks professional.
But you can also mix and match elements from different collections or designers if you want something more unique. Maybe you love one designer’s invitation style but want to use a different RSVP card design, or you want to add a custom illustrated element to an otherwise simple suite. Just make sure there’s some visual connection – similar colors, complementary styles, coordinating fonts – so it doesn’t look like you just grabbed random pieces.
One thing that really annoys me is when couples try to DIY parts of a professionally designed suite and the quality doesn’t match. Like they’ll order beautiful letterpress invitations and then print their own details cards on their home printer and it just… looks off. Either commit to DIY or commit to professional, mixing the two rarely works unless you really know what you’re doing design-wise.
Digital Options
Okay so some couples are skipping physical suites entirely and going digital which honestly makes sense for certain situations. Environmental concerns, budget constraints, last-minute planning, or just personal preference. There are services that do beautiful digital invitation suites that get emailed or texted to guests.
The thing is, digital invitations don’t have the same… I don’t know, weight? Importance? Some guests especially older ones don’t take them as seriously. But for casual weddings or elopements or micro-weddings they work fine. You can still have a “suite” concept digitally with a main invitation page, RSVP form, details page, etc.
Some couples do a hybrid – send digital save the dates but physical invitation suites, or send physical invitations to older relatives and digital to everyone else. There’s no rule that says you have to do it one way.
Working With a Stationer vs. Ordering Online
Custom stationers give you personalized service and completely custom designs but cost more. Online template companies like Minted or Paperless Post or whatever are cheaper and faster but less personalized. Both can create complete suite packages.
If you go custom, you’ll have consultations with the designer, they’ll create mockups based on your wedding style and colors, you’ll go back and forth on revisions. It’s more involved but you get exactly what you want. Packages from custom stationers usually include design time, printing, and sometimes assembly.
Online template sites let you choose a design, customize the text and colors yourself, and order. It’s straightforward and budget-friendly. They often have suite packages where you select the main design and it automatically coordinates all the other pieces. Way less hand-holding but also less flexibility if you want something really specific.
I work with both kinds depending on what my clients need and… honestly sometimes the online templates look just as good as custom work, especially if you have a good eye for design and choose well.
Postage Considerations
This is boring but important – your assembled suite needs to be weighed before you buy stamps. If it’s over 1 ounce (which suites with multiple inserts often are), you need extra postage. Square envelopes cost more to mail than rectangular ones. Wax seals might require hand-canceling at the post office which means extra fees.
Take a fully assembled invitation to the post office and have them weigh it and tell you exactly what postage you need. Then buy pretty stamps that match your wedding colors if you want, just make sure you have enough postage value. Running out of stamps or having invitations returned for insufficient postage is a nightmare you don’t need.
Also mail yourself a test invitation first to make sure everything arrives intact and nothing gets damaged in transit. Some elaborate suites with ribbons or thick paper or wax seals don’t mail well and you wanna know that before you send 150 of them out into the world.