Planning Guides, Style Guide
Vellum Jackets: Translucent Invitation Wrap Sleeves
Jun
Getting Started with Vellum Jackets
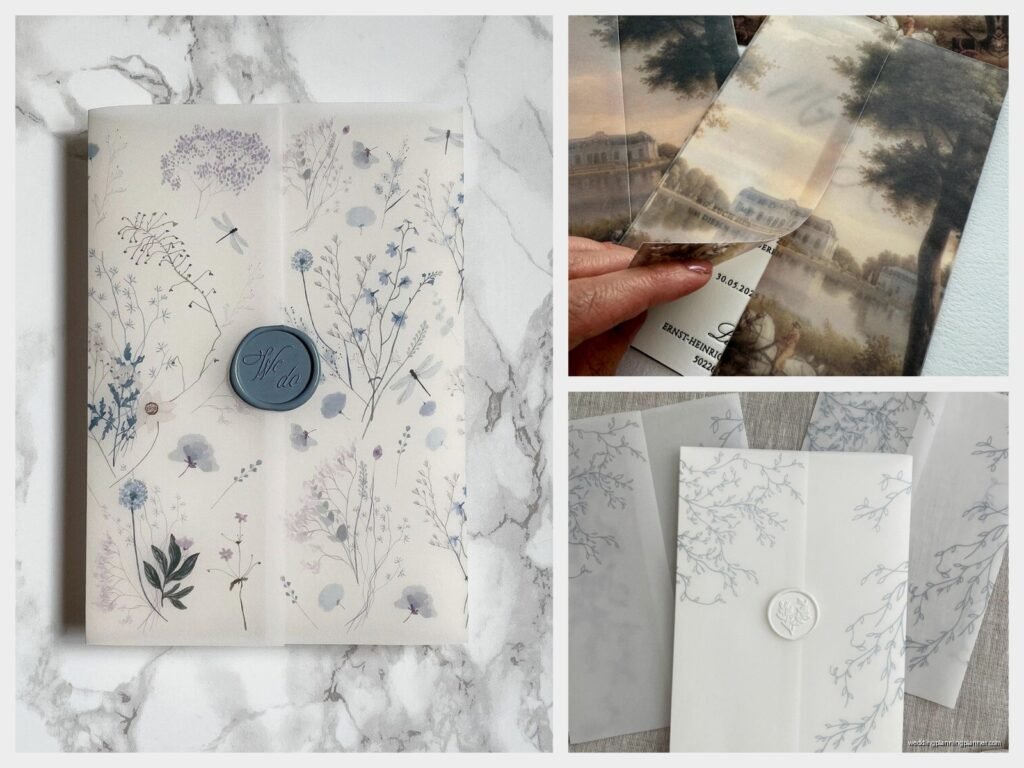
Okay so vellum jackets are basically these translucent sleeves that wrap around your wedding invitations and they’re having such a moment right now. They’re like this elegant protective layer that adds dimension without being too extra, you know? I started using them back in spring 2023 when a bride came to me with a floral invitation suite that needed something special but her budget was kinda tight for full custom work.
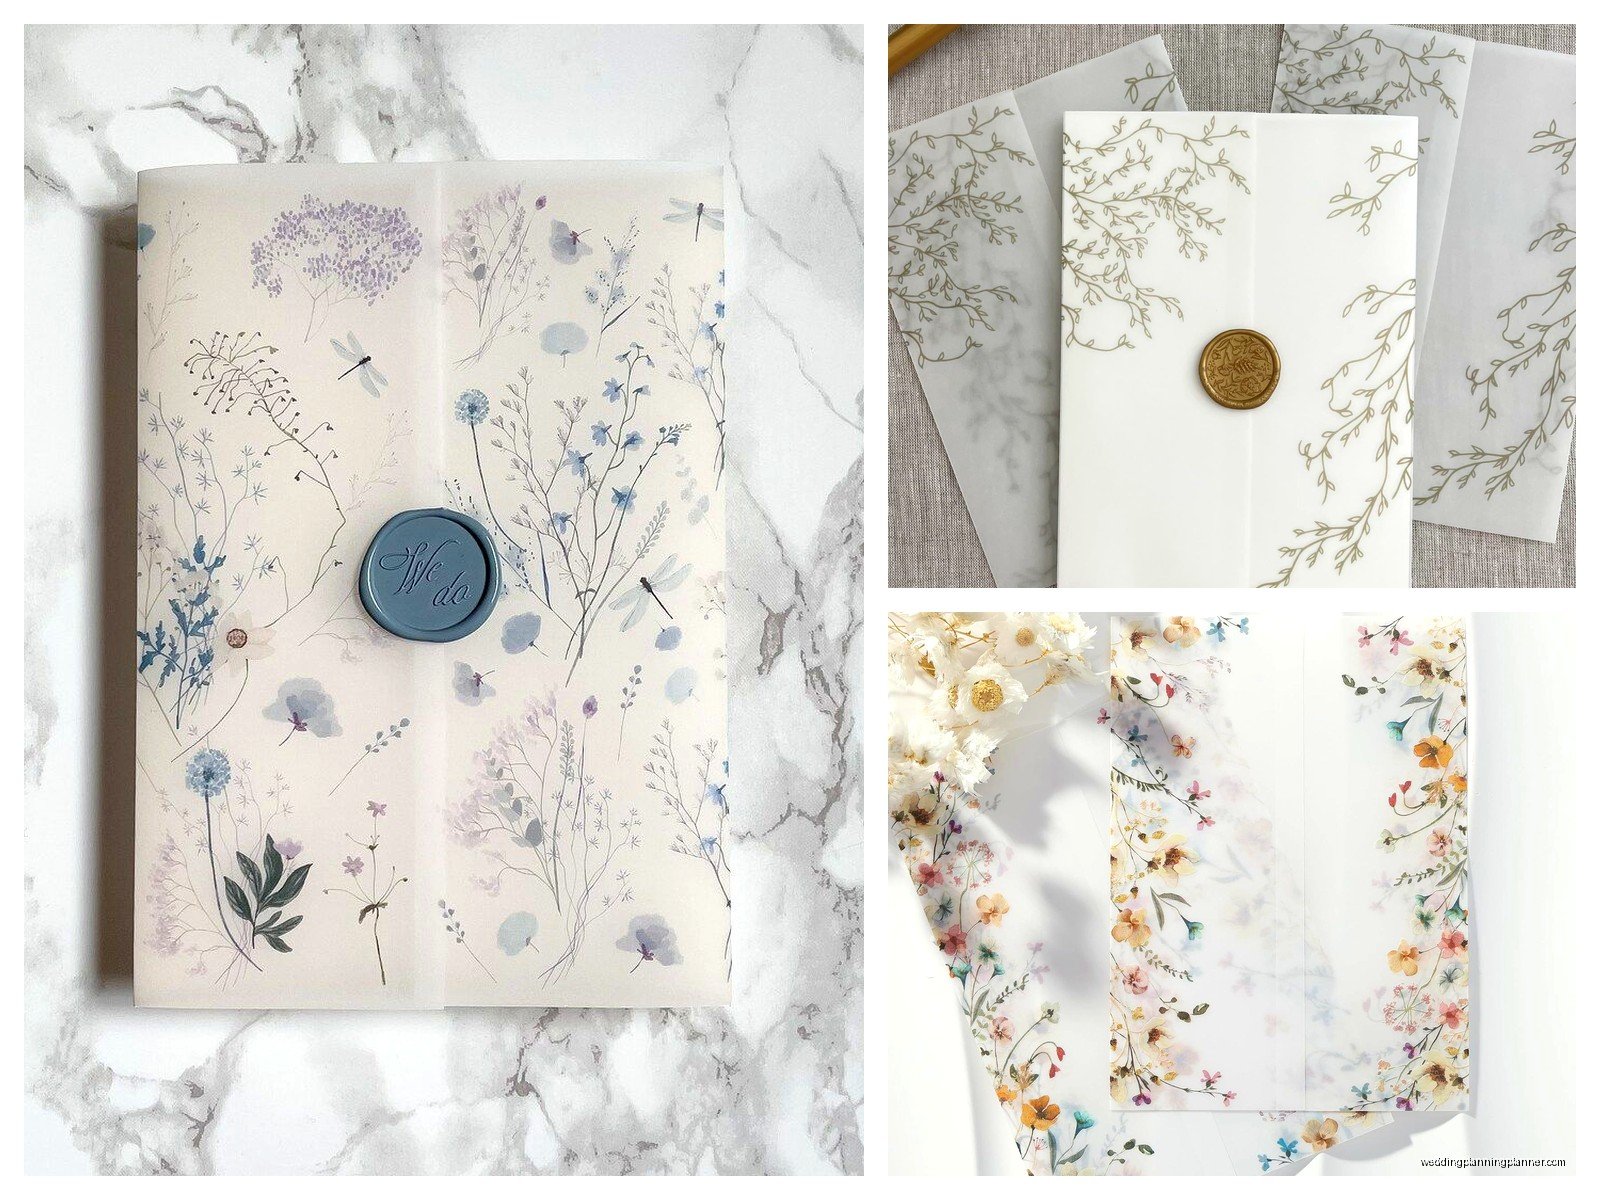
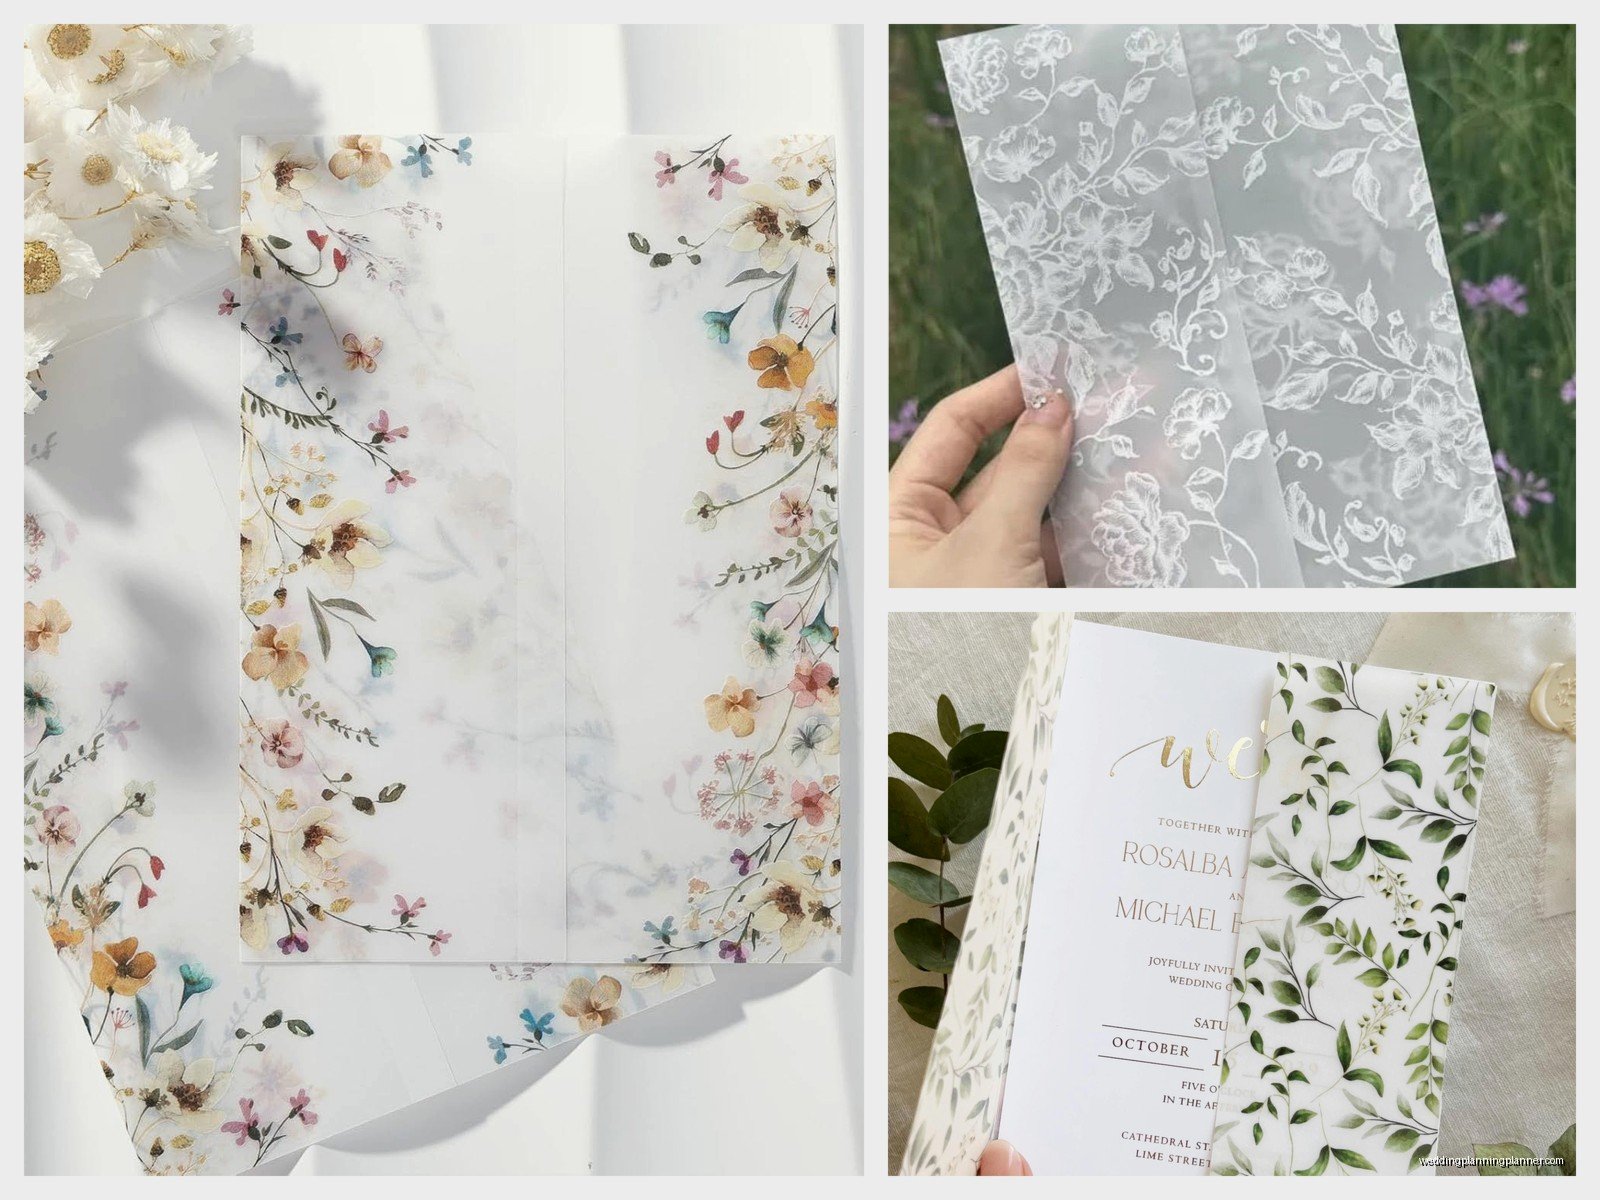
The whole point is they let you see the design underneath while adding texture and sophistication. You can print on them, leave them plain, use them to hold everything together, or layer them with belly bands or wax seals. They’re translucent not fully transparent which is an important distinction because you still get that frosted elegant look.
Materials You Actually Need
First things first you gotta get the right vellum. Not all vellum is created equal and this annoyed me SO much when I first started because I ordered what I thought was vellum and it was basically just thin printer paper. Total waste.
You want vellum that’s at least 30-40 lb weight. Anything lighter and it’s gonna feel cheap and crinkle weird. I usually go with 40 lb for jackets because it has enough body to feel substantial but it’s still translucent enough to see the invitation clearly. Some people use up to 48 lb but honestly that starts feeling more like cardstock.
You’ll need a scoring tool or bone folder, a paper trimmer with a fresh blade, adhesive (and we’ll get into which kind because oh boy there are opinions), and obviously your invitation suite that you’re wrapping. If you’re planning to print on the vellum you need to test your printer first because some printers absolutely hate vellum and will jam constantly.
Measuring and Cutting Your Jackets
So the standard approach is to measure your invitation and then add extra for the wrap and overlap. If your invitation is 5×7 inches you’re probably cutting your vellum to about 11×7 inches give or take. That gives you enough to wrap around with a nice overlap on the back.
Here’s what I do: lay your invitation flat, then figure out how much you want visible on the front. Some people do a full wrap where the vellum covers everything, others leave like a quarter inch border of the invitation showing on all sides. There’s no wrong answer it’s totally aesthetic preference.
For a full wrap on a 5×7 invitation I cut vellum at 10.75 x 7 inches. This wraps around with about a half inch overlap on the back which is enough to secure it but not so much that it’s bulky. You can adjust based on how your invitations are sized though.
The scoring is important because vellum doesn’t fold as crisply as cardstock. You need to score where you want the folds otherwise you get these wonky uneven edges. I score at about 5 inches and 5.5 inches from one edge so the front panel is slightly larger than the back overlap. Makes it look intentional instead of like you measured wrong.
The Adhesive Situation That Nobody Agrees On
This is where wedding planners get into actual fights. What adhesive do you use on vellum jackets because anything wet-based will wrinkle the vellum and show through since it’s translucent.
Double-sided tape is my go-to for most projects. The thin kind not the foam mounting tape. You put a small piece on the inside of the overlap and press it down. It doesn’t show through if you’re careful about placement and it holds really well. Some people hate tape because they think it looks cheap but honestly if it’s on the back and hidden nobody knows.
Glue dots work too especially the small ones. I use these when I’m doing like 200+ invitations because they’re faster than cutting tape. Just don’t use the big glue dots because they will show through as circular shadows and it looks bad.
Wax seals are gorgeous but they’re not actually adhesive they’re decorative. You still need something holding the vellum closed under the wax seal. I learned this the hard way during a summer 2021 wedding where we used only wax seals and half of them popped off in transit because the vellum wasn’t actually secured. The bride was not happy and I had to emergency re-seal 80 invitations at the venue.
Some people swear by vellum adhesive which is this special translucent glue but I find it finicky and it still shows sometimes depending on the lighting. Your mileage may vary.
Printing on Vellum Jackets
If you want to print names or designs or whatever on the vellum itself you need to do this before assembly obviously. Test your printer first with scrap vellum because not all printers handle it well.
Laser printers generally work better than inkjet for vellum. Inkjet ink can smudge on the smooth surface even after it dries. I have an HP laser printer that handles vellum pretty well but I always do a test page first. Feed the vellum one sheet at a time through the manual feed tray not the regular paper tray or you’re gonna have jams.
For inkjet if that’s all you have let the ink dry completely like give it 10-15 minutes before you touch it. Some people use a heat tool to set it faster but be careful because too much heat will warp the vellum. It’s a whole thing.
You can also get vellum printed professionally which honestly for large orders is worth it. I send files to my local print shop and they do it on their big printers and it comes out perfect. Costs more but saves so much time and frustration.
Assembly Process Step by Step
Alright so you’ve got your vellum cut and scored and maybe printed. Now you’re gonna assemble these things.
First stack your invitation suite in the order you want. Usually that’s the invitation card on bottom then any insert cards like reception details or RSVP cards on top. Some people do a specific order for this but as long as the main invitation is visible it’s fine.
Place your vellum jacket flat with the printed side down if you printed on it. Put your invitation stack in the center. Fold one side of the vellum over the invitation and crease it gently. Then fold the other side over creating the overlap on the back.
This is where you add your adhesive. I put a small piece of double-sided tape right in the center of the overlap about an inch from the top and another inch from the bottom. Two small pieces is enough. Don’t go crazy with adhesive or it’ll show through the vellum and look messy.
Press firmly to secure. Then flip it over and check that everything looks centered and the folds are crisp. If you’re adding a belly band or wax seal do that now while everything’s still flat.
Belly Bands and Wax Seals
Belly bands are those paper or ribbon strips that wrap around the whole suite horizontally. They look really polished with vellum jackets and they add extra security. You can make them from cardstock in a coordinating color or use actual ribbon.
For paper belly bands I cut strips about 1.5 to 2 inches wide and long enough to wrap around with a small overlap. Usually like 11-12 inches for a 5×7 suite. Secure the belly band with the same adhesive method as the jacket.
Wax seals are gorgeous on vellum jackets especially if you use a colored wax that contrasts with the invitation underneath. The translucent vellum lets you see hints of the design below and the wax seal becomes this focal point. Just remember what I said earlier about needing actual adhesive under the seal.
My cat knocked over an entire box of wax seals once and they rolled everywhere under the furniture so now I keep them in a drawer with a latch but anyway.
Common Problems and Fixes
Vellum wrinkling is the biggest issue. This happens when you use wet adhesive or when you handle the vellum too much with sweaty hands honestly. Vellum shows fingerprints and oils really easily so I wear those thin cotton gloves when I’m doing large batches. You’ll feel ridiculous but your vellum will look perfect.
If your vellum does wrinkle slightly you can sometimes smooth it by placing it under a heavy book overnight but deep wrinkles don’t really come out. Prevention is key.
Uneven folds happen when you don’t score properly or when you rush. Take your time with the scoring and use a ruler to keep your bone folder straight. It makes such a difference in the final look.
The vellum sliding around before you secure it is annoying but you can use tiny dots of repositionable adhesive or even small pieces of washi tape temporarily while you’re positioning everything. Just remove them before final assembly.
Different Styles You Can Try
Full wraps are what I’ve been describing where the vellum completely wraps around the invitation. But you can also do pocket style where the vellum creates a pocket on one side and the invitation slides in. This is easier for DIY brides because there’s less precision needed.
For pocket style you fold the vellum unevenly so one side is longer and creates a flap. Secure the sides with adhesive and leave the top open. The invitation slides in and out which is kinda nice for guests who want to save the vellum separately.
Layered jackets are when you use vellum as one layer in a more complex suite. Like maybe you have a colored cardstock backer then the invitation then a vellum jacket then a belly band. It creates dimension and looks really expensive even if the materials aren’t that pricey.
You can also do partial wraps where the vellum only covers part of the invitation like just the top half or wraps from the back and stops at the front edges. This shows more of the invitation design which is nice if you spent a lot on printing.
Pricing and Quantities
If you’re buying vellum for this you can get it pretty affordable in bulk. A pack of 50 sheets of 8.5×11 vellum runs about fifteen to twenty dollars depending on the brand and weight. That’ll make quite a few jackets depending on your sizing.
For pricing if you’re doing this for clients I charge around two to three dollars per invitation for vellum jacket assembly on top of the cost of materials. It’s labor intensive especially for large weddings and your time is worth something. Some planners charge more if there’s printing or wax seals involved.
When ordering vellum always get extra. Like if you need 100 invitations order enough vellum for 120. You will mess up some during cutting or assembly or printing and it’s better to have extras than to run out and have to wait for shipping.
Mailing Considerations
Vellum jackets add thickness to your invitations which means they might not fit in standard envelopes or might require extra postage. Always assemble one complete invitation with the vellum jacket and all inserts and take it to the post office to get it weighed before you buy stamps for everything.
The texture of vellum can sometimes catch in postal equipment so I always recommend hand canceling if possible. It costs a bit extra but it prevents your beautiful invitations from getting chewed up by machines. You have to specifically ask for hand canceling at the post office they don’t always offer it automatically.
Some vellum jackets slide around inside envelopes during shipping which can look messy when the recipient opens it. You can add a small dot of adhesive between the envelope and the back of the vellum jacket to keep it positioned nicely but this is optional and honestly most people don’t bother.
Timing for DIY Projects
If you’re doing this yourself for your own wedding don’t underestimate how long it takes. I had a bride in 2023 who thought she could assemble 150 vellum jacket invitations in one weekend and she ended up calling me in tears on Sunday night because she wasn’t even halfway done and her hands hurt.
Plan for about 3-5 minutes per invitation if you’re doing vellum jackets with belly bands or wax seals. That’s like 8-12 hours for 150 invitations not including breaks. Spread it out over multiple days or recruit friends to help. Make it an assembly party with wine or whatever.
Do all your cutting first then all your scoring then all your assembly. Production line style is way faster than doing one complete invitation at a time. Trust me on this.
Storage Until Mailing
Store your finished invitations flat in a box with tissue paper between layers so they don’t rub against each other. Vellum can get scratched or pick up texture from other surfaces so you wanna protect them.
Keep them somewhere dry because humidity can affect vellum and make it ripple or warp. Not in a basement or garage basically. A closet inside your house is fine.
Don’t stack anything heavy on top of the box because that can crease the vellum jackets even through tissue paper. I learned this when I stored boxes under my desk and accidentally kicked them and everything got bent it was a disaster.