
Planning Guides, Style Guide
Wedding Itinerary Cards: Weekend Schedule Inserts
May
Okay So Weekend Itinerary Cards Are Basically Essential Now
If you’re having a wedding weekend instead of just a single-day event, you need itinerary cards. Like, you really need them. I learned this the hard way back in spring 2023 when I had a couple who insisted their guests would “just figure it out” and then I got approximately seven thousand texts from confused aunts asking where the welcome dinner was. Never again.
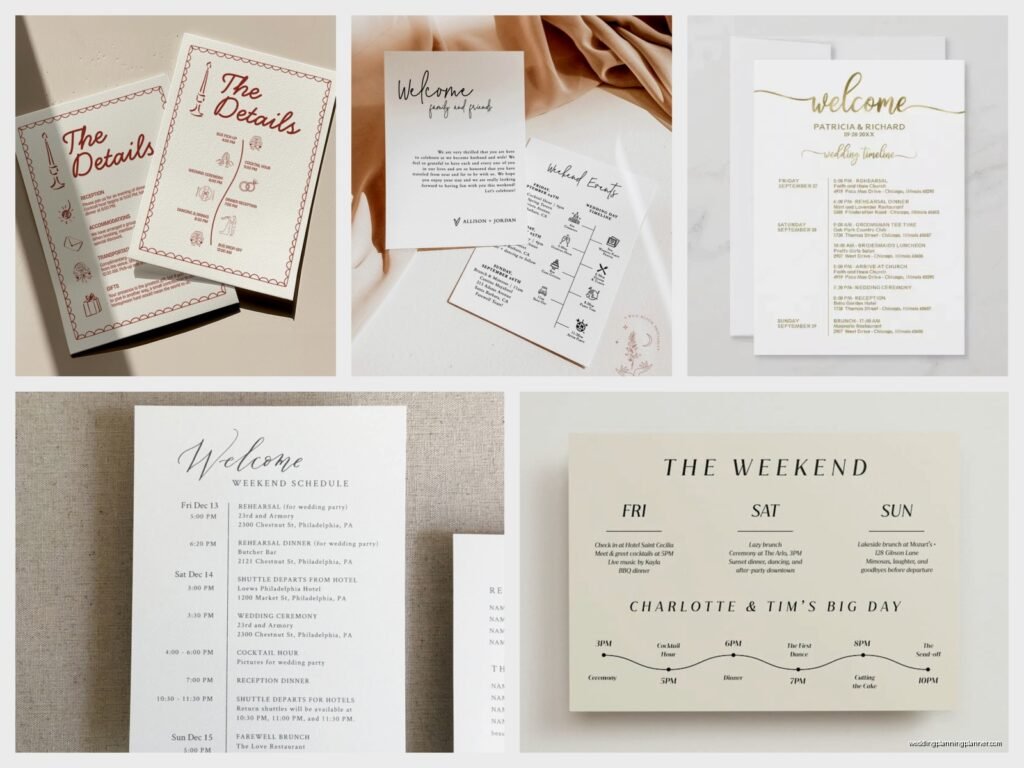
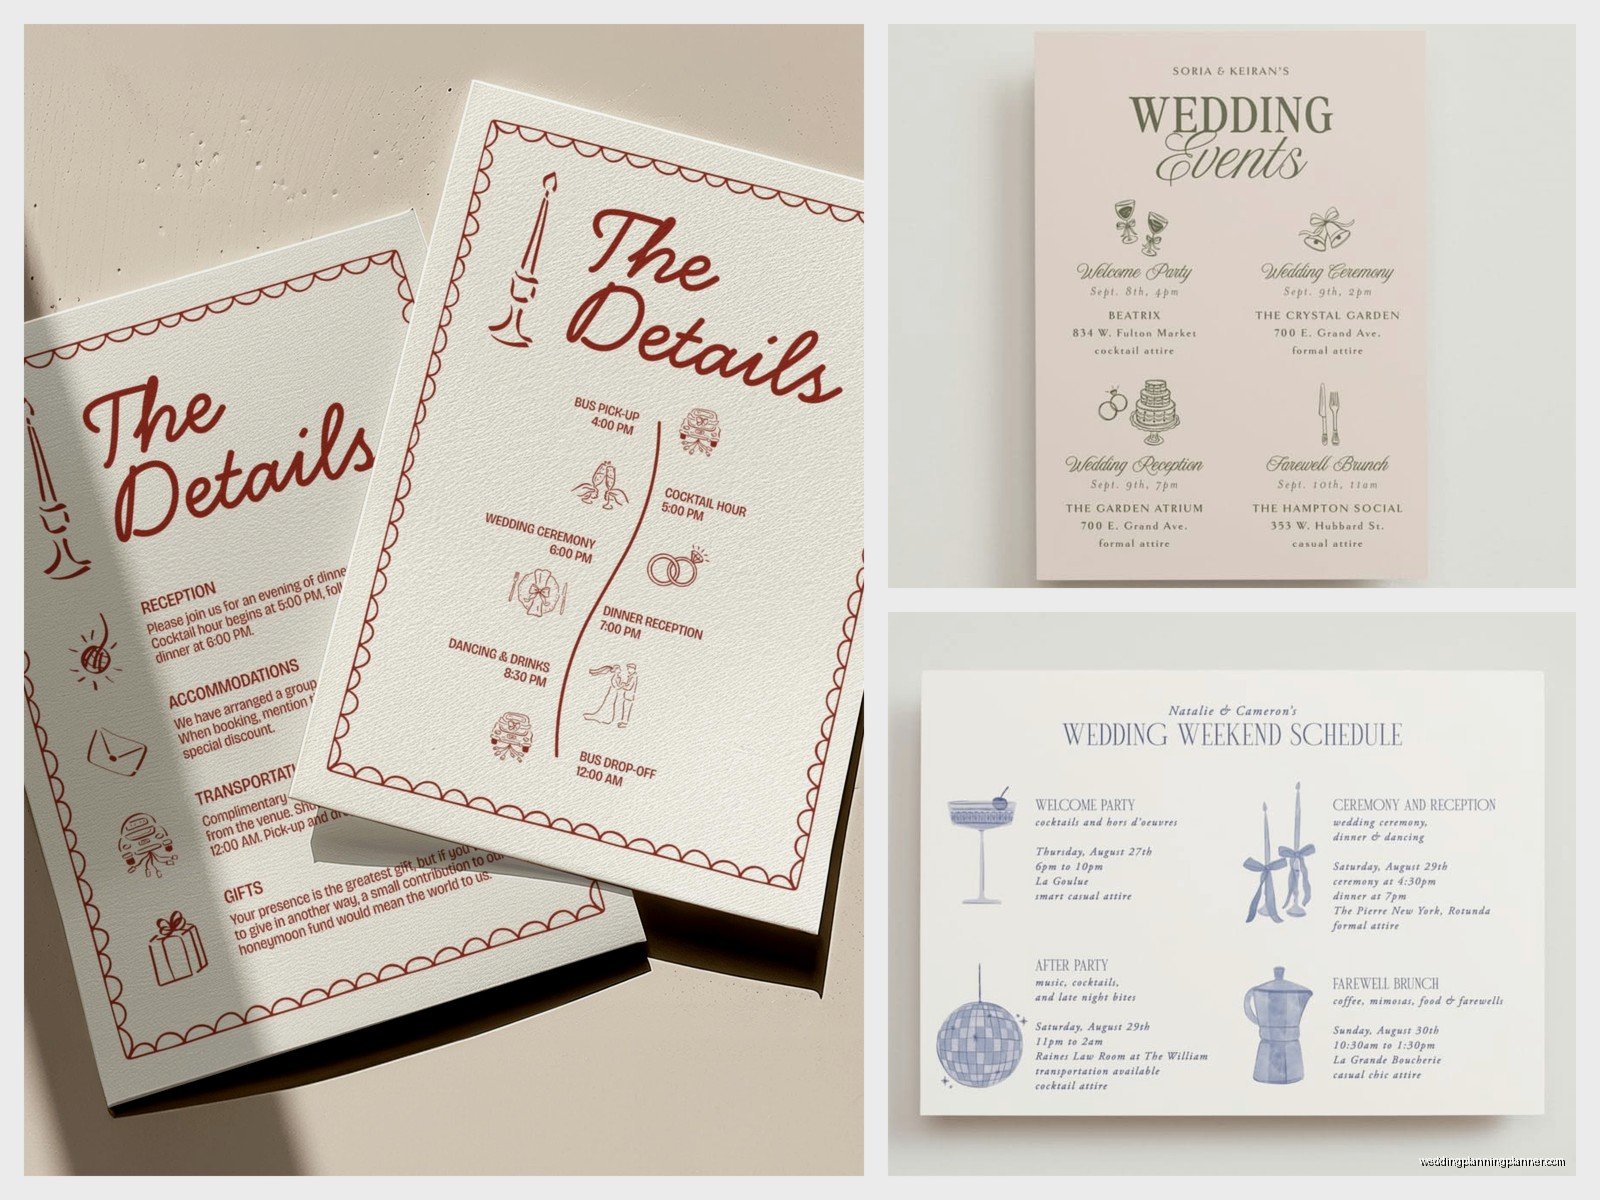
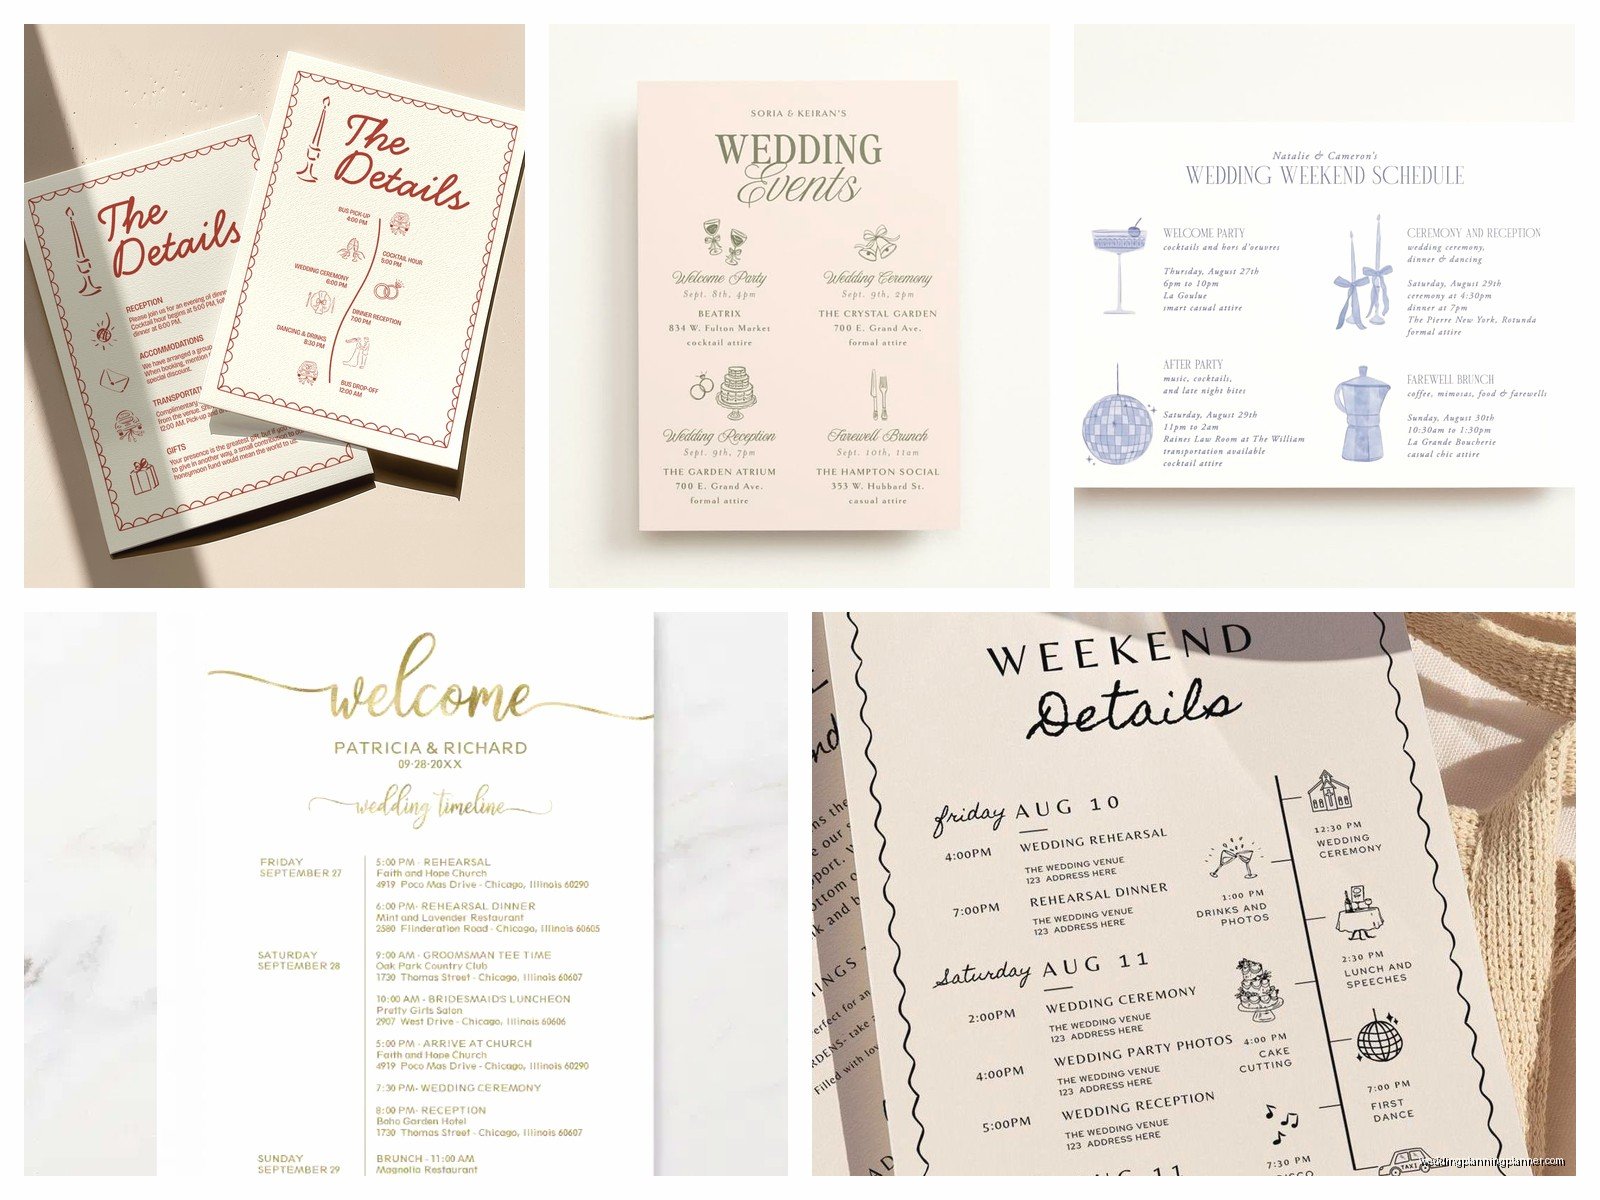
Weekend itinerary cards are these insert cards that go with your invitation suite and they list out everything happening during your wedding weekend. Welcome drinks Friday night, the ceremony Saturday afternoon, farewell brunch Sunday morning, all that stuff. They’re separate from your main invitation because you don’t wanna cram all that information onto one card—it looks messy and people genuinely won’t read it.
What Actually Goes On These Cards
Alright so the basic structure is pretty straightforward but there’s some stuff that people always forget. You need the event name, the time, the location, and the dress code if it varies by event. That last part is huge because I’ve seen guests show up to a beach bonfire in cocktail attire and they were miserable.
Here’s what I typically include:
- Day and date at the top (Friday, September 15th)
- Each event listed chronologically
- Specific times (not “evening” but “7:00 PM”)
- Venue names and addresses if they’re different from the main venue
- Attire for each event
- Whether it’s optional or just for certain people (like “Wedding Party Only”)
One thing that kinda drives me nuts is when couples put super vague times. “Afternoon reception” means nothing. Is that 1 PM? 4 PM? Just tell people when to show up.
Size and Format Options
Most itinerary cards are either 4×6 inches or 5×7 inches. I prefer 5×7 honestly because you have more room and it feels substantial. If you’re doing a weekend with like five events, you’re gonna need that space. Some people do 4×9 inches which is more of a bookmark shape—that actually works really well because guests can stick it in their phone case or a book.
You can also do a folded card situation if you have a TON of information. Like if you need to include maps, transportation details, plus the full schedule. I had a destination wedding in summer 2021 where we did a trifold itinerary card because there were shuttle schedules, restaurant recommendations, and four different events. It was basically a mini program guide.
The paper weight should match your invitation suite. If you’re doing 110lb cardstock for your invitations, use the same for the itinerary. Consistency matters more than you’d think.
Design Tips That Actually Matter
Keep it readable. I know that sounds obvious but you’d be shocked how many couples want to use a fancy script font for the entire itinerary card and then their 70-year-old grandparents can’t read it. Use your decorative fonts for headers and a clean sans-serif or simple serif for the actual information.
Hierarchy is everything here. Make the day/date bigger and bolder. Then each event name should be prominent. Then the details can be smaller. Your eye should be able to scan down the card and immediately understand what’s happening when.
Color-coding can help if you have events at multiple venues. Like all the events at the main resort in navy, the downtown events in coral, whatever. But don’t go overboard or it looks like a kindergarten craft project.
What Not To Include
Don’t put your registry information on the itinerary card. That goes on a separate insert or just on your website. Don’t include your full wedding website URL taking up three lines—put it on the main invitation or a details card.
Also you don’t need to explain what each event IS. You don’t need “Welcome Dinner: A casual dinner to kick off the weekend and reconnect with loved ones.” Nah. Just say “Welcome Dinner, 7:00 PM, The Boathouse, Casual Attire.” People get it.
One couple wanted to include a paragraph about the “meaning and significance” of their Saturday morning yoga session and I was like… we have 5×7 inches of cardstock, not a memoir. Save the explanations for your wedding website or the day-of programs.
Dealing With Different Guest Groups
This is where it gets tricky and honestly kinda annoying to manage. Not all guests are invited to all events, right? Your wedding party might have a rehearsal dinner, your immediate family might have a private brunch, whatever.
You have a few options:
Option 1: List everything and mark what’s for whom. Like “Friday, 6:00 PM – Rehearsal Dinner at Gianni’s (Wedding Party and Families).” This is the most transparent but some people think it’s tacky to show people what they’re not invited to. I personally think adults can handle it.
Option 2: Create different versions of the itinerary card. One version for wedding party, one for all guests, one for family. This is more work and you gotta be super organized about which envelope gets which version. I use color-coded dots on the back of cards to track this.
Option 3: Only list the events that everyone’s invited to on the card, and handle the private events through separate invitations or emails. This is probably the cleanest approach but requires additional communication.
I usually recommend Option 1 for casual couples and Option 3 for more formal situations. Option 2 is for people who have their shit together organizationally, which, let’s be honest, most couples don’t during wedding planning.
Transportation and Parking Details
If you’re providing shuttles, PUT THE SHUTTLE SCHEDULE ON THE ITINERARY CARD. Or at least mention that shuttles are available and reference where to find the schedule. I had a wedding where the couple didn’t mention shuttles at all and half the guests drove separately and then couldn’t drink at the reception because they had to drive back. Such a waste.
Include pickup locations and times. “Shuttles depart from the Marriott at 4:30 PM and 5:00 PM” is way more helpful than “Shuttle service available.”
If parking is complicated or costs money, mention it. “Street parking available” or “Valet parking provided” or whatever applies.
Wording Examples Because Everyone Asks
Here’s how I usually format the actual text, and you can copy this structure:
Friday, October 6th
Welcome Cocktails
6:00 PM – 8:00 PM
The Terrace at Hotel Valencia
Resort Casual
Saturday, October 7th
Ceremony
5:00 PM
The Grand Lawn
Formal Attire
Reception to Follow
6:00 PM – 11:00 PM
The Ballroom
Dinner and Dancing
Sunday, October 8th
Farewell Brunch
10:00 AM – 12:00 PM
The Garden Room
Casual Attire
See? Clean, simple, no fluff. You can adjust the spacing and formatting based on your design but that’s the basic info you need.
Digital Versions
Some couples are doing digital itinerary cards now, either as a PDF they email out or as part of a wedding app. Honestly I think you should do both. Print for your invitation suite and digital for people to have on their phones during the weekend.
The digital version can include clickable addresses that open in maps, which is super helpful. You can also update it if something changes, whereas you’re stuck with whatever you printed.
There are apps like Appy Couple, Greenvelope, or even just a Google Doc that you can share. My cat knocked over my coffee onto a couple’s printed itineraries last month and we had to rush reprint them, but at least the digital version was already out there so people had the info.
Printing and Assembly
Order these at the same time as your main invitations so the printing matches. Different print runs can have slight color variations that’ll bug you even if guests don’t notice.
The itinerary card usually goes behind the main invitation in the envelope, or in a pocket if you’re doing pocket invitations. I stack them: invitation on top, then RSVP card and envelope, then itinerary card, then any other details cards, then accommodations card at the back. That order just makes sense visually when someone opens the envelope.
If you’re doing belly bands or ribbon, the itinerary card gets wrapped up with everything else. If you’re doing a wax seal on the back of the envelope, make sure you’re accounting for the extra weight—you might need additional postage.
Timing For Sending These Out
Itinerary cards should go out with your invitations, which is typically 8-12 weeks before the wedding. For destination weddings or holiday weekends, send them 3-4 months out. People need time to plan, book hotels, request time off work, all that.
Some couples send a “save the date” with just the weekend dates, then the full itinerary with the invitation. That works fine. Just don’t wait until like a month before and expect everyone to clear their whole weekend… or actually, some people do that and then get mad when guests can’t make all the events. Not my problem at that point.
Common Mistakes I See Constantly
Forgetting to include the year. I know that sounds dumb but when you’re sending invitations 10 weeks out, people genuinely might not remember if October 6th is this year or next year, especially if they’re looking at it months later.
Not specifying AM or PM. “Ceremony at 5:00” could technically be morning or evening, and I have seen confused guests show up at the wrong time because of this.
Listing events that you haven’t actually planned yet. Don’t put “After-party at TBD” on there. Either finalize the location or don’t include it. You can always spread the word about a spontaneous after-party the day of.
Making the font size too small to squeeze everything on. If you can’t fit it all legibly, you need to edit the content or go up a card size. Squinting shouldn’t be required to read your wedding stationery.
Using abbreviations that not everyone knows. “RD at GG’s” might make sense to you but your guests don’t know that’s Rehearsal Dinner at Grandma Gloria’s house. Spell it out.
What About Weather Contingencies
Don’t put backup plans on the printed itinerary card. It just creates confusion and looks pessimistic. Handle weather contingencies through your wedding website or day-of communication. You can include a line like “Please check our website for any weather-related updates” if you’re really worried about it.
I had an outdoor wedding weekend where it rained for literally every single event and we had moved everything indoors, but the itinerary cards still listed the original outdoor locations. We just had someone at the entrance directing people to the new spots. It worked fine. People are more flexible than you think.
Accessibility Stuff To Consider
If any of your venues have accessibility limitations, mention it. “The welcome dinner is on the second floor with elevator access” or “The ceremony site has a gravel path” helps people plan accordingly.
If you’re providing transportation, note whether it’s wheelchair accessible. Same with parking—if there’s accessible parking close to the venue, mention it.
Font size matters for readability. I try not to go below 10pt for body text, and even that’s kinda small. 11pt or 12pt is better if you can swing it design-wise.
Coordinating With Your Wedding Website
Your itinerary card and your wedding website should have the same information. It’s so annoying when they contradict each other and then I’m getting texts asking which one is correct. Update them at the same time and double-check everything before you send the invitations to print.
The website can have MORE detail than the card—like directions, parking maps, menu previews, whatever. But the basic times and locations need to match exactly. I usually copy-paste from one to the other just to be sure.
Some couples put “For full schedule and details, visit [website]” at the bottom of the itinerary card. That’s fine, but make sure the card itself has enough info that people don’t HAVE to go to the website. Not everyone is gonna check it, especially older guests.
Cost Considerations
Itinerary cards add to your stationery budget obviously. If you’re printing 150 invitations, you need 150 itinerary cards. At maybe $1.50-$3 per card depending on your printing method and design complexity, that’s an extra $225-$450. Not nothing.
You can save money by doing a simpler design, using standard sizes, or printing digitally instead of letterpress. Or you could skip the itinerary card entirely and just put all the info on your website, but I really don’t recommend that for weekend weddings. People need something physical to reference.
If budget is tight, prioritize the itinerary card over some of the other insert cards. You can skip the accommodations card if that info’s on your website, you can skip the direction card if venues are easy to find, but the itinerary card is actually useful during the weekend itself.
