Planning Guides, Style Guide
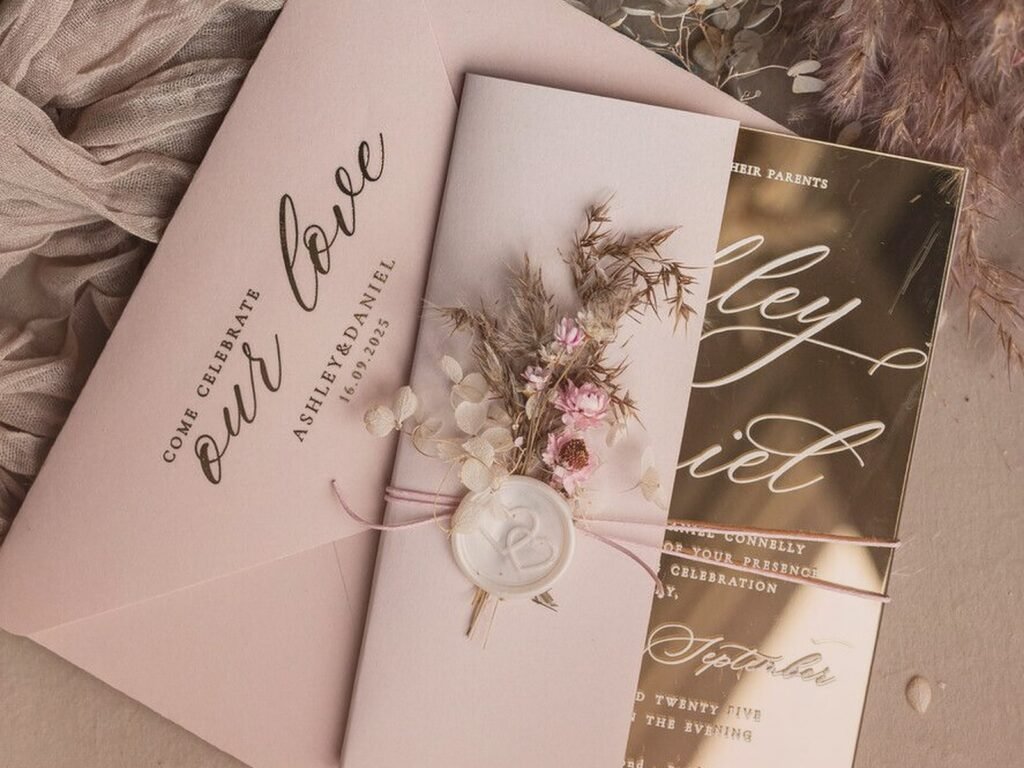
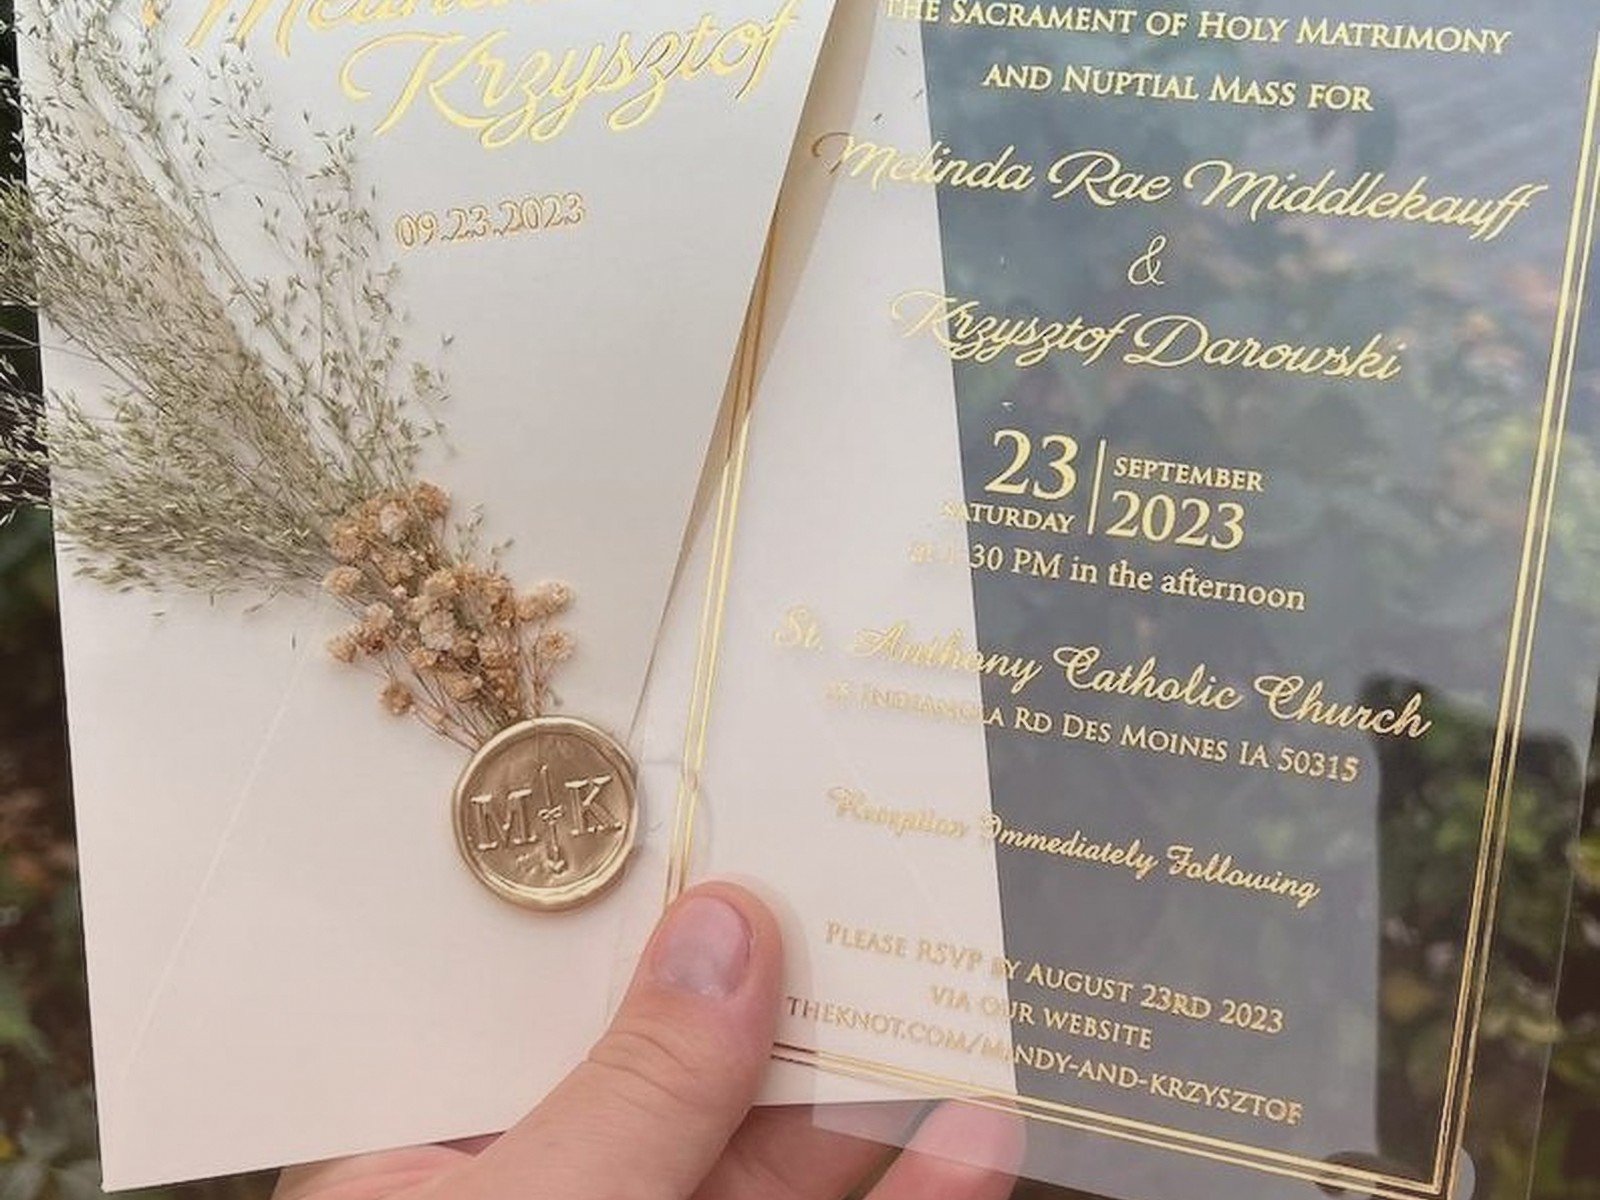
Acrylic Invitation Card: Clear Perspex Modern Design
Jun
So You Want Acrylic Invitations
Okay so acrylic invitations are literally those clear plastic cards that look super modern and fancy, right? They’re made from perspex or plexiglass and honestly they photograph AMAZING which is why every bride suddenly wants them after scrolling Instagram. I had this client in spring 2023 who showed me like 47 screenshots of acrylic invites and I’m like yes but do you understand the cost and also the mailing situation because…
Let me back up. These invitations are basically sheets of clear acrylic that you can print on, engrave, or use vinyl on. They’re typically 1/8 inch thick but sometimes 1/16 inch if you’re trying to save money or mail them easier. The modern look is what everyone’s after – super minimalist, clean lines, contemporary vibes.
What Makes Them Different From Regular Invites
The transparency is the whole point. You can see through them which creates this layered effect that’s really cool. Some couples do a single acrylic card, others stack multiple pieces together with different info on each layer. I’ve seen people put them over colored paper or fabric in the envelope so the background shows through the clear parts.
They’re heavy though. Like way heavier than paper. This is gonna be important later when we talk about postage because oh boy did I learn that lesson the hard way.
Design Options You’ve Got
You can do several printing methods on acrylic and each gives you a different look:
- UV printing – this prints directly onto the acrylic in white ink or color, looks super crisp and modern
- Engraving – laser engraved text that’s etched into the surface, very elegant but you gotta have good lighting to read it sometimes
- Vinyl lettering – cut vinyl applied to the surface, usually in metallic gold or white
- Foil stamping – yes you can foil stamp acrylic and it looks incredible but $$$
I personally love the UV printed ones because the text is super readable and you can do any color. The engraved ones are beautiful but I had a bride once who chose light engraving and half her guests couldn’t read the time of the ceremony which was… not ideal. She called me stressed and I’m trying to explain that engraving depth matters and she’s like “but it looked fine in the sample” and yeah, samples are always in perfect lighting conditions.
Size and Shape Considerations
Most acrylic invites are either 5×7 inches or 4×6 inches. You can technically do any size but standard sizes are cheaper and easier to find envelopes for. I’ve seen square ones at 5.5×5.5 which look cool but finding the right envelope is annoying.
Shape-wise you can do rectangles with rounded corners, perfect rectangles, circles, hexagons, arch shapes – basically anything you can cut. Custom shapes cost more obviously. The rounded corners are nice because they’re less likely to chip or crack and also they won’t poke through envelopes as easily.
Thickness matters more than you’d think. The 1/8 inch thick ones feel really substantial and luxe but they’re heavy and expensive to mail. The 1/16 inch ones are lighter and cheaper but they can feel kinda flimsy? It depends on your budget honestly.
Edge Finishing
The edges of your acrylic can be polished or unpolished. Polished edges are clear and smooth, unpolished edges are more frosted looking. Polished looks more high-end but costs more. Some people do a combination where the top and bottom edges are polished but the sides aren’t to save money.
Text and Layout Tips
Here’s where it gets tricky – you need good contrast. If you’re printing in white ink on clear acrylic, you need to make sure there’s enough white coverage that people can actually read it. I see so many designs where someone wanted to be “artistic” with transparent text effects and it just looks unreadable.
Keep your text a decent size. Nothing smaller than 10pt for body text, seriously. The clear background can make smaller text harder to read than on paper.
Modern fonts work best – thin sans serifs, geometric fonts, contemporary script fonts. Traditional wedding fonts can look weird on acrylic. You want clean and minimal.
White space is your friend. Or I guess clear space? Don’t cram too much onto the card. The whole appeal is that modern minimalist aesthetic so embrace it.
The Mailing Situation That Drives Me Crazy
Okay this is the thing that annoyed me so much I’m gonna spend extra time on it. Acrylic invitations are HEAVY. A single 5×7 acrylic invite can weigh 2-3 ounces depending on thickness. Regular invitations are usually under 1 ounce.
In the US, first class mail up to 1 oz is one price, but 2-3 oz is significantly more. You’re looking at extra postage for every single invitation. For 100 invitations, this adds up fast. I had a bride in summer 2021 who did not budget for this at all and nearly had a breakdown when the post office told her the mailing cost. She thought it would be like $55 for stamps and it was closer to $200.
Also acrylic can crack or chip if it’s not packaged properly. You need padded envelopes or rigid mailers. Regular paper envelopes won’t protect them. Some people do a clear cellophane sleeve inside a paper envelope which looks pretty but adds more weight.
Packaging Options
- Padded envelopes – protects the acrylic but looks less fancy
- Rigid cardboard mailers – professional looking, good protection
- Paper envelope with cardboard insert – you can make this look elegant with nice paper
- Clear sleeve inside decorative envelope – pretty but adds weight and cost
- Wooden box (for super luxury invites) – I’ve seen this done for very small weddings, like 20 guests
Whatever you choose, you gotta hand cancel these at the post office. Don’t just drop them in a mailbox because the sorting machines will destroy them. Hand canceling means the postal worker manually stamps them instead of running them through machines.
Cost Breakdown Reality Check
Let’s be real about pricing because I think this is where people get surprised. DIY acrylic blanks from online suppliers run about $2-5 per card depending on size and thickness. Then you need to add your design which you can do yourself with vinyl if you’re crafty.

Professional acrylic invitations from a stationer or online service typically cost $8-20 per invitation for basic designs. More complex designs with multiple layers, foiling, or custom shapes can be $25-50 each. I’ve seen luxury acrylic suites go for $75-100 per invitation when they include multiple pieces and fancy packaging.
Don’t forget assembly time if you’re DIYing. Applying vinyl lettering to 100 acrylic cards takes hours. Like, many hours. And if you mess up, you’ve potentially ruined an expensive blank.
DIY vs Professional
You can DIY these if you’re patient and detail-oriented. You’ll need acrylic blanks, vinyl cutting machine or access to UV printing, transfer tape if using vinyl, and a lot of patience.
The vinyl method is most accessible for DIY. You design your invite in Cricut or Silhouette software, cut the vinyl, weed it (remove the excess), apply transfer tape, then carefully apply to the acrylic. It’s not super hard but it’s time consuming and you need steady hands.
Professional printing is worth it if you want UV printing or engraving because the equipment is expensive. Also if you’re doing over 75-100 invitations, your time is probably worth more than the cost difference.
Design Trends I’m Seeing Right Now
Frosted acrylic is having a moment – it’s not completely clear but has a translucent frosted effect. Looks really sophisticated and text shows up better on it.
Colored acrylic is getting popular too. Blush pink, sage green, smoky gray – these aren’t fully transparent but they’re not opaque either. My cat actually knocked over a sample of smoky gray acrylic last month and I thought it shattered but it just slid under the couch, so that was a relief.
Layered suites where you have an acrylic invite over a colored card are everywhere. The colored card shows through the clear parts which solves the readability issue and adds visual interest.
Gold or rose gold vinyl lettering on clear acrylic – classic and elegant, photographs beautifully.
Geometric shapes and borders are very on trend. Think hexagons, arches, art deco inspired frames.
What Info Goes On An Acrylic Invite
Same as any invitation really but you might need to think about additional cards since you probably want to keep the acrylic piece minimal. The acrylic card usually has:
- Names of couple
- Date and time
- Venue name and location
- Reception information if it’s same location
Then you’d include separate paper cards for RSVP, details card with hotel info and website, reception card if different location. Some people do everything on the acrylic if they’re going all out but it gets expensive and also crowded looking.
Common Mistakes People Make
Not ordering samples. The way acrylic looks in photos vs in person can be different. Always get a sample before ordering 150 invitations.
Choosing fonts that are too thin. What looks delicate and pretty on screen can be basically invisible on clear acrylic.
Not factoring in assembly and mailing time. These take longer to put together and mail than paper invites.
Forgetting about the weight for postage – I mentioned this already but it’s such a common issue.
Ordering too close to the wedding date. Production time for custom acrylic invites is usually 2-3 weeks, sometimes longer during busy season. Then you need time to assemble, address, and mail them.
Not having a backup plan for addressing. You can’t write directly on acrylic with regular pens. You need to either address the outer envelope or use printed labels or… some people get creative with vinyl cut addresses which actually looks really cool but is labor intensive.
Seasonal Considerations
Acrylic works for any season but I see it most for modern spring weddings, contemporary summer weddings, and minimalist winter weddings. Fall weddings sometimes feel too rustic for the ultra modern acrylic vibe but you can make it work with the right colors and design.
Temperature can affect acrylic slightly – extreme cold might make it more brittle but this isn’t usually an issue unless you’re mailing them to Alaska in January or something.
Matching Suite Pieces
If you’re doing acrylic invitations, you might want matching pieces for the wedding day. Acrylic works great for:
- Welcome signs
- Table numbers
- Seating charts
- Menu cards
- Place cards
- Ceremony programs (though these get expensive quick)
You don’t have to match everything but having a few acrylic elements throughout creates a cohesive look. Table numbers are probably the most popular because they photograph well and you don’t need that many.
Working With a Designer or Stationer
If you’re hiring someone, ask to see physical samples of their acrylic work. Photos don’t always show the true quality. Ask about their production timeline, what’s included in the price, and how they handle reprints if there’s an error.
Good questions to ask: What thickness acrylic do you use? What printing method? Do you include envelopes? What about assembly? Is postage consultation included? Can I see the proof on actual acrylic or just digital?
Some stationers charge a flat rate per invitation, others charge separately for design, printing, and materials. Make sure you understand the full cost breakdown.
Alternatives If Acrylic Is Too Expensive
Vellum overlays on paper invitations give a similar translucent modern look for way less money. You can also do acrylic for just the invite and paper for all the other suite pieces. Or do acrylic save the dates which are smaller and cheaper, then paper invitations.
Some people do printed acrylic designs on paper – like printing a design that looks like acrylic but it’s actually just on nice cardstock. It doesn’t have the same impact but it’s a budget friendly option.
Storage Before Mailing
Keep them flat and protected. Don’t stack too many on top of each other because the weight can cause scratching. If you’re storing them for a while before mailing, keep them in a cool dry place. I usually recommend keeping them in the packaging they arrived in until you’re ready to assemble everything.
The vinyl lettering can sometimes lift if it gets too hot, so don’t leave them in a hot car or direct sunlight for extended periods before mailing.
Timing Your Order
Order 6-8 weeks before you need to mail them if you’re going custom. Order samples 10-12 weeks out so you have time to make changes and still order the full quantity with plenty of buffer time. Rush orders are possible with some vendors but expect to pay significantly more.
Standard invitation timeline is to mail 6-8 weeks before the wedding, so work backwards from there. Save the dates should go out 6-8 months before if you’re doing acrylic save the dates.