Planning Guides, Style Guide
White And Gold Invitations: Design & Ordering Guide
Jun
So You Want White and Gold Invitations
Okay so white and gold is probably the most requested color combo I get for wedding invitations and honestly it never gets old because when done right it’s just chef’s kiss. But there’s SO much that can go wrong and I learned that the hard way back in spring 2023 when a bride ordered what she thought were going to be elegant white invitations with gold foil and they arrived looking like someone just slapped yellow ink on printer paper. She was in tears and I had to scramble to fix it three weeks before her wedding.
Understanding Your Gold Options (This Is Where Most People Mess Up)
Right so here’s the thing about gold that’s gonna make or break your whole situation. Not all gold is created equal and this is super important. You’ve got like five main categories:
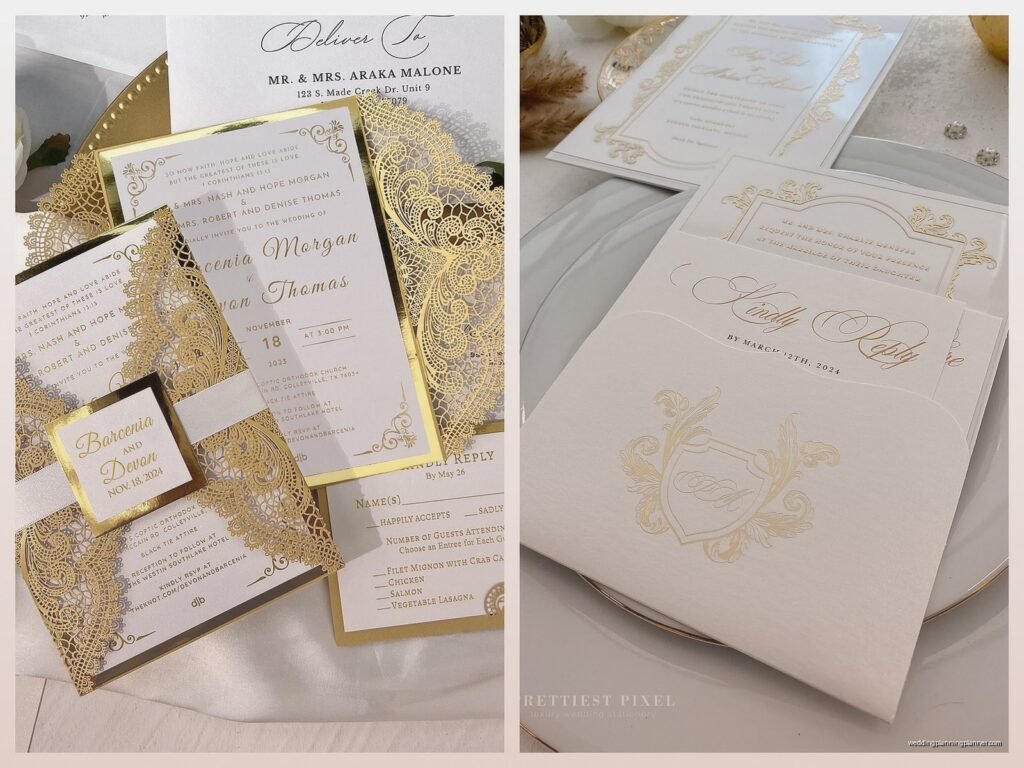
- Gold foil – the real deal, actual metallic foil stamped onto paper with heat and pressure
- Gold ink – regular printing with gold-colored ink (this is what my client got by accident)
- Digital metallic gold – printed gold that tries to look shiny but usually falls flat
- Rose gold or champagne gold – warmer tones that read differently
- Matte gold – less shiny, more subtle
Gold foil is the most expensive but it’s the one that actually looks luxe in person. I always tell people to get samples because what looks amazing on a screen can look totally different when you’re holding it. The foil catches light and has dimension that you just can’t replicate with printing.
Gold ink is cheaper but it’s basically just… yellow that’s trying really hard? It works fine if you’re on a tight budget but manage your expectations. It won’t have that shimmer.
Paper Stock Matters More Than You Think
The paper you choose is kinda the foundation of everything. With white and gold you want something that feels substantial because thin paper makes even expensive foiling look cheap.
I usually recommend:
- 110lb cardstock minimum – anything less feels flimsy
- Cotton paper if you can afford it – it has this beautiful texture
- Smooth finishes for foil (textured paper can make foil not adhere properly)
- Bright white vs ivory white – test both because they give totally different vibes
Oh and here’s something that annoyed me SO much – I had a vendor once tell a client that 80lb paper was “perfectly fine” for formal invitations and when they arrived they were see-through when you held them up to light. Like you could literally read the text from the back side. Don’t let anyone tell you thin paper is acceptable for wedding invitations.
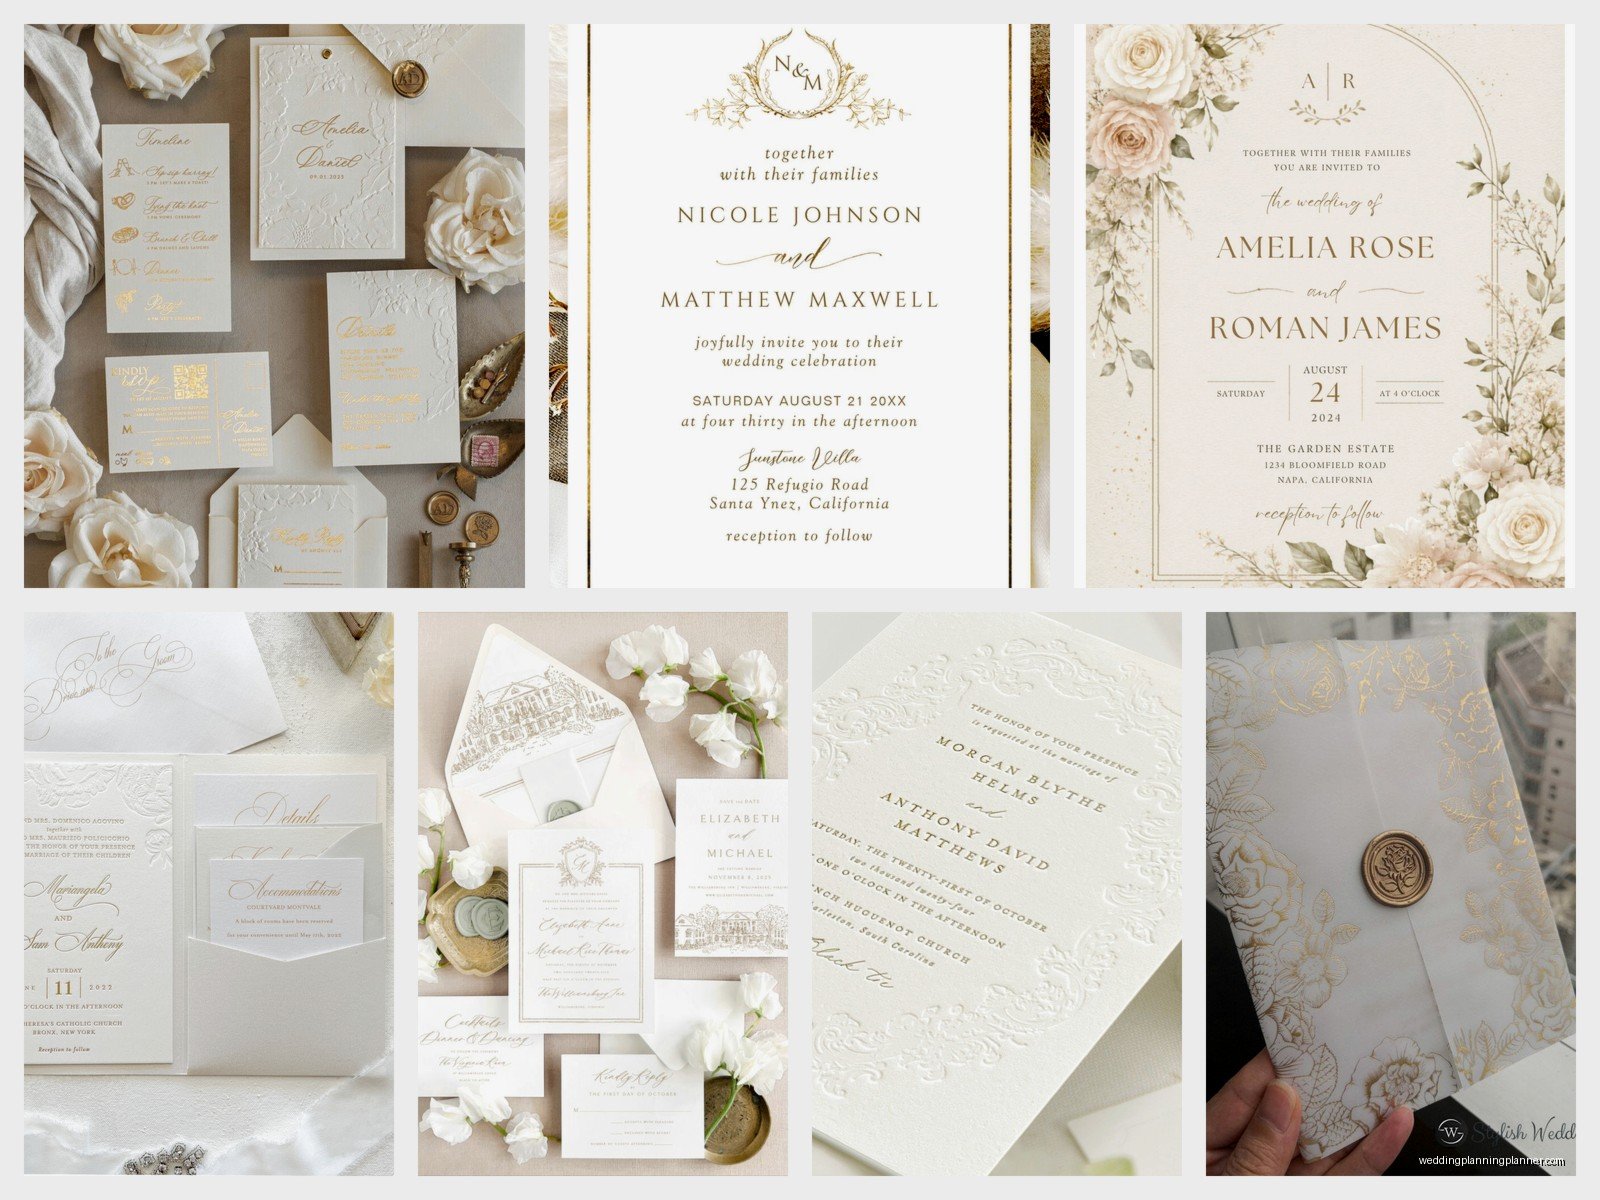
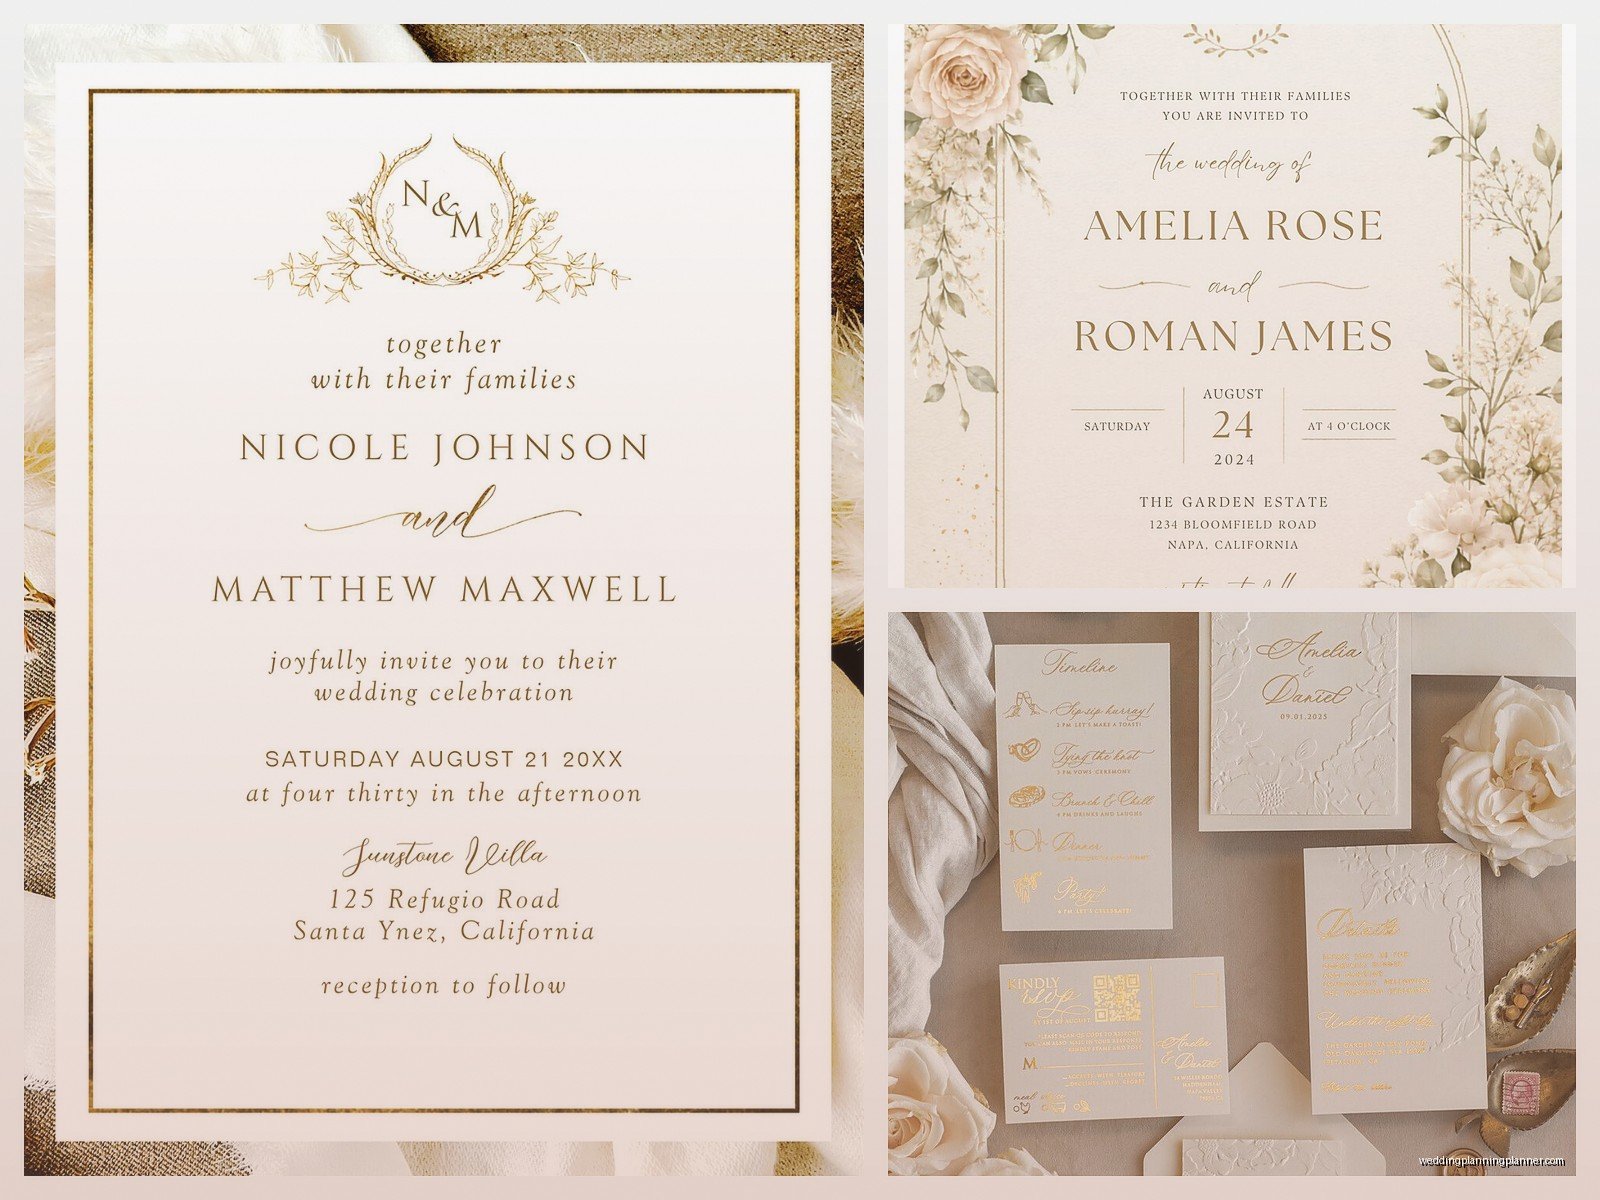
Bright White vs Ivory/Cream
This is a personal preference thing but it changes the whole aesthetic. Bright white with gold is very modern, clean, almost minimalist. It’s what I used for my own stationery suite when I rebranded last year actually. Ivory or cream with gold reads more vintage, romantic, traditional.
I always ask clients to look at their venue and their overall wedding vibe. Black tie ballroom wedding? Bright white probably. Garden ceremony with lots of greenery? Maybe ivory works better.
Design Elements That Actually Work
Okay so you’ve got your paper and you know what kind of gold you want, now let’s talk about design because this is where people either create something gorgeous or something that looks like a Pinterest fail.
Typography is huge. With white and gold you can go super ornate with script fonts or really modern with clean sans-serifs. Both work but you gotta commit to one direction. Mixing too many font styles makes it look cluttered and confused.
For the gold elements, less is usually more. Some options:
- Gold foil just on names or important details
- Gold border or frame
- Gold geometric shapes or line details
- Gold monogram
- Gold envelope liner (this is underrated honestly)
I had this client who wanted EVERYTHING in gold and I had to gently talk her down because when there’s too much foil it actually loses impact. Your eye doesn’t know where to focus. We ended up doing her names in gold foil and a thin gold border and it was perfect.
Envelope Game
Don’t sleep on envelopes because they’re the first thing people see. You can do:
- White envelopes with gold liner – classic and beautiful
- Gold envelopes with white ink – bold but can be tricky with addressing
- White envelopes with gold wax seal – adds that extra touch
- Gold calligraphy on white envelopes – timeless
Speaking of addressing, if you’re doing gold calligraphy make sure you get actual metallic ink not just gold-colored regular ink. The difference is night and day.
Where to Actually Order These Things
Alright so you’ve designed your dream invitation (or hired someone to do it) and now you need to actually order them. Here’s where I send people depending on their budget and timeline:
High-End Custom ($$$$) – Find a local letterpress studio or stationery designer who does custom work. You’ll pay premium but you get exactly what you want and the quality is unmatched. Expect to spend $15-30+ per invitation suite.
Mid-Range Semi-Custom ($$$) – Companies like Minted, Paperless Post (for their premium options), Bella Figura, Crane & Co. They have templates you can customize and most offer real foil options. Usually $8-15 per suite.
Budget-Friendly ($$) – Etsy designers who offer digital files you print yourself, Vistaprint, Zazzle. You can find gold foil options but they’re usually digital printing not real foil. $3-7 per suite typically.
One thing I learned – always always ALWAYS order samples first. I don’t care if it costs extra or takes more time. Order samples. That spring 2023 disaster I mentioned? Could’ve been avoided with a $5 sample order.
Timeline for Ordering
People always underestimate how long this takes and then they’re stressed and rushing and mistakes happen.
- Custom/letterpress: Start 6-8 months before you need to mail them
- Semi-custom with foil: 4-5 months out
- Budget options: 3 months minimum
And that’s just for the invitations themselves. You still need time for addressing, stuffing, and mailing. I usually tell people invitations should go out 8 weeks before the wedding, so work backwards from there.
The Actual Ordering Process
Okay so when you’re ready to place your order, here’s what you’re gonna need to have figured out:
- Exact wording for invitation, RSVP card, details card, etc
- Quantity (order 15-20% extra for mistakes and keepsakes)
- Return address for RSVP envelopes
- Your wedding website if you’re including it
- Any accommodations info, dress code, etc
Pro tip that I wish someone had told me earlier in my career – have at least three people proofread everything before you submit. I once had a client approve invitations with the wrong date and didn’t catch it until they arrived. We caught it before mailing but still, that was a expensive mistake.
Proofing and Revisions
Most companies give you a digital proof to approve. Look at EVERYTHING. Check spelling of names, dates, times, addresses. Make sure AM/PM is correct. Verify the venue name and address. Look at spacing and alignment.
If you’re doing custom work you might get 2-3 rounds of revisions included, but after that you’ll pay extra. So make your feedback clear and comprehensive each round.
Additional Pieces to Consider
Your invitation suite isn’t just the invitation itself. Think about what else you need:
- RSVP cards and envelopes
- Details card (accommodations, website, etc)
- Reception card if ceremony and reception are separate
- Weekend events card for multi-day weddings
- Envelope liner
- Belly band or vellum wrap
- Wax seal
Not everyone needs all of these but think through what information you need to communicate. I’m a big fan of keeping the actual invitation simple and elegant, then putting all the logistical details on a separate card.
DIY vs Professional
Look I’m not gonna lie, you can DIY parts of this and save money. But know what you’re getting into. I tried to DIY gold foil once at home with one of those foil transfer systems and it was a disaster. My cat knocked over the whole setup halfway through and I had gold foil stuck to everything for weeks.
What you CAN DIY successfully:
- Printing if you have a good printer and patience
- Assembling and stuffing envelopes
- Addressing envelopes if you have nice handwriting
- Adding ribbon or wax seals
What you probably SHOULDN’T DIY:
- Foil stamping (requires special equipment)
- Letterpress (definitely need professional equipment)
- Cutting custom shapes or sizes
- Complicated multi-layer designs
Common Mistakes I See All The Time
Since we’re being real here, let me tell you what drives me crazy because maybe it’ll help you avoid these issues:
Not accounting for postage – White and gold invitations are often thick or have embellishments, which means they need extra postage. Take a fully assembled invitation to the post office and have them weigh it BEFORE you buy stamps. Square envelopes also cost more to mail.
Choosing fonts that are too small or too ornate – Remember your guests span different ages and vision capabilities. If your grandmother can’t read it without a magnifying glass, pick a different font or make it bigger.
Forgetting about RSVP envelope postage – You’re supposed to include a stamped return envelope for RSVPs. Budget for those stamps too.
Not thinking about seasons – Heavy velvet ribbon on a July beach wedding invitation? Probably not. Consider when your wedding is and what makes sense.
Ordering exact quantities – I mentioned this before but seriously, order extras. You’ll want keepsakes, you’ll mess up addressing a few, you might get a few damaged in shipping…
The Gold Smudging Issue
Here’s something I discovered that nobody really talks about – some gold foil can smudge or transfer onto other surfaces, especially if it’s not sealed properly. If you’re doing foil on the envelope flap or anywhere that touches other paper, ask about sealing or protective coating. Otherwise you might end up with gold fingerprints all over everything which sounds pretty but actually just looks messy.
Digital Options (Kinda Controversial But Hear Me Out)
Okay so I know we’re talking about physical invitations but I have to mention that digital invitations have come a long way. Some platforms now offer animated white and gold designs that actually look really elegant. They’re obviously way cheaper and you don’t have to worry about printing or postage.
But like, for formal weddings most people still expect a physical invitation. I usually suggest digital for save-the-dates or for specific events like a welcome party, then do physical for the actual wedding invitation. Best of both worlds.
Working With a Designer vs Templates
If you’re not confident in your design skills, you’ve got options. Custom designers will create something unique for you but expect to pay $500-2000+ just for design services before printing costs. Templates are cheaper (often free to $50) but you’re limited to what exists.
The middle ground is semi-custom where you start with a template but a designer helps you modify it. This is actually what most of my clients end up doing because it balances cost with personalization.
When you’re looking at templates make sure they actually offer the printing method you want. Some gorgeous Etsy templates are only set up for digital printing, so if you want foil you’d have to find a separate printer who can work with the file.
Tracking Your Order
Once you’ve ordered, stay on top of the timeline. Most companies send updates but I always recommend:
- Mark your calendar with the expected delivery date
- Check in if you haven’t heard anything a week before that date
- Inspect everything immediately when it arrives
- Count the pieces to make sure you got what you ordered
- Check for printing errors or damage
If there’s a problem, contact the company right away. Most reputable places will fix mistakes or send replacements but you need to give them time to do it.
Assembly and Mailing
This is the part where everything comes together literally. Set up a little assembly line situation – it makes it go so much faster. I usually do it while watching TV or listening to podcasts because it’s kinda mindless once you get in a rhythm.
Standard order for stuffing:
- Invitation on bottom (facing up so it’s the first thing they see)
- Reception card on top of that
- Details card next
- RSVP card and envelope on top (with the envelope flap visible)
If you’re using a belly band or vellum wrap, slide that on carefully so you don’t smudge any gold elements. Then into the envelope, add any wax seal or sticker to close it, address it, stamp it, and you’re done.
Well not done because you still have to actually mail them but you know what I mean. Take them to the post office and hand them to a person rather than just dropping them in a mailbox, especially if they’re thick or have embellishments. You want to make sure they’ll actually go through the mail system properly.