Planning Guides, Style Guide
Tri Fold Invitations: Three-Panel Folded Card Design
Jun
Okay So Tri Fold Invitations Are Actually Pretty Genius
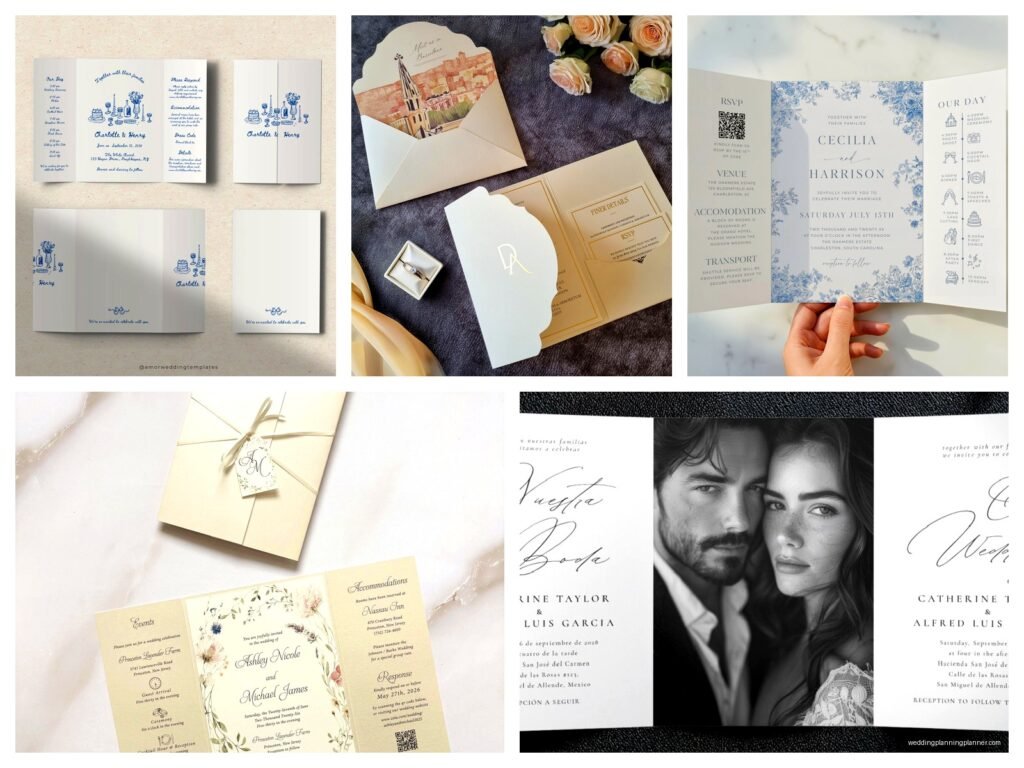
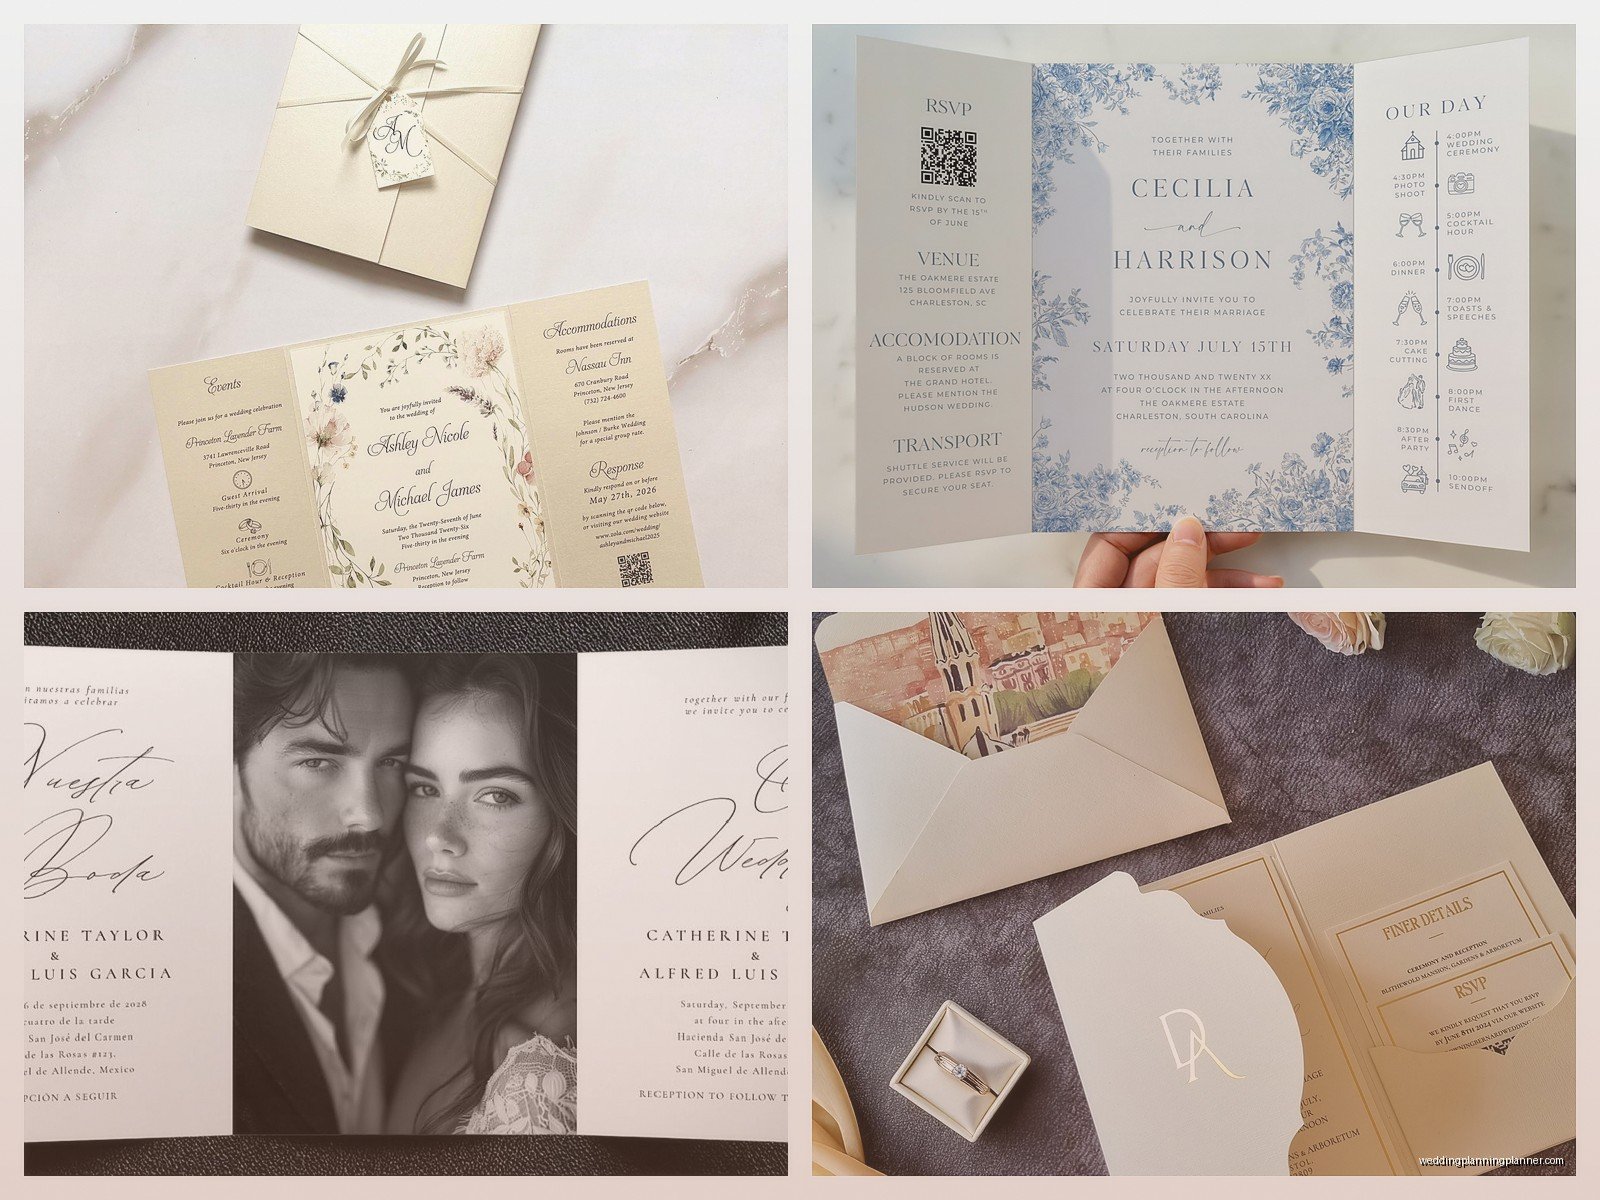
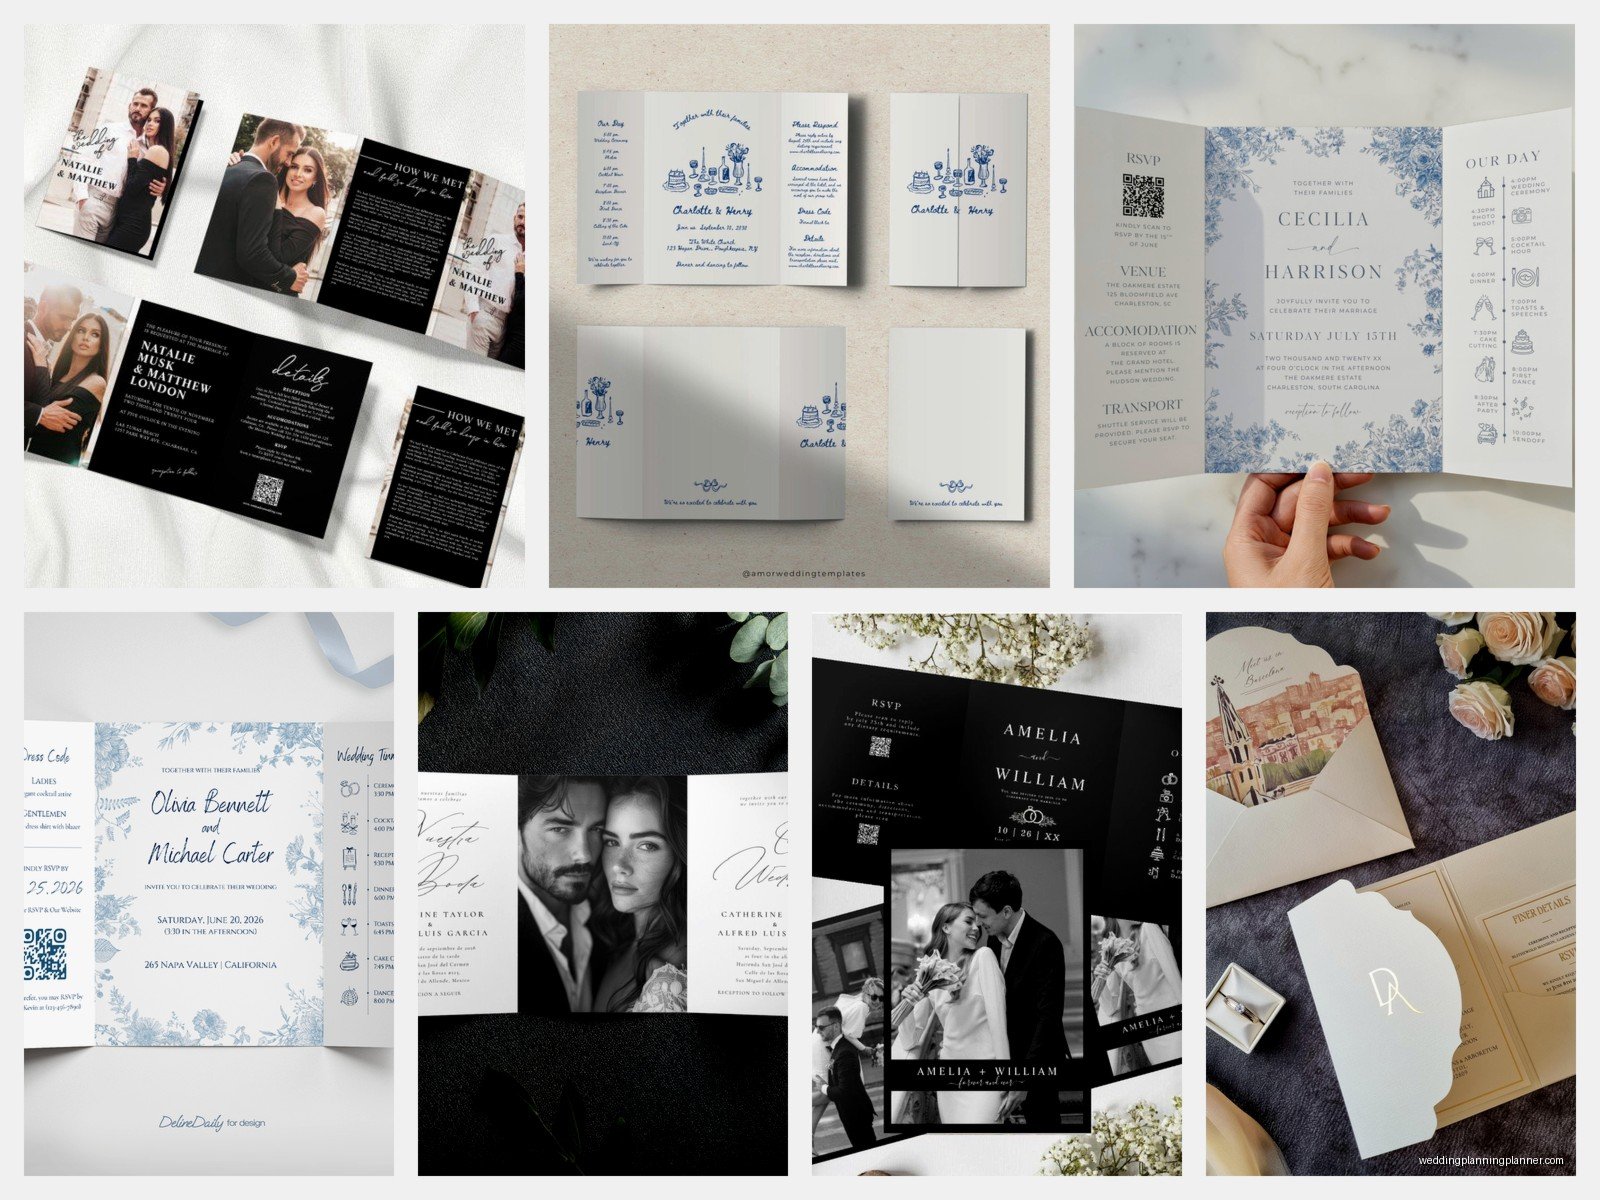
Tri fold invitations are basically these three-panel cards that fold twice, and honestly they’re one of my favorite formats to recommend because you get so much usable space without making the invitation feel bulky or overwhelming. Think of it like a brochure but make it fancy and wedding-appropriate. The standard setup gives you six panels total when you count both sides, though most people only use five because the back panel is usually blank or has a decorative pattern.
The thing that kinda makes these special is how they unfold. There’s this reveal factor that flat cards just don’t have. Your guests open the first fold and get one piece of info, then they open the second fold and boom—more details. It’s like… I don’t know, opening a little present? That sounds cheesy but it’s true.
The Basic Structure You’re Working With
So when the card is completely flat and face-up, you’ve got three panels in a row. The right panel folds in first, then the left panel folds over that. When someone receives it, they’re looking at that left panel (which becomes your front cover), and they unfold from there.
Here’s how I usually map it out for clients:
- Panel 1 (far left when flat): This becomes the front cover when folded. Your names, maybe a monogram, some decorative element.
- Panel 2 (middle): This is what they see when they open the first fold. I typically put the main invitation wording here—the who, what, when, where.
- Panel 3 (far right when flat): This opens last, so it’s perfect for ceremony and reception timeline, dress code, or additional event details.
- Back of Panel 1: Usually the RSVP info or website details.
- Back of Panel 2: Accommodation suggestions, directions, maybe a sweet quote if you’re into that.
- Back of Panel 3: Often left blank or used for a decorative pattern that shows when the card is closed.
In spring 2023, I had this bride who wanted to include literally everything in her invitation—registry info, full weekend itinerary, parking instructions, her dog’s Instagram handle (I’m not kidding), and the tri fold format saved us because we actually had room for most of it without making the text microscopic.
Sizing and Paper Weight Stuff
The most common finished size when folded is around 4″ x 6″ or 5″ x 7″, which means your flat card is either 12″ x 6″ or 15″ x 7″. Some people go bigger, like 6″ x 9″ folded, but then you’re getting into oversized postage territory and that gets expensive fast.
Paper weight matters more with tri folds than regular invitations because you’re folding it twice. If you go too thin, it feels flimsy and cheap. If you go too thick, it won’t fold cleanly and you’ll get cracking along the score lines. I usually recommend 80lb to 100lb cover stock. Some printers will try to sell you on 110lb or higher, but nah, that’s gonna crack unless they’re using really good scoring equipment.
You gotta make sure whoever’s printing these is using proper scoring, not just perforating. Scoring creates an indented line that the paper folds along cleanly. Perforation is those little dotted tear-lines, which is absolutely not what you want.
Design Layout Tips That Actually Matter
The biggest mistake I see—and this annoyed me SO much with a printer I worked with in 2022—is not accounting for the fold zones. You need to leave at least a quarter inch of blank space on either side of where the folds will be. If you put text or important design elements right on the fold line, they’re gonna disappear into the crease or get distorted.
Also think about how the panels interact with each other. When the invitation is closed, does the back panel design complement the front? When it’s fully open, do all three front panels create a cohesive look or does it feel like three separate cards smooshed together?
I like to use the middle panel as the focal point since that’s where the main invitation text goes. The other panels should support that, not compete with it. So if your middle panel has elaborate floral borders, maybe keep the side panels simpler with just accent elements or solid colors.
Text Hierarchy Is Your Friend
With six potential panels, you can really spread out your information, but that also means you need to think about what people read first, second, third. The natural reading flow goes: front cover, first inside panel (middle when flat), second inside panel (right when flat), then people flip it over if they’re looking for more info.
Put your most critical information in that middle panel. I’m talking ceremony time, venue address, that stuff. The things people absolutely need to know go there. Everything else is supplementary and can live on the other panels.
Printing Methods and What Works Best
You’ve got options here. Digital printing is the most affordable and works fine for most designs, especially if you’re doing full-color or photo backgrounds. The quality has gotten really good in the past few years, and turnaround times are quick.
Letterpress looks gorgeous on tri folds but it’s pricey and you need to be careful about coverage. Too much letterpress impression on a folded card can make it bow or warp. If you’re set on letterpress, consider doing it just on the front panel or as accent elements rather than full coverage.
Foil stamping is my personal favorite for tri folds because it adds that luxury feel without the bulk that letterpress can create. Gold foil on a navy or deep green card stock? *Chef’s kiss.* Just watch your budget because foil gets expensive if you’re doing multiple colors or large coverage areas.
I worked with a couple once who wanted rose gold foil on all six panels and when I sent them the quote they nearly fell over, but like… that’s what happens when you want metallic everything.
Assembly and Mailing Considerations
Here’s something people don’t think about until the last minute: how are you keeping these closed? A tri fold card doesn’t naturally stay shut, so you need some kind of closure method.
Options include:
- Belly bands (paper bands that wrap around the middle)
- Sticker seals or wax seals
- Ribbon or twine tied around it
- Clear stickers on the edge (least attractive option but functional)
- Vellum wraps
Belly bands are super popular right now and they’re not too hard to DIY if you’re into that. You basically cut strips of cardstock about 1.5 to 2 inches wide, wrap them around the folded invitation, and secure with a dab of glue or double-sided tape. You can print info on the belly band too, like “Ashley & Jordan” or your wedding date.
Whatever closure method you pick, test it with your actual invitation before you commit to 150 of them. And please, for the love of all that is holy, assemble a complete mock-up and mail it to yourself before you send them out. I cannot tell you how many times clients have skipped this step and then discovered their invitations get mangled by the post office’s sorting machines.
Envelope Sizing
You’ll need envelopes that are slightly larger than your folded invitation. So if your invitation is 5″ x 7″ when folded, get 5.25″ x 7.25″ envelopes (A7 size). Make sure the invitation fits comfortably without forcing it, because if it’s too tight, the envelope will bulge and might rip during mailing.
My cat just knocked over my coffee while I’m writing this, cool cool cool… anyway, back to envelopes.
Inner envelopes are optional but they do add a nice touch if you’re going for formal vibes. Some people use the inner envelope to clarify who exactly is invited, like if the outer envelope says “The Martinez Family” but the inner envelope specifies “Carlos and Sofia Martinez” to indicate the kids aren’t invited. That’s a whole other conversation though.
Cost Breakdown Reality Check
Tri folds cost more than standard flat cards, just so you know going in. You’re using more paper, the printing setup is more complex, and if you’re doing any special finishes, that adds up quick.
Ballpark numbers based on what I typically see:
- Basic digital printing on decent cardstock: $3-5 per invitation
- Digital with one foil color: $5-8 per invitation
- Letterpress: $8-12+ per invitation
- Custom design + premium printing + fancy finishes: $10-20+ per invitation
Those prices usually include envelopes but not always, so ask. They also don’t include postage, which for a tri fold with a belly band or seal is probably gonna need extra postage beyond a regular stamp. Take a fully assembled invitation to the post office and have them weigh it to get the exact postage amount.
DIY vs Professional Printing
Can you DIY tri fold invitations? Yeah, technically. Should you? Depends on your setup and how much you value your time and sanity.
If you’ve got a good printer at home and you’re only doing like 30 invitations, it might be worth it. But scoring the fold lines properly is tricky without the right equipment. You can buy a scoring board (they’re like $25-40) which helps a lot. Just know that home printers often can’t handle cardstock heavier than 80lb, and even then, you might have feeding issues.
I had a bride in summer 2021 who insisted on DIY-ing her tri folds to save money, and she ended up spending three full weekends fighting with her printer, wasted probably $150 in paper and ink on test prints, and eventually came back to me asking for printer recommendations anyway. Sometimes the “savings” aren’t worth the stress, you know?
If you’re working with a professional printer, ask to see samples of their tri fold work before you commit. Check the fold quality, make sure the scores are clean, look at how the panels align. A good printer will have this dialed in. A mediocre one will give you wonky folds that don’t line up properly.
Design Software and Templates
If you’re designing these yourself, you’ll want to use proper design software. Canva has some tri fold templates now, which is cool for beginners, but the customization is kinda limited. Adobe InDesign or Illustrator give you way more control if you know how to use them.
Make sure you’re setting up your document with the correct dimensions and bleed. Bleed is the extra space around the edges that gets trimmed off—usually 0.125 inches on all sides. This ensures your background colors or images go all the way to the edge without white borders.
Also set up your fold lines as guides in your design file so you can see exactly where the folds will be while you’re designing. This prevents that thing where you accidentally put someone’s face right on the fold line and then it looks weird when it’s actually folded.
What to Include on Each Panel
Okay so I touched on this earlier but let me break it down more specifically because I get asked this constantly.
Front panel: Keep it simple. Names, monogram, or a decorative element. Maybe your wedding date if it fits the design. This is basically the cover of a book—it should be attractive and give a hint of what’s inside, but it doesn’t need to tell the whole story.
Middle inside panel (main invitation): The formal invitation wording. “Together with their families, Sarah Chen and Michael Rodriguez request the honor of your presence…” or however formal or casual you’re going. Include ceremony date, time, and venue name and city.
Right inside panel: This is where I usually put the reception details if it’s at a different location or time, dress code, and maybe a line about dinner or dancing to follow. Or if you have multiple events (welcome party, day-after brunch), list those here.
Back of front panel: RSVP instructions and deadline. If you’re doing online RSVPs, put your wedding website here. If you’re including a separate RSVP card, you might skip this panel or use it for something else.
Back of middle panel: Hotel room block info, transportation details, or that bit about “adults-only reception” if you need to communicate that. Some couples put a short personal note here, like “We can’t wait to celebrate with you” or whatever feels right.
Back of right panel: Usually decorative or blank. If you’re using a belly band or seal, this is what shows when the invitation is closed, so it can have a pattern or design element that complements the front.
Common Problems and How to Avoid Them
The number one issue I see is text that’s too small. Just because you have six panels doesn’t mean you should cram tons of tiny text everywhere. If your guests need reading glasses to decipher your invitation, you’ve done too much. Stick with font sizes of at least 10pt for body text, bigger for headers and important info.
Second biggest problem: panels that don’t align properly when folded. This usually happens when the printer’s cutting or scoring is off, but sometimes it’s a design issue where you haven’t accounted for the thickness of the paper. Each fold adds a tiny bit of bulk, so the outermost panel when folded might need to be a hair wider than the others. Most professional printers know this and adjust automatically, but if you’re DIY-ing, keep it in mind.
Also, watch out for dark colors on the fold lines. If you score dark cardstock, sometimes the score line shows up lighter because you’re compressing the paper fibers. It’s not always a dealbreaker, but on something like black or navy cardstock, it can be noticeable. Test it first or consider using slightly lighter colors if this bothers you.
Timeline for Ordering
Give yourself more time than you think you need. If you’re working with a professional printer, the whole process from final design approval to printed invitations in your hands can take 3-6 weeks, sometimes longer if you’re doing letterpress or custom work.
Then you need time to assemble everything—stuff envelopes, add belly bands or seals, address them (or wait for your calligrapher to address them), and get them to the post office. I tell clients to have their invitations ready to mail 10-12 weeks before the wedding, which means you should start the design and ordering process at least 14-16 weeks out, maybe more if you’re… let’s be real, if you’re the type who takes a while to make decisions.
Rushing this process is how you end up with mistakes or compromises you’re not happy with. I’ve seen it happen too many times where someone orders invitations in a panic six weeks before the wedding and then hates them but it’s too late to reorder.
Real Talk About Whether Tri Folds Are Right for You
These invitations work really well if you have a lot of information to communicate—multi-day events, complex logistics, multiple venue locations. They’re also great if you just love the aesthetic of something more substantial and interesting than a flat card.
But if you’re having a simple, straightforward wedding and don’t have much to say beyond the basics, a tri fold might be overkill. Sometimes a classic single-panel card or even a standard folded card (just one fold, two panels) is plenty. Don’t pick a tri fold just because they’re trendy or because you saw one on Pinterest that you liked—make sure it actually serves your needs.
Also consider your guest list. If you’re inviting a lot of older relatives who might find multiple panels confusing, or if you’re worried about people missing important info because it’s spread across too many sections, maybe simplify. The goal is clear communication, not showing off how fancy your invitation is.